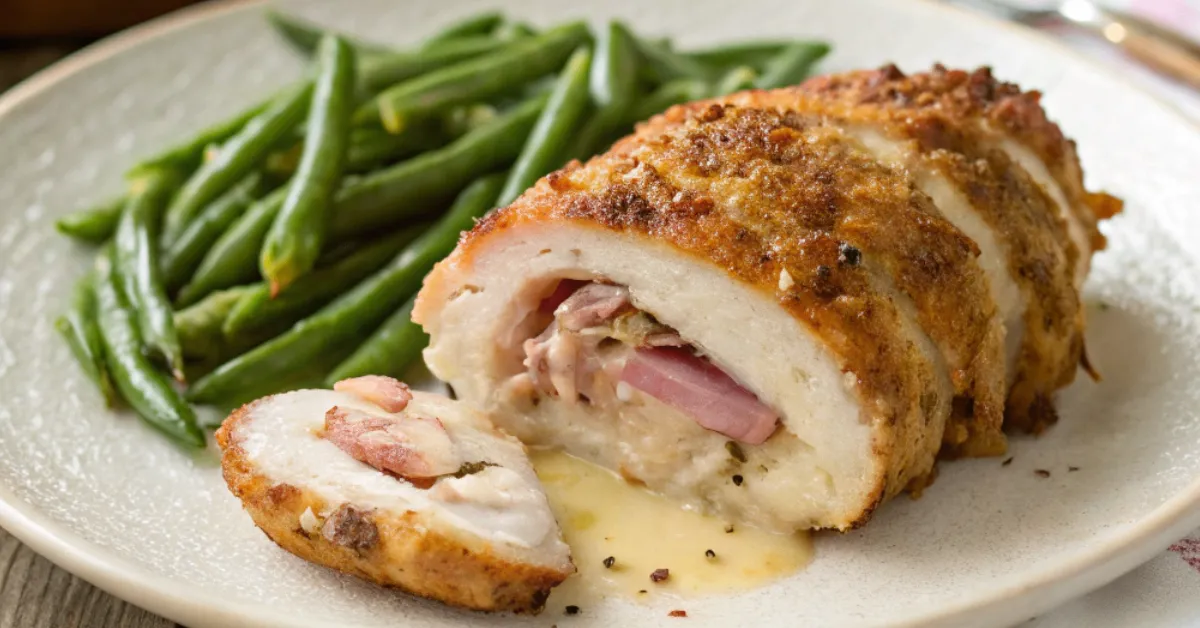
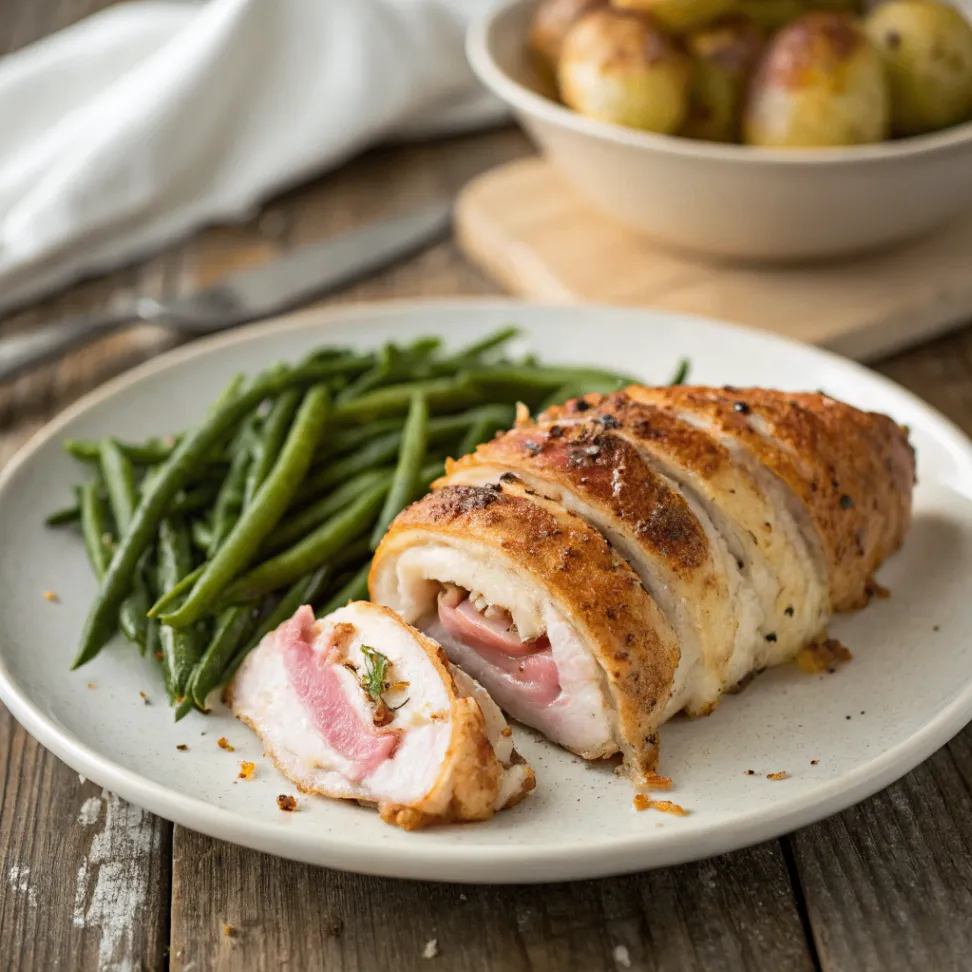
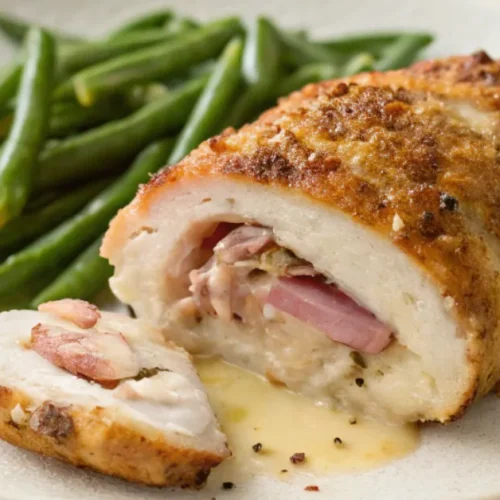
Hasselback Chicken Cordon Bleu: The Ultimate Stuffed Chicken Dish
Introduction
If you’re looking for a delicious, restaurant-quality meal that’s easy to make at home, Hasselback Chicken Cordon Bleu is the perfect dish. This recipe combines the classic flavors of traditional Chicken Cordon Bleu with a modern, hassle-free twist. The Hasselback technique allows for even cooking, a crispier texture, and a beautifully stuffed presentation. Whether you’re preparing a special dinner for your family or want to impress guests, this recipe delivers bold flavors with minimal effort.
In this blog, we’ll walk you through everything you need to know about making Hasselback Chicken Cordon Bleu, from ingredients and step-by-step instructions to pro tips for achieving the perfect dish. Let’s dive in!
Table of Contents
What is Hasselback Chicken Cordon Bleu?
Hasselback Chicken Cordon Bleu is a modern take on the classic Chicken Cordon Bleu, which typically consists of chicken breast stuffed with ham and Swiss cheese, then breaded and fried. The Hasselback method involves making thin, evenly spaced cuts in the chicken breast, stuffing each slit with ham and cheese, and then baking it to perfection. This technique ensures even cooking and allows the cheese to melt beautifully, creating a rich and flavorful dish.
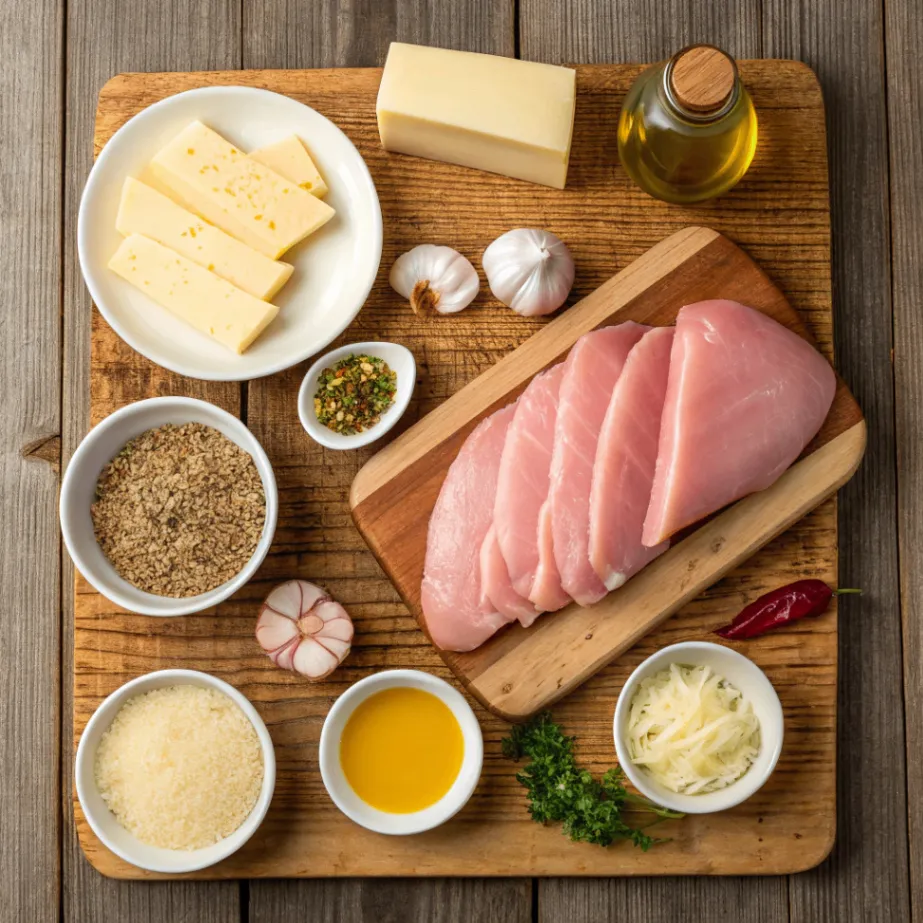
Essential Ingredients
To make the perfect Hasselback Chicken Cordon Bleu, you’ll need:
- Chicken Breasts – Large, boneless, and skinless
- Swiss Cheese – Classic for a rich, creamy taste
- Ham Slices – Thinly sliced for easy stuffing
- Dijon Mustard – Infuses a bold, tangy richness to elevate the flavor
- Garlic Powder – Enhances the overall taste
- Paprika – Adds color and a mild smoky flavor
- Salt & Black Pepper – Essential for seasoning
- Olive Oil or Butter – For a crispy, golden finish
- Panko Bread Crumbs (Optional) – For extra crunch
- Parmesan Cheese (Optional) – Enhances the cheesy goodness
Alternative Ingredients
If you want to customize your Hasselback Chicken Cordon Bleu, here are some great alternatives:
| Original Ingredient | Alternative Option |
|---|---|
| Swiss Cheese | Cheddar, Mozzarella, or Provolone |
| Ham | Turkey slices or Prosciutto |
| Panko Bread Crumbs | Crushed pork rinds (for keto) |
| Dijon Mustard | Honey mustard or mayonnaise |
| Olive Oil | Melted butter or avocado oil |
Recipe Overview
| Prep Time | Cook Time | Total Time | Servings | Yield |
|---|---|---|---|---|
| 10 minutes | 25 minutes | 35 minutes | 4 servings | 4 stuffed chicken breasts |
Key Features of This Recipe
✔ High in Protein – Perfect for a balanced meal
✔ Low-Carb & Keto-Friendly Options Available
✔ Crispy & Cheesy – A flavor-packed twist on a classic dish
✔ Easy to Make – Simple yet elegant
✔ Perfect for Meal Prep – Reheats well
Nutrition Facts (Per Serving)
| Calories | Protein | Carbs | Fat |
|---|---|---|---|
| 420 kcal | 42g | 5g | 25g |
(Nutrition may vary based on ingredient choices.)
Step-by-Step Guide to Making Hasselback Chicken Cordon Bleu
Creating the perfect Hasselback Chicken Cordon Bleu requires careful preparation and attention to detail. This step-by-step guide will walk you through the entire process, ensuring a delicious, crispy, and cheesy dish every time.
Step 1: Preparing the Chicken
The foundation of this dish is the chicken breast, which must be properly prepared to ensure even cooking and optimal stuffing.
- Choose the Right Chicken:
- Use large, boneless, and skinless chicken breasts. Larger pieces hold the fillings better and prevent the cheese from spilling out.
- Make Hasselback Slits:
- Position the chicken breasts on a sanitized cutting board.
- Use a sharp knife to make deep, evenly spaced cuts across the top of each breast.
- Be careful not to cut all the way through—leave about ¼ inch intact at the bottom. This keeps the chicken structured while allowing space for the stuffing.
Step 2: Seasoning the Chicken
Proper seasoning is essential to enhance the natural flavors of the chicken and complement the ham and cheese.
- Prepare the Seasoning Mix:
- In a small bowl, combine Dijon mustard, garlic powder, paprika, salt, and black pepper.
- This mix will create a bold, tangy, and slightly smoky flavor that pairs perfectly with the creamy cheese and savory ham.
- Apply the Seasoning:
- Use a brush or your hands to rub the seasoning mixture all over the chicken breasts, ensuring the seasoning gets into the slits for maximum flavor.
Step 3: Stuffing the Chicken
This step gives the dish its signature cheesy, ham-filled texture and taste.
- Cut the Ham and Cheese:
- Slice the Swiss cheese and ham into smaller pieces that fit neatly into the slits.
- Folding the cheese and ham before inserting them creates a layered effect, ensuring every bite is packed with flavor.
- Stuff the Slits:
- Insert one piece of ham and one slice of Swiss cheese into each cut.
- Press them down gently to make sure they stay in place during baking.
- Avoid overstuffing, as too much filling might cause the cheese to overflow while baking.
Step 4: Adding a Crispy Topping (Optional)
For those who love an extra crunch, adding a breadcrumb topping is a great way to enhance the texture.
- Prepare the Breadcrumb Mix:
- In a small bowl, combine Panko breadcrumbs, grated Parmesan cheese, and a drizzle of olive oil.
- Sprinkle Over the Chicken:
- Evenly sprinkle the breadcrumb mixture over the stuffed chicken breasts.
- This helps create a golden-brown crust while adding an extra layer of flavor.
Step 5: Baking the Chicken
The final step is to bake the chicken to tender, juicy perfection.
- Preheat the Oven:
- Preheat your oven to 375°F (190°C) and lightly coat a baking dish with oil or cooking spray.
- Place the Chicken in the Baking Dish:
- Arrange the stuffed chicken breasts in the dish, ensuring they don’t overlap.
- Bake Until Golden and Bubbly:
- Bake for 25-30 minutes until the chicken is thoroughly cooked and the cheese turns perfectly melted and bubbly.
- Use a meat thermometer to check for an internal temperature of 165°F (74°C) to ensure it’s safe to eat.
- Rest Before Serving:
- Let the chicken rest for 5 minutes before serving.
- This allows the juices to redistribute, keeping the chicken moist and flavorful.
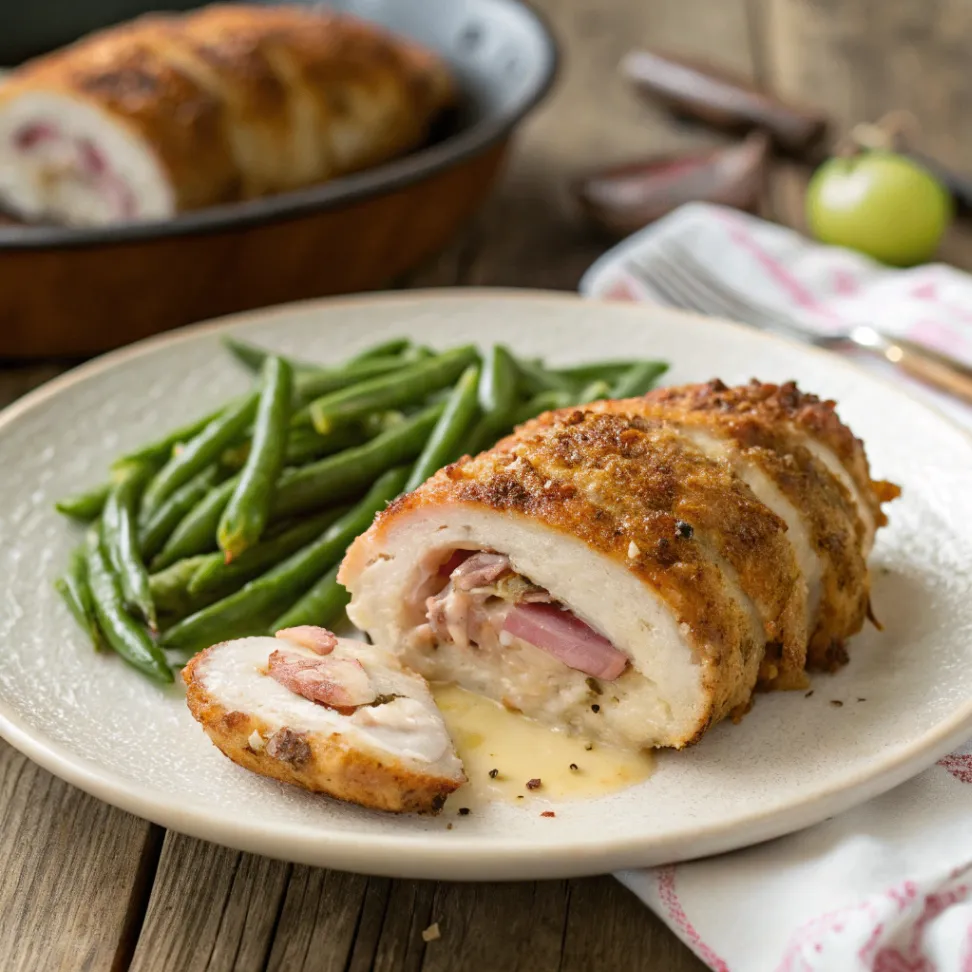
Step 6: Serving & Pairing Suggestions
Now that your Hasselback Chicken Cordon Bleu is beautifully cooked, it’s time to serve it with delicious sides.
- Garnish for Extra Flavor:
- Sprinkle with fresh parsley or grated Parmesan for an extra burst of flavor.
- A squeeze of lemon juice adds brightness and balances the richness of the dish.
- Perfect Side Dishes:
- Roasted Vegetables – Asparagus, Brussels sprouts, or carrots
- Creamy Mashed Potatoes – For a comforting meal
- Garlic Butter Green Beans – A light, fresh side
- Crisp Garden Salad – With a lemon vinaigrette to cut through the richness
By following these steps, you’ll create a crispy, cheesy, and irresistibly delicious Hasselback Chicken Cordon Bleu that will impress your family and guests every time.
Pro Tips for a Perfect Hasselback Chicken Cordon Bleu
Creating the perfect Hasselback Chicken Cordon Bleu requires a few expert techniques to ensure the best texture, flavor, and presentation. Follow these pro tips for a foolproof dish:
1. Use a Sharp Knife for Hasselback Cuts
A sharp knife is essential to make clean, even cuts without tearing the chicken. Aim for ¼-inch deep slits, ensuring you don’t slice all the way through. This keeps the structure intact and prevents the filling from spilling out.
2. Don’t Overstuff the Slits
While it’s tempting to load up on cheese and ham, overstuffing can cause the cheese to leak excessively while baking. Use thinly sliced ham and cheese and fold them neatly into the slits for an even distribution.
3. Season Generously for Bold Flavor
Since Hasselback Chicken Cordon Bleu isn’t breaded like the classic version, proper seasoning is key. Rub a mix of Dijon mustard, garlic powder, paprika, salt, and pepper directly into the cuts to infuse flavor throughout.
4. Bake at the Right Temperature
Bake at 375°F (190°C) for 25-30 minutes to ensure the chicken remains juicy while the cheese melts perfectly. Overcooking can lead to dryness, so use a meat thermometer to check for an internal temperature of 165°F (74°C).
5. Let It Rest Before Serving
Let the baked chicken rest for about 5 minutes before slicing. This allows the juices to settle back into the meat, ensuring every bite stays juicy and full of flavor.
Why You’ll Love This Recipe
- Healthier than traditional Chicken Cordon Bleu (since it’s baked, not fried).
- Perfect for meal prep – Remains fresh in the refrigerator for up to three days.
- Versatile – Can be served with pasta, rice, or a simple side salad.
- Perfect for Kids – Even the fussiest eaters won’t be able to resist the creamy, cheesy deliciousness!
What Makes This Recipe Unique?
Unlike traditional Chicken Cordon Bleu, this Hasselback version is simpler, healthier, and faster to prepare. The slits allow for better seasoning penetration and an even distribution of flavors. Plus, it eliminates the need for deep frying while still achieving that crispy, cheesy perfection.
Frequently Asked Questions (FAQs)
1. Can I use a different type of cheese?
Yes! While Swiss cheese is traditional, you can use Cheddar, Mozzarella, or Gruyère.
2. How do I store leftovers?
Keep it fresh by storing it in an airtight container in the refrigerator for up to 3 days. To reheat, simply pop it in the oven at 350°F (175°C) for about 10 minutes.
3. Can I make this dish gluten-free?
Absolutely! Opt for a gluten-free panko or simply skip the breadcrumbs altogether for a satisfying, crispy finish.
4. Is this recipe keto-friendly?
Yes, if you skip the bread crumbs and use a keto-friendly mustard.
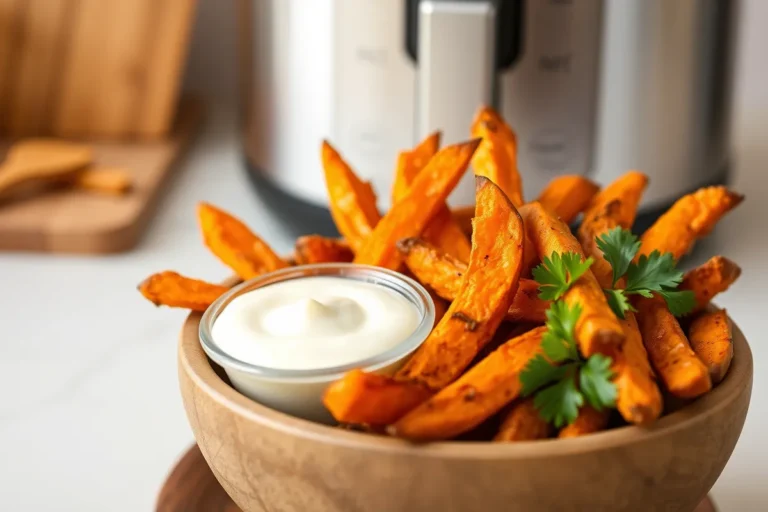
5. Can I cook this in an air fryer?
Yes! Air fry at 375°F (190°C) for 18-20 minutes, checking for doneness at 165°F (74°C).
You’ll Also Love:
- Creamy Garlic Parmesan Chicken
- Stuffed Spinach & Ricotta Chicken
- Crispy Air Fryer Chicken Cutlets
Conclusion
Hasselback Chicken Cordon Bleu is a game-changer for anyone who loves cheesy, crispy, and flavorful dishes. It’s easy to make, full of protein, and perfect for any occasion. Whether you’re cooking for yourself, family, or guests, this ultimate stuffed chicken dish is bound to impress.
Ready to give it a try? Feel free to share how it goes in the comments below! Happy cooking!
Don’t forget to snap a picture and share your #BeesRecipes creations on Instagram – we can’t wait to see your unique take on this Recipe!
Hasselback Chicken Cordon Bleu
Notes
Equipment:
- Sharp Knife
- Baking Dish
- Oven
- Meat Thermometer (optional)
Ingredients:
| Amount | Unit | Ingredient Name | Notes |
|---|---|---|---|
| 4 | Pieces | Boneless Chicken Breasts | Large and thick breasts work best |
| 8 | Slices | Swiss Cheese | Can use Gruyère or Mozzarella as alternatives |
| 4 | Slices | Thinly Sliced Ham | Choose your preferred ham |
| 1 Tbsp | – | Dijon Mustard | Adds a tangy flavor |
| 1 tsp | – | Garlic Powder | For extra flavor |
| 1 tsp | – | Paprika | For smokiness |
| – | – | Olive Oil | To drizzle for baking |
| – | – | Panko Bread Crumbs | Optional for extra crunch |
| – | – | Parmesan Cheese | Optional topping |
Instructions:
- Preheat the Oven: Preheat your oven to 375°F (190°C) and lightly grease a baking dish.
- Prepare the Chicken: Place chicken breasts on a cutting board and make even, deep slits across the top, being careful not to cut all the way through.
- Season the Chicken: Mix Dijon mustard, garlic powder, paprika, salt, and pepper in a bowl and rub it over the chicken, ensuring the slits are well-coated.
- Stuff the Chicken: Insert slices of ham and Swiss cheese into each slit.
- Add Crunch (Optional): Sprinkle with Panko breadcrumbs and Parmesan cheese for a crispy topping.
- Bake: Drizzle with olive oil and bake for 25-30 minutes or until the chicken reaches an internal temperature of 165°F (74°C).
- Rest: Let the chicken rest for 5 minutes before serving.
- Serve and Enjoy! Serve your Hasselback Chicken Cordon Bleu with your favorite sides.
Nutrition (Per Serving):
| Nutrient | Amount |
|---|---|
| Calories | 420 kcal |
| Protein | 42g |
| Carbs | 5g |
| Fat | 25g |
Recipe Notes:
- For a healthier version, omit the Panko breadcrumbs and use a lower-fat cheese.
- This recipe can easily be adapted for keto diets by skipping the breadcrumbs.
- Leftovers store well in the fridge for up to 3 days and can be reheated in the oven for best results.
There are no reviews yet. Be the first one to write one.