Cheesy Broccoli Stuffed Chicken
The first time I made stuffed chicken, I used toothpicks to seal it and forgot to tell my husband. He bit into one mid-dinner. We don’t talk about that night anymore.
Cheesy broccoli stuffed chicken is one of those recipes that looks like you tried really hard, but actually isn’t that difficult once you get the technique down. It’s a real meal, not a weeknight shortcut. Tender chicken breast, a warm pocket of melted cheese and soft broccoli inside. It holds together, it reheats well, and it doesn’t taste like sad diet food even though the macros are pretty solid.
I make this at least twice a month, usually on Sunday when I have a bit of time and want something that’ll last a few days in the fridge.
What It’s Good For
This is the kind of dish that works for a few different situations. Meal prep is the obvious one. You can make four at once, refrigerate them, and have a solid lunch or dinner ready for most of the week.
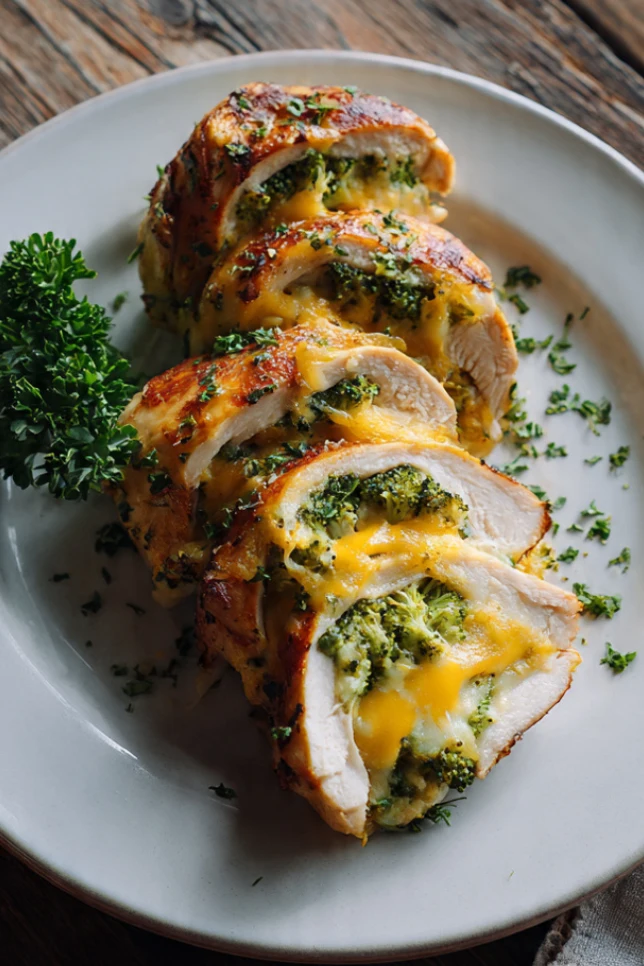
It’s also one of those recipes that feels dinner-party appropriate without being complicated. Slice it on a diagonal, fan it out on the plate, and it looks genuinely impressive. People assume you did something difficult.
If you’re eating higher protein and trying to keep things interesting, this beats plain grilled chicken by a mile. The filling makes it feel like an actual meal instead of a macro-optimized obligation.
How to Store It
Cooked stuffed chicken keeps well in the fridge for up to 4 days. Store it in an airtight container, whole or sliced. I usually keep mine whole and slice when I’m ready to eat so it doesn’t dry out as fast.
To reheat, wrap in a damp paper towel and microwave in 45-second intervals, or reheat in a 325°F oven for about 12 minutes covered with foil. The oven method keeps the texture better, especially if you’re reheating from fully cold.
I wouldn’t freeze these. The cheese filling gets a bit grainy when thawed and the texture of the chicken suffers. Better to just make a fresh batch.
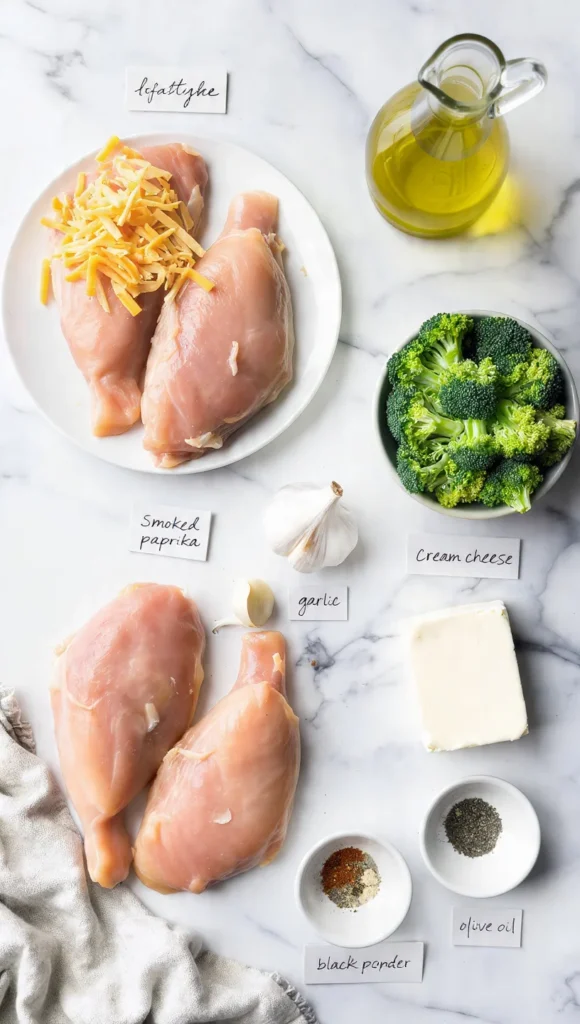
Ingredients
For the filling:
- 1 cup broccoli florets, finely chopped (fresh or frozen, thawed and dried)
- 3/4 cup shredded sharp cheddar
- 2 oz cream cheese, softened
- 1 garlic clove, minced
- Salt and pepper to taste
- Pinch of red pepper flakes (optional)
For the chicken:
- 4 large chicken breasts
- 1 tsp garlic powder
- 1 tsp onion powder
- 1 tsp smoked paprika
- 1/2 tsp salt
- 1/2 tsp black pepper
- 1 tbsp olive oil
Instructions
- Prep your broccoli first. Whether you’re using fresh or frozen, it needs to be very dry before it goes in the filling. Wet broccoli makes the cheese filling too loose and it leaks out during cooking. Pat it down with paper towels. Chop it fine, almost like a rough mince.
- Make the filling. Mix the cream cheese, cheddar, garlic, broccoli, salt, pepper, and red pepper flakes together in a bowl until combined. It should be thick and hold its shape when you scoop it. If it looks too soft, add a bit more shredded cheese.
- Butterfly the chicken. Lay each breast flat on your cutting board. Slice horizontally through the middle, stopping about half an inch from the edge so it opens like a book but stays connected. Don’t cut all the way through. If your chicken breasts are very thick, you can also pound them slightly with a meat mallet after butterflying to even things out.
- Season the chicken. Mix the garlic powder, onion powder, paprika, salt, and pepper together. Rub it all over the outside of each breast, including inside the pocket.
- Fill and seal. Spoon about 2 to 3 tablespoons of filling into each breast. Don’t overfill. Close the chicken over the filling and secure with two or three toothpicks. (Tell your family about the toothpicks. Learn from my mistake.)
- Sear it first. Heat olive oil in an oven-safe skillet over medium-high heat. Sear the chicken for 3 minutes per side until you get a golden crust. This step matters for flavor. Don’t skip it.
- Finish in the oven. Transfer the skillet to a 400°F oven and bake for 18 to 22 minutes, until the internal temperature hits 165°F. Check with a meat thermometer at the thickest part, not near the filling pocket.
- Rest before cutting. Let the chicken sit for 5 minutes before removing the toothpicks and slicing. This keeps the juices in. Cut on a diagonal to show off the filling when you plate it.
A Couple of Notes
The cheese matters here. Sharpness makes a difference. Mild cheddar goes kind of bland once it’s baked inside the chicken. I use Cabot sharp cheddar or Tillamook. If you want something more melty and less sharp, a mix of cheddar and Gruyere works really well.
The mistake I made for years was stuffing too much filling in and wondering why cheese was pooling at the bottom of my skillet. Less is more. Two tablespoons per breast is enough. The filling puffs slightly as it heats and you’ll get some cheese in every bite without it all escaping.
If your chicken breasts are small, this still works, you’ll just use less filling and reduce the oven time by a few minutes. Keep an eye on the temperature rather than the clock.
This isn’t a complicated recipe but it does require a little attention the first time. Once you’ve done it once, the whole process takes about 35 minutes start to finish. Worth it.
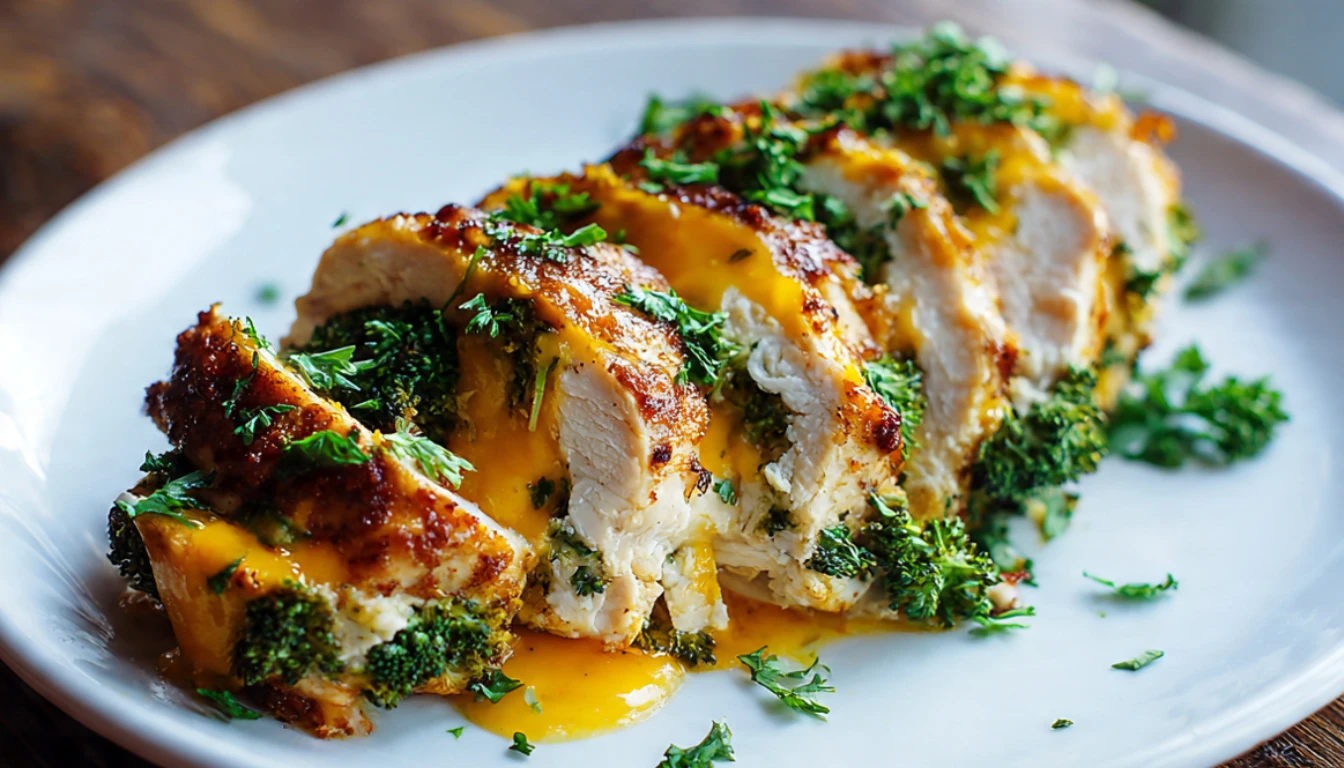
Cheesy Broccoli Stuffed Chicken
Golden seared chicken breast with a melted cheddar and broccoli filling. High protein, meal prep ready, and way easier than it looks.
Ingredients
Filling
- 1 cup broccoli florets, finely chopped and dried
- 3/4 cup shredded sharp cheddar
- 2 oz cream cheese, softened
- 1 garlic clove, minced
- to taste salt and black pepper
- pinch red pepper flakes (optional)
Chicken
- 4 large chicken breasts
- 1 tsp garlic powder
- 1 tsp onion powder
- 1 tsp smoked paprika
- 1/2 tsp salt
- 1/2 tsp black pepper
- 1 tbsp olive oil
Instructions
- Dry the broccoli Chop broccoli florets very finely and pat completely dry with paper towels. Wet broccoli will make the filling watery and it will leak out during cooking.
- Make the filling Mix cream cheese, cheddar, garlic, broccoli, salt, pepper, and red pepper flakes in a bowl until combined. It should be thick and hold its shape. Add more cheese if it looks too soft.
- Butterfly the chicken Lay each breast flat. Slice horizontally through the middle, stopping about half an inch from the edge so it opens like a book but stays connected. Pound lightly if needed to even out the thickness.
- Season the chicken Mix garlic powder, onion powder, smoked paprika, salt, and pepper together. Rub it all over the outside and inside the pocket of each breast.
- Fill and seal Spoon 2 to 3 tablespoons of filling into each breast. Do not overfill. Close the chicken over the filling and secure with 2 to 3 toothpicks. Tell anyone eating this about the toothpicks.
- Sear Heat olive oil in an oven-safe skillet over medium-high heat. Sear chicken for 3 minutes per side until a golden crust forms. Don’t skip this step.
- Bake Transfer skillet to a 400°F (200°C) oven and bake for 18 to 22 minutes. Check with a meat thermometer at the thickest part. You’re looking for 165°F internal temperature.
- Rest and slice Let chicken rest 5 minutes before removing toothpicks. Slice on a diagonal to show off the filling when serving.
Notes
Use sharp cheddar, not mild. It makes a real difference in flavor once it’s baked inside the chicken. Cabot or Tillamook are solid choices. Store cooked chicken in an airtight container in the fridge for up to 4 days. Reheat wrapped in a damp paper towel (microwave, 45-second intervals) or covered in foil at 325°F for 12 minutes. Don’t freeze these as the cheese filling turns grainy when thawed.