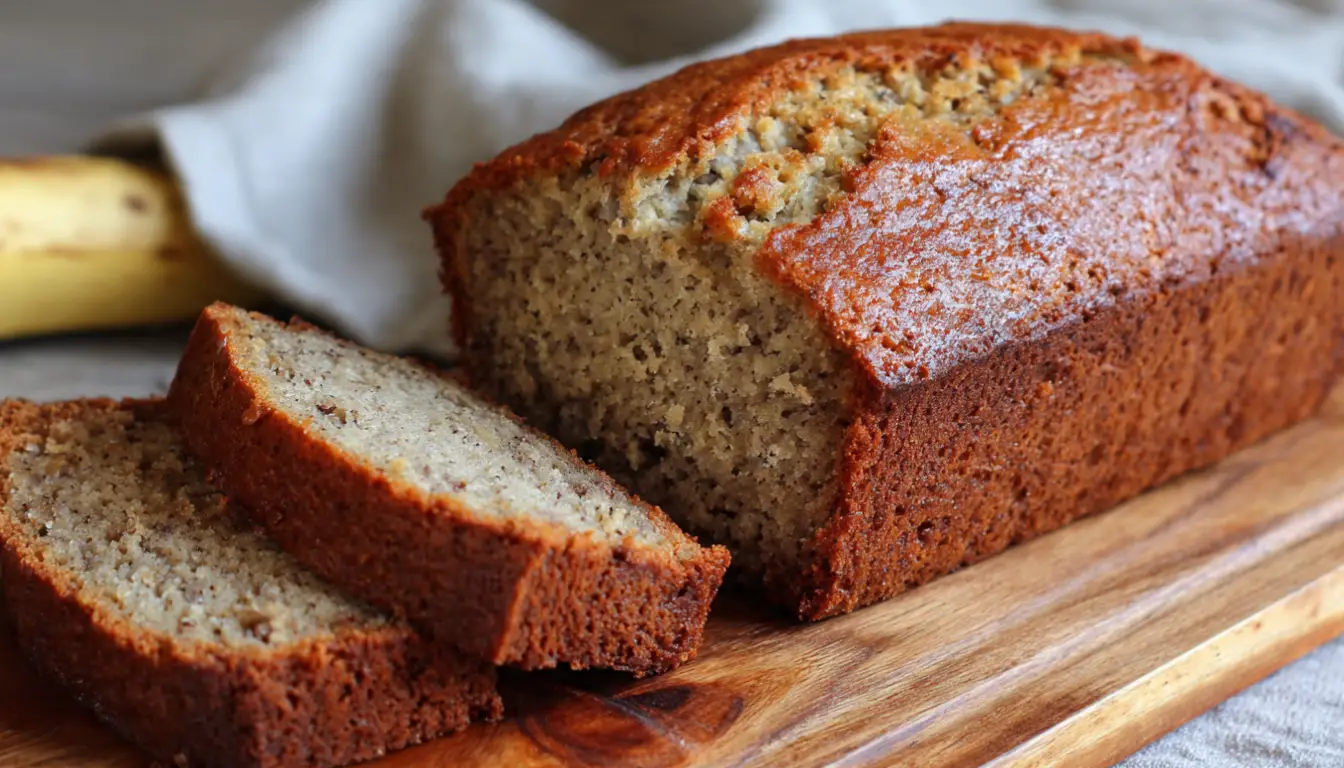
Classic Banana Bread Recipe
You know that moment when you open your fruit bowl and find three bananas that have gone full leopard-print spotted? Ten years ago, I would’ve tossed them. Now? They’re my excuse to make the best banana bread you’ll ever taste.
I’ll be honest with you. My first attempt at banana bread was a disaster. I followed my grandmother’s recipe to the letter, but somehow ended up with something that had the texture of a brick and tasted like flour with a hint of banana. Turns out, I was making three critical mistakes that most beginner bakers make. But I learned. And after hundreds of loaves (my neighbors got really lucky for a few months), I’ve perfected a recipe that comes out moist, flavorful, and absolutely foolproof every single time.
The thing about banana bread is that it’s incredibly forgiving. You don’t need a fancy stand mixer or any special equipment. I’ve made this recipe with just a wooden spoon and a bowl countless times. That said, if you do have a KitchenAid or any stand mixer, it makes the job even easier and ensures you get that perfectly smooth batter. But don’t worry if you don’t have one. Your arm muscles will get a little workout, and the bread will taste just as amazing.
Essential Ingredients
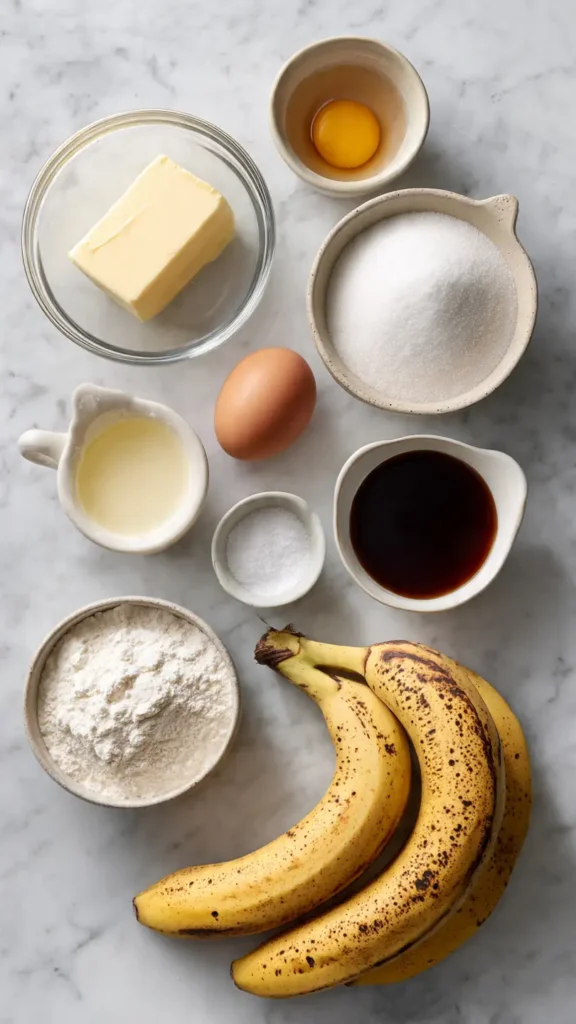
Here’s what you’ll need to make one standard 9×5 inch loaf:
- 3 very ripe bananas (the spottier, the better)
- 1/3 cup melted butter (I use unsalted)
- 3/4 cup granulated sugar
- 1 large egg, beaten
- 1 teaspoon vanilla extract
- 1 teaspoon baking soda
- Pinch of salt
- 1 1/2 cups all-purpose flour
That’s it. Seriously. No weird ingredients you need to hunt down at specialty stores. Just basic pantry staples and those sad-looking bananas you were about to throw away.
Alternative Ingredients
Look, I get it. Sometimes you’re missing an ingredient or you want to make this recipe work for your dietary needs. I’ve experimented with pretty much every substitution you can imagine, so here’s what actually works:
For the bananas: Each banana is roughly 1/2 cup mashed. If you’re short one banana, you can substitute with 1/4 cup unsweetened applesauce. It won’t have quite the same banana flavor punch, but it’ll still be delicious.
For the butter: Coconut oil works beautifully if you’re dairy-free. I’ve also used vegetable oil in a pinch, but melted butter gives you the best flavor and texture.
For the sugar: You can swap half the sugar for brown sugar if you want a deeper, more caramel-like flavor. I sometimes do 1/2 cup granulated and 1/4 cup packed brown sugar. Honey or maple syrup can work too, but you’ll need to reduce the amount slightly (about 2/3 cup) since they’re sweeter and more liquid.
For the flour: If you want to use whole wheat flour, replace up to half the all-purpose flour. Going 100% whole wheat makes it too dense and heavy. Trust me on this one.
For the egg: A flax egg (1 tablespoon ground flaxseed mixed with 3 tablespoons water, left to sit for 5 minutes) works if you’re vegan. The texture will be slightly different, but still tasty.
Step-by-Step Directions
Step 1: Prep Your Pan and Oven
Preheat your oven to 350°F (175°C). Grease a 9×5 inch loaf pan with butter or cooking spray. I like to line mine with parchment paper too, with the edges hanging over the sides. Makes it so much easier to lift the bread out later without it sticking or breaking.
Step 2: Mash Those Bananas
In a large mixing bowl, mash the bananas with a fork until they’re mostly smooth. A few small lumps are totally fine and actually add nice texture to the finished bread. If you have a food processor, you can pulse them a few times, but don’t overdo it. You want mashed bananas, not banana puree.
Step 3: Mix the Wet Ingredients
Stir the melted butter into the mashed bananas. The mixture will look a little weird and separated at first, but that’s normal. Mix in the sugar, beaten egg, and vanilla extract. If you’re using a stand mixer, this is where it shines. Just use the paddle attachment on low speed. By hand? A sturdy wooden spoon works perfectly.
Step 4: Add the Dry Stuff
Sprinkle the baking soda and salt over the banana mixture and stir it in. Then add the flour. Here’s where most people mess up: they overmix. You want to stir just until the flour disappears into the batter. I usually count about 10-15 gentle stirs. If you see a few streaks of flour, that’s okay. Overmixing develops the gluten in the flour, which makes your bread tough and dense instead of tender and moist.
Step 5: Into the Pan
Pour the batter into your prepared loaf pan. It should fill it about 2/3 of the way. Give the pan a gentle tap on the counter to release any air bubbles.
Step 6: Bake
Bake for 60-65 minutes. The top should be golden brown and a toothpick inserted into the center should come out clean or with just a few moist crumbs. If your toothpick has wet batter on it, give it another 5 minutes and check again.
Here’s a mistake I used to make: taking it out too early because the top looked done. The edges will set before the center, so don’t be fooled by a gorgeous golden top. That toothpick test is your friend.
Step 7: Cool
This is the hardest part. Let the bread cool in the pan for about 10 minutes. Then use the parchment paper overhang (if you used it) to lift it out and transfer to a wire rack. Let it cool for at least 30 minutes before slicing. I know the smell is intoxicating and you want to dive right in, but cutting into hot banana bread will give you a gummy, dense texture. Patience pays off here.
Pro Tips
After making this recipe more times than I can count, here are the tricks I’ve learned:
The riper the bananas, the better. I’m talking black-spotted, soft, almost-too-far-gone bananas. They’re sweeter and have more concentrated banana flavor. Sometimes I’ll even buy extra bananas just to let them ripen on my counter for this recipe.
Don’t throw out banana peels yet. This sounds weird, but if your bananas aren’t quite ripe enough, you can speed up the process by putting them in a paper bag with an apple. The ethylene gas from the apple makes them ripen faster. Or, in a pinch, you can roast unpeeled bananas at 300°F for about 15-20 minutes until the skins are completely black. Let them cool, peel them, and use them. The flavor won’t be quite as developed as naturally ripened bananas, but it works in a bind.
Add mix-ins strategically. Want chocolate chips? Walnuts? Both? I usually add about 3/4 cup of mix-ins, gently folded in at the very end. If you’re adding nuts, toasting them first in a dry pan for about 5 minutes makes a huge difference in flavor.
For meal prep enthusiasts: This bread freezes beautifully. I bake two loaves at once, slice one, and wrap the slices individually in plastic wrap, then store them in a freezer bag. Pop a slice in the toaster straight from frozen for a quick breakfast. It keeps in the freezer for up to 3 months in good meal prep containers.
The toothpick test isn’t foolproof. Sometimes you’ll hit a melted chocolate chip or a piece of banana and think it’s not done. Insert the toothpick in a few different spots to be sure.
If the top is browning too fast, tent the loaf with aluminum foil about halfway through baking. This happens sometimes in ovens that run hot.
FAQs
Why is my banana bread dense?
Overmixing or using underripe bananas usually causes dense texture. Keep mixing minimal.
Can I freeze banana bread?
Yes. Freeze slices up to 3 months for quick breakfasts.
Can I make banana bread without eggs?
Yes. Use flaxseed or applesauce as a substitute.
How do I know it is fully baked?
Use a toothpick. Clean or slightly crumbly means done.
Can I make muffins instead?
Yes. Bake shorter for about 20 minutes.
Recipe Info Table
| Prep Time | Cook Time | Total Time | Servings | Yield |
|---|---|---|---|---|
| 10 minutes | 60-65 minutes | 75 minutes | 8-10 slices | 1 loaf |
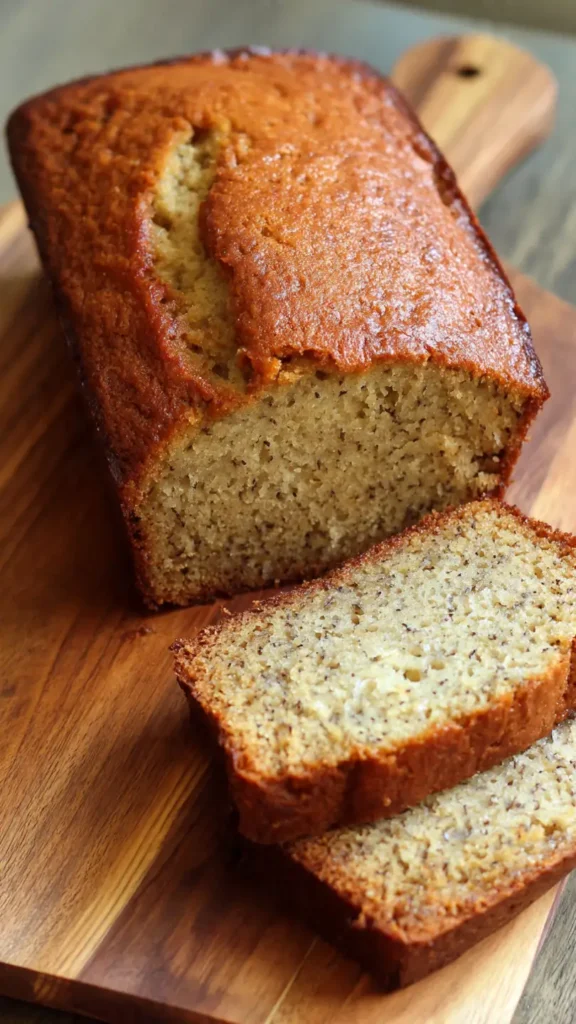
Why You’ll Love This Recipe
This isn’t your average banana bread. It’s the recipe I come back to every single time because it just works. No failures, no surprises, just consistent deliciousness.
It’s incredibly versatile. You can eat it for breakfast, as an afternoon snack, or even as a not-too-sweet dessert. I’ve served it at brunches, packed it in school lunches, and given it as gifts to new neighbors. Everyone loves it.
The ingredient list is short and simple. No running to three different stores for specialty items. If you bake even occasionally, you probably have everything you need right now.
It’s actually beginner-friendly despite what baking might seem like. If you can mash bananas and stir, you can make this. My 8-year-old nephew made it with minimal supervision. If that’s not a testament to how easy it is, I don’t know what is.
What Makes This Recipe Unique
Here’s the thing: banana bread recipes are everywhere. But this one has a few tweaks that make it special.
The butter-to-banana ratio creates the perfect moisture level. Not too greasy, not too dry. I’ve tested this with more butter, less butter, oil instead of butter. This ratio is the sweet spot.
Just one egg keeps it tender without making it too cake-like. Some recipes call for two eggs, which makes banana bread more like banana cake. This has that classic dense, moist, bread texture.
The slightly lower sugar amount lets the banana flavor really shine. You taste banana first, sweetness second. That’s how it should be.
And honestly? The simplicity. I’ve tried recipes with sour cream, Greek yogurt, buttermilk, and all sorts of other additions. They’re fine, but they don’t make it significantly better. Sometimes simple is best.
Key Features
✓ One-bowl recipe – Less cleanup means more eating
✓ No mixer required – Though a stand mixer makes it even easier if you have one
✓ Freezer-friendly – Perfect for meal planning and batch baking
✓ Customizable – Add chocolate chips, nuts, or keep it simple
✓ Uses overripe bananas – Finally, a use for those black bananas
✓ Moist texture that lasts – Stays fresh for days
✓ Beginner-friendly – Perfect for new bakers
Nutrition Facts Table
Per slice (based on 10 slices)
| Nutrient | Amount |
|---|---|
| Calories | 180 |
| Total Fat | 6g |
| Saturated Fat | 3.5g |
| Cholesterol | 30mg |
| Sodium | 150mg |
| Total Carbohydrates | 30g |
| Dietary Fiber | 1g |
| Sugars | 16g |
| Protein | 3g |
Note: Nutrition information is approximate and will vary based on specific ingredients and portion sizes.
You’ll Also Love
If this banana bread becomes a favorite (and I’m betting it will), you might want to try these related recipes:
Banana Muffins – Same great flavor, portion-controlled and freezer-friendly
Zucchini Bread – Another great way to use up excess produce
Chocolate Chip Banana Bread – This recipe with 3/4 cup chocolate chips stirred in
Banana Bread French Toast – Use day-old banana bread for an incredible breakfast
Peanut Butter Banana Bread – Swirl 1/4 cup peanut butter into the batter before baking
Conclusion
Look, I could give you a fancier recipe with more ingredients and complicated steps. But why? This classic banana bread recipe works. It’s been my go-to for a decade because it delivers every single time.
The beauty of this recipe is in its simplicity and reliability. Whether you’re a complete beginner or an experienced baker, you’ll get perfect results. Those overripe bananas sitting on your counter aren’t trash anymore. They’re the start of something delicious.
So grab those spotty bananas, preheat your oven, and get baking. Your kitchen is about to smell absolutely incredible. And in about an hour and fifteen minutes, you’ll have a warm slice of the best banana bread you’ve ever tasted. Maybe with a little butter melted on top. Or maybe just plain. Either way, you’re in for a treat.
Now if you’ll excuse me, I have three very ripe bananas calling my name from the kitchen counter. Time to practice what I preach.
Happy baking!
External Resources:
- Learn more about bananas and their ripening process
- Discover the history of quick breads
- Understanding baking soda as a leavening agent
Classic Banana Bread
Moist, rich, and incredibly easy banana bread made with simple ingredients and perfectly ripe bananas.
Ingredients
- 3 ripe bananas
- 1/3 cup melted butter
- 3/4 cup sugar
- 1 egg
- 1 teaspoon vanilla
- 1 teaspoon baking soda
- Pinch salt
- 1 1/2 cups flour
Instructions
- Preheat oven to 350°F and grease pan.
- Mash bananas in bowl.
- Mix in butter, sugar, egg, and vanilla.
- Add baking soda, salt, and flour.
- Mix gently until just combined.
- Pour into pan and bake 60-65 minutes.
- Cool before slicing.
Notes
Use very ripe bananas for best flavor. Avoid overmixing to keep bread soft and moist. Store at room temperature up to 4 days or freeze up to 3 months.