No Bake Dragon Fruit Mini Cheesecakes
Introduction
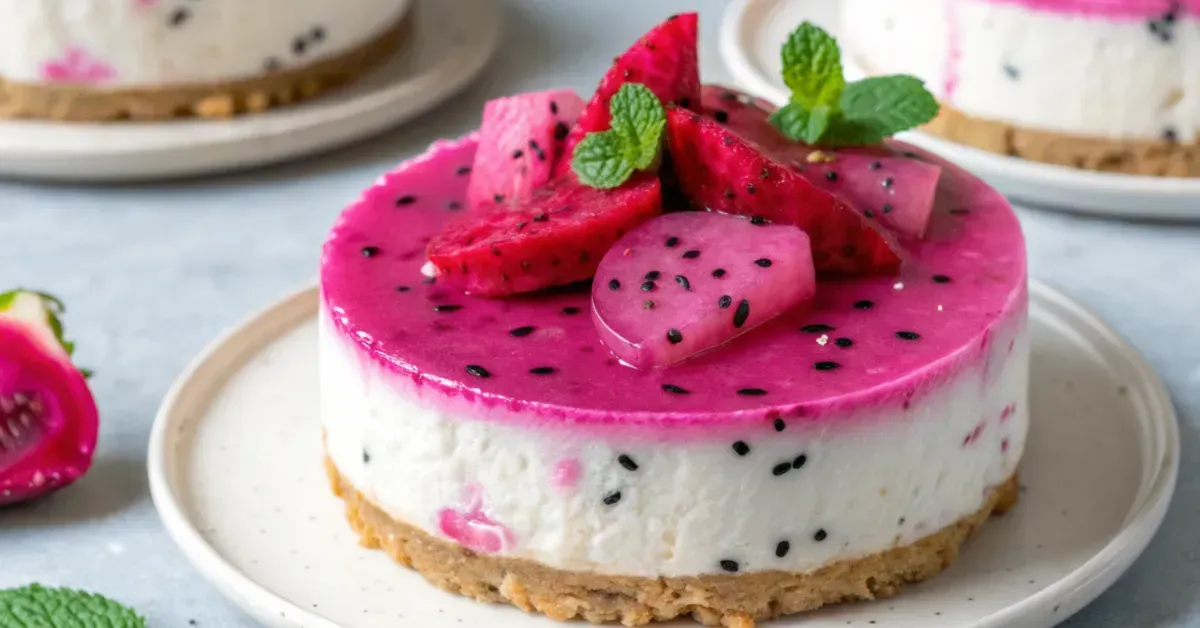
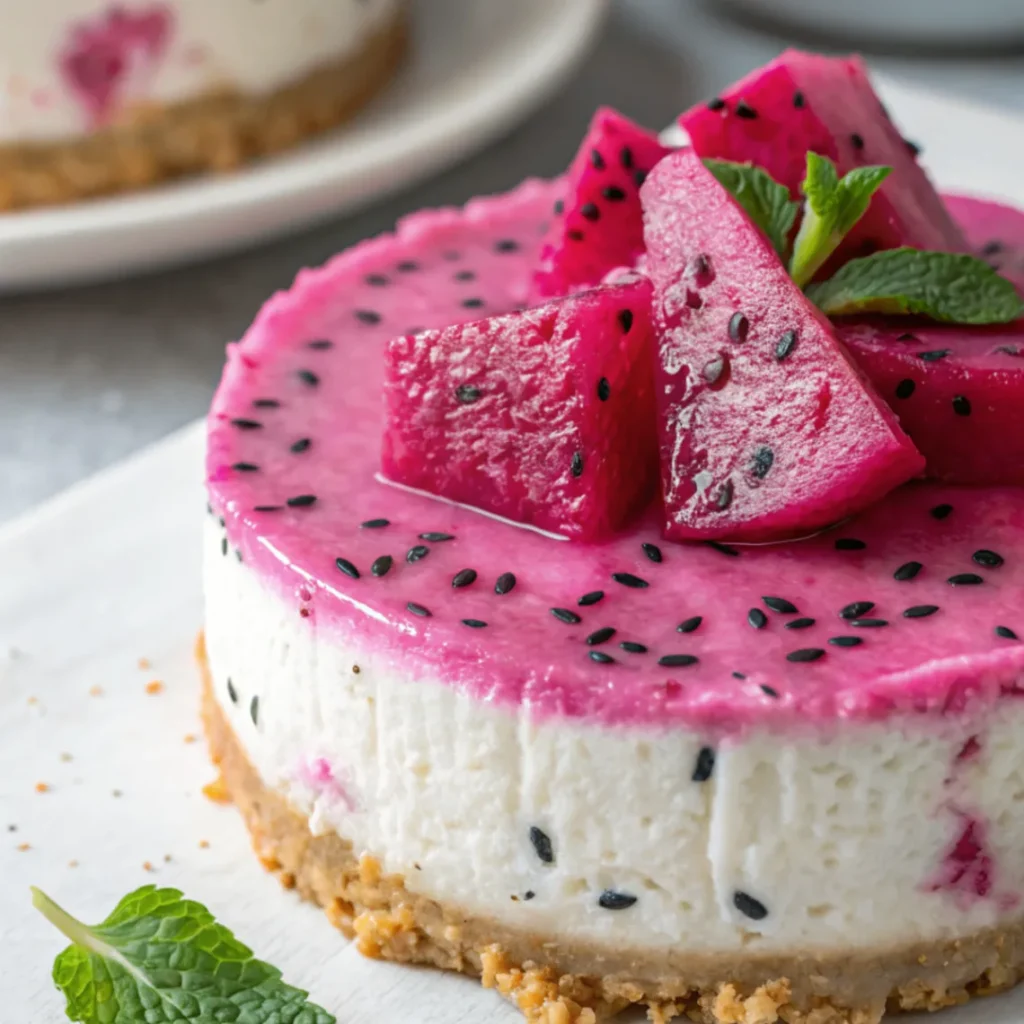
As someone who has spent a decade in professional kitchens, I’ve learned that some of the most beautiful desserts are the simplest ones. And honestly, nothing proves that more than these no bake dragon fruit mini cheesecakes. They’re bright. They’re creamy. They’re almost too pretty to be real.
I first created a version of this recipe during a summer catering event where the host wanted something refreshing and eye-catching but not overly sweet. Dragon fruit immediately came to mind because it brings natural color and delicate tropical flavor without tasting artificial. The challenge was keeping the cheesecake light and silky while ensuring it held well at room temperature. After several trials, this became the version that made my clients fall in love.
Today I’m sharing it with you as a dessert that looks as stunning as anything from a pastry shop but requires zero baking, zero fuss, and very little time. Let’s dive in.
Essential Ingredients (in prose)
To build the perfect no bake dragon fruit mini cheesecakes, you only need a handful of ingredients, but each one plays a key role. The base starts with crushed crackers combined with melted butter to form a firm, flavorful crust that doesn’t crumble when you remove the cheesecakes from their molds.
For the filling, you’ll use full-fat cream cheese, which provides richness and a stable structure. A bit of powdered sugar softens the tang, while vanilla adds depth. The real star is the dragon fruit, either fresh or frozen puree, blended until smooth and naturally vibrant. A touch of whipped cream lightens the mixture to a mousse-like texture, and a small amount of gelatin helps the cheesecakes hold shape without baking.
Alternative Ingredients
If you want a variation, here are easy swaps:
Crust
Use graham crackers, digestive biscuits, shortbread cookies, or gluten-free crackers.
Sweetener
Replace powdered sugar with honey or maple syrup for a softer sweetness.
Dragon Fruit
Use pink pitaya puree, fresh dragon fruit, or even freeze-dried dragon fruit powder mixed with water.
Cream Cheese
Mascarpone creates a richer, silkier filling. Greek yogurt lightens it for a tangier version.
Stabilizer
Agar agar works as a vegetarian alternative to gelatin.
Recipe Info Table
Prep Time. 20 minutes
Cook Time. 0 minutes
Chill Time. 3 hours
Total Time. About 3 hours 20 minutes
Servings. 12 mini cheesecakes
Yield. 12 minis
Key Features
Easy no bake method that requires no oven
Naturally vibrant color from dragon fruit
Creamy, mousse-like texture
Refreshing tropical flavor
Perfect for parties, desserts tables, and summer gatherings
Beginner friendly recipe with professional results
Nutrition Facts Table
Approximate per mini cheesecake.
Calories. 210
Fat. 13 g
Carbohydrates. 20 g
Protein. 3 g
Sugar. 12 g
Fiber. 1 g
Step-by-Step Directions
Step 1. Prepare the crust
Start by crushing your crackers until they become fine crumbs. Mix the crumbs with melted butter until the texture resembles wet sand. Press this mixture firmly into the bottoms of a muffin tin lined with parchment cups or silicone molds. The key is firm pressure, especially around the edges, so the crust doesn’t crumble when unmolded. Let the crust chill while you prepare the filling.
Step 2. Make the dragon fruit puree
If you’re using fresh dragon fruit, scoop out the flesh and blend until smooth. If you’re using frozen puree, thaw it first. The goal is a silky, lump-free puree that mixes effortlessly with the cream cheese.
Step 3. Whip the cream
In a separate bowl, whip cold heavy cream until soft peaks form. This gives the final cheesecake its airy texture. Set aside.
Step 4. Prepare the gelatin
Sprinkle gelatin over a small amount of warm water and let it bloom for a minute. Gently heat it until dissolved. Avoid overheating because that can change the texture. This simple step ensures your cheesecakes hold their shape without baking.
Step 5. Blend the filling
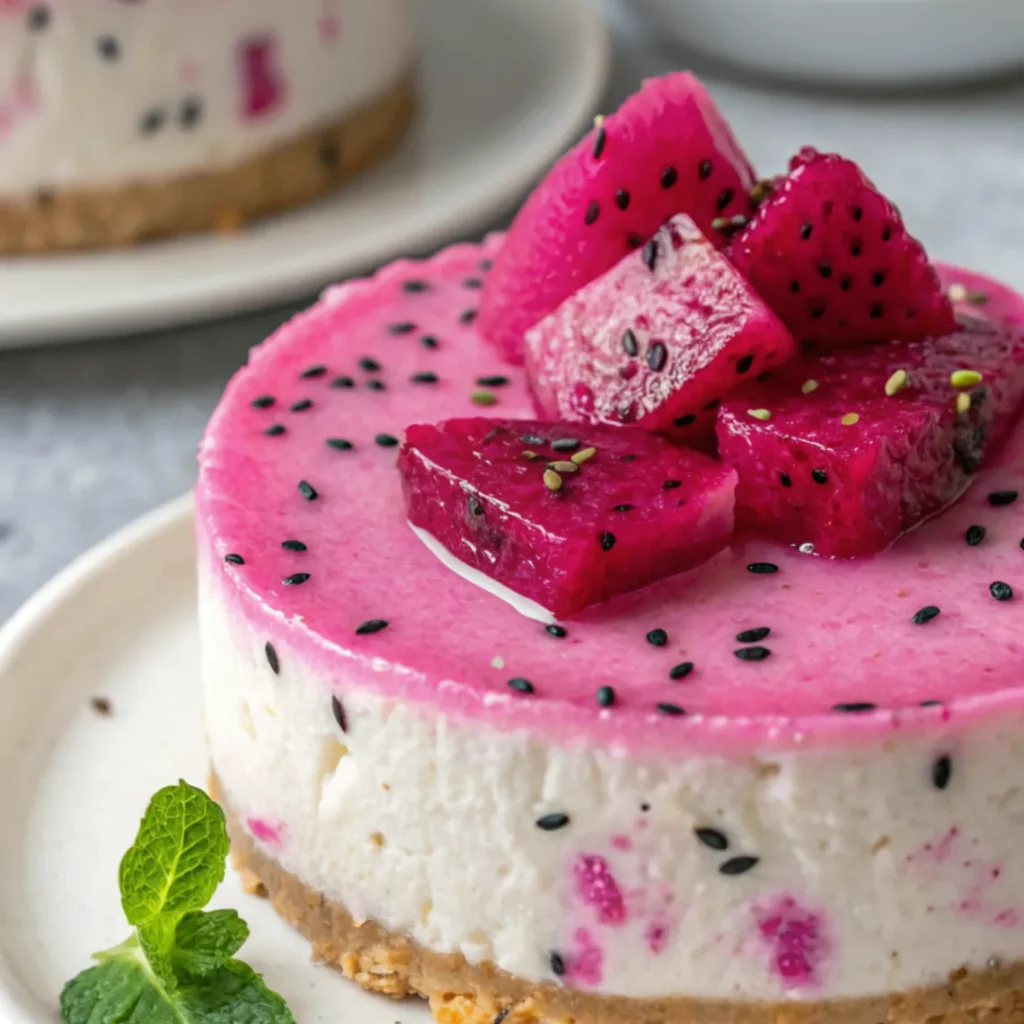
Beat the cream cheese until smooth and fluffy. Add powdered sugar and vanilla, then pour in the dragon fruit puree. You’ll immediately see the color turn a stunning magenta. Blend in the dissolved gelatin until everything is even and silky. Finally, fold in the whipped cream gently to keep the mixture light.
Step 6. Assemble the cheesecakes
Spoon the filling over the chilled crusts, smoothing the tops with a spatula. Tap the pan lightly on the counter to release air bubbles. Cover and refrigerate for at least three hours, though overnight gives the best texture.
Step 7. Unmold and decorate
Once the cheesecakes are firm, gently remove them from their molds. You can top them with dragon fruit cubes, whipped cream, or even a drizzle of condensed milk. The vibrant color makes them beautiful even without decoration.
Pro Tips
From ten years working with no bake desserts, these are the tricks that make the biggest difference.
Use full-fat cream cheese for stability
Whip the cream separately for the airiest texture
Keep the gelatin warm and smooth before adding it to avoid clumps
Chill long enough so the minis hold their shape
Use silicone molds for easier unmolding
Blend dragon fruit thoroughly for a perfectly vibrant look
Taste the puree first and adjust sugar depending on ripeness
Why You’ll Love This Recipe
If you want a dessert that checks all the boxes, this one does it. These no bake dragon fruit mini cheesecakes are effortless yet elegant. They’re light enough for warm days but rich enough to satisfy real dessert cravings. The natural color makes them look like something from a boutique pastry shop, and they fit almost any occasion. Plus, you won’t need your oven at all.
What Makes This Recipe Unique
It’s the combination of professional pastry techniques with ingredients you can find in any grocery store. You get the structure and creaminess of a classic cheesecake, the striking color of dragon fruit, and a delicate tropical flavor that’s refreshing rather than heavy. These minis hold beautifully at room temperature and slice cleanly without baking, which is rare for vibrant fruit cheesecakes.
FAQs
Can I make these cheesecakes without gelatin
Yes. Use agar agar, but follow package directions because the amount needed varies.
How long do these cheesecakes last
They stay fresh for up to four days in the refrigerator.
Can I freeze them
Absolutely. Freeze individually, then thaw in the fridge before serving.
Can I use white dragon fruit
Yes, but the color will be pale. Add a tablespoon of freeze-dried pitaya powder for color.
Can I make one large cheesecake instead of minis
Yes. Pour the filling into a springform pan and chill overnight.
You’ll Also Love
Here are more refreshing desserts from beesrecipes.com you might enjoy:
Mango coconut parfait
Strawberry cheesecake bars
No bake lemon raspberry cups
Creamy tropical yogurt mousse
Conclusion
These no bake dragon fruit mini cheesecakes prove that beautiful desserts don’t need to be complicated. With their creamy texture, bright color, and refreshing flavor, they bring a touch of tropical charm to any table. Whether you’re hosting guests or simply treating yourself, this recipe delivers a dessert that looks impressive and tastes even better.
Don’t forget to share your creations with #beesrecipes on Instagram. I can’t wait to see your delicious take on this no bake dessert.