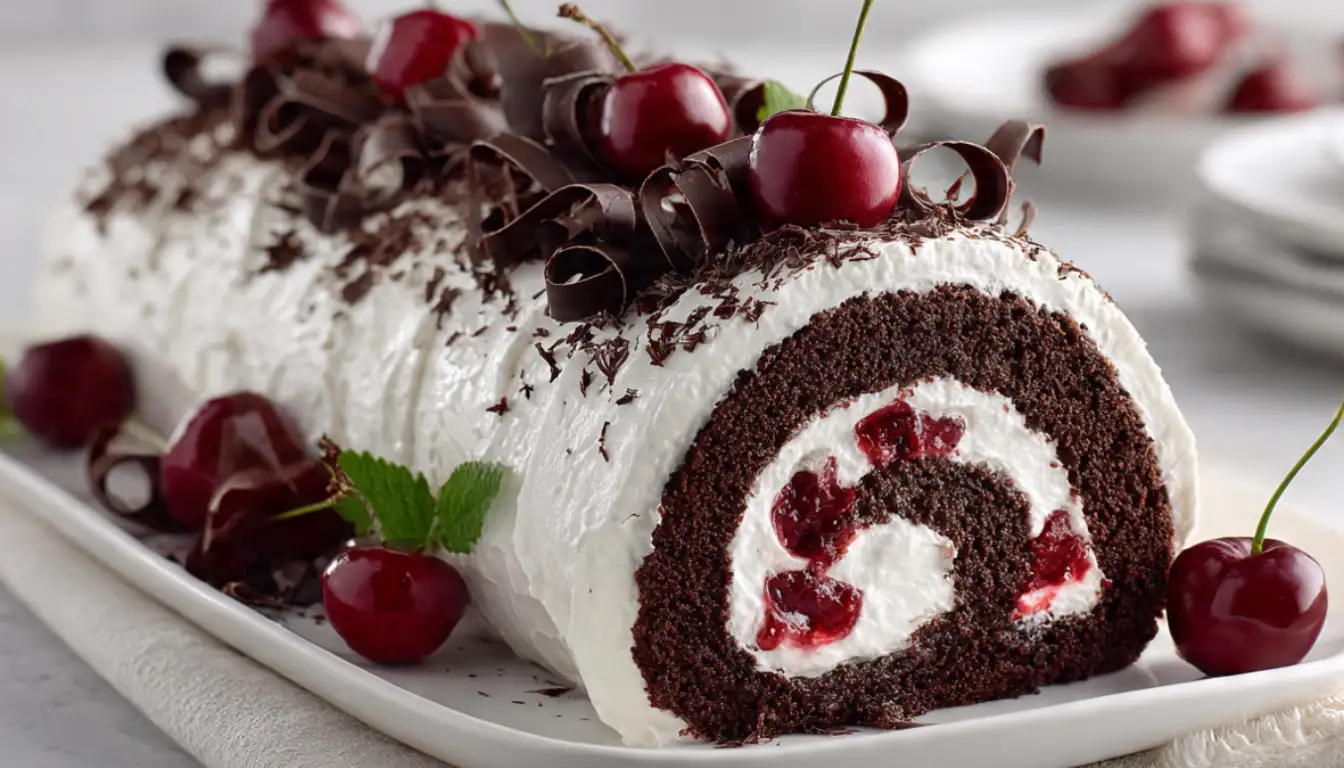
Swiss Roll Meets Black Forest Charm
You know that moment when you bite into a slice of Black Forest cake at a fancy bakery and think, “I wish this wasn’t so heavy”? That’s exactly what happened to me three years ago, and honestly, it sparked this entire recipe journey. I wanted all that cherry-chocolate goodness without feeling like I needed a nap afterwards.
So here’s what I did. I took the classic Swiss roll (that light, airy sponge that practically melts on your tongue) and dressed it up with everything I love about Black Forest cake. Cherry filling that’s tart and sweet at the same time. Whipped cream that doesn’t feel too rich. Dark chocolate shavings because, well, they’re non-negotiable.
The best part? This whole thing comes together faster than you’d think. No layer cake drama, no precision stacking required. Just roll, chill, and serve. I’ve made this for birthdays, potlucks, and random Tuesday nights when I needed something impressive without the stress.
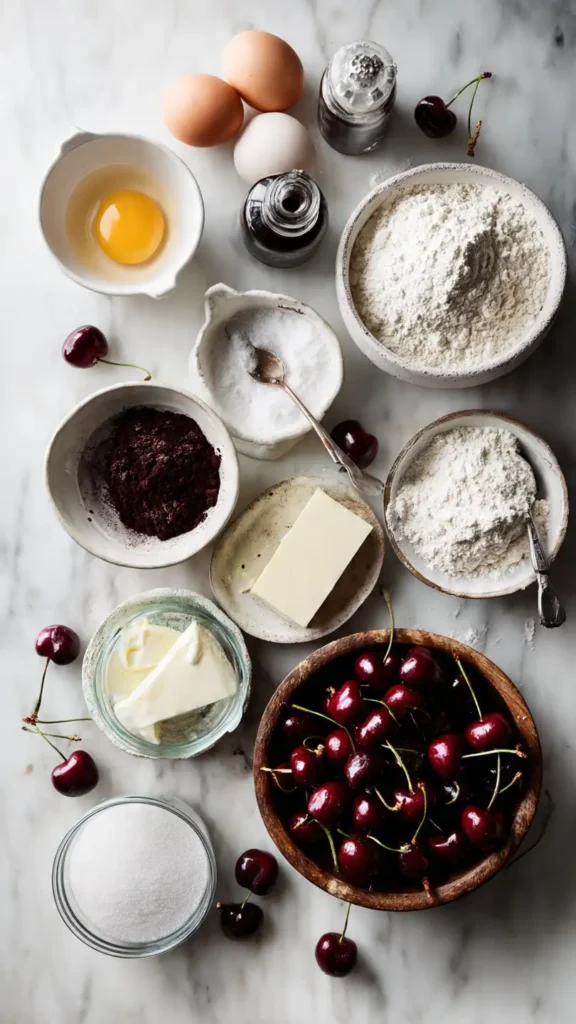
Essential Ingredients
For the Chocolate Sponge:
- 4 large eggs (room temperature)
- 2/3 cup granulated sugar
- 1/3 cup all-purpose flour
- 1/4 cup unsweetened cocoa powder
- 1 teaspoon vanilla extract
- 1/4 teaspoon salt
- Powdered sugar for dusting
For the Cherry Filling:
- 2 cups fresh or frozen pitted cherries
- 1/3 cup granulated sugar
- 2 tablespoons cornstarch
- 2 tablespoons cherry liqueur or kirsch (optional)
- 1 tablespoon lemon juice
For the Whipped Cream:
- 2 cups heavy whipping cream (cold)
- 1/4 cup powdered sugar
- 1 teaspoon vanilla extract
For Assembly:
- Dark chocolate bar (for shaving)
- Fresh cherries with stems (for garnish)
- Extra powdered sugar
Alternative Ingredients
Can’t find fresh cherries? Frozen works just as well, and I actually prefer them in winter. Just thaw them completely and drain off the excess liquid before cooking.
If cherry liqueur isn’t your thing (or you’re serving this to kids), skip it entirely. A splash of almond extract gives you that classic Black Forest flavor without the alcohol. I use maybe 1/2 teaspoon, because almond extract is powerful stuff.
For the whipped cream, you can use mascarpone mixed with heavy cream if you want something that holds up longer. I do half and half when I’m making this ahead. It stays pretty for hours.
The cocoa powder matters here. I learned this the hard way after using cheap grocery store cocoa once. Dutch-processed cocoa gives you that deep, dark chocolate flavor that actually tastes like Black Forest cake. Hershey’s or Ghirardelli both work great.
Step-by-Step Directions
Prep Your Pan (Don’t Skip This)
Line a 10×15 inch jelly roll pan with parchment paper. I mean really line it. Get the paper into all the corners and up the sides. Use a bit of butter or cooking spray to help it stick. Trust me, this step saves your sanity later when you’re trying to roll a delicate cake.
Preheat your oven to 375°F. This temperature is hotter than regular cake baking, but it’s what makes that sponge light and rollable.
Make the Chocolate Sponge
Separate your eggs while they’re cold (easier that way), then let them sit for 20 minutes to come to room temperature. This isn’t me being fussy. Room temp eggs whip up way better.
Beat the egg yolks with half the sugar using your stand mixer or a hand mixer. I use my KitchenAid on medium-high speed for about 3 minutes until the mixture is thick and pale yellow. It should ribbon when you lift the beaters.
In a separate bowl (and this is important, it needs to be totally clean and dry), whip the egg whites with the salt until foamy. Gradually add the remaining sugar while beating. Keep going until you get stiff, glossy peaks. When you lift the beaters, the peaks should stand straight up.
Sift the flour and cocoa together. I know sifting feels old-fashioned, but it really does prevent lumps in your delicate sponge.
Fold the vanilla into the yolk mixture, then gently fold in about a third of the egg whites. This lightens the yolk mixture so it’s easier to incorporate everything else. Add the remaining whites in two additions, being gentle but thorough. You want to keep all that air you just beat in.
Sift the flour-cocoa mixture over the batter in three additions, folding gently after each. Stop folding as soon as you don’t see any more dry streaks. Over-mixing here makes a tough cake.
Bake and Roll
Pour the batter into your prepared pan and spread it evenly, getting it right into the corners. Bake for 12-15 minutes. You’re looking for the cake to spring back when you touch it lightly.
While it bakes, lay out a clean kitchen towel and dust it generously with powdered sugar. (I go through about 1/4 cup of powdered sugar for this.)
The second that cake comes out of the oven, run a knife around the edges and flip it onto your sugared towel. Peel off the parchment paper carefully. Starting from the short end, roll up the cake with the towel inside. The towel takes the place of the filling while the cake cools in its rolled shape. This prevents cracking later.
Let it cool completely like this, about 45 minutes. You can speed this up by putting it in the fridge for 20 minutes.
Make the Cherry Filling
While your cake is cooling, make the filling. If you’re using fresh cherries, pit them. I use a cherry pitter because doing this with a knife takes forever and makes a mess.
Toss about 1/2 cup of the cherries into a food processor and pulse until they’re chopped but not pureed. You want some texture. Combine these with the whole cherries in a saucepan.
Mix the sugar and cornstarch together, then stir them into the cherries. This prevents clumping. Add the lemon juice.
Cook over medium heat, stirring constantly, until the mixture thickens and bubbles. This takes about 5-7 minutes. It should be thick enough to mound on a spoon. If you’re using kirsch, stir it in off the heat.
Let this cool completely. You can’t put warm filling on your cake or it’ll make everything soggy. I usually make the filling first and let it chill in the fridge while I deal with the cake.
Whip the Cream
Make sure your cream is really cold. I keep my mixing bowl and beaters in the freezer for 10 minutes before doing this. Cold everything = better whipped cream.
Beat the cream with the powdered sugar and vanilla until you get medium-stiff peaks. You don’t want it super stiff (that’s for piping), just thick enough that it holds its shape but still spreads easily.
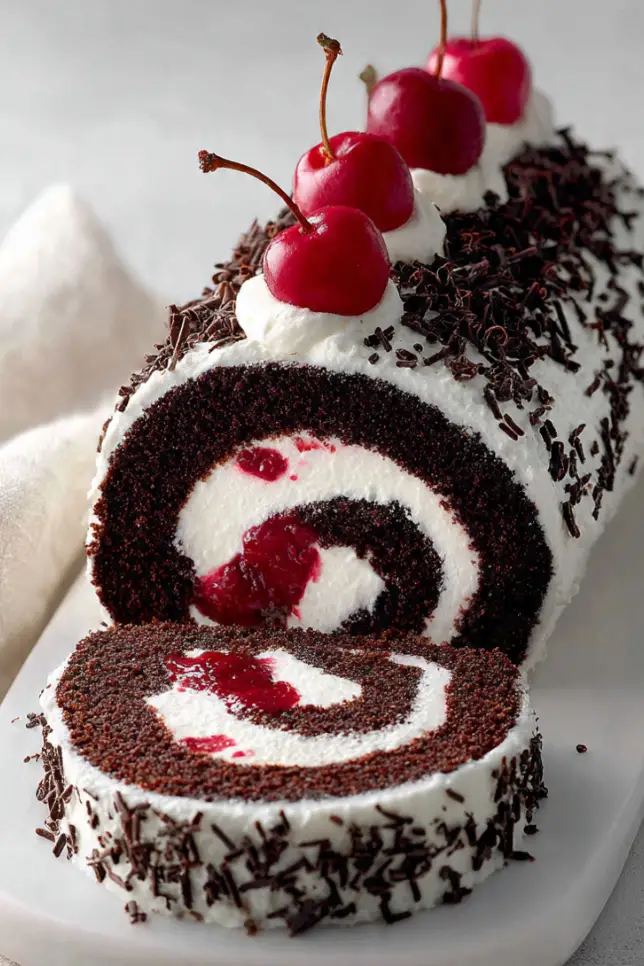
Assembly Time
Carefully unroll your cooled cake, removing the towel. Don’t worry if you see a few small cracks. That’s normal and won’t show in the final roll.
Spread about half the whipped cream over the cake, leaving a 1-inch border on the far long edge. This border prevents filling from squishing out when you roll.
Spoon the cherry filling over the cream in an even layer. I use a slotted spoon so I’m not adding too much liquid.
Here’s where people mess up: they try to roll it too tightly. Roll it snugly but not super tight. Start from the short end, use the parchment paper to help you lift and roll, and work slowly.
Transfer your rolled cake to a serving platter, seam side down. Frost the outside with the remaining whipped cream. I use an offset spatula for this, but a regular butter knife works fine too.
Use a vegetable peeler to shave curls from your dark chocolate bar directly onto the cake. Nestle a few fresh cherries on top if you have them.
Chill for at least 2 hours before serving. This lets everything set and makes slicing so much easier.
Pro Tips
The biggest mistake I see? People try to roll the cake when it’s too warm. Let it cool completely. A warm cake will crack every single time.
When you’re folding the egg whites into the yolk mixture, rotate the bowl as you fold. This helps incorporate everything evenly without deflating the batter.
If your cherry filling seems too thin after cooking, don’t panic. Mix 1 teaspoon of cornstarch with 2 teaspoons of cold water, add it to the filling, and cook for another minute. It’ll thicken right up.
For cleaner slices, run your knife under hot water and wipe it dry between each cut. Works like magic.
This cake actually tastes better the next day after the flavors have had time to meld. I always make it the night before a party.
FAQs
Can I make a Black Forest Swiss roll ahead of time?
Yes, it tastes even better the next day after chilling.
Why did my Swiss roll crack?
It was likely overbaked or not rolled while warm.
Can I use canned cherry filling?
You can, but homemade filling gives better flavor.
Can I freeze this dessert?
Yes, freeze tightly wrapped for up to 2 months.
Why You’ll Love This Recipe
Look, I’m not going to promise this is easier than buying a cake at the store. But it’s definitely more impressive, and honestly, way more delicious. You get that wow factor when you slice into it and see those perfect swirls.
The texture is what really gets me. That light sponge cake paired with tart cherries and barely-sweet whipped cream? It’s the kind of dessert you can actually eat after a big meal without feeling stuffed.
Plus, people assume it’s way harder to make than it actually is. The technique is simple once you understand it, and the ingredients are pretty basic. You probably have most of them already.
What Makes This Recipe Unique
Most Black Forest Swiss rolls you see online use cherry jam or canned filling. This one uses real cherries cooked down into a thick, glossy filling that actually tastes like fruit. That makes a huge difference.
The cocoa sponge is adapted from a European recipe I got from a Swiss friend. It’s got more eggs and less flour than American sponge cakes, which makes it more flexible and less likely to crack.
And I don’t drench this thing in alcohol like traditional Black Forest cake. Just a hint of kirsch in the filling if you want it, or skip it entirely. The cherry flavor shines through either way.
Key Features
Light but Decadent: All the flavors of Black Forest cake without the heaviness. You can actually finish a whole slice.
Impressive Presentation: That spiral when you cut into it looks like you went to pastry school. Nobody needs to know it took less than an hour of actual work.
Make-Ahead Friendly: This is perfect for entertaining because you can make it the day before and just add the final touches before serving.
Adaptable: Don’t like cherries? Use raspberries or strawberries. Want it boozy? Add more liqueur. Prefer milk chocolate? Use that instead of dark.
You’ll Also Love
If you’re into this light-but-fancy vibe, try my Lemon Curd Swiss Roll. It’s got that same airy sponge but with bright, tangy lemon filling instead of chocolate and cherries.
The Strawberry Cream Roll is another winner, especially in summer when strawberries are cheap and perfect. It’s even easier because you don’t have to cook the filling.
And if you want to go full chocolate overload, my Triple Chocolate Swiss Roll is basically a chocolate lover’s dream. Dark chocolate sponge, chocolate whipped cream, and chocolate ganache drizzle.
Conclusion
I’ll be honest, the first time I made a Swiss roll, I was terrified. All those warnings about cracking and delicate sponge. But once you do it once and see how forgiving it actually is, you’ll want to make them all the time.
This Black Forest version is my go-to when I want something that looks impressive but doesn’t require advanced pastry skills. The combination of chocolate, cherries, and cream is just unbeatable. And serving it up in those perfect spiral slices? Always gets compliments.
Give yourself a little extra time the first time you make it, just to get comfortable with the rolling technique. After that, it’s a breeze. And if it cracks a little? Pile on extra whipped cream and chocolate shavings. Nobody will ever know.
Happy baking!
Black Forest Swiss Roll
Light, airy chocolate sponge rolled with cherry filling and whipped cream for a fresh take on Black Forest cake.
Ingredients
- 4 eggs
- 2/3 cup sugar
- 1/3 cup flour
- 1/4 cup cocoa powder
- 2 cups cherries
- 2 cups heavy cream
- Dark chocolate
Instructions
- Prepare pan and preheat oven.
- Make sponge batter and fold gently.
- Bake until soft and springy.
- Roll warm cake in towel and cool.
- Cook cherry filling and cool.
- Whip cream.
- Fill, roll, frost and decorate.
Notes
Always roll the cake while warm to prevent cracks. Chill before slicing for clean layers.