Peanut Butter Lasagna
Let me tell you about the dessert that changed my potluck game forever. I needed something impressive but easy for a family gathering, and my friend Sarah mentioned this peanut butter lasagna she’d had at a church social. I was skeptical. Lasagna? With peanut butter? But trust me, this thing is absolutely incredible.
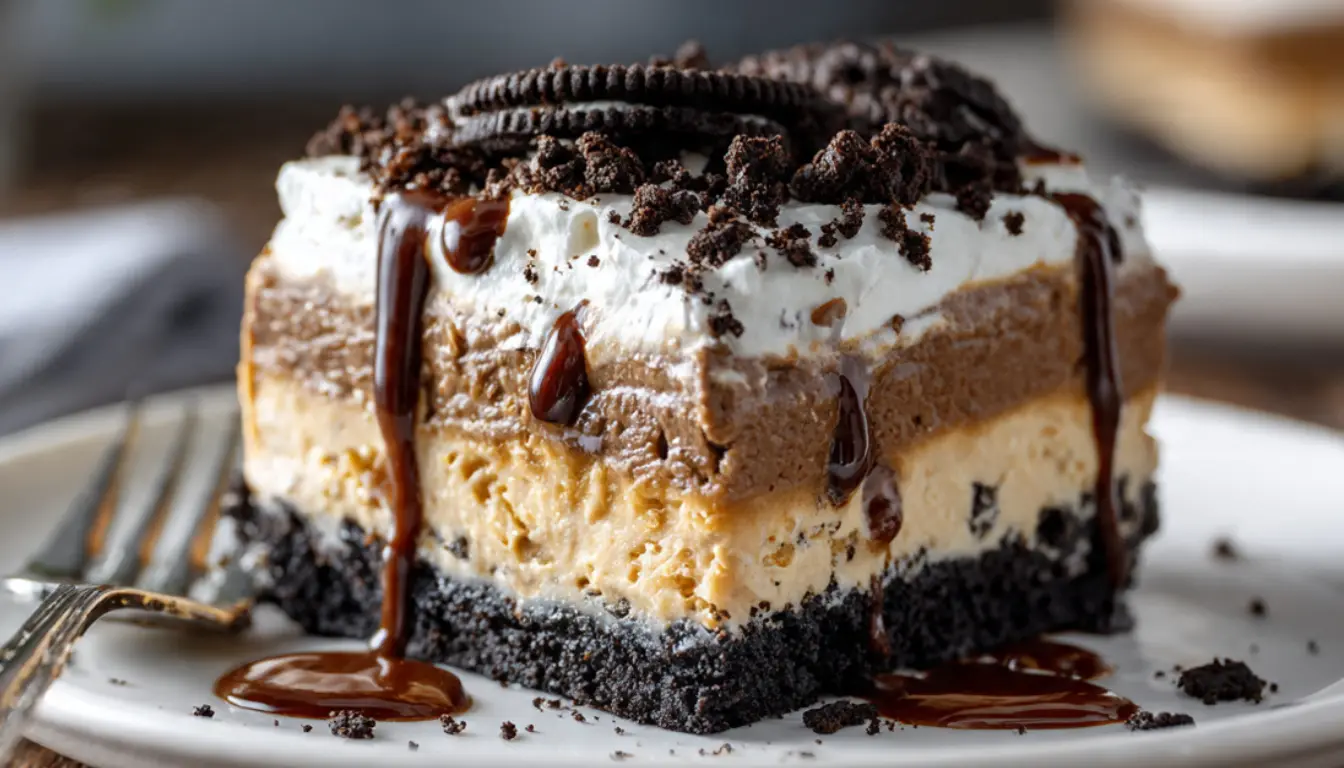
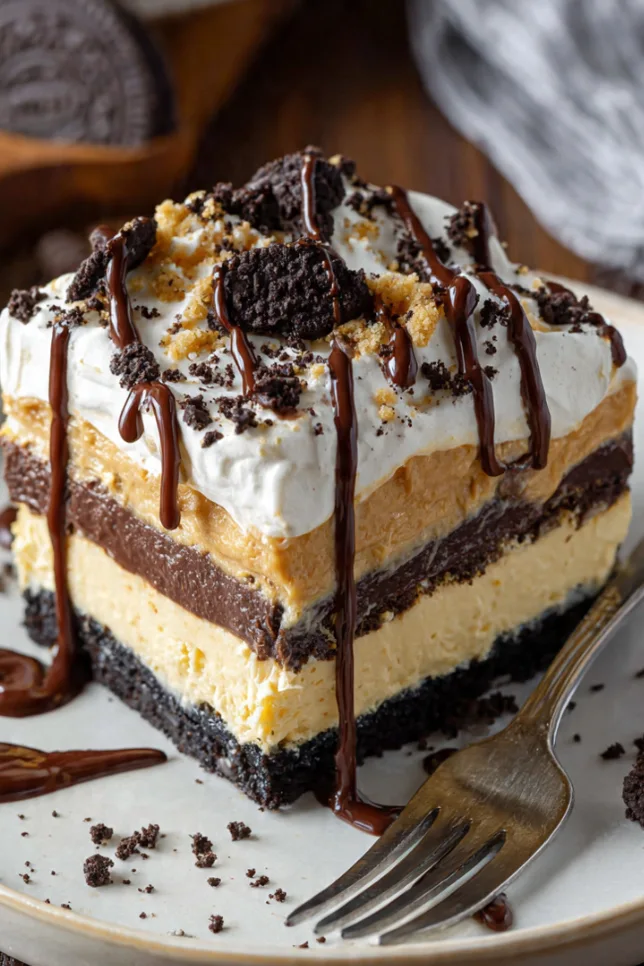
It’s not actually lasagna in the traditional sense. There’s no pasta or sauce. It’s called lasagna because of the layered structure. You’ve got a buttery Oreo crust on the bottom, then a fluffy peanut butter cream cheese layer, followed by chocolate pudding, and finally topped with whipped cream and more crushed Oreos. It’s basically everything good in life, stacked up in a 9×13 glass baking dish.
The best part? It’s completely no-bake. I don’t even turn on my oven for this one, which is a huge win during summer months.
Essential Ingredients
For the Oreo Crust:
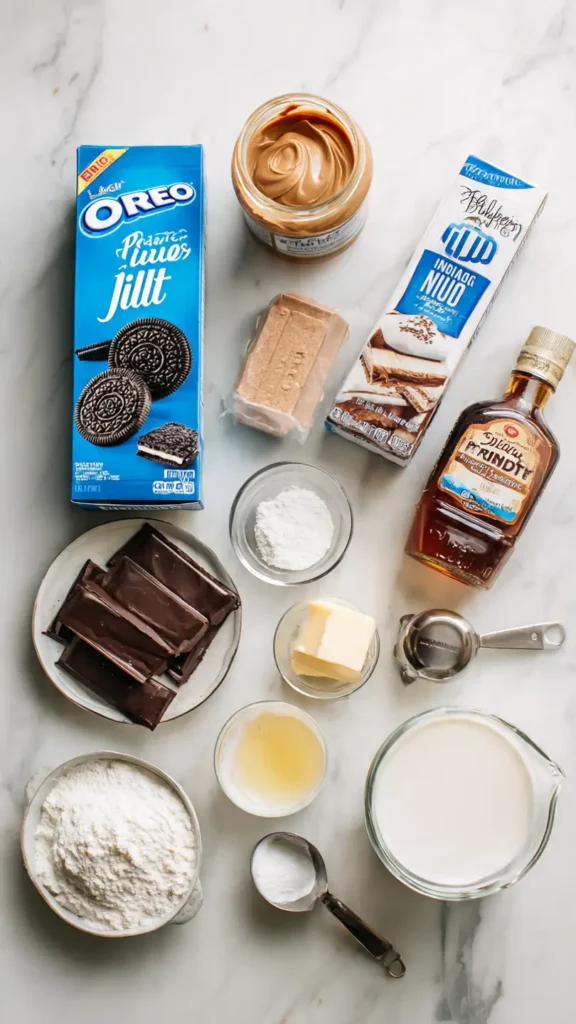
- 36 Oreo cookies (about one standard package)
- 6 tablespoons melted butter
For the Peanut Butter Layer:
- 8 oz cream cheese, softened (I always use Philadelphia cream cheese because it whips up smoothest)
- 1 cup creamy peanut butter
- 1 cup powdered sugar
- 8 oz Cool Whip, divided
- 1 teaspoon vanilla extract
For the Chocolate Pudding Layer:
- 2 boxes (3.9 oz each) instant chocolate pudding mix
- 3 cups cold milk
For the Topping:
- Remaining Cool Whip
- Crushed Oreos for garnish
- Mini peanut butter cups, chopped (optional but amazing)
Alternative Ingredients
Look, I get it. Not everyone has the same pantry or preferences. Here’s what you can swap:
If you don’t want to use Cool Whip, you can make your own whipped cream. Just whip 2 cups of heavy cream with 1/4 cup powdered sugar until stiff peaks form. Use half in the peanut butter layer and half for topping.
Don’t like Oreos? Graham crackers work great for the crust. You’ll need about 2 cups of crumbs mixed with the melted butter. Nutter Butters are also fantastic if you want to go all-in on the peanut butter theme.
For the peanut butter, natural peanut butter works, but the processed stuff like Jif or Skippy gives you better texture. The natural oils can make the layer a bit greasy.
Step-by-Step Directions
Step 1: Make the Crust
Crush your Oreos. I used to do this in a food processor, which works perfectly if you have one. But honestly, putting them in a ziplock bag and going at them with a rolling pin is just as effective and way more satisfying after a long day. You want fine crumbs, not chunks.
Mix the Oreo crumbs with the melted butter until everything looks like wet sand. Press this mixture firmly into the bottom of your 9×13 inch baking dish. I use the bottom of a measuring cup to really pack it down. Pop it in the fridge while you make the next layer.
Step 2: Create the Peanut Butter Layer
This is where a stand mixer really shines, though you can absolutely do it with a hand mixer or even by hand if you’re patient. Beat the softened cream cheese until it’s completely smooth and fluffy. This takes about 2 minutes on medium speed.
Add the peanut butter and powdered sugar. Beat until combined. Here’s a pro tip I learned the hard way: make sure your cream cheese is actually soft. I once tried to rush this with cold cream cheese from the fridge, and I ended up with lumps that never fully smoothed out. Let it sit at room temperature for at least 30 minutes before you start.
Fold in half of the Cool Whip (or 1 cup of your homemade whipped cream) and the vanilla extract. Spread this over your chilled crust. I use an offset spatula to get it really smooth and even.
Step 3: Mix the Pudding
In a large bowl, whisk together the chocolate pudding mix and cold milk. Whisk for about 2 minutes until it starts to thicken. Don’t skip this step or try to rush it. The pudding needs time to set up properly.
Let it sit for 5 minutes, then spread it over the peanut butter layer. The pudding will continue to firm up in the refrigerator.
Step 4: Add the Topping
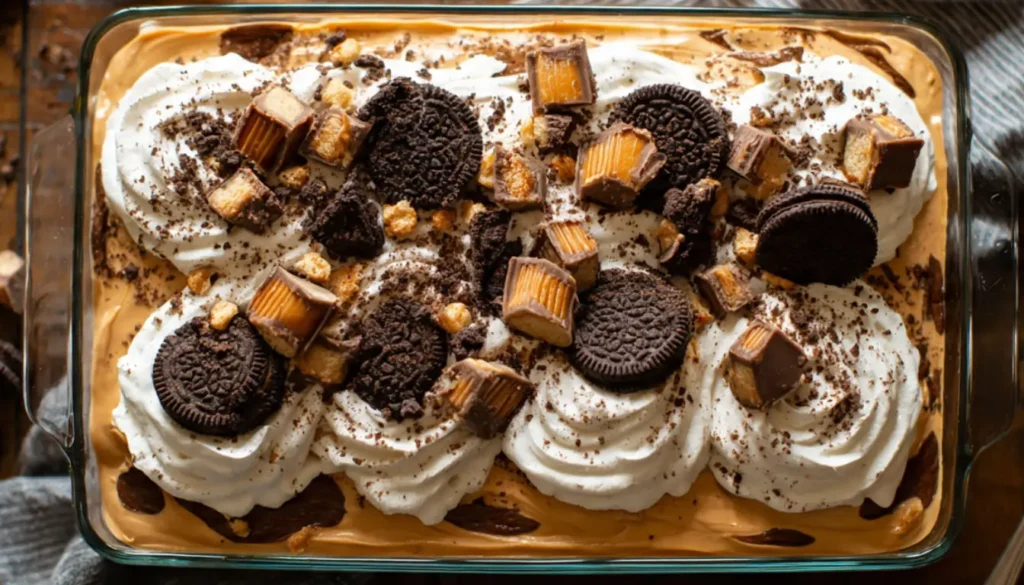
Spread the remaining Cool Whip over the pudding layer. I like to make swoopy peaks with my spatula because it looks pretty, but you can keep it smooth if that’s your style.
Crush some more Oreos and sprinkle them on top. If you’re using the mini peanut butter cups, chop them up and scatter them over the top too.
Step 5: Chill
This is the hardest part because you have to wait. Cover the dish with plastic wrap (carefully, so you don’t mess up your beautiful top layer) and refrigerate for at least 4 hours. I usually make this the night before I need it. Overnight chilling gives you the cleanest slices because everything has time to set up properly.
Pro Tips
The biggest mistake people make with this dessert is not letting it chill long enough. I know it’s tempting to dig in after an hour, but you really need that full 4 hours minimum. Otherwise, the layers slide around when you try to cut it, and you end up with a delicious mess instead of pretty slices.
Use a hot knife to cut clean slices. I keep a pitcher of hot water next to my cutting board, dip the knife in, wipe it clean, then make each cut. It sounds fussy, but it makes such a difference in presentation.
If you’re making this for a crowd, invest in some good quality meal prep containers. I portion out individual servings in small containers for easy grab-and-go desserts. They keep in the fridge for up to 3 days, though they’ve never lasted that long in my house.
For a fancier presentation, you can make this in individual serving glasses. Just layer the ingredients in clear cups or mason jars. It takes a bit more time, but it looks incredibly impressive.
FAQs
Can I make peanut butter lasagna ahead of time?
Yes, it is actually better when made the night before since it allows the layers to fully set.
Can I freeze peanut butter lasagna?
Yes, you can freeze it for up to 2 months. Thaw in the refrigerator before serving.
What can I use instead of Oreos for the crust?
Graham crackers or peanut butter cookies work great as alternatives.
Can I use homemade whipped cream?
Yes, whip heavy cream with powdered sugar until stiff peaks form.
Why is my dessert not firm?
It needs more chilling time. Let it sit at least 4 hours or overnight.
Why You’ll Love This Recipe
First off, it’s ridiculously easy. You’re not baking anything, you’re not tempering chocolate, you’re not doing anything complicated. If you can use a mixer and spread layers in a pan, you can make this.
Second, it’s a crowd-pleaser. I’ve served this to picky kids, fancy dinner party guests, and everyone in between. I’ve yet to meet someone who doesn’t love it. The combination of peanut butter and chocolate is pretty much universally adored.
Third, it’s make-ahead friendly. You can’t make a lot of impressive desserts the day before, but this one actually needs to be made ahead. That’s huge when you’re planning for holidays or parties.
What Makes This Recipe Unique
Most peanut butter desserts are heavy on the peanut butter and light on everything else. This recipe balances the peanut butter with chocolate pudding and the subtle vanilla from the whipped cream. You get peanut butter flavor without it being overwhelming.
The texture contrast is what really sets this apart. You’ve got the crunchy Oreo crust, the creamy peanut butter layer, the smooth pudding, and the airy whipped topping. Every bite has multiple textures happening at once.
Also, unlike traditional pudding desserts that can be one-note, the layers in this recipe mean you get different flavor combinations depending on how much of each layer you get in your bite. It keeps things interesting from first bite to last.
Key Features
- No-Bake: Perfect for summer or when you don’t want to heat up the kitchen
- Make-Ahead: Actually better when made the night before
- Crowd-Sized: One pan serves 12-15 people easily
- Customizable: Easy to swap ingredients based on dietary needs or preferences
- Kid-Friendly: My friend’s kids ask for this instead of birthday cake
- Freezer-Friendly: Yes, you can freeze individual portions for up to 2 months
You’ll Also Love
If this peanut butter lasagna is your jam, you need to try my Chocolate Éclair Cake. It has that same layered, no-bake magic with graham crackers, vanilla pudding, and chocolate frosting.
My No-Bake Oreo Cheesecake uses a similar crust technique and is just as impressive.
For another peanut butter fix, my Peanut Butter Cup Brownies are dangerous. I mean, hide-them-from-yourself dangerous.
And if you’re into the whole no-bake dessert situation, my Strawberry Pretzel Salad (which is actually a dessert, don’t ask me why it’s called salad) is another potluck favorite.
Conclusion
I’ve been making this peanut butter lasagna for years now, and it never gets old. It’s become my signature potluck dish, the thing people specifically request when I’m bringing dessert. I’ve probably made it 50 times at this point, and I still look forward to that first slice.
The beautiful thing about recipes like this is that they look and taste like you spent hours in the kitchen, but the reality is you spent 20 minutes assembling layers and the fridge did all the real work. That’s my kind of cooking.
If you make this, let it chill properly, use good quality peanut butter, and don’t skimp on the Oreo garnish on top. Those three things will take you from good to amazing.
Now if you’ll excuse me, I’m pretty sure I have all the ingredients to make this right now, and I’ve successfully talked myself into it while writing this. That’s the problem with being a food blogger. You never know when recipe inspiration is going to strike and suddenly you need dessert at 2 PM on a Tuesday.
Peanut Butter Lasagna
No-bake layered dessert with Oreo crust, creamy peanut butter filling, and chocolate pudding.
Ingredients
- 36 Oreo cookies
- 6 tbsp melted butter
- 8 oz cream cheese
- 1 cup peanut butter
- 1 cup powdered sugar
- 8 oz Cool Whip
- 1 tsp vanilla
- 2 boxes chocolate pudding
- 3 cups milk
Instructions
- Crush Oreos and mix with butter. Press into dish.
- Beat cream cheese, peanut butter, and sugar.
- Fold in Cool Whip and spread over crust.
- Prepare pudding and spread on top.
- Add remaining Cool Whip and toppings.
- Chill at least 4 hours before serving.
Notes
For best results, chill overnight. Use a hot knife for clean slices. Store in fridge up to 3 days.