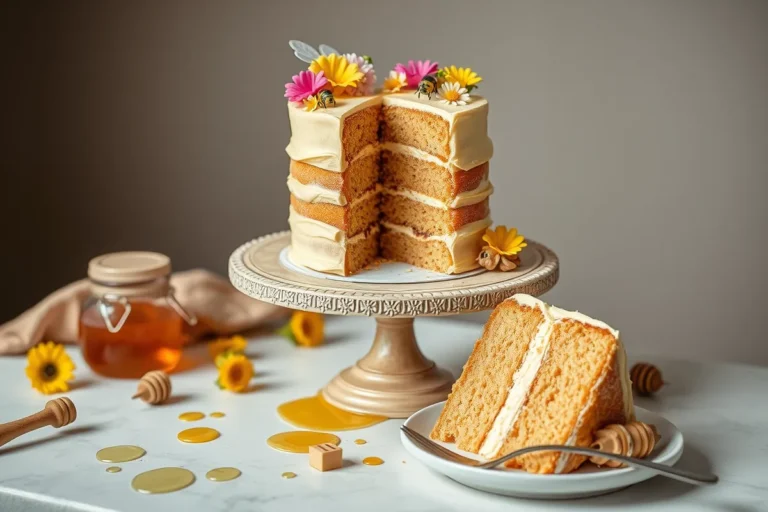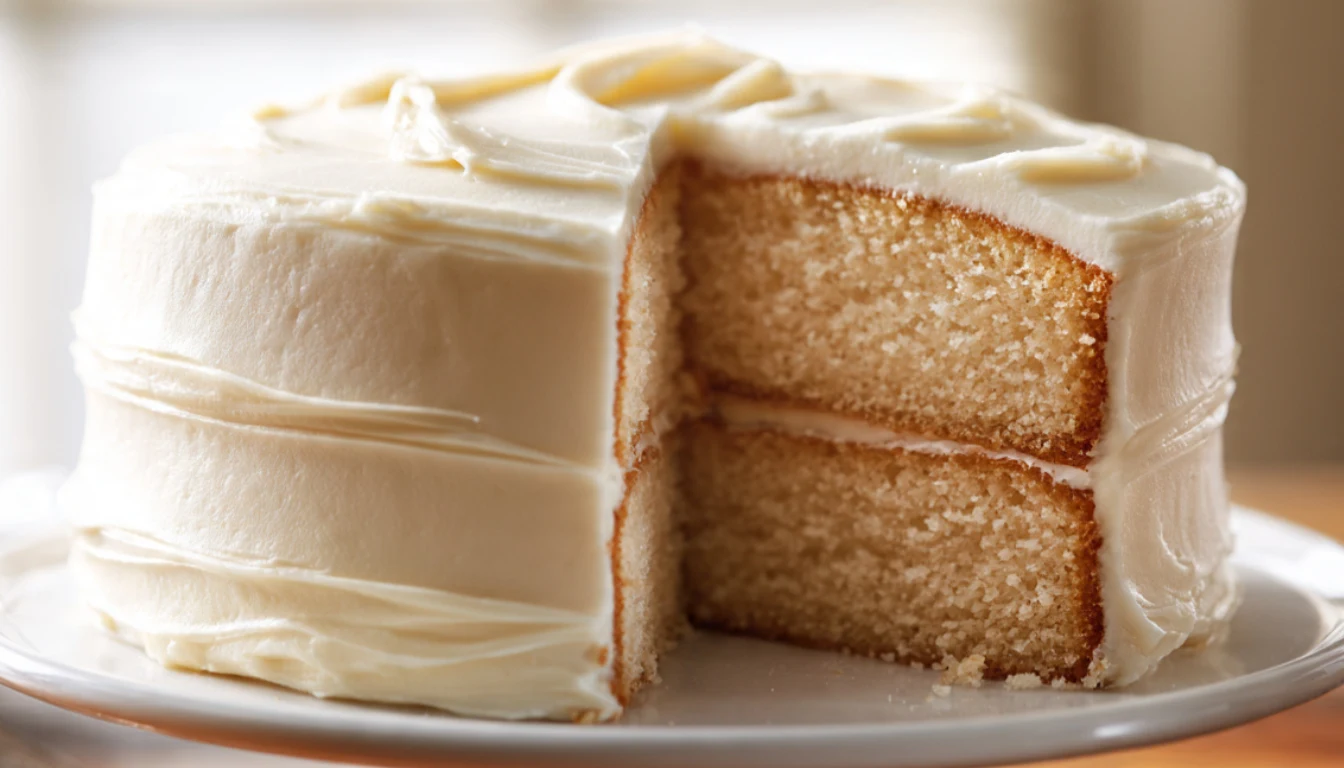
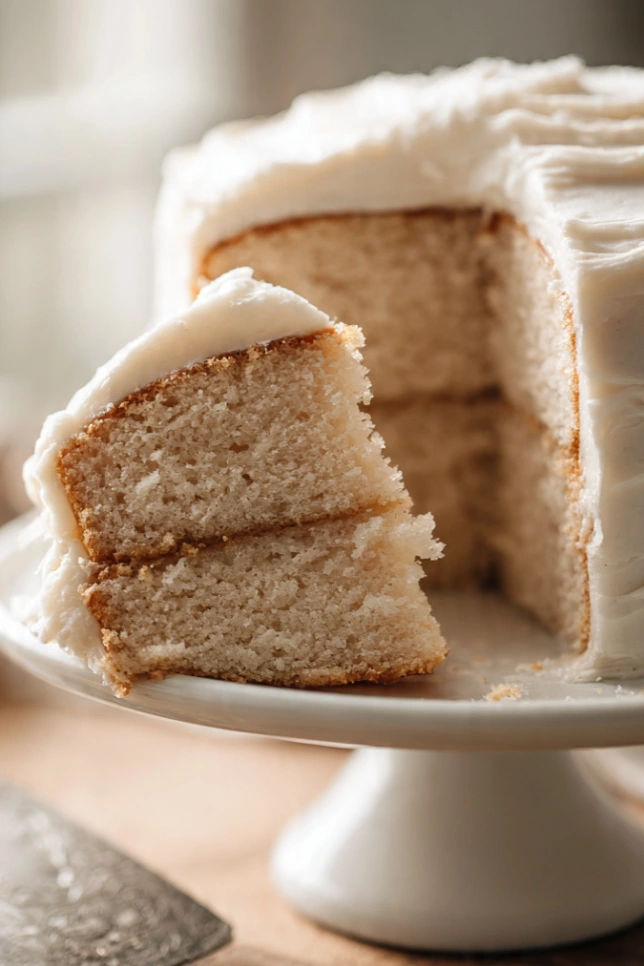
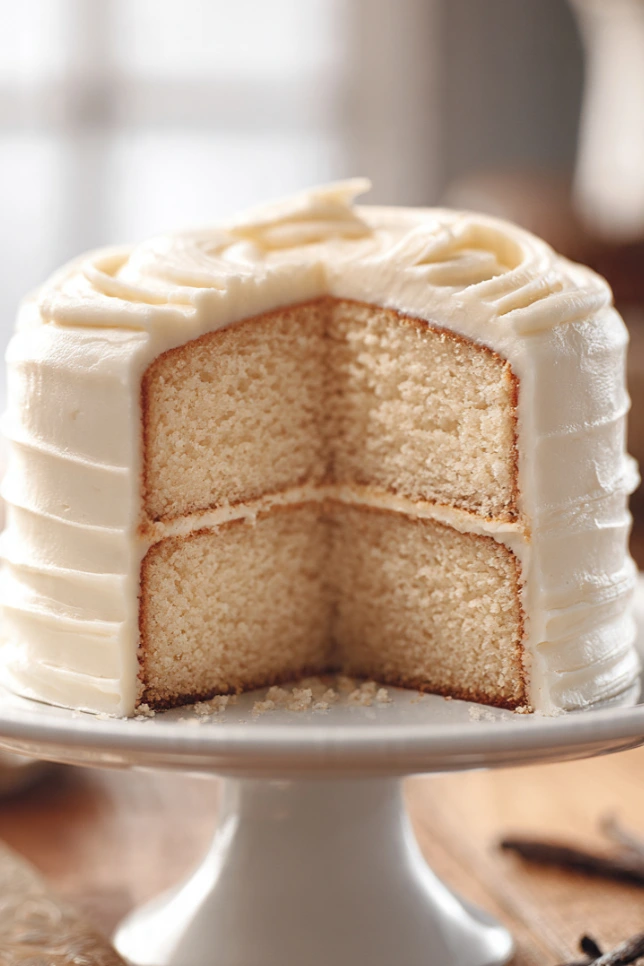
Vanilla Velvet Cake: The Soft, Buttery Cake That Tastes Like a Bakery Made It
There’s a version of vanilla cake that most people have never actually had. Not the dry, slightly sad version that shows up at office birthday parties. I’m talking about the one that’s soft enough to dent with a fork, rich with real butter and vanilla, and somehow both light and dense at the same time. That’s vanilla velvet cake, and once you make it properly, every boxed mix you’ve ever bought starts to feel like a betrayal.
I started making this cake about eight years ago after a disastrous attempt at a “simple vanilla cake” for my niece’s birthday. It came out of the oven looking right, but the texture was all wrong, dry on the edges, gummy in the middle, and about as exciting as plain toast. I spent the next few months testing batches (my freezer was full of half cakes for weeks) until I landed on this one. Honestly, the secret isn’t some exotic ingredient. It’s technique, and a few small details most recipes skip over entirely.
This cake gets its “velvet” texture from a reverse creaming method, where you mix the butter into the dry ingredients first instead of creaming butter and sugar together. It sounds like a small thing. It’s not. That one switch is the difference between a cake with big, uneven air pockets and one with that fine, tight, almost cottony crumb that makes velvet cakes so addictive.
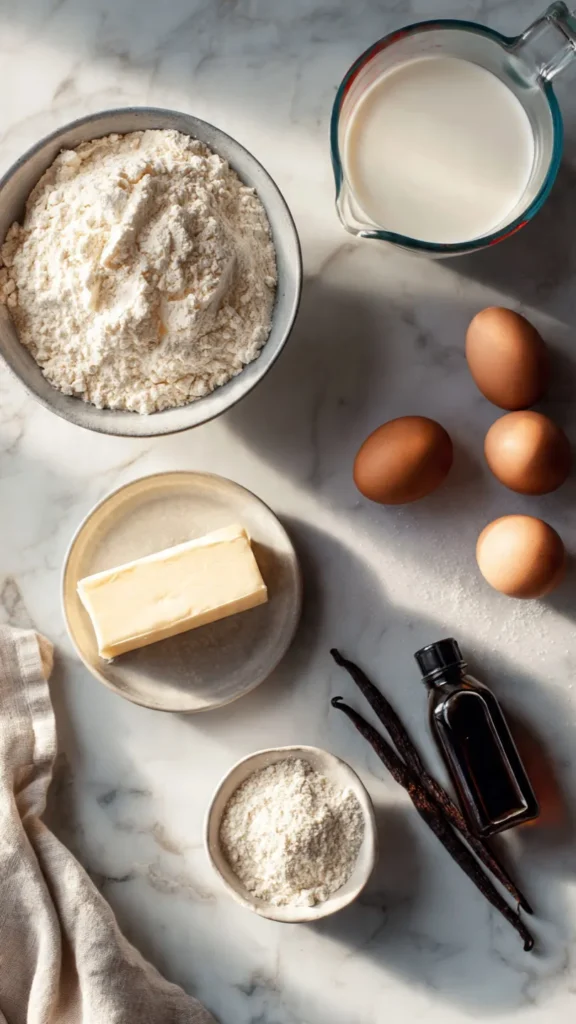
Essential Ingredients
- 2 1/2 cups (300g) cake flour, sifted
- 1 1/2 cups (300g) granulated sugar
- 1 tablespoon baking powder
- 1/2 teaspoon salt
- 1 cup (227g) unsalted butter, softened and cubed
- 4 large eggs, room temperature
- 1 cup whole milk, room temperature
- 2 tablespoons pure vanilla extract
- 1 teaspoon vanilla bean paste (optional, but worth it)
For the frosting:
- 1 1/2 cups (340g) unsalted butter, softened
- 4 cups powdered sugar, sifted
- 3 tablespoons heavy cream
- 2 teaspoons vanilla extract
- Pinch of salt
Alternative Ingredients
No cake flour on hand? You can make your own by swapping 2 tablespoons of all-purpose flour per cup with cornstarch. It’s not identical, but it gets you close enough that nobody at the party will notice.
If you’re dairy-sensitive, oat milk works fine here, though the crumb gets very slightly denser. Margarine can replace butter in a pinch, but I’ll be honest, the flavor takes a hit. This is one of those recipes where real butter genuinely earns its place.
For the vanilla, if you don’t have vanilla bean paste, just double up on extract. And if you’re working with a tighter grocery budget, a mid-range pure vanilla extract still beats the cheapest imitation by a mile in a cake this simple, where the vanilla flavor has nowhere to hide.
Step-by-Step Directions
- Preheat your oven to 350°F (175°C). Grease and line two 9-inch round cake pans with parchment. A good non-stick cake pan set makes this whole process easier, especially for getting clean release without tearing the crumb.
- In a stand mixer fitted with the paddle attachment, combine the sifted cake flour, sugar, baking powder, and salt on low speed for about 30 seconds, just to mix.
- Add the cubed butter a few pieces at a time, mixing on low until the mixture looks like damp sand. This is the reverse creaming step, and it’s what gives you that velvety crumb instead of an airy, cake-mix texture.
- In a separate bowl, whisk the eggs, milk, and both vanillas together. With the mixer on low, slowly stream this into the flour-butter mixture. Mix just until combined, then bump the speed to medium for 30 seconds to develop a bit of structure. Don’t overmix here, or you’ll lose that tender bite.
- Divide the batter evenly between your pans (a kitchen scale helps if you want them perfectly even, which matters more than you’d think for stacking later).
- Bake for 28 to 32 minutes, until a toothpick comes out clean and the top springs back lightly when pressed.
- Cool the cakes in the pans for 10 minutes, then turn out onto a wire rack to cool completely. This part is non-negotiable. Frosting a warm cake is a mistake I made exactly once and never again.
- For the frosting, beat the butter alone for 3 full minutes until pale and fluffy. Add powdered sugar in batches, then the cream, vanilla, and salt. Beat on medium-high for another 2 minutes until light and spreadable.
- Level your cakes if needed, stack with a generous layer of frosting between them, then frost the outside. A simple offset spatula or even a butter knife works fine if you don’t have a fancy cake-decorating turntable.
Pro Tips
Room temperature ingredients matter more in this recipe than almost any other I make. Cold eggs and milk shock the butter and you’ll end up with a slightly curdled-looking batter that bakes up dense.
If your kitchen runs warm, chill your mixing bowl for ten minutes before making the frosting. Butter that’s too soft turns the frosting greasy instead of fluffy.
Weigh your flour if you can. A kitchen scale is one of those tools that feels unnecessary until you use one consistently, and then you can’t imagine going back to scooping cups.
Frequently Asked Questions
Can I make Vanilla Velvet Cake ahead of time?
Yes. Bake the cake layers up to 2 months ahead, wrap them tightly and freeze. Thaw completely before frosting.
What makes Vanilla Velvet Cake so soft?
The reverse creaming method coats the flour with butter before the liquids are added, producing an exceptionally fine and tender crumb.
Can I make this recipe into cupcakes?
Yes. The batter makes about 24 cupcakes. Bake them for 16 to 18 minutes at 350°F.
Should Vanilla Velvet Cake be refrigerated?
Once frosted, the cake can stay at room temperature for up to 2 days. Refrigerate any leftovers and allow them to come to room temperature before serving.
Recipe Info Table
| Detail | Time/Amount |
|---|---|
| Prep Time | 25 minutes |
| Cook Time | 30 minutes |
| Total Time | 1 hour 10 minutes (plus cooling) |
| Servings | 12 slices |
| Yield | One 9-inch double-layer cake |
Why You’ll Love This Recipe
It’s genuinely foolproof once you understand the reverse creaming trick, the crumb stays soft for days, and the vanilla flavor is front and center instead of an afterthought. It’s also flexible. Dress it up for a birthday, keep it plain for a weeknight treat, or use the same base for cupcakes when you need something portable.
What Makes This Recipe Unique
Most vanilla cake recipes use the standard creaming method, butter and sugar beaten together first. This one flips that order, which is the actual reason it comes out so tender and fine-crumbed rather than airy and crumbly. It’s a small technical shift that makes a noticeably bigger difference than people expect.
Key Features
- Soft, tight crumb from the reverse creaming method
- Strong, balanced vanilla flavor without being one-note
- Freezer-friendly layers for make-ahead baking
- Easily doubled for cupcakes or a sheet cake
- Stable buttercream that holds up well for decorating
Nutrition Facts (per slice, approximate)
| Nutrient | Amount |
|---|---|
| Calories | 480 |
| Total Fat | 24g |
| Saturated Fat | 15g |
| Carbohydrates | 62g |
| Sugar | 48g |
| Protein | 5g |
| Sodium | 220mg |
Values are estimates and will vary based on specific brands and exact measurements used.
You’ll Also Love
- Classic Yellow Butter Cake with Chocolate Frosting
- Lemon Velvet Layer Cake
- Brown Butter Vanilla Cupcakes
- Old-Fashioned Pound Cake with Vanilla Glaze
Conclusion
This cake took me more failed attempts than I’d like to admit before it became the one I reach for every single time someone asks for “just a really good vanilla cake.” Once you try the reverse creaming method, you’ll probably never go back to the standard approach either. Give it a try this weekend, and let me know how your layers turn out in the comments. I read every single one.
Vanilla Velvet Cake
A bakery-style vanilla cake with a rich buttery flavor and an incredibly soft velvet crumb created using the reverse creaming method.
Ingredients
Cake
- 2½ cups cake flour, sifted
- 1½ cups granulated sugar
- 1 tbsp baking powder
- ½ tsp salt
- 1 cup unsalted butter, softened
- 4 large eggs
- 1 cup whole milk
- 2 tbsp vanilla extract
- 1 tsp vanilla bean paste (optional)
Buttercream Frosting
- 1½ cups unsalted butter
- 4 cups powdered sugar
- 3 tbsp heavy cream
- 2 tsp vanilla extract
- 1 pinch salt
Instructions
- Prepare the pans Preheat oven to 350°F (175°C). Grease and line two 9-inch cake pans.
- Combine dry ingredients Mix cake flour, sugar, baking powder and salt together for about 30 seconds.
- Reverse cream Gradually mix in softened butter until the mixture resembles damp sand.
- Mix wet ingredients Whisk eggs, milk, vanilla extract and vanilla bean paste together.
- Finish the batter Slowly add the wet mixture into the flour mixture. Mix until just combined, then beat on medium speed for 30 seconds.
- Bake Divide batter evenly between prepared pans and bake for 28 to 32 minutes.
- Cool Leave cakes in pans for 10 minutes before transferring to a cooling rack.
- Prepare frosting Beat butter until fluffy. Gradually mix in powdered sugar, heavy cream, vanilla and salt until smooth.
- Assemble Level cakes if necessary, spread frosting between layers and frost the outside evenly.
Notes
Always use room temperature eggs, milk and butter for the best texture. Avoid overmixing after adding the wet ingredients. Unfrosted cake layers can be frozen for up to 2 months. Bring refrigerated cake to room temperature before serving for the softest crumb and creamiest frosting.