2 Ingredient Pizza Chips: The Crispy Snack That Changed My Game Night Forever
Look, I’m not gonna lie. When I first heard about pizza chips, I thought someone was messing with me. Two ingredients? Making actual crispy chips that taste like pizza? It sounded like one of those Pinterest fails waiting to happen.
But here’s the thing. I was hosting game night about three years ago, and I’d completely forgotten to prep snacks. You know that panic when people are arriving in 20 minutes and your pantry looks like a sad, empty cave? That was me. All I had was some pepperoni and a block of cheese. I figured, worst case scenario, I’d throw them on a plate and call it charcuterie.
Then I remembered seeing something about pizza chips on a cooking forum. I thought, “What do I have to lose?” Spoiler alert: absolutely nothing. And what I gained was the easiest, crispiest, most addictive snack I’ve ever made. My friends literally asked me to make them again the next week. Now it’s become my signature party trick.
What Exactly Are Pizza Chips?
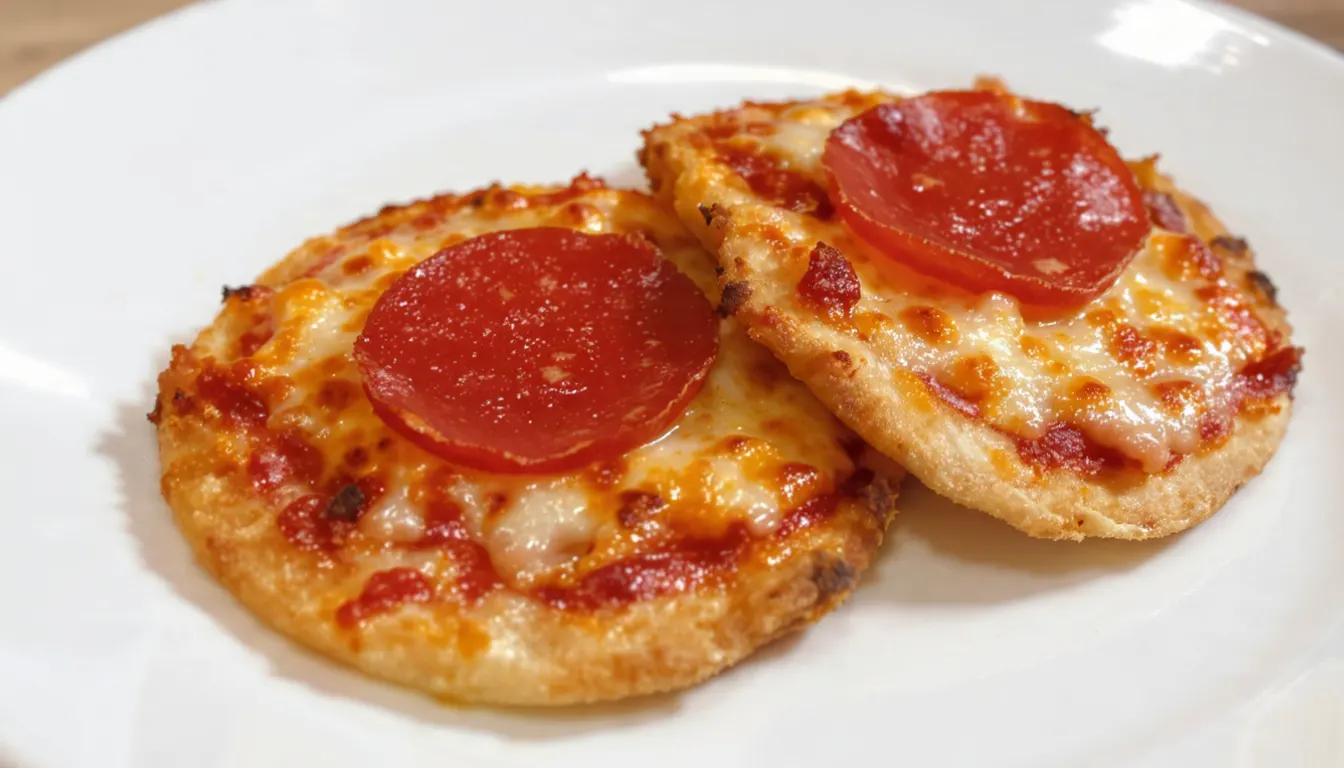
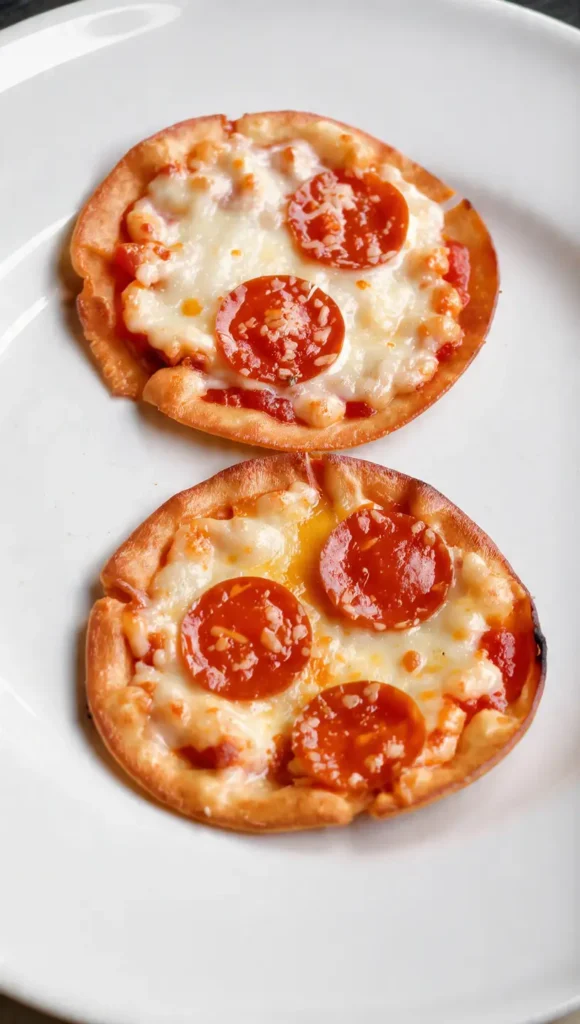
If you’ve never had them, pizza chips are basically exactly what they sound like. You take pepperoni (or any cured meat, but pepperoni works best) and cheese, bake them until they’re crazy crispy, and boom. You’ve got these salty, savory, crunchy chips that taste exactly like the best part of a pizza crust edge, but better.
The magic happens when the fat renders out of the pepperoni and the cheese melts into these lacy, golden edges. It’s like the cheese crisps you get at fancy restaurants, except you don’t need to pay $12 for six pieces. You can make literally dozens of these in one batch.
I’ve been making these for three years now, and I still get excited every time I pull a tray out of the oven. They’re that good.
Essential Ingredients
Here’s where it gets stupid simple. You literally need two things:
- Pepperoni slices (the regular deli kind, not the tiny ones) – I usually buy about 8-10 ounces for a good snack batch
- Shredded cheese (mozzarella, cheddar, or a pizza blend work best) – about 2 cups
That’s it. That’s the whole shopping list. I told you this was easy.
Alternative Ingredients
Now, once you’ve mastered the basic version, you can get creative. I’ve tried all kinds of variations over the years, and here’s what actually works:
For the meat:
- Salami (makes them a bit spicier)
- Turkey pepperoni (if you want to pretend you’re being healthy)
- Prosciutto (fancy version for when you want to impress people)
- Skip the meat entirely and just do cheese (still amazing)
For the cheese:
- Sharp cheddar gives you more intense flavor
- Parmesan makes them super crispy but watch them closely, they burn fast
- Pepper jack if you like a kick
- Mix different cheeses together (my favorite is half mozzarella, half sharp cheddar)
I’ve also seen people add Italian seasoning, garlic powder, or red pepper flakes. Honestly? The plain version is so good that I rarely bother with add-ins. But you do you.
Step-by-Step Directions
Okay, so here’s how you make these magic chips. And I mean this when I say it’s almost embarrassingly easy.
Step 1: Preheat your oven
Set it to 400°F (200°C). If you’ve got an air fryer, you can use that instead at 375°F and they cook even faster. I love using my air fryer for these because cleanup is basically nonexistent. But the oven works perfectly fine too.
Step 2: Line your baking sheet
This is crucial, trust me. Use parchment paper or a silicone baking mat. The first time I made these, I tried using regular foil and they stuck like crazy. Parchment paper is your friend here. It also makes cleanup so much easier since there’s going to be rendered fat everywhere.
Step 3: Arrange your pepperoni
Lay out your pepperoni slices on the lined baking sheet. Give them a little space between each one, maybe half an inch or so. They’re going to shrink and curl as they cook, so don’t worry too much about perfect spacing.
Step 4: Add the cheese
Put about a tablespoon of shredded cheese on top of each pepperoni slice. You want enough cheese to cover the pepperoni and spread a bit beyond it. This is where the lacy edges come from, and honestly, that’s the best part.
Pro tip: If you’re doing a cheese-only version, just make little piles of cheese about 2 tablespoons each. Space them out well because they spread.
Step 5: Bake until crispy
Pop them in the oven for 8 to 12 minutes. You’ll know they’re done when the edges are golden brown and bubbly, and the cheese has stopped actively bubbling. The pepperoni will curl up and get crispy.
Here’s where I messed up the first few times: I kept pulling them out too early because I was worried they’d burn. But they need that full cooking time to get properly crispy. If they’re still floppy when you take them out, they’ll stay floppy. Nobody wants a floppy pizza chip.
Step 6: Cool them down
This is the hardest part, I’m not gonna lie. Let them cool on the pan for about 2-3 minutes. They’ll firm up as they cool. If you try to eat them right away, you’ll burn your mouth (ask me how I know), and they’ll be too soft.
Use a spatula to transfer them to a paper towel-lined plate. This soaks up any excess grease. Although honestly, sometimes I skip this step when I’m feeling lazy.
Pro Tips From My Years of Making These
The thickness matters. I used to buy the thin-sliced pepperoni thinking it would get crispier. Wrong. The regular thickness pepperoni works way better. The thin stuff tends to burn before the cheese gets properly crispy.
Don’t overcrowd the pan. I know it’s tempting to fit as many as possible on one sheet, but trust me, give them space. When they’re too close together, the steam gets trapped and they don’t crisp up right. I learned this the hard way after making a batch that turned out weirdly chewy.
Watch them like a hawk in the last 2 minutes. The difference between perfect and burnt is literally 60 seconds. I set a timer on my phone and I actually stand there watching through the oven door window. My husband makes fun of me for this, but I haven’t burned a batch in two years, so who’s laughing now?
Let them cool completely before storing. If you put warm pizza chips in a container, they get soggy from condensation. They’ll last about 3-4 days in an airtight container at room temperature, but honestly, they never make it that long in my house.
The grease is not your enemy. Some people get weird about the amount of oil that renders out. But that’s literally what makes them crispy. Just drain them on paper towels and move on with your life. If you’re really concerned, blot the top with another paper towel before serving.
FAQs
Can I make these ahead of time?
Yes! They actually keep really well for a few days. I make a big batch on Sunday and snack on them throughout the week. Just store them in an airtight container. If they lose a bit of crispiness, you can pop them in the oven at 350°F for about 3 minutes to re-crisp them.
Can I use fresh mozzarella instead of shredded?
I tried this once because I had leftover fresh mozz from making pizza. It doesn’t work as well. Fresh mozzarella has too much moisture, so you end up with more of a melted cheese puddle than crispy chips. Stick with the pre-shredded stuff.
What if I don’t eat pork?
Turkey pepperoni works great. You can also use beef pepperoni. Or skip the meat entirely and just make cheese crisps. I do this sometimes when I want a vegetarian version.
How many does this recipe make?
With 8 ounces of pepperoni and 2 cups of cheese, you’ll get about 30-35 chips depending on how much cheese you pile on each one. It sounds like a lot, but they disappear fast.
Can I add other toppings?
Absolutely. I’ve added jalapeño slices, a tiny sprinkle of oregano, or a dash of garlic powder. Just don’t go too crazy with wet ingredients or you’ll prevent them from getting crispy.
Recipe Info Table
| Category | Details |
|---|---|
| Prep Time | 5 minutes |
| Cook Time | 10 minutes |
| Total Time | 15 minutes |
| Servings | 6-8 people (about 30-35 chips) |
| Yield | Approximately 35 chips |
Why You’ll Love This Recipe
First off, it’s so easy that my 12-year-old nephew makes these by himself. If a kid who once tried to microwave a fork can successfully make pizza chips, anyone can.
They’re also perfect for so many situations. Game night? Check. After-school snack? Absolutely. Something to bring to a potluck when you forgot until the last minute? You bet. Low-carb diet and missing pizza desperately? These are your new best friend.
The fact that you can whip them up in 15 minutes with ingredients you probably already have is just fantastic. I can’t tell you how many times these have saved me when unexpected guests showed up or when I needed to bring something to a party and completely forgot.
Plus, they’re naturally gluten-free if that matters to you. I have a friend with celiac disease who literally cried the first time I made these for her because she hadn’t had anything that tasted like pizza in years.
What Makes This Recipe Unique
Look, I’m not going to pretend I invented pizza chips. People have been making various versions of these for years. But what makes this version special is how stupidly foolproof it is.
A lot of recipes make you do weird stuff like pressing the pepperoni between paper towels first or pre-cooking things. Unnecessary. This method is literally just arrange, top, and bake. That’s it.
I’ve also tested this with about 15 different cheese combinations over the years (yeah, I got a bit obsessed), and I can tell you exactly which ones work best. The pizza blend you get at the grocery store is actually perfect for this because it already has the right mix of mozzarella and other cheeses.
Key Features
Minimal cleanup: One pan, some parchment paper, done. If you use an air fryer, it’s even easier. I just wipe out the basket and I’m finished.
Budget-friendly: Even with decent pepperoni and cheese, you’re looking at maybe $6 to make enough chips for a party. Compare that to buying fancy snacks at the store.
Customizable: Once you master the basic version, you can experiment with different meats, cheeses, and seasonings. I’ve probably made 20 different variations at this point.
Crowd-pleaser: I have yet to serve these to someone who didn’t immediately ask for the recipe. Even people who claim they don’t like pepperoni end up eating half the batch.
Works with different cooking methods: Oven, air fryer, even a toaster oven if you’re making a small batch. I’ve successfully made these in all three.
Nutrition Facts Table
Per serving (5-6 chips)
| Nutrient | Amount |
|---|---|
| Calories | 180 |
| Total Fat | 14g |
| Saturated Fat | 6g |
| Cholesterol | 35mg |
| Sodium | 480mg |
| Carbohydrates | 1g |
| Protein | 11g |
Note: Nutrition facts are approximate and vary based on specific brands and cheese types used.
You’ll Also Love
If pizza chips are your thing, you should definitely try making actual pizza from scratch. I know it sounds intimidating, but it’s actually way easier than you think. And once you’ve nailed these chips, you already understand how cheese and pepperoni work together.
I also make these amazing cheese crisps with just Parmesan that are equally addictive. They’re basically the same concept but with a nuttier flavor.
For meal prep, these work great alongside my favorite chicken recipes. They add that salty, crunchy element that makes a boring meal feel special. I pack them in my meal prep containers all the time for work lunches.
Conclusion
So there you have it. The easiest snack recipe you’ll probably ever make, and also one of the most delicious. I genuinely think everyone should know how to make these because they’re such a game-changer for entertaining or just satisfying those salty, crunchy cravings.
The first time you make them, you might think “this can’t possibly work” when you’re just throwing cheese on pepperoni. But then you’ll pull them out of the oven and they’ll be perfect and crispy and delicious, and you’ll get it.
I make these at least twice a month now, sometimes more if we’re having people over. They’ve become such a staple in my house that my kids request them for after-school snacks. Sometimes I use my food processor to shred different cheeses fresh for variety, but honestly, the pre-shredded stuff works perfectly fine.
Start with the basic recipe, nail it a couple times, then experiment with your favorite cheese combinations. You might discover your new favorite version. And when people ask you for the recipe and you tell them it’s two ingredients, watch their faces. It never gets old.
Now go make some pizza chips. Your taste buds will thank you.