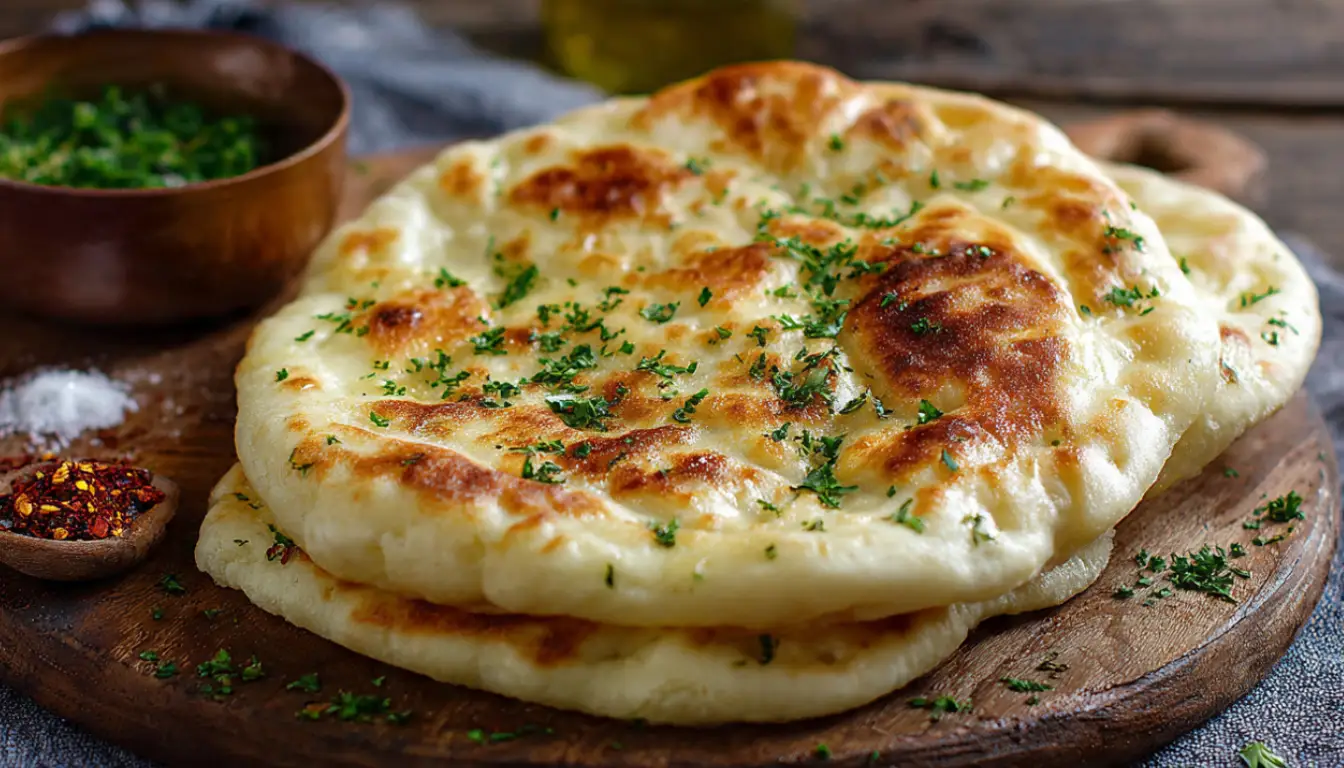
Turkish Bread (Soft & Fluffy Flatbread)
The first time I had real Turkish bread at a café in Brooklyn, I knew I had to learn how to make it. After seven attempts and one flour explosion involving my KitchenAid stand mixer, I finally got it right.
Turkish bread (sometimes called pide) is deceptively simple. It’s just flour, water, yeast, and patience. The magic is in the technique, not fancy ingredients. This recipe makes soft, pillowy flatbread perfect for wrapping grilled meats, dipping in hummus, or slathering with butter and honey. I make a batch every Sunday for meal prep, and they’re gone by Wednesday.
Essential Ingredients
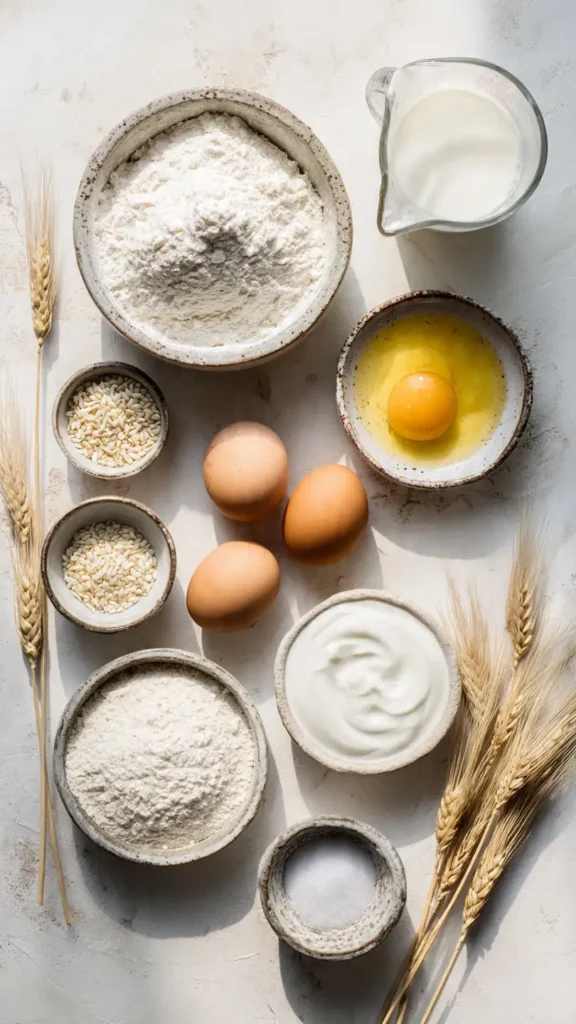
- 4 cups all-purpose flour (plus extra for dusting)
- 1 1/2 cups warm water (around 110°F, not too hot or you’ll kill the yeast)
- 2 teaspoons active dry yeast
- 2 tablespoons granulated sugar
- 1 1/2 teaspoons salt
- 3 tablespoons olive oil
- 2 tablespoons plain yogurt (Greek or regular, both work)
- 1 egg (for brushing)
- 2 tablespoons sesame seeds or nigella seeds (optional, but traditional)
Alternative Ingredients
Flour: Bread flour works for extra chewiness. For whole wheat, use half all-purpose and half whole wheat to keep the soft texture.
Yeast: Instant yeast can be mixed directly with dry ingredients (skip proofing). Sourdough starter (1 cup) works but changes the flavor.
Yogurt: Sour cream or buttermilk work fine. The yogurt adds tenderness and tang, but it’s not essential.
Oil: Melted butter gives richer flavor. Vegetable oil works too.
Seeds: Sesame seeds alone are perfect. Or skip them entirely.
Step-by-Step Directions
Step 1: Wake Up the Yeast Mix warm water with sugar in a small bowl. Sprinkle yeast on top and let sit 5 minutes until foamy. If it doesn’t foam, your yeast is dead or water was too hot. Start over.
Step 2: Make the Dough In a large bowl (or stand mixer bowl), combine flour and salt. Make a well in the center and add foamy yeast mixture, olive oil, and yogurt. Using a KitchenAid with dough hook, mix on low for 8 minutes until smooth and elastic. By hand, mix with a wooden spoon, then knead on a floured surface for 10 minutes.
Step 3: First Rise Form dough into a ball and place in a lightly oiled bowl. Cover with a damp towel. Let rise in a warm spot for 1 to 1.5 hours until doubled. Cold kitchen? Turn oven to lowest setting for 2 minutes, turn off, and proof inside.
Step 4: Shape the Breads Punch down dough and divide into 8 pieces. Roll each into a ball, then flatten into oval shapes about 1/4 inch thick using a rolling pin.
Step 5: Second Rise Place shaped breads on a parchment-lined baking sheet. Cover and rest 20 minutes.
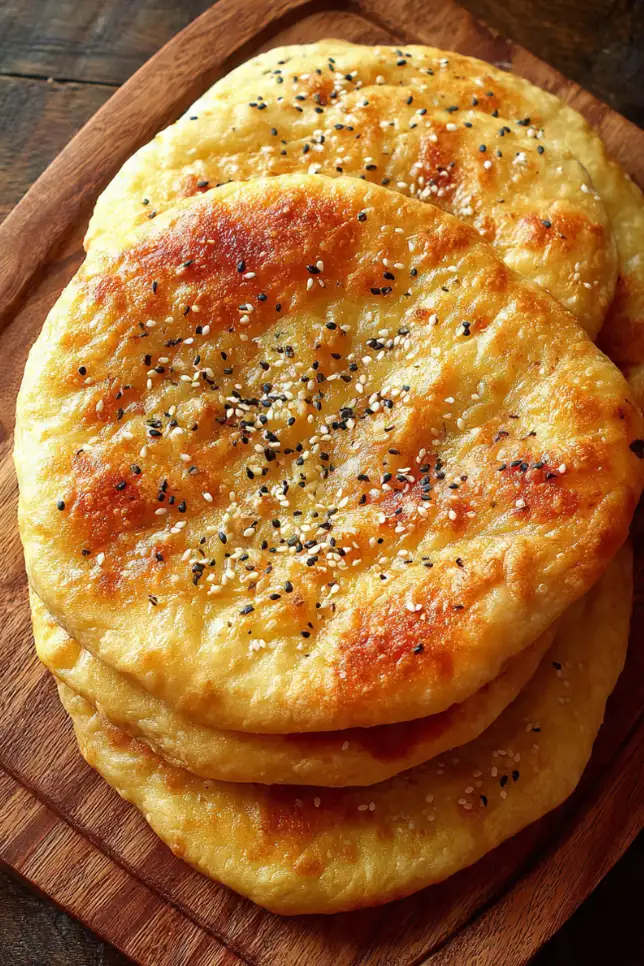
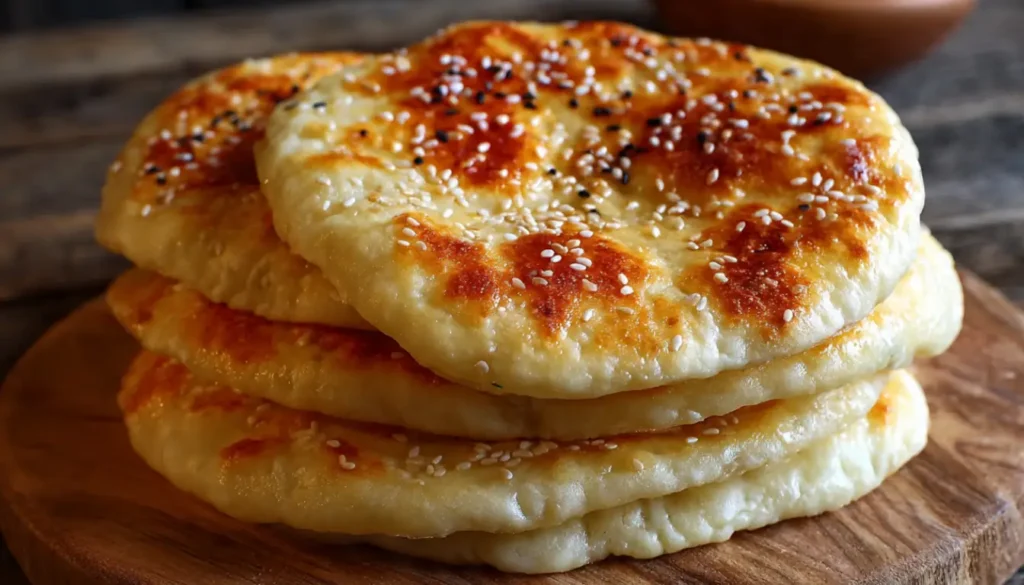
Step 6: Add the Toppings Beat egg with a tablespoon of water. Brush egg wash over each bread. Sprinkle with sesame or nigella seeds. Make dimples all over the surface with your fingers.
Step 7: Bake Preheat oven to 475°F. Bake 8 to 10 minutes until golden brown. Watch after 7 minutes as they can overcook quickly.
Alternative stovetop method: Cook on a cast iron skillet or griddle over medium-high heat, 2 to 3 minutes per side until charred spots appear. Great for summer when you don’t want to heat the oven.
Pro Tips
Water temperature: Should feel like a comfortable bath, not a hot shower. Too hot kills yeast, too cold won’t activate it.
Don’t skip the yogurt: The lactic acid helps break down gluten slightly, creating that tender texture.
Soft dough is good: Slightly sticky dough makes soft bread. Too much flour creates dense, hockey-puck results.
Storage: Keep in airtight containers or meal prep containers for 2-3 days. Freeze up to 3 months wrapped individually.
Reheating: Sprinkle with water and warm in a dry skillet for 30 seconds per side, or microwave wrapped in damp paper towel for 15 seconds.
Windowpane test: Stretch a small piece of dough thin. If you can see light through it without tearing, your gluten is properly developed.
FAQs
Can I make Turkish bread ahead of time?
Yes. Refrigerate the dough after the first rise and bring it to room temperature before baking.
Why is my Turkish bread not soft?
Too much flour or overbaking can make it tough. Keep dough soft and bake briefly.
Can I cook Turkish bread without an oven?
Yes. A hot skillet works perfectly and gives beautiful charred spots.
What is the difference between Turkish bread and pita?
Turkish bread is soft and flat, while pita forms a pocket when baked.
Can I freeze Turkish bread?
Yes. Freeze for up to 3 months and reheat before serving.
Recipe Info Table
| Category | Details |
|---|---|
| Prep Time | 20 minutes |
| First Rise | 1 hour 30 minutes |
| Second Rise | 20 minutes |
| Cook Time | 10 minutes |
| Total Time | 2 hours 20 minutes |
| Servings | 8 flatbreads |
| Yield | 8 medium-sized Turkish breads |
| Difficulty | Easy to Moderate |
Why You’ll Love This Recipe
Your house will smell like a Turkish bakery while these bake. They’re incredibly versatile, working for both fancy dinner parties and quick weeknight meals. The soft, pillowy interior with charred spots (if using the stovetop method) is genuinely addictive. Plus, pulling fresh bread from your oven or cast iron skillet is deeply satisfying, even though the recipe is actually quite forgiving.
What Makes This Recipe Unique
This recipe hits the perfect thickness sweet spot (not too thick, not too thin). The yogurt addition, learned from a Turkish friend’s grandmother, keeps the bread soft longer. I’ve adapted it for both oven and stovetop cooking, so you don’t have to heat your oven to 475°F in summer. The stovetop method creates Maillard reaction char marks that look more authentic. The dimpling technique prevents large air pockets and creates that handmade, rustic appearance.
Key Features
Pantry staples: Everything you need is probably already in your kitchen.
Freezer-friendly: Make a double batch and freeze half for later.
No special equipment: Works with just hands, a bowl, and a rolling pin, though a stand mixer makes it easier.
Weeknight-friendly: Rising time is passive. Active work is about 30 minutes total.
Customizable: Add herbs, garlic butter, cheese and spinach, or make them sweet with cinnamon and sugar.
Nutrition Facts Table
| Nutrient | Per Serving (1 bread) |
|---|---|
| Calories | 245 |
| Total Fat | 6g |
| Saturated Fat | 1g |
| Cholesterol | 25mg |
| Sodium | 440mg |
| Total Carbohydrates | 41g |
| Dietary Fiber | 2g |
| Sugars | 3g |
| Protein | 7g |
Note: Nutrition information is approximate and will vary based on exact ingredients used and portion sizes.
You’ll Also Love
If you’re into this Turkish bread, you’ll probably love these other recipes that pair perfectly:
- Homemade Hummus: Because you need something to dip this bread into
- Turkish Lentil Soup: A classic pairing in Turkish cuisine
- Grilled Lamb Kebabs: Wrap them in this bread for the ultimate experience
- Baba Ganoush: Another dip that’s perfect with flatbread
- Turkish Breakfast Spread: Feta, olives, tomatoes, cucumbers, and this bread
Conclusion
This isn’t a 10-minute recipe, but the payoff is huge. Most of the time is passive waiting while dough rises. The first time you pull a batch off your cast iron skillet or out of the oven and tear into one while it’s warm, you’ll understand why it’s worth it.
Start with this basic recipe. Get comfortable with it. Then experiment with herbs, toppings, and fillings. And if your first batch isn’t perfect, don’t stress. My seventh attempt is when it finally clicked. Now these breads are a regular rotation in my kitchen, impressing guests who think I’m way more talented than I actually am.
Turkish Bread (Soft & Fluffy Flatbread)
Soft, fluffy, bakery-style Turkish bread that is perfect for wraps, dips, and everyday meals.
Ingredients
- 4 cups all-purpose flour
- 1 1/2 cups warm water
- 2 teaspoons yeast
- 2 tablespoons sugar
- 1 1/2 teaspoons salt
- 3 tablespoons olive oil
- 2 tablespoons yogurt
- 1 egg
- Sesame or nigella seeds
Instructions
- Activate yeast by mixing warm water, sugar, and yeast.
- Mix dough ingredients and knead until smooth.
- Let rise until doubled.
- Divide and shape into flat ovals.
- Rest 20 minutes.
- Brush, top, and bake until golden.