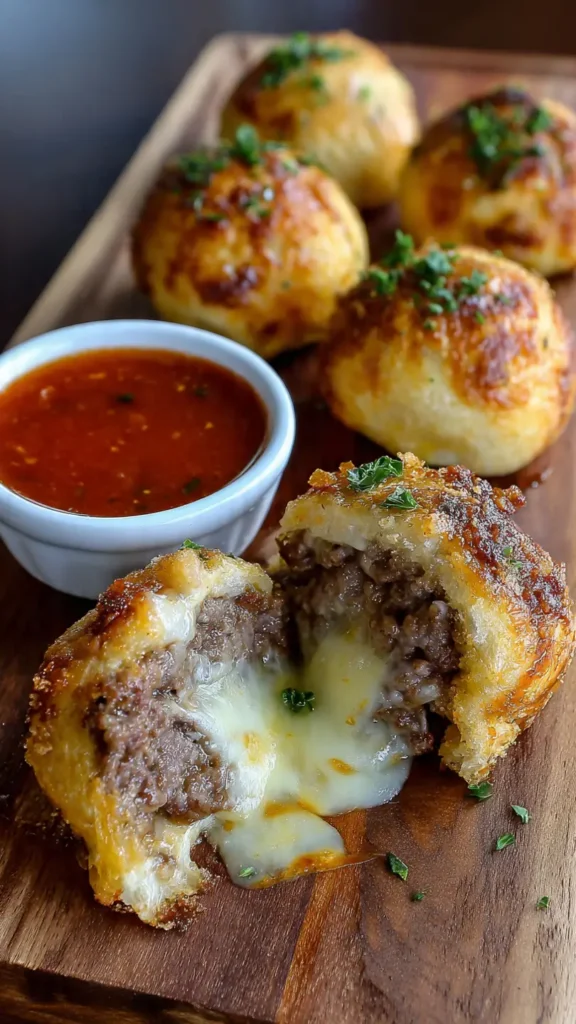
Homemade Garlic Parmesan Cheeseburger Bombs Recipe
You know those nights when you’re craving a cheeseburger but want something a little more fun? That’s exactly how these Garlic Parmesan Cheeseburger Bombs came into my life. I was meal prepping for the week in my kitchen, and I had some ground beef and pizza dough sitting there just begging to be combined. Honestly, I thought I’d ruined them the first time because I overstuffed them and they burst open in the oven. But here’s the thing: even my “failures” tasted incredible, and now I’ve got the technique down to a science.
These little bombs are basically everything you love about a cheeseburger wrapped up in soft, golden dough and finished with garlic butter and parmesan. Trust me on this, they’re addictive. I’ve made them for game day parties, quick weeknight dinners, and even packed them in my kids’ lunch boxes (they absolutely devour them cold, which surprised me). The best part? You can prep a whole batch on Sunday and have ready-to-bake snacks all week long.
Essential Ingredients
Let me walk you through what you’ll need. I’ve learned the hard way that quality ingredients really do make a difference here.
- 1 pound ground beef (I use 80/20 for the best flavor)
- 1 cup shredded cheddar cheese (sharp cheddar gives you that classic burger taste)
- 1/2 cup diced onions (I use my food processor to get them super fine)
- 2 cloves garlic, minced (fresh is way better than powder here)
- 1 can refrigerated pizza dough (or homemade if you’re feeling ambitious)
- 3 tablespoons butter, melted
- 1/4 cup grated Parmesan cheese
- 1 teaspoon garlic powder
- 1 teaspoon dried parsley
- Salt and pepper to taste
- Optional: pickles, mustard, ketchup (for that authentic burger flavor)

Alternative Ingredients
Here’s where you can get creative. I love swapping ingredients based on what I have in my fridge:
If you don’t have pizza dough, crescent roll dough works great (just pinch the seams together). Ground turkey or chicken can replace the beef if you’re looking for a leaner option, though I’d add a bit more cheese to keep them moist. For the cheese, I’ve used mozzarella, pepper jack (if you like heat), or even cream cheese mixed with cheddar. Trust me, the cream cheese version is ridiculously good.
Don’t have fresh garlic? Garlic powder works in a pinch, but use about 1/2 teaspoon instead of the fresh cloves. And if you’re trying to sneak in some veggies (I see you, parents), finely diced bell peppers or mushrooms work beautifully when mixed with the beef.
Step-by-Step Directions
I’m going to walk you through this exactly how I make them. I’ve messed these up enough times to know all the little tricks.
Step 1: Brown the beef Heat up your cast iron skillet over medium-high heat. I swear by my cast iron for browning meat because it gets that perfect sear. Add the ground beef and break it up with a wooden spoon. Cook until it’s nicely browned, about 6-7 minutes. Here’s a pro move I learned: don’t drain ALL the fat. Leave about a tablespoon in there for flavor. Add your diced onions and minced garlic, cook for another 2-3 minutes until the onions are soft. Season with salt and pepper, then let this cool completely. This is important because hot filling will make your dough soggy.
Step 2: Prep your dough While the beef cools, roll out your pizza dough on a lightly floured surface. I cut mine into 12 equal squares (about 3×3 inches each). Don’t stress about making them perfect. Mine never are, and they still taste amazing.
Step 3: Fill and seal This is where I used to go wrong. Don’t overstuff! Put about 2 tablespoons of the beef mixture in the center of each square, top with a generous pinch of cheddar cheese. If you’re adding pickles or a tiny dollop of mustard, now’s the time. Bring all four corners up to the center and pinch the seams tightly. I mean really pinch them. Roll it between your palms to make a smooth ball. The seam should be completely sealed or they’ll open up while baking (learned that the hard way).
Step 4: Bake them Preheat your oven to 375°F. Line a baking sheet with parchment paper (makes cleanup so much easier). Place your bombs seam-side down on the sheet, giving them about 2 inches of space. Bake for 18-22 minutes until they’re golden brown. I usually check at 18 minutes because every oven is different.
Step 5: The garlic parmesan finish While they’re baking, mix your melted butter with garlic powder. As soon as the bombs come out of the oven, brush them generously with this garlic butter mixture. Then sprinkle the parmesan cheese and dried parsley all over them. This step is what takes them from good to absolutely incredible.
Pro Tips
After making these probably 50+ times, here’s what I’ve learned:
Temperature matters: Make sure your beef mixture is completely cool before filling. I once tried to rush this and ended up with soggy dough bombs. Not fun.
Don’t skimp on the sealing: I press the seams together, then roll the whole thing in my palms to make sure there are no weak spots. A broken bomb is still delicious, but keeping them intact looks way better.
Freezer-friendly gold: These freeze beautifully. I assemble them, freeze on a baking sheet until solid, then transfer to meal prep containers. When you want them, bake from frozen but add 5-10 minutes to the cooking time. This has saved me on busy weeknights more times than I can count.
Try an air fryer: If you’ve got an air fryer, these cook up beautifully at 360°F for about 12-15 minutes. They get super crispy on the outside while staying soft inside. I actually prefer them this way now.
Dipping sauces are your friend: I always set out a few options. Thousand Island dressing is basically Big Mac sauce and works perfectly. Ranch, marinara, or even cheese sauce are all winners.
FAQs
Can I make these ahead and freeze them?
Yes! Assemble the bombs, freeze on a baking sheet until firm, then transfer to containers. Bake from frozen, adding 5-10 minutes to the cooking time.
Can I use ground turkey or chicken instead of beef?
Absolutely. Use ground turkey or chicken and add a little extra cheese to keep them moist.
Can I make these in an air fryer?
Yes, cook at 360°F for about 12-15 minutes. They get crispy on the outside and stay soft inside.
What sauces go well with these bombs?
Thousand Island, ranch, marinara, and cheese sauce all pair perfectly with these cheeseburger bombs.
Why You’ll Love This Recipe
Look, I’m not going to oversell this. These are basically cheeseburgers in dough form, but there’s something about that combination that just works. They’re portable (huge plus for lunches and parties), they reheat well, and honestly, they’re just fun to eat. My kids request these at least twice a month, and I’ve brought them to potlucks where they disappear faster than anything else on the table.
The garlic parmesan coating gives them this Italian-American fusion vibe that’s really satisfying. Plus, you can customize them endlessly. I’ve made breakfast versions with scrambled eggs and bacon, pizza versions with pepperoni and mozzarella, and even a taco version with seasoned beef and pepper jack cheese.
What Makes This Recipe Unique
Most cheeseburger bomb recipes I’ve seen online use crescent rolls or biscuit dough. While those work fine, I prefer pizza dough because it has a better texture and doesn’t get too puffy. The garlic parmesan butter finish is something I borrowed from garlic bread techniques, and it seriously elevates these from “pretty good” to “addictively delicious.”
The other thing I do differently is cooling the beef completely. I know it seems like an extra step, but it prevents soggy dough and makes the whole assembly process way easier. You can actually make the filling a day ahead and keep it in your fridge, which makes meal prep even simpler.
Key Features
✓ Make-ahead friendly: Prep on Sunday, bake throughout the week ✓ Freezer-safe: Stock your freezer with ready-to-bake bombs ✓ Kid-approved: My picky eaters actually ask for these ✓ Budget-friendly: Costs way less than takeout burgers ✓ Versatile: Endless filling combinations ✓ Portable: Perfect for lunch boxes and parties
You’ll Also Love
If these cheeseburger bombs hit the spot, you should definitely try my Pizza Roll-Ups (similar concept, different flavor profile), Bacon Cheeseburger Sliders (when you want the real deal), or my Cheesy Taco Bombs (basically the same technique with Mexican flavors). I’ve also got a breakfast version with eggs, sausage, and cheese that’s become my go-to for brunch gatherings.
Conclusion
I’ll be honest with you, these Garlic Parmesan Cheeseburger Bombs aren’t fancy restaurant food. They’re fun, they’re practical, and they taste really, really good. They’ve saved me on countless busy weeknights when I needed something quick that my family would actually eat without complaining. The fact that I can make a big batch and freeze them for later? That’s just smart cooking.
Give them a try. Start with the basic recipe I’ve outlined here, then make them your own. Add bacon (always a good choice), experiment with different cheeses, or throw in some jalapeños if you like heat. And hey, if your first batch splits open in the oven like mine did, don’t worry about it. They’ll still taste amazing, and you’ll nail the technique next time.
Happy cooking!
Linda
Garlic Parmesan Cheeseburger Bombs
BEST RECIPE For Garlic Parmesan Cheeseburger Bombs, easy recipe, dinner recipe, party recipe
Ingredients
- 1 pound ground beef (80/20)
- 1 cup shredded cheddar cheese
- 1/2 cup diced onions
- 2 cloves garlic, minced
- 1 can refrigerated pizza dough
- 3 tablespoons butter, melted
- 1/4 cup grated Parmesan cheese
- 1 teaspoon garlic powder
- 1 teaspoon dried parsley
- Salt and pepper to taste
- Optional: pickles, mustard, ketchup
Instructions
- Brown the beefHeat a skillet over medium-high heat. Add ground beef, cook 6-7 minutes until browned. Add onions and garlic, cook 2-3 more minutes. Season with salt and pepper, cool completely.
- Prep the doughRoll out pizza dough on a floured surface. Cut into 12 squares, about 3×3 inches each.
- Fill and sealPlace 2 tablespoons beef mixture in center of each square, top with cheddar. Add pickles or mustard if desired. Pinch corners to seal and roll into smooth balls.
- BakePreheat oven to 375°F. Place bombs seam-side down on parchment-lined sheet, 2 inches apart. Bake 18-22 minutes until golden brown.
- Add garlic parmesan finishMix melted butter with garlic powder. Brush over hot bombs, sprinkle Parmesan and parsley.
Notes
Ensure beef mixture is completely cool before filling to prevent soggy dough. Freeze fully assembled bombs on a tray before storing in containers for meal prep. Air fryer cooking works at 360°F for 12-15 minutes. Serve with sauces like Thousand Island, ranch, or cheese sauce.