How to Make Texas Roadhouse Butter Chicken Skillet
I’ll never forget the first time I tried to recreate Texas Roadhouse’s famous butter at home. It was a complete disaster (I used way too much garlic powder and nearly choked my dinner guests), but that experience taught me something valuable: restaurant flavors aren’t magic, they’re just well-balanced technique. Fast forward eight years, and I’ve cracked the code on one of my favorite Texas Roadhouse-inspired dishes: this incredible butter chicken skillet that brings those same rich, savory flavors straight to your kitchen.
Here’s the thing about restaurant copycat recipes: most of them promise authenticity but deliver disappointment. But this butter chicken skillet? It genuinely captures that Texas Roadhouse experience. The chicken stays juicy, the butter sauce is ridiculously good, and you can have it on the table faster than you’d get seated at the actual restaurant on a Friday night. Plus, making it in a cast iron skillet gives you that perfect sear and keeps everything warm from stove to table.
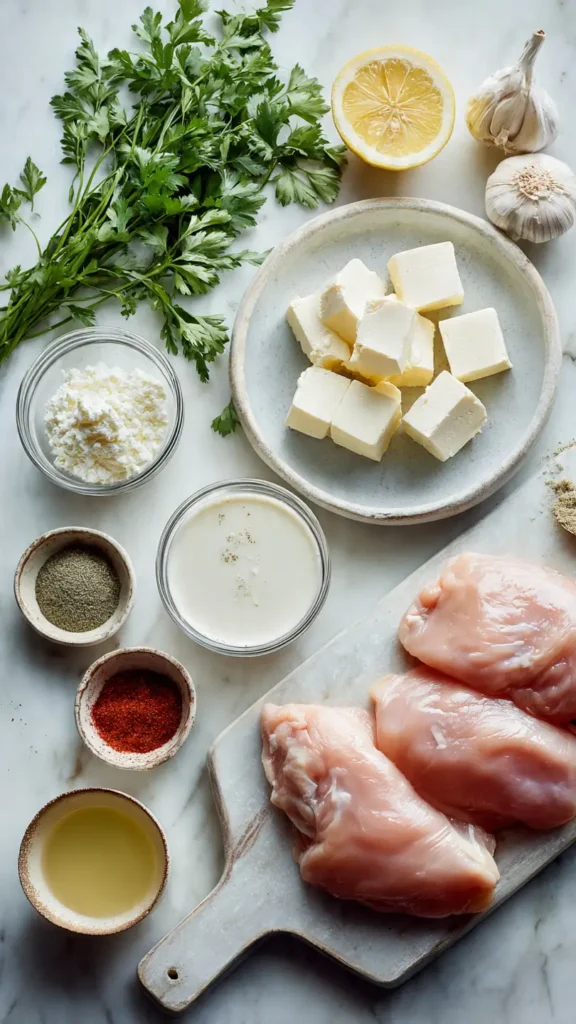
Essential Ingredients
For the Chicken:
- 1.5 lbs boneless, skinless chicken breasts (or thighs if you prefer darker meat)
- 2 tablespoons olive oil
- 1 teaspoon garlic powder
- 1 teaspoon onion powder
- 1/2 teaspoon paprika
- 1/2 teaspoon salt
- 1/4 teaspoon black pepper
For the Butter Sauce:
- 4 tablespoons unsalted butter
- 4 cloves fresh garlic, minced
- 1/2 cup chicken broth
- 1/4 cup heavy cream
- 2 tablespoons fresh parsley, chopped
- 1 tablespoon lemon juice
- 1/2 teaspoon dried thyme
- Salt and pepper to taste
Optional Add-ins:
- 1/2 cup mushrooms, sliced
- 1/4 cup sun-dried tomatoes
- Fresh Parmesan cheese for serving
Alternative Ingredients
Look, I get it. Sometimes you open the fridge and realize you’re missing half the ingredients. I’ve been there more times than I can count, especially when I’m trying to pull together a quick weeknight dinner after a long day.
Chicken Options: Don’t have chicken breasts? Chicken thighs actually work better in this recipe because they stay moister. I’ve also made this with turkey cutlets when they were on sale, and honestly, nobody could tell the difference. For a budget-friendly option, you can even use chicken tenderloins, though you’ll need to adjust the cooking time down by a few minutes.
Butter Alternatives: I know some of you are watching your saturated fat intake. You can substitute half the butter with olive oil, but I’ll be honest with you: it won’t taste quite as decadent. That said, it’s still delicious, just in a lighter way. For dairy-free needs, use vegan butter (I’ve tested Earth Balance and it works great).
Cream Substitutes: No heavy cream? Half-and-half works, or you can use whole milk with a tablespoon of cream cheese stirred in. In a pinch, I’ve even used evaporated milk and it turned out surprisingly well.
Herb Variations: Fresh thyme is fantastic if you have it, but dried works perfectly fine. You can also swap the parsley for fresh basil or even cilantro if you’re feeling adventurous (though that takes it in a different flavor direction).
Step-by-Step Directions
Step 1: Prep Your Chicken
Pound your chicken breasts to an even thickness, about 3/4 inch. This is one of those steps I used to skip when I was in a hurry, and I always regretted it. Uneven chicken means some parts are overcooked while others are still pink in the middle. Trust me on this one. I use a meat mallet, but if you don’t have one, a heavy skillet wrapped in plastic wrap works just fine.
Season both sides generously with the garlic powder, onion powder, paprika, salt, and pepper. Let it sit for 5-10 minutes while you prep everything else. This gives the seasonings time to actually penetrate the meat instead of just sitting on the surface.
Step 2: Sear the Chicken
Heat your cast iron skillet over medium-high heat. Add the olive oil and let it get hot (you’ll know it’s ready when it shimmers). Place the chicken in the skillet, making sure not to crowd it. If you’re cooking for a crowd, work in batches. Crowded chicken steams instead of sears, and that’s how you end up with sad, gray chicken instead of beautiful golden-brown pieces.
Sear for 5-6 minutes on the first side without moving it. I know it’s tempting to poke and prod and flip constantly, but resist. That’s how you get a proper crust. Flip and cook another 5-6 minutes until the internal temperature reaches 165°F. Remove the chicken and set it aside on a plate. Don’t worry if it looks a little pale; it’s going to finish cooking in the sauce.
Step 3: Make the Butter Sauce
In the same skillet (don’t wash it, those brown bits are flavor gold), reduce the heat to medium. Add the butter and let it melt completely. Once it’s bubbling, add the minced garlic. Here’s where people usually mess up: they burn the garlic. Cook it for just 30-45 seconds until it’s fragrant, not browned. Burned garlic is bitter and there’s no coming back from that.
Pour in the chicken broth and use a wooden spoon to scrape up all those beautiful browned bits from the bottom of the pan. This is called deglazing, and it’s basically free flavor. Let it simmer for 2-3 minutes to reduce slightly.
Step 4: Add Cream and Finish
Stir in the heavy cream, thyme, and lemon juice. The sauce should start looking glossy and slightly thickened. If it seems too thin, let it simmer another minute or two. Too thick? Add a splash more broth. Cooking is more forgiving than people think.
Return the chicken to the skillet, spooning some of that gorgeous sauce over the top. Let it simmer together for 3-4 minutes. This is when the chicken absorbs all those buttery, garlicky flavors and everything comes together. Sprinkle with fresh parsley right before serving.
Pro Tips
After making this dish literally hundreds of times (I tested it constantly before adding it to my meal prep rotation), here are the tricks that make the biggest difference:
Use a Meat Thermometer: I resisted buying one for years because I thought I could tell when chicken was done by touch. Spoiler alert: I couldn’t. A good instant-read thermometer is like $15 and will save you from serving dry, overcooked chicken forever.
Don’t Skip the Resting: Let the chicken rest for 5 minutes after cooking and before slicing. This isn’t just chef speak; it actually keeps the juices inside the meat instead of all over your cutting board.
Make It a Meal Prep Winner: This recipe doubles beautifully. I make it every Sunday and portion it into meal prep containers with roasted vegetables and rice. It reheats perfectly in the microwave (2 minutes on high, stir, another minute if needed). The butter sauce stays creamy even after refrigeration, which is rare for cream-based sauces.
Cast Iron is King: If you have a cast iron skillet, use it. The heat retention is unmatched, and it creates that restaurant-quality sear. Plus, it goes from stovetop to oven if you want to finish it that way (I sometimes do when I’m making a double batch). If you don’t have cast iron yet, it’s honestly one of the best kitchen investments you can make. They last forever if you take care of them.
Flavor Boosters: Sometimes I add a quarter cup of white wine instead of some of the chicken broth. It’s not necessary, but it adds a nice depth. Also, a tablespoon of Dijon mustard stirred into the sauce at the end is absolutely incredible (learned that trick from a French chef I used to work with).
Frequently Asked Questions
Can I use chicken thighs instead of chicken breasts?
Yes. Chicken thighs are a great substitute and usually stay even juicier than chicken breasts when cooked in a skillet.
Can I make this butter chicken skillet ahead of time?
Yes. Prepare the recipe up to two days ahead and store it in the refrigerator. Reheat gently with a splash of broth or cream.
What side dishes pair well with butter chicken skillet?
Mashed potatoes, rice, roasted vegetables, or buttered noodles are perfect for soaking up the rich garlic butter sauce.
Can I freeze leftover butter chicken?
Yes. Freeze portions for up to three months. Reheat slowly and stir in a little cream to restore the sauce texture.
Recipe Info Table
| Metric | Details |
|---|---|
| Prep Time | 10 minutes |
| Cook Time | 20 minutes |
| Total Time | 30 minutes |
| Servings | 4 servings |
| Yield | 4 chicken breasts with sauce |
Why You’ll Love This Recipe
This isn’t just another chicken recipe. It’s the kind of dish that makes weeknight dinners feel special without requiring you to spend two hours in the kitchen or master complicated techniques. The butter sauce is rich enough to feel indulgent but comes together in literally 10 minutes. And unlike a lot of restaurant copycat recipes that promise the world and deliver mediocrity, this one actually tastes like what you’re trying to recreate.
I love that it’s versatile enough for meal planning but fancy enough for company. Last month I served this to my in-laws (who are notoriously picky about restaurant-quality food), and my mother-in-law asked for the recipe. That’s when you know you’ve nailed it.
The fact that it all happens in one skillet means minimal cleanup, which is honestly half the battle when you’re cooking dinner after work. And if you’re into meal prep like I am, this recipe scales beautifully. I’ve made quadruple batches in my largest cast iron skillet without any issues.
What Makes This Recipe Unique
Most butter chicken recipes you’ll find online are either the Indian curry-style version (which is delicious but completely different) or bland, underseasoned attempts at American-style butter chicken. This recipe hits that sweet spot: bold enough to be interesting, simple enough to be weeknight-friendly.
The technique of searing the chicken first, then finishing it in the sauce, keeps the meat incredibly juicy while building layers of flavor. And using the same skillet for everything (instead of dirtying multiple pans) isn’t just about convenience. Those browned bits left from searing the chicken? That’s where the magic happens. When you deglaze the pan and scrape them up, you’re adding concentrated chicken flavor that you simply can’t get any other way.
I’ve also included enough variations in the alternative ingredients section that you can adapt this to whatever’s in your kitchen. Cooking shouldn’t be stressful or require a special grocery run every time you want to try a new recipe.
Key Features
One-Pan Wonder: Everything cooks in a single skillet. Less cleanup, more flavor, better heat control.
Quick Enough for Weeknights: 30 minutes from start to finish. That’s faster than delivery and infinitely better tasting.
Meal Prep Friendly: Stores beautifully for 4-5 days in the fridge. Some cream sauces get weird after a day or two, but this one stays smooth and delicious.
Budget-Conscious: Uses simple, affordable ingredients. No exotic spices or expensive specialty items required. The most “fancy” ingredient is heavy cream, and even that costs less than $3.
Adaptable: Works with chicken breasts, thighs, even turkey. You can make it dairy-free, adjust the richness, add vegetables. It’s a template you can customize to your needs.
Restaurant Quality at Home: Seriously rivals what you’d pay $18 for at a casual dining restaurant, but costs about $4 per serving to make at home.
Nutrition Facts Table
Per serving (1 chicken breast with sauce):
| Nutrient | Amount |
|---|---|
| Calories | 385 |
| Total Fat | 24g |
| Saturated Fat | 12g |
| Cholesterol | 145mg |
| Sodium | 520mg |
| Total Carbohydrates | 4g |
| Dietary Fiber | 0g |
| Sugars | 1g |
| Protein | 38g |
Note: Nutrition information is approximate and will vary based on specific ingredients used and portion sizes.
You’ll Also Love
If you enjoyed this recipe, you might want to check out these other favorites from my collection:
Creamy Garlic Parmesan Chicken: Similar flavor profile but with a Parmesan cream sauce instead of butter-based. Even richer, if you can believe it.
One-Pot Lemon Herb Chicken and Rice: All the convenience of one-pan cooking but with a complete meal (protein, starch, vegetables) in a single dish. Great for meal prep.
Honey Garlic Chicken Thighs: A sweeter take on skillet chicken. Uses the same cooking technique but with a honey-soy glaze that’s absolutely addictive.
Cast Iron Chicken Fajitas: If you love the skillet method, these fajitas are weeknight dinner perfection. Everything cooks together in one pan, and the cast iron gives you that char you’d normally need a grill for.
Conclusion
Looking back at my early attempts to recreate restaurant dishes at home, I can laugh now at how complicated I made everything. I thought professional cooking required expensive ingredients, special equipment, or years of culinary school. But the truth is, good food comes down to understanding a few key techniques and using quality ingredients without overcomplicating things.
This Texas Roadhouse butter chicken skillet is proof of that philosophy. It’s built on simple techniques (proper searing, making a pan sauce, managing heat), uses ingredients you can find at any grocery store, and delivers flavors that genuinely remind you of eating out, but better because you made it yourself.
Whether you’re looking for a solid weeknight dinner option, trying to impress someone special, or just want something delicious that doesn’t require ordering takeout, this recipe has you covered. The butter sauce alone is worth the price of admission. I’ve been known to make extra just to have it on hand for drizzling over vegetables, stirring into pasta, or (don’t judge me) eating with a spoon straight from the fridge.
Give it a try, and let me know how it turns out. And if you discover any great variations or substitutions, I’d love to hear about them. After ten years of recipe development, I’ve learned that the best innovations often come from home cooks adapting recipes to their own kitchens and preferences.
Happy cooking, and enjoy every buttery, garlicky bite.
External Resources:
- Learn more about chicken as a protein source and its nutritional benefits
- Discover the fascinating history of butter in cooking across different cuisines
- Explore the science behind cast iron cookware and why it’s so effective for searing
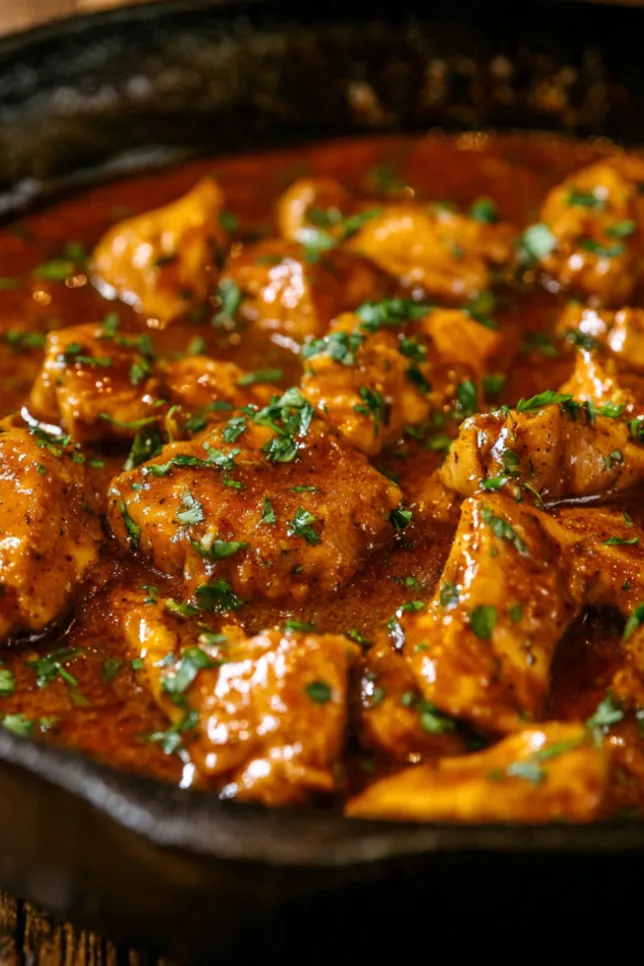
Texas Roadhouse Butter Chicken Skillet
Juicy seared chicken simmered in a rich garlic butter cream sauce made in one skillet. A restaurant style dinner ready in just 30 minutes.
Ingredients
- 1.5 lbs boneless skinless chicken breasts
- 2 tablespoons olive oil
- 1 teaspoon garlic powder
- 1 teaspoon onion powder
- 1/2 teaspoon paprika
- 1/2 teaspoon salt
- 1/4 teaspoon black pepper
- 4 tablespoons unsalted butter
- 4 cloves garlic minced
- 1/2 cup chicken broth
- 1/4 cup heavy cream
- 1 tablespoon lemon juice
- 1/2 teaspoon dried thyme
- 2 tablespoons fresh parsley chopped
- Salt and pepper to taste
Instructions
- Pound chicken to even thickness and season with garlic powder, onion powder, paprika, salt, and pepper.
- Heat olive oil in a skillet and sear chicken 5 to 6 minutes per side until golden and cooked through. Remove from pan.
- Melt butter in the same skillet and sauté garlic for about 30 seconds until fragrant.
- Add chicken broth and scrape the browned bits from the pan. Simmer 2 to 3 minutes.
- Stir in heavy cream, lemon juice, and thyme. Simmer until slightly thickened.
- Return chicken to skillet and coat with sauce. Cook 3 to 4 minutes. Garnish with parsley and serve.