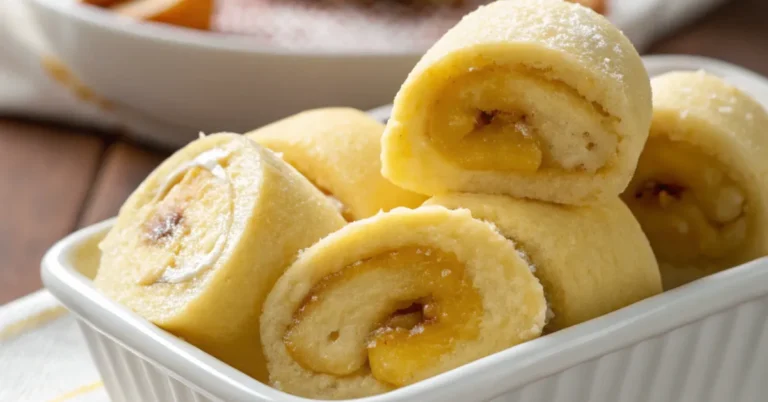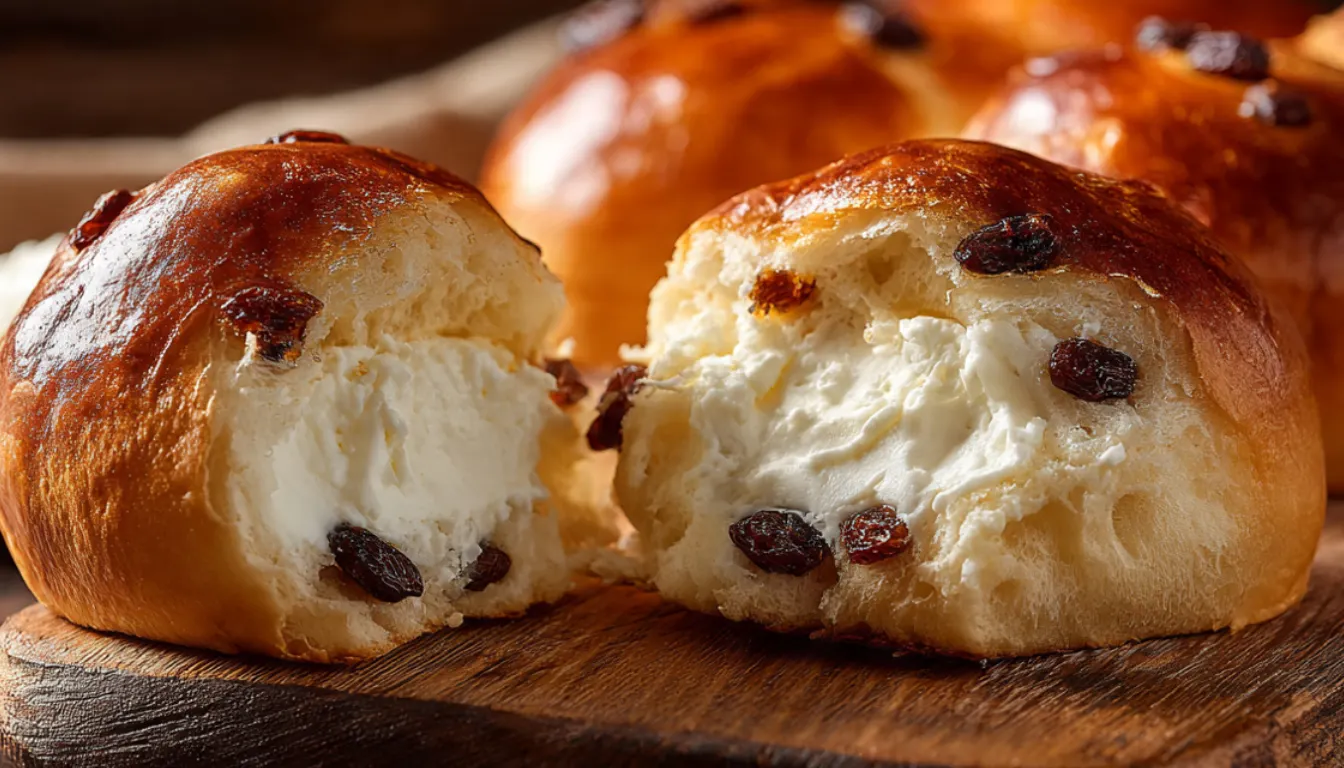
Japanese Cream Cheese Raisin Buns
I’ll never forget the first time I tasted Japanese cream cheese raisin buns at a tiny bakery in San Francisco’s Japantown. The soft, pillowy texture combined with that tangy cream cheese filling and sweet raisins? It was love at first bite. I knew I had to recreate them at home.
Here’s the thing though. My first attempt was a disaster. The dough was too dense, the filling leaked everywhere, and honestly, I almost gave up. But after testing this recipe about fifteen times (yes, really), I finally cracked the code. And trust me, once you nail the technique, you’ll be making these buns every weekend.
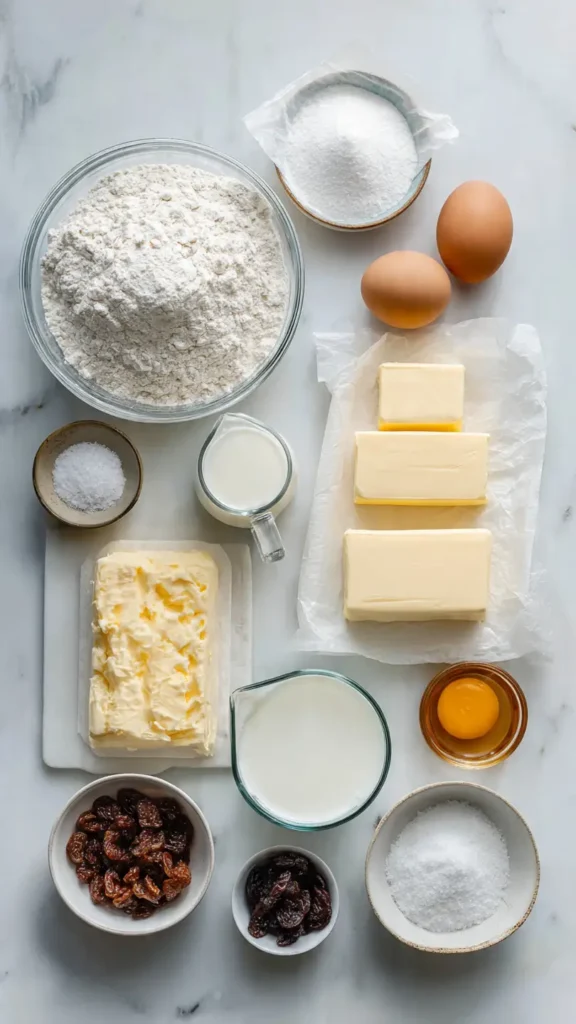
Essential Ingredients
For the Dough:
- 3 ½ cups bread flour
- ⅓ cup granulated sugar
- 2 ¼ teaspoons instant yeast
- 1 teaspoon salt
- 1 cup warm whole milk
- 1 large egg
- ¼ cup unsalted butter, softened
- 1 tablespoon milk powder (optional but recommended)
For the Cream Cheese Filling:
- 8 oz cream cheese, softened
- ¼ cup powdered sugar
- 1 teaspoon vanilla extract
- 1 tablespoon all-purpose flour
For the Raisin Mix:
- 1 cup raisins
- 2 tablespoons rum or warm water (for soaking)
For the Egg Wash:
- 1 egg yolk
- 1 tablespoon milk
Alternative Ingredients
Look, I get it. Not everyone has every ingredient sitting in their pantry. Here are some swaps that actually work.
You can use all-purpose flour instead of bread flour, but your buns won’t be quite as fluffy. The higher protein content in bread flour is what gives these that amazing chewy texture. If you’re lactose intolerant, try oat milk instead of regular milk. It works surprisingly well.
Don’t have rum for soaking the raisins? Just use warm water or even orange juice. The rum adds a nice depth of flavor, but it’s not a dealbreaker if you skip it. And if you’re not a raisin fan (I know some of you are raising your hands right now), dried cranberries or chopped dried apricots work beautifully.
For the cream cheese filling, you can reduce the sugar if you prefer less sweetness. I’ve gone as low as 2 tablespoons and it still tastes great.
Step-by-Step Directions
Prepare the Raisins: Start by soaking your raisins in rum or warm water for about 30 minutes. This plumps them up and prevents them from stealing moisture from your dough. Drain them well before using.
Mix the Dough: In your mixing bowl, combine the warm milk, sugar, and yeast. Let it sit for about 5 minutes until it gets foamy. This is how you know your yeast is alive and ready to work its magic.
Add the egg, then gradually mix in the flour, salt, and milk powder. If you’ve got a KitchenAid stand mixer, now’s the time to use it. Attach the dough hook and knead on medium speed for about 8-10 minutes. Don’t have a stand mixer? No worries. You can knead by hand, but it’ll take about 12-15 minutes and you’ll definitely get an arm workout.
Add the Butter: Once your dough is smooth and elastic, add the softened butter one tablespoon at a time. I know it looks messy at first, but keep kneading. The dough will eventually absorb all that butter and become incredibly soft and silky.
First Rise: Place the dough in a lightly greased bowl, cover it with a damp kitchen towel, and let it rise in a warm spot for about 1-1.5 hours, or until it doubles in size. I usually stick mine in the oven with just the light on. It creates the perfect warm environment.
Make the Filling: While the dough rises, beat together the cream cheese, powdered sugar, vanilla, and flour until smooth. The flour helps prevent the filling from being too runny. Pop it in the fridge until you’re ready to use it.
Shape the Buns: Here’s where it gets fun. Punch down the dough (so satisfying) and divide it into 12 equal pieces. Roll each piece into a smooth ball.
Flatten each ball into a circle about 4 inches wide. Place about 1 tablespoon of cream cheese filling in the center, add a few plumped raisins on top, then carefully pinch the edges together to seal. Make sure you seal them really well, or the filling will leak out during baking. Trust me on this.
Place the sealed buns seam-side down on a parchment-lined baking sheet, spacing them about 2 inches apart.
Second Rise: Cover the buns with a damp towel and let them rise again for 30-45 minutes. They should look puffy and almost doubled in size.
Bake: Preheat your oven to 350°F. Brush the buns gently with the egg wash for that gorgeous golden color. Bake for 15-18 minutes until they’re golden brown and smell absolutely amazing.
Let them cool on a wire rack for at least 10 minutes before diving in. I know it’s hard to wait, but hot cream cheese filling can burn your mouth pretty badly.

Pro Tips
After making these buns more times than I can count, here are my hard-earned tips:
The dough should be soft and slightly sticky. If it’s too dry, your buns will be dense. If you’re kneading by hand and it feels impossibly sticky, resist the urge to add more flour. Just keep kneading with lightly oiled hands.
Make sure your cream cheese is at room temperature before mixing the filling. Cold cream cheese will be lumpy no matter how long you beat it. I learned this the hard way after trying to soften it in the microwave and ending up with melted cheese soup.
Don’t overfill the buns. I know it’s tempting to stuff them with extra filling, but too much will just leak out and make a mess. About 1 tablespoon is the sweet spot.
These buns freeze beautifully. I always make a double batch and freeze half for quick breakfasts. Just wrap them individually in plastic wrap, then store in a freezer-safe container. They’ll keep for up to 3 months. Reheat in a 300°F oven for about 10 minutes, and they taste freshly baked.
If you’re into meal prep, you can prepare the dough the night before and let it do its first rise in the fridge overnight. Just bring it to room temperature before shaping the next day.
Frequently Asked Questions
Can I use all-purpose flour instead of bread flour?
Yes, but the buns will be slightly less fluffy since bread flour has higher protein content.
Why did my filling leak?
Usually from overfilling or not sealing the dough properly.
Can I make these ahead?
Yes, refrigerate the dough overnight or freeze baked buns.
Can I swap raisins?
Yes, use cranberries, apricots, or chocolate chips.
How do I keep them soft?
Store airtight and reheat slightly before serving.
Why You’ll Love This Recipe
Look, I’m not going to tell you these are quick to make. They’re not. But they’re absolutely worth every minute of your time.
First off, they’re way better than anything you’ll buy at a bakery. The texture is unbelievably soft and stays that way for days. The combination of tangy cream cheese with sweet raisins in a buttery bun? It’s just perfection.
They’re also surprisingly versatile. I’ve served them for breakfast, packed them in lunchboxes, brought them to potlucks, and even given them as gifts. Everyone goes crazy for them.
And here’s something I love: you can customize them endlessly. Don’t like raisins? Swap them out. Want more cream cheese? Add it. Prefer them less sweet? Reduce the sugar. The base recipe is super forgiving.
What Makes This Recipe Unique
What sets these buns apart from regular sweet rolls is the tangohuan technique (that’s the Japanese method of creating that super soft, milk bread texture). It’s all about the high hydration dough and proper kneading.
The cream cheese filling is also different from what you’d find in Western-style cream cheese buns. It’s lighter, less sweet, and perfectly balanced with the rich dough. Japanese bakeries really understand how to balance flavors without making things overly sweet.
Another unique aspect is the texture contrast. You’ve got the soft, pillowy bread, the creamy filling, and then those chewy raisins. It’s like a party in your mouth.
Key Features
- Ultra-soft texture that stays fresh for days
- Perfect balance of sweet and tangy flavors
- Make-ahead friendly for busy mornings
- Freezer-friendly for long-term storage
- Customizable fillings to suit your taste
- Impressive presentation that looks bakery-quality
- Uses basic ingredients you probably already have
- Great for meal planning when you batch-bake
You’ll Also Love
If these Japanese cream cheese raisin buns hit the spot for you, here are some other recipes you should definitely try:
- Japanese Milk Bread – The base for so many amazing Japanese baked goods
- Matcha Cream Buns – Same soft dough but with a green tea twist
- Korean Cream Cheese Garlic Bread – For when you want something savory
- Hokkaido Milk Rolls – Smaller, pull-apart versions perfect for dinner
- Red Bean Paste Buns – Traditional Japanese sweet buns with anko filling
Conclusion
Making Japanese cream cheese raisin buns at home might seem intimidating at first, but honestly, it’s mostly just waiting for the dough to rise. The actual hands-on time is pretty minimal.
I’ve been making these for my family for years now, and they never get old. There’s something deeply satisfying about pulling a tray of golden, fragrant buns from your oven. And when you tear one open while it’s still warm and see that creamy filling? Pure happiness.
The best part is watching people’s faces when they taste them. I’ve had friends offer to pay me to make batches for them. (I usually just trade for their homemade cookies instead.)
Give this recipe a try on a lazy weekend when you’ve got some time. Put on your favorite music, enjoy the process, and I promise you’ll end up with something absolutely delicious. And if you’re like me, you’ll probably make a double batch because they disappear ridiculously fast.
If you do try these, I’d love to hear how they turn out for you. Happy baking!
Japanese Cream Cheese Raisin Buns
Soft, pillowy Japanese-style sweet buns filled with tangy cream cheese and plump raisins. Perfect for breakfast or as a sweet snack.
Ingredients
For the Dough
- 3 1/2 cups bread flour
- 1/3 cup granulated sugar
- 2 1/4 tsp instant yeast
- 1 tsp salt
- 1 cup warm whole milk
- 1 large egg
- 1/4 cup unsalted butter, softened
- 1 tbsp milk powder (optional)
For the Cream Cheese Filling
- 8 oz cream cheese, softened
- 1/4 cup powdered sugar
- 1 tsp vanilla extract
- 1 tbsp all-purpose flour
For the Raisin Mix
- 1 cup raisins
- 2 tbsp rum or warm water
For the Egg Wash
- 1 egg yolk
- 1 tbsp milk
Instructions
- Prepare the raisins Soak raisins in rum or warm water for 30 minutes. Drain well before using.
- Mix the dough In a mixing bowl, combine warm milk, sugar, and yeast. Let sit for 5 minutes until foamy. Add egg, then gradually mix in flour, salt, and milk powder. Knead with a stand mixer for 8-10 minutes or by hand for 12-15 minutes until smooth and elastic.
- Add the butter Add softened butter one tablespoon at a time while kneading. Continue until the dough is soft and silky.
- First rise Place dough in a greased bowl, cover with a damp towel, and let rise in a warm spot for 1-1.5 hours until doubled in size.
- Make the filling Beat together cream cheese, powdered sugar, vanilla, and flour until smooth. Refrigerate until needed.
- Shape the buns Punch down dough and divide into 12 equal pieces. Roll each into a 4-inch circle. Place 1 tablespoon cream cheese filling in center, add a few raisins, and pinch edges to seal. Place seam-side down on a parchment-lined baking sheet.
- Second rise Cover buns with a damp towel and let rise for 30-45 minutes until puffy and nearly doubled.
- Bake Preheat oven to 350°F. Brush buns with egg wash (egg yolk mixed with milk). Bake for 15-18 minutes until golden brown.
- Cool and serve Let cool on a wire rack for at least 10 minutes before serving.
Notes
The dough should be soft and slightly sticky. Don’t add too much flour or the buns will be dense. Make sure to seal the buns well to prevent filling leakage. These buns freeze beautifully for up to 3 months. Wrap individually and reheat at 300°F for 10 minutes. For make-ahead convenience, prepare the dough the night before and let it rise in the fridge overnight.