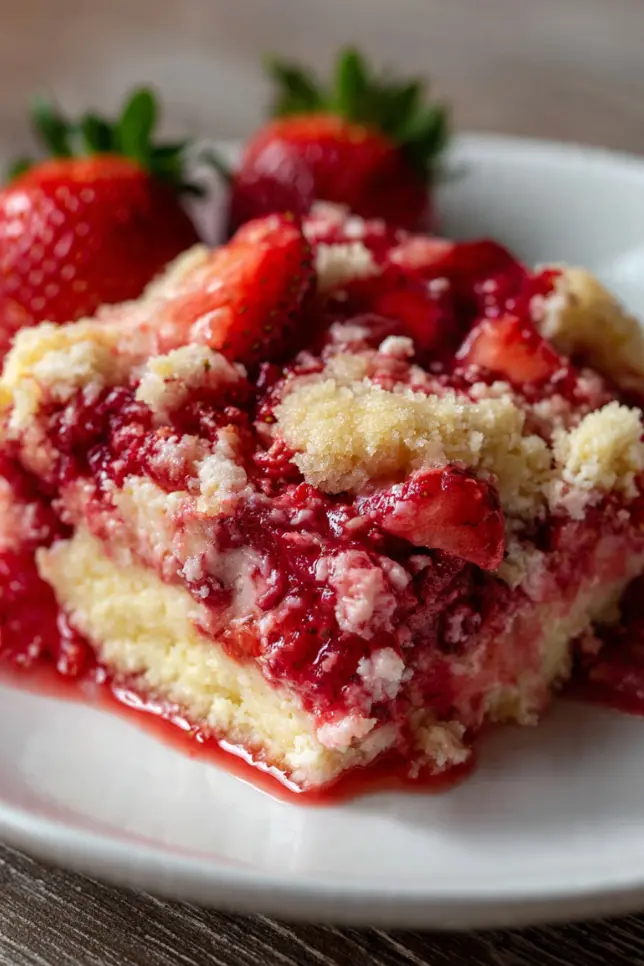
Strawberry Cheesecake Dump Cake
You know those moments when you’re absolutely craving something sweet, but the thought of pulling out your stand mixer and measuring a million ingredients makes you want to just order takeout? That’s exactly where I was three summers ago when my sister showed up unannounced with her kids, and I had exactly zero dessert options in my kitchen. That’s when I discovered the magic of dump cakes, and honestly, I haven’t looked back since.
This strawberry cheesecake dump cake is what I call my “emergency dessert” because it comes together in about 10 minutes of actual work. You literally dump everything into a baking dish (hence the name), and the oven does all the heavy lifting. The result? A gooey, creamy dessert with a buttery cake topping that tastes like you spent hours making it. Trust me on this one.
Essential Ingredients
- 2 cans (21 oz each) strawberry pie filling
- 8 oz cream cheese, softened and cut into small cubes
- 1 box (15.25 oz) yellow cake mix
- 1/2 cup (1 stick) unsalted butter, melted
- 1/2 cup white chocolate chips
- 1/4 cup sliced almonds (optional, for crunch)
- 1 teaspoon vanilla extract
- Whipped cream or vanilla ice cream for serving
Alternative Ingredients
Here’s the thing about dump cakes: they’re incredibly forgiving. I’ve experimented with this recipe more times than I can count, and these swaps work beautifully.
Instead of yellow cake mix, you can use white cake mix or even vanilla cake mix. They all work, though yellow gives you that classic buttery flavor I love. If you’re watching your sugar intake, sugar-free cake mix works surprisingly well here.
Don’t have strawberry pie filling? Cherry or blueberry pie filling are fantastic alternatives. I once used mixed berry filling when that’s all I had at home, and my guests literally asked for the recipe. You can also use fresh strawberries if you toss them with 1/2 cup sugar and let them sit for 30 minutes to release their juices.
The white chocolate chips are optional but highly recommended. If you’re not a white chocolate fan, semi-sweet chocolate chips or even butterscotch chips work great. I sometimes skip them entirely when I’m trying to keep things simpler.
For a dairy-free version, use vegan cream cheese and dairy-free butter. I haven’t tried this variation personally, but my friend who’s lactose intolerant swears by it.
Step-by-Step Directions
Preheat your oven to 350°F and grab a 9×13 inch baking dish. I use a glass baking dish because I like seeing the bubbling strawberry filling through the sides, but any material works fine.
Start by spreading both cans of strawberry pie filling evenly across the bottom of your dish. Don’t stress about making it perfectly smooth. This is a dump cake, after all, and perfection is not the goal here.
Next comes the cream cheese. Cut it into small cubes (about 1/2 inch each) and scatter them randomly over the strawberry filling. Some pieces will sink, some will float, and that’s exactly what you want. Those pockets of cream cheese create the most amazing creamy bites throughout the dessert.
Now for the fun part. Sprinkle the entire box of dry cake mix evenly over everything. And I mean DRY. Do not mix it with anything. Do not add water or eggs. Just dump that powder right on top and spread it around gently with your hands or a spoon. I learned this the hard way my first time when I tried to “help” by mixing things together. Total disaster.
Drizzle the melted butter all over the top of the dry cake mix. Try to cover as much of the powder as possible, but don’t worry if you miss some spots. Those dry patches will pick up moisture from the fruit as it bakes. Sprinkle the white chocolate chips and sliced almonds over the top if you’re using them.
Pop it in the oven and bake for 45 to 55 minutes. You’re looking for a golden brown top with the edges bubbling like crazy. My oven runs hot, so mine is usually done around 47 minutes, but ovens vary wildly. Start checking at 45 minutes.
Let it cool for at least 15 minutes before serving. I know it’s tempting to dig in immediately (I’ve burned my tongue more than once), but those strawberries are molten lava straight out of the oven.
Pro Tips
The biggest mistake people make with dump cakes is trying to mix everything together. Resist that urge! The layering is what creates that amazing texture contrast between the gooey fruit bottom and the cake topping.
I’ve found that room temperature cream cheese distributes better than cold cream cheese. If you forget to take it out ahead of time, cut it into smaller pieces so it melts faster during baking.
For extra decadence, I sometimes add a drizzle of sweetened condensed milk over the strawberry layer before adding the cream cheese. It’s not traditional, but it creates this incredible caramel-like sauce that my family goes crazy for.
If you’re making this for a crowd, it’s actually better the day after. The flavors meld together overnight, and you can store it covered in the fridge. Just reheat individual portions in the microwave for about 30 seconds, and it tastes like it just came out of the oven.
Want to get fancy? Serve it warm with a scoop of vanilla ice cream on top. The contrast between the hot cake and cold ice cream is absolutely perfect. I keep a good quality vanilla ice cream in my freezer specifically for desserts like this.
For meal prep enthusiasts, this actually freezes really well. I portion it into individual meal prep containers, freeze them, and pull one out whenever I need a quick dessert. Microwave for 90 seconds, and you’re good to go.
FAQs
Can I make strawberry cheesecake dump cake ahead of time?
Yes, assemble it in advance and bake when ready.
Why is my topping soggy?
It usually needs more butter or less liquid.
Can I use fresh strawberries?
Yes, just add sugar and let them release juices first.
How do I store leftovers?
Keep in fridge up to 5 days and reheat before serving.
Can I freeze it?
Yes, freeze in portions and reheat when needed.
Why You’ll Love This Recipe
Let me be real with you for a second. I’m all about recipes that don’t require me to become a pastry chef for the evening. This dump cake is the definition of low-effort, high-reward cooking. You get all the flavors of an elaborate strawberry cheesecake without the fuss of making an actual cheesecake. No water baths, no worrying about cracks, no precision required.
The texture is what really sets this apart. You get that tangy cream cheese flavor mixed with sweet strawberries, all topped with a buttery cake layer that’s crispy on top and soft underneath. It’s like eating strawberry cheesecake and cobbler at the same time.
Plus, it’s incredibly versatile. Dress it up with whipped cream and fresh strawberries for a dinner party, or eat it straight from the pan with a fork at midnight (no judgment here). I’ve served this at potlucks, birthday parties, and casual Tuesday dinners, and it always disappears fast.
What Makes This Recipe Unique
Unlike traditional dump cakes that are just fruit and cake mix, the cream cheese addition here transforms this into something special. Those little pockets of tangy cream cheese throughout the dessert mimic the flavor profile of actual cheesecake without any of the complicated steps.
I also love that this recipe doesn’t require any special equipment. No food processor, no KitchenAid stand mixer, not even a hand mixer. Just a baking dish, a knife to cut the cream cheese, and a spoon to spread things around. If you’re setting up your first kitchen or working with limited space, this is the perfect dessert to have in your back pocket.
The white chocolate chips aren’t traditional in dump cakes, but they add these little pockets of creamy sweetness that complement the tartness of the strawberries perfectly. It’s a small touch that makes a big difference.
Key Features
Quick Assembly: Seriously, 10 minutes from start to oven. I’ve timed it.
Minimal Cleanup: One baking dish and maybe a cutting board. That’s it. My kind of recipe.
Crowd-Pleaser: I’ve never met anyone who doesn’t like this. Kids love it, adults love it, picky eaters love it.
Budget-Friendly: Using a cake mix instead of making everything from scratch keeps the cost down. You can usually make this entire dessert for under $10.
Flexible: Works for casual weeknight desserts or fancier occasions when you add some garnishes.
Make-Ahead Friendly: Assemble early, bake when ready. Perfect for dinner parties when you’re juggling multiple dishes.
Portion Control Options: Easy to cut into clean squares for serving or storing in individual containers.
You’ll Also Love
If this strawberry cheesecake dump cake is hitting the spot, you might want to check out some of my other easy dessert recipes. My chocolate lava mug cake is another low-effort favorite that comes together in the microwave in about 5 minutes. It’s perfect for those solo dessert emergencies.
The triple berry cobbler is another dump-style recipe that uses a similar technique but with mixed berries and a biscuit topping instead of cake mix. It’s a bit more rustic and perfect for summer when berries are in season.
For chocolate lovers, my brownie cheesecake bars combine fudgy brownies with a cream cheese swirl. They take a bit more effort than this dump cake, but they’re still pretty straightforward and absolutely worth it.
And if you’re into the whole dump cake concept, my pineapple upside-down dump cake is a total game-changer. It uses crushed pineapple and maraschino cherries with a yellow cake mix, and the results are fantastic.
Conclusion
After years of making complicated desserts, this strawberry cheesecake dump cake has become my go-to recipe when I need something sweet without the stress. It’s proof that impressive desserts don’t have to be difficult.
The best part? You can totally make this your own. Add different fruits, swap the cake mix flavor, throw in some nuts or coconut. The basic technique stays the same, and you really can’t mess it up. I’ve accidentally used salted butter instead of unsalted (still delicious), forgotten the vanilla extract (didn’t notice), and once even used a 9×9 pan when I couldn’t find my 9×13 (just needed longer baking time).
So next time you’re staring at your oven wondering what to make for dessert, remember this recipe. Your future self will thank you when you’re eating warm, gooey strawberry cheesecake dump cake in about an hour with minimal effort and even less cleanup. And if anyone asks how long it took you to make it, well, that’s between you and me.
Now if you’ll excuse me, I have some leftover dump cake calling my name from the fridge.
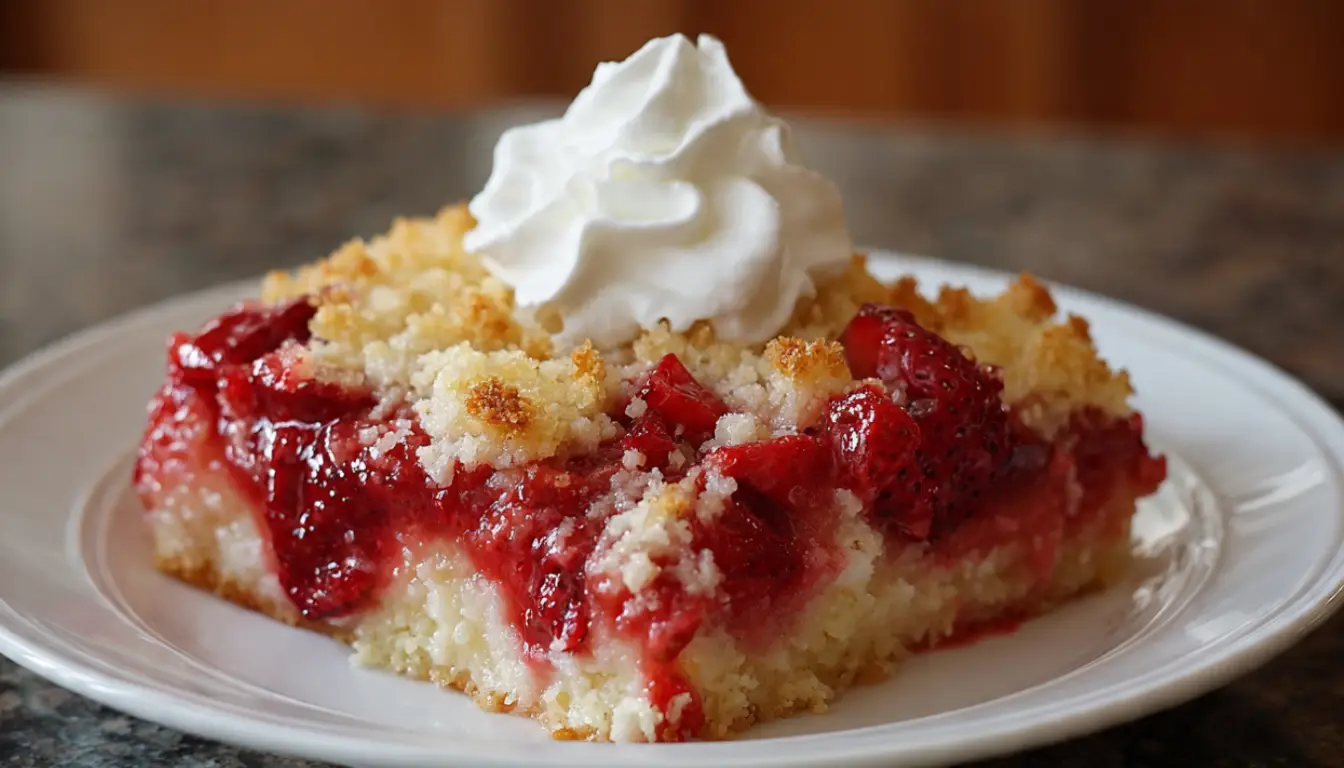
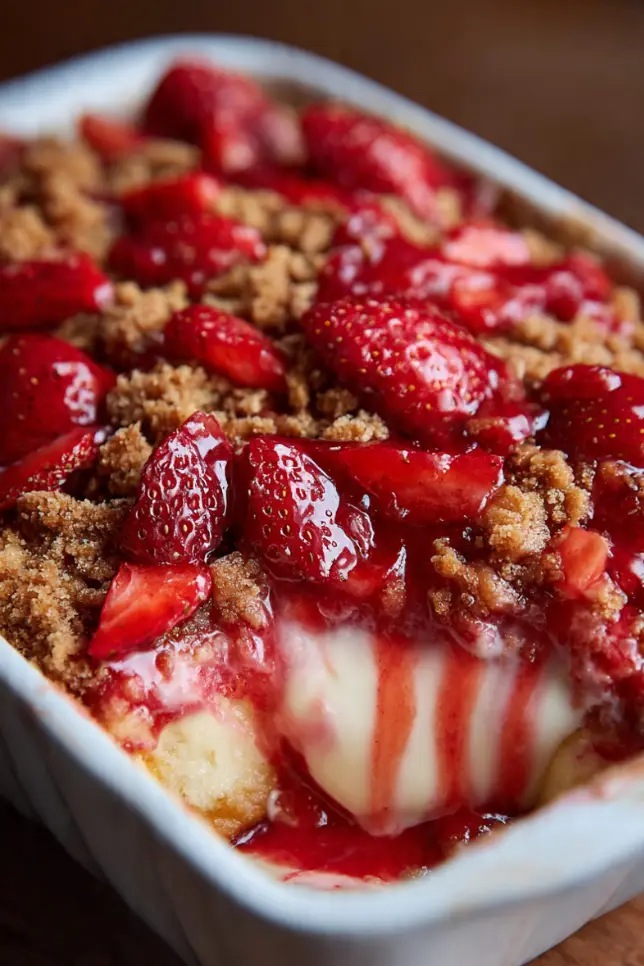
Strawberry Cheesecake Dump Cake
Easy no-mix dessert with strawberry pie filling, cream cheese pockets, and buttery golden topping
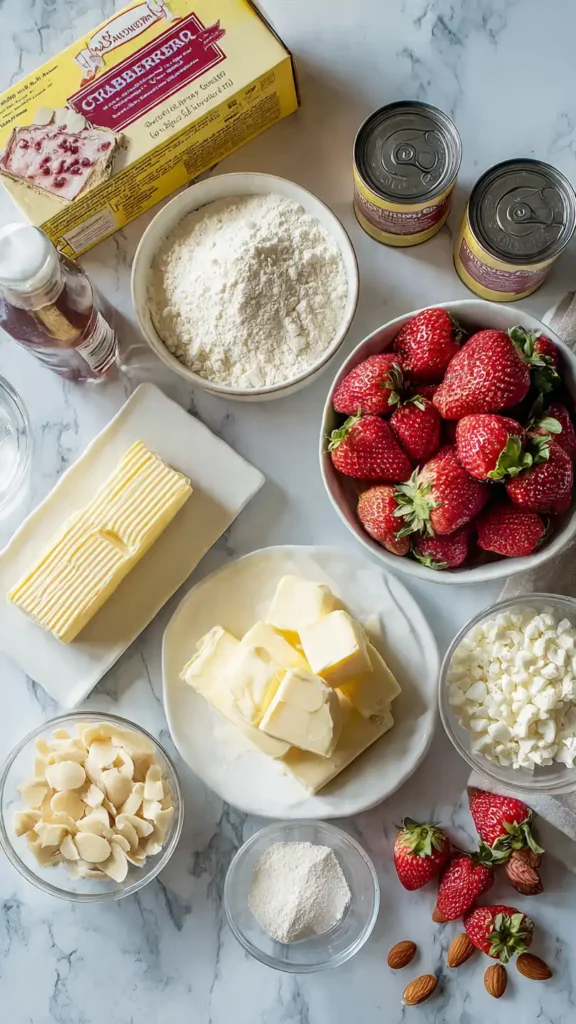
Ingredients
Main Ingredients
- 2 cans (21 oz each) strawberry pie filling
- 8 oz cream cheese, softened and cubed
- 1 box (15.25 oz) yellow cake mix
- 1/2 cup unsalted butter, melted
- 1/2 cup white chocolate chips
- 1/4 cup sliced almonds (optional)
- 1 tsp vanilla extract
For Serving
- Whipped cream or vanilla ice cream
- Fresh strawberries for garnish (optional)
Instructions
- Preheat and prep Preheat your oven to 350°F. Prepare a 9×13 inch baking dish by lightly greasing it or leaving it ungreased (both work fine).
- Add strawberry layer Spread both cans of strawberry pie filling evenly across the bottom of the baking dish. Don’t worry about making it perfectly smooth.
- Add cream cheese Cut the softened cream cheese into small cubes (about 1/2 inch each) and scatter them randomly over the strawberry filling. They don’t need to be perfectly distributed.
- Add dry cake mix Sprinkle the entire box of DRY cake mix evenly over the cream cheese and strawberry layers. Do not mix it with anything and do not add water or eggs. Just the dry powder.
- Drizzle butter Drizzle the melted butter evenly over the dry cake mix, trying to cover as much of the powder as possible. It’s okay if some spots aren’t covered.
- Add toppings Sprinkle the white chocolate chips and sliced almonds (if using) evenly over the top of everything.
- Bake Bake for 45-55 minutes until the top is golden brown and you can see the strawberry filling bubbling at the edges. Start checking at 45 minutes.
- Cool and serve Let the dump cake cool for at least 15 minutes before serving. Serve warm with vanilla ice cream or whipped cream. Store leftovers covered in the refrigerator for up to 5 days.
Pro Tips
Don’t mix the layers! The magic of dump cake is in keeping the layers separate. The dry cake mix will absorb moisture from the fruit and butter as it bakes. Cream cheese tip: Room temperature cream cheese distributes better and melts more evenly. Make ahead: Assemble everything in the baking dish, cover with plastic wrap, and refrigerate up to 24 hours before baking. Add 5-10 minutes to baking time if starting cold. Variations: Try cherry, blueberry, or mixed berry pie filling instead of strawberry.