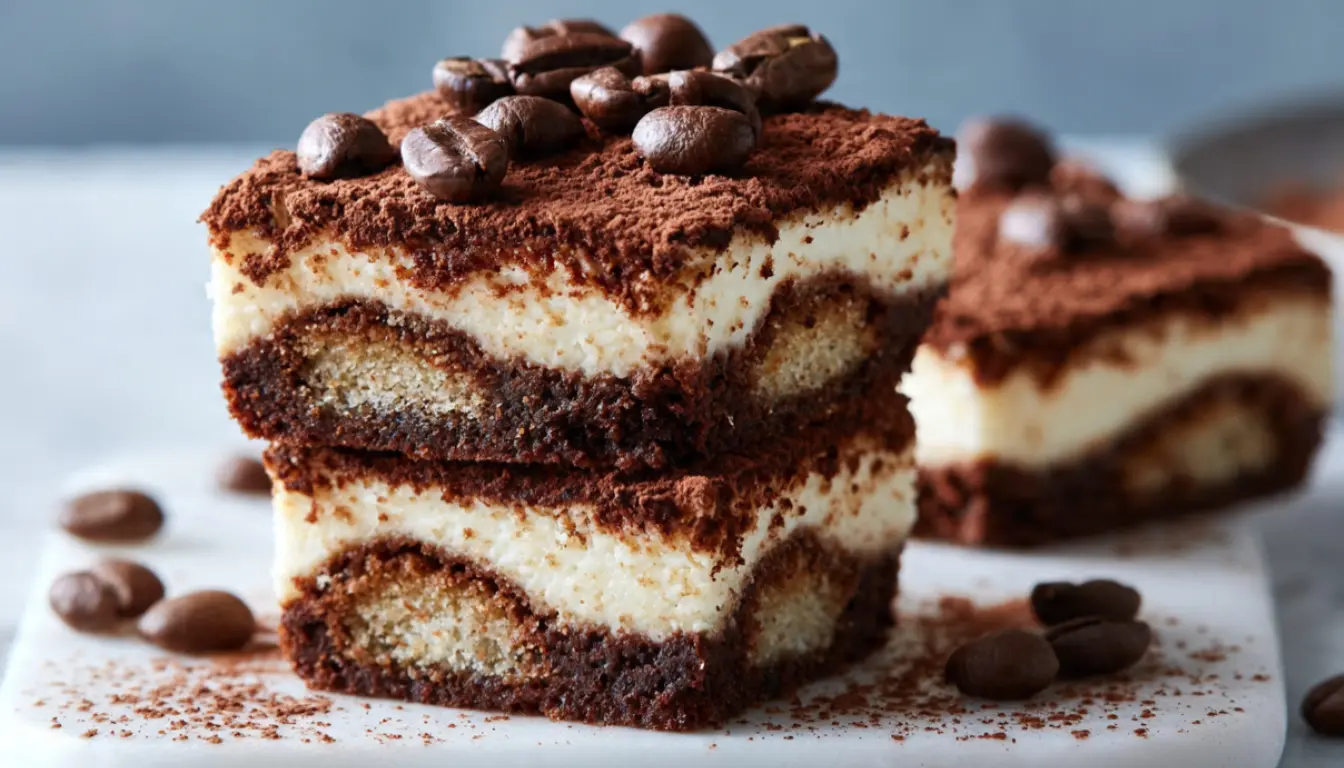
Tiramisu Brownies: The Dessert Mashup That Broke My Brain (In the Best Way)
I was at a dinner party about three years ago when the host brought out a tray of what looked like ordinary brownies. One bite in, I put my fork down and just stared at the plate. There was espresso. There was mascarpone. There were rich, fudgy chocolate layers. It tasted exactly like a tiramisu decided to become a brownie, and honestly? I was a little offended that I hadn’t thought of it first.
I went home that night and did what any obsessive home baker does: I pulled out my KitchenAid stand mixer and started experimenting. It took me about four rounds of testing before I landed on a version I was truly proud of, and I’ve been making these tiramisu brownies ever since. They’re the recipe I bring to every gathering when I want people to ask me for a recipe. Which they always do.
So let me walk you through exactly how to make them.
What Makes These Tiramisu Brownies So Good
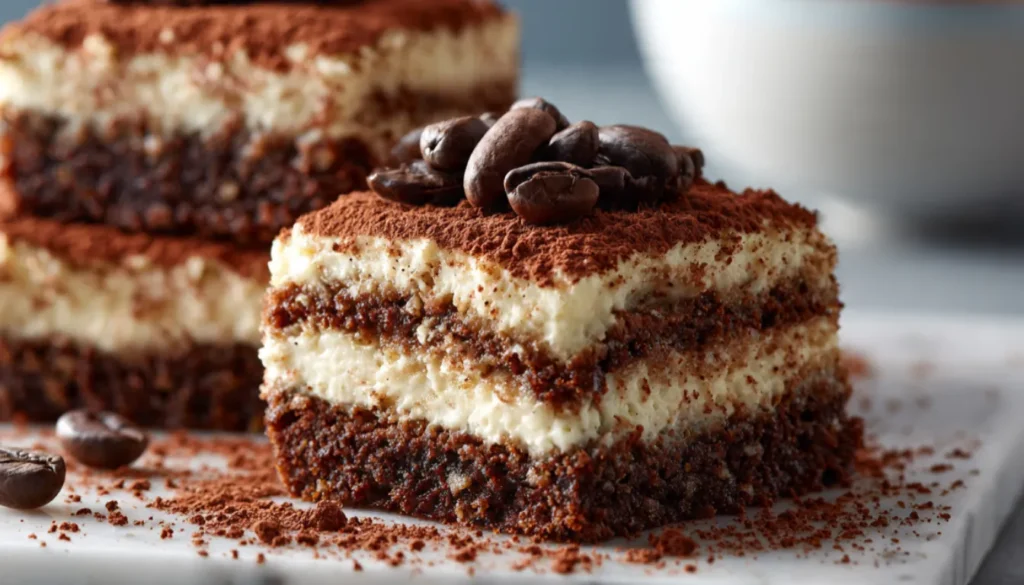
Here’s the thing about combining tiramisu and brownies: both desserts are already incredible on their own. Tiramisu has that silky mascarpone cream, strong espresso, and that dusting of cocoa that makes it feel both elegant and comforting. Brownies give you that dense, fudgy, chocolatey satisfaction that no other dessert quite delivers. Together, they’re kind of ridiculous in the best possible way.
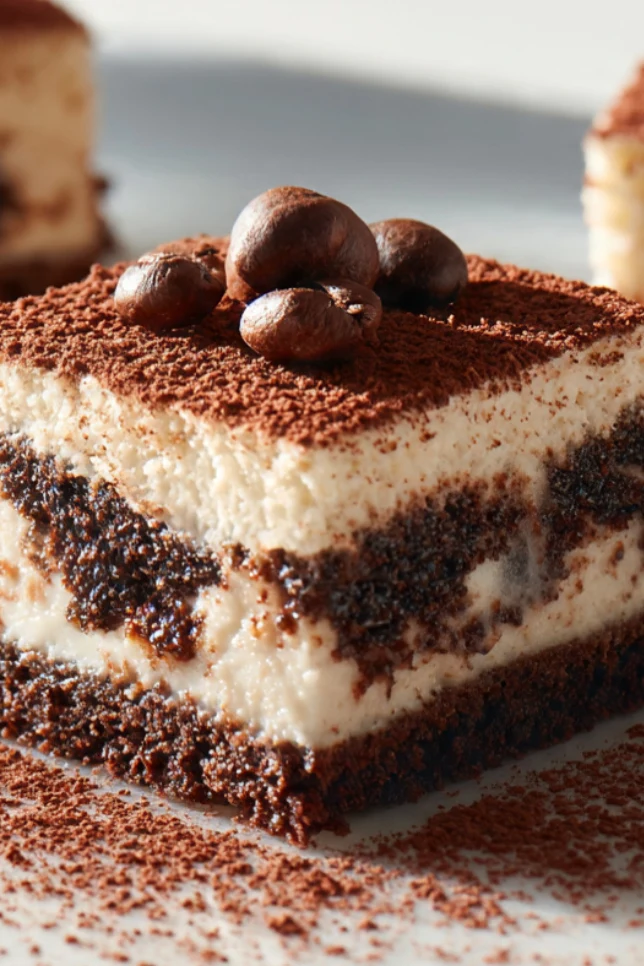
The key is layering. You’re building a fudgy espresso-spiked brownie base, then topping it with a light mascarpone cream layer that sets up beautifully in the fridge. The cocoa powder finish on top ties the whole thing back to classic tiramisu. It tastes like a restaurant dessert, but you made it in a 9×13 baking dish on a Tuesday.
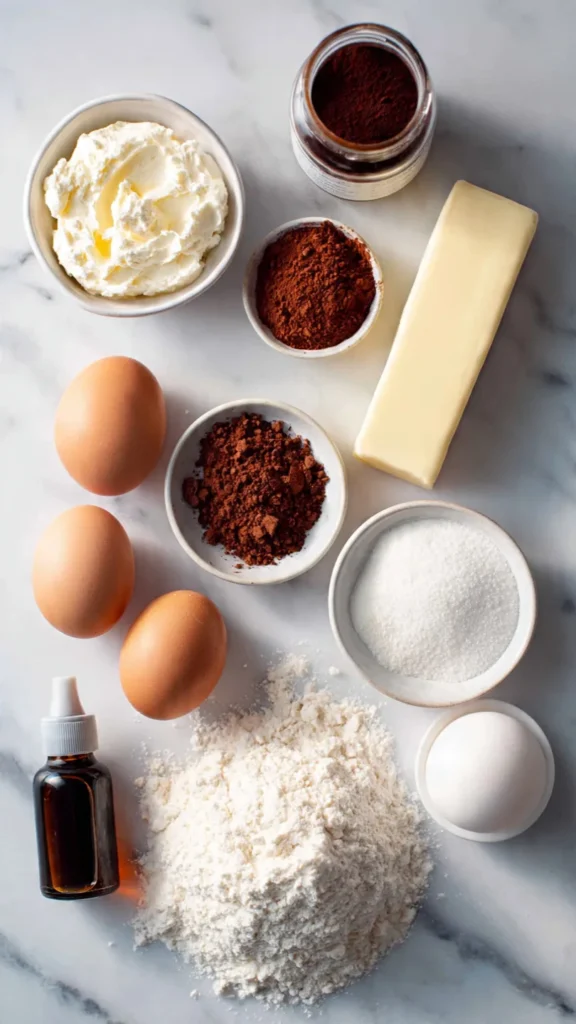
Essential Ingredients
For the Brownie Base:
- 1 cup (2 sticks) unsalted butter
- 2 cups granulated sugar
- 4 large eggs, room temperature
- 2 teaspoons pure vanilla extract
- 2 tablespoons instant espresso powder (I use Medaglia d’Oro)
- 1 cup all-purpose flour
- 3/4 cup unsweetened cocoa powder (Dutch-process gives the best depth)
- 1/2 teaspoon salt
- 1/2 teaspoon baking powder
For the Mascarpone Cream Layer:
- 8 oz mascarpone cheese, room temperature
- 1 cup heavy whipping cream (cold)
- 1/2 cup powdered sugar
- 1 teaspoon vanilla extract
- 1 tablespoon Kahlua or Tia Maria (optional, but honestly worth it)
For the Finish:
- 2 tablespoons Dutch-process cocoa powder, for dusting
- Optional: chocolate-covered espresso beans for garnish
Alternative Ingredients
Don’t have mascarpone? Full-fat cream cheese works as a substitute, though the flavor is a bit tangier. I’ve done it in a pinch and it’s still delicious. If you want to skip the alcohol entirely, just leave it out and add an extra half teaspoon of vanilla. For a lighter brownie base, you can swap half the butter for coconut oil, which adds a subtle flavor that actually pairs nicely with the espresso. And if you don’t have espresso powder, very strong brewed coffee reduced down to about two tablespoons works too, but espresso powder is honestly worth keeping in your pantry because it does double duty in so many recipes.
Step-by-Step Directions
Step 1: Prep Your Pan and Preheat
Preheat your oven to 350°F (175°C). Line a 9×13 inch baking pan with parchment paper, leaving some overhang on the sides so you can lift the brownies out cleanly later. Spray lightly with non-stick cooking spray. This step sounds small but it saves so much frustration when it’s time to cut and serve.
Step 2: Make the Brownie Batter
Melt the butter in a medium saucepan over low heat or in a microwave-safe bowl in 30-second intervals. Let it cool slightly. Whisk in the sugar until combined, then add the eggs one at a time, whisking after each addition. Add the vanilla extract and the instant espresso powder. The batter will smell amazing at this point and you’ll want to drink it. Don’t.
Sift in the cocoa powder, flour, salt, and baking powder. Fold everything together with a rubber spatula until just combined. Do not overmix, this is the number one mistake people make with brownies. You want a few streaks of flour still visible when you stop, they’ll incorporate on their own.
Step 3: Bake the Brownies
Pour the batter into your prepared pan and smooth it out evenly. Bake for 28 to 32 minutes. Start checking at 28 minutes. A toothpick inserted in the center should come out with moist crumbs, not wet batter and not completely clean. Fudgy brownies sit right in that middle zone.
Let the brownies cool completely in the pan. And I mean completely. If you add the cream layer while the brownies are still warm, you’ll end up with a melted mess. I usually bake them the night before or pop the pan in the fridge to speed things up.
Step 4: Make the Mascarpone Cream
This part is where a hand mixer or stand mixer earns its place. Beat the mascarpone on medium speed for about 30 seconds just to soften it. In a separate chilled bowl (I stick mine in the freezer for 5 minutes), beat the cold heavy cream with the powdered sugar until you get medium-soft peaks. Fold the whipped cream into the mascarpone gently, then stir in the vanilla and Kahlua if you’re using it. You want this mixture to be thick enough to spread but still light and airy.
Step 5: Assemble and Chill
Spread the mascarpone cream over the completely cooled brownie base in an even layer. Use an offset spatula if you have one, it gives you a much cleaner result than a regular knife. Cover the pan loosely with plastic wrap and refrigerate for at least 2 hours, or up to overnight.
Step 6: Finish and Serve
Right before serving, dust the top generously with cocoa powder using a fine mesh sieve. Cut into 16 squares. If you want a clean cut, wipe your knife between each slice. Serve cold straight from the fridge for the best texture.
Tools That Make This Easier
A good stand mixer like a KitchenAid is genuinely useful here for whipping the cream to the right consistency without wearing out your arm. A hand mixer works just as well though. For the brownie base, a heavy-bottomed 9×13 non-stick baking pan makes a noticeable difference in how evenly everything bakes. I’ve used cheap pans and the edges always overcook before the center is done. A fine mesh sieve is essential for the cocoa powder dusting. And if you’re the type who bakes a lot (you should be), an offset spatula is one of those inexpensive kitchen tools that changes your life. Seriously, five dollars at any kitchen supply store.
Pro Tips from 10 Years of Baking These
Room temperature ingredients matter more than you think. Cold eggs and cold mascarpone both create texture problems. Pull everything from the fridge about 45 minutes before you start.
Dutch-process cocoa powder is not negotiable if you want that deep, rich chocolate flavor. Natural cocoa will work but the color and taste are noticeably different. Valrhona and Cacao Barry are both excellent options if you want to invest in a quality cocoa powder. Your brownies and your hot chocolate will both be better for it.
The espresso powder is doing two jobs here: it intensifies the chocolate flavor in the brownie base while also giving you that signature tiramisu coffee note. Don’t skip it and don’t reduce it.
If you want to make these ahead for a party or holiday gathering, they keep beautifully in an airtight food storage container in the fridge for up to four days. The flavors actually deepen overnight, so making them the day before is genuinely the better move.
Why You’ll Love This Recipe
These tiramisu brownies hit every note you want from a dessert. They’re fudgy and rich without being cloying, the mascarpone cream is light enough to balance the dense brownie base, and the espresso runs through everything like a thread tying both desserts together. They look impressive on a plate but require no special skills, no candy thermometer, no water bath. If you can make a box of brownies from scratch, you can make these.
They also travel well. I’ve brought them to work, to picnics, to baby showers. Pack them in a glass food storage container, keep them cold, and they arrive looking perfect.
What Makes This Recipe Unique
Most tiramisu brownie recipes you’ll find online go one of two directions: they either make a dry, cakey brownie base that misses the whole point, or they use a boxed brownie mix with a store-bought whipped topping that tastes fine but not special. This recipe builds a genuinely fudgy from-scratch brownie loaded with espresso, then pairs it with real mascarpone cream. The ratio of brownie to cream layer is also intentional. You want enough cream to taste it in every bite without it overwhelming the chocolate underneath.
FAQs
Can I make tiramisu brownies ahead of time?
Yes. In fact, tiramisu brownies taste even better after chilling overnight because the flavors deepen and the mascarpone layer firms up beautifully.
Do tiramisu brownies need to be refrigerated?
Yes. Because of the mascarpone cream topping, these brownies should always be stored covered in the refrigerator.
Can I freeze tiramisu brownies?
You can freeze the brownie base without the mascarpone topping for up to 2 months. Thaw completely before adding the cream layer and cocoa powder.
What can I use instead of mascarpone cheese?
Full-fat cream cheese is the best substitute for mascarpone. Mix it with a tablespoon of heavy cream for a smoother, more authentic texture.
Can I make tiramisu brownies without alcohol?
Absolutely. Simply leave out the Kahlua or Tia Maria and add a little extra vanilla extract instead.
Key Features
- Ready in under 3 hours including chill time
- No special equipment required beyond a mixer
- Make-ahead friendly, actually better the next day
- Freezer-friendly (freeze without the cocoa dusting)
- Crowd-pleasing enough for dinner parties, easy enough for weeknights
You’ll Also Love
- Classic Fudgy Brownies with Sea Salt
- No-Bake Tiramisu (Traditional Italian Recipe)
- Espresso Chocolate Chip Cookies
- Mascarpone Cheesecake Bars
Conclusion
These tiramisu brownies are one of those recipes that feels like it should be complicated but really isn’t. Once you make them the first time, you’ll have the process down and they’ll become your go-to “I need to bring something impressive” bake. The combination of fudgy espresso brownies and light mascarpone cream is genuinely hard to beat, and every single time I set them out on a table, they’re gone before anything else.
Give them a try this weekend, and let me know in the comments how they turned out. I love hearing what people do with recipes like this, whether you kept it classic or added your own twist.
Happy baking, Linda
Tiramisu Brownies
Rich espresso brownies layered with silky mascarpone cream and finished with cocoa powder for the ultimate tiramisu-inspired dessert.
Ingredients
Brownie Base
- 1 cup unsalted butter
- 2 cups granulated sugar
- 4 large eggs, room temperature
- 2 tsp pure vanilla extract
- 2 tbsp instant espresso powder
- 1 cup all-purpose flour
- 3/4 cup Dutch-process cocoa powder
- 1/2 tsp salt
- 1/2 tsp baking powder
Mascarpone Cream Layer
- 8 oz mascarpone cheese
- 1 cup cold heavy whipping cream
- 1/2 cup powdered sugar
- 1 tsp vanilla extract
- 1 tbsp Kahlua or Tia Maria (optional)
For the Finish
- 2 tbsp Dutch-process cocoa powder
- Optional chocolate-covered espresso beans
Instructions
- Prep the pan Preheat oven to 350°F. Line a 9×13 inch baking pan with parchment paper and lightly grease it with non-stick spray.
- Make the brownie batter Melt butter and whisk in sugar until combined. Add eggs one at a time, then whisk in vanilla and espresso powder. Fold in flour, cocoa powder, salt, and baking powder until just combined.
- Bake the brownies Spread batter evenly into prepared pan and bake for 28 to 32 minutes. A toothpick should come out with moist crumbs, not wet batter.
- Cool completely Allow brownies to cool fully before adding the mascarpone layer. Warm brownies will melt the cream.
- Prepare mascarpone cream Beat mascarpone until smooth. In a separate chilled bowl, whip heavy cream and powdered sugar to medium peaks. Fold whipped cream into mascarpone and stir in vanilla and optional Kahlua.
- Assemble the brownies Spread mascarpone cream evenly over cooled brownies using an offset spatula for a smooth finish.
- Chill Cover loosely and refrigerate for at least 2 hours or overnight to fully set.
- Finish and serve Dust generously with cocoa powder before serving. Slice into squares and serve cold for the best texture.
Notes
Use room temperature eggs and mascarpone for the smoothest texture. Dutch-process cocoa powder gives the brownies a deeper chocolate flavor and darker color. These brownies actually taste even better the next day after chilling overnight. Store covered in the refrigerator for up to 4 days.