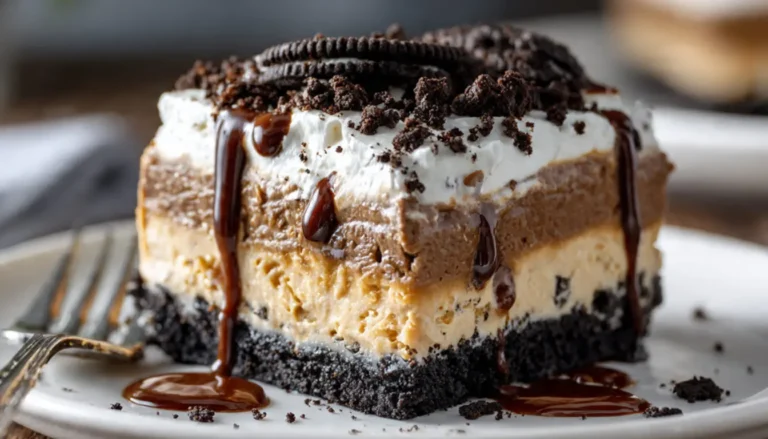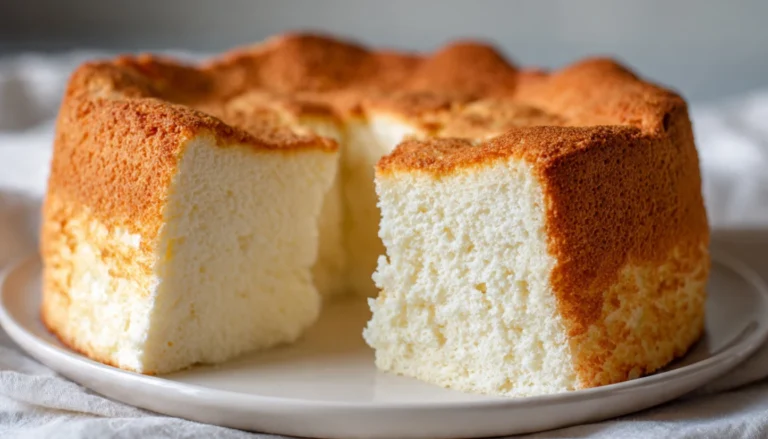
Vanilla Magic Custard Cake Three Layer Slice
The first time I pulled a magic custard cake out of my oven, I honestly thought I’d messed something up. The batter looked impossibly thin when I poured it into my springform pan, and I spent the entire 50-minute bake time convinced I’d wasted a dozen eggs. But here’s the thing: that weird, watery batter transforms into the most incredible three-layered dessert you’ve ever tasted, and it all happens like actual magic while it bakes.
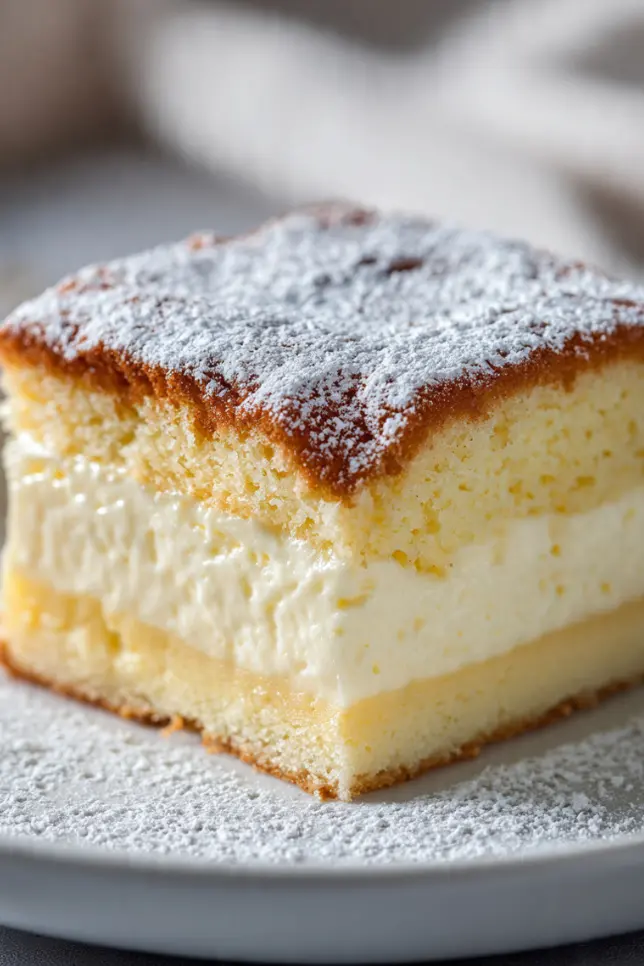
I’ve been making this vanilla magic custard cake for about six years now, ever since a friend served it at a dinner party and refused to tell anyone how she made it. She called it her “secret weapon dessert,” and after one bite, I understood why. The bottom layer is dense and custardy, the middle is impossibly creamy, and the top turns into this light, airy sponge. All from one bowl, one batter. No assembly required.
Essential Ingredients
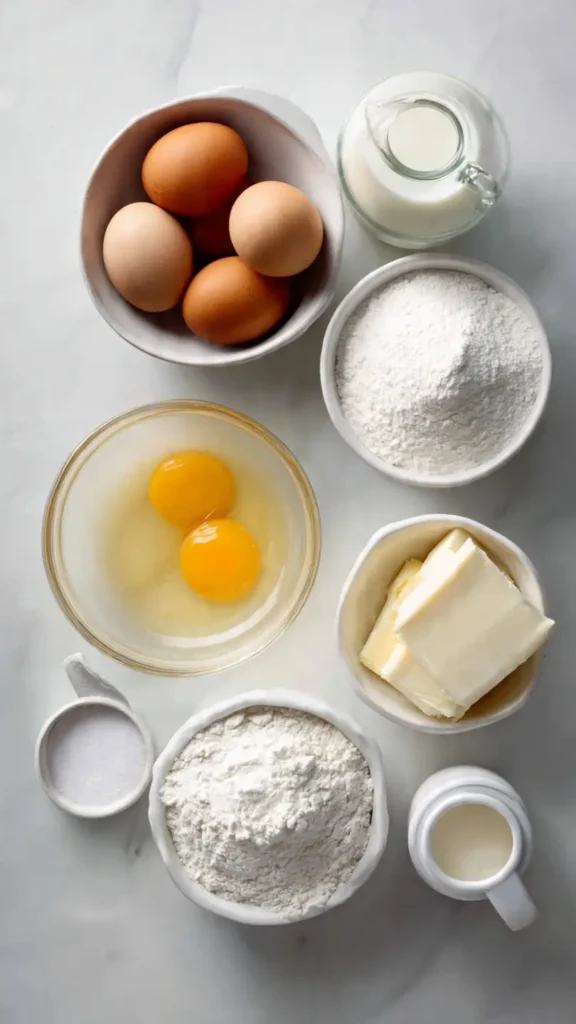
- 4 large eggs, separated and at room temperature
- 3/4 cup granulated sugar
- 1 stick (1/2 cup) unsalted butter, melted and slightly cooled
- 1 tablespoon water
- 2 teaspoons pure vanilla extract
- 3/4 cup all-purpose flour
- 2 cups whole milk, lukewarm (very important)
- 1/4 teaspoon salt
- 1/4 teaspoon cream of tartar
- Powdered sugar for dusting
Alternative Ingredients
If you don’t have cream of tartar on hand, you can substitute 1/2 teaspoon of lemon juice or white vinegar. The acid helps stabilize the egg whites, though cream of tartar works best in my experience.
For the vanilla extract, you could use vanilla bean paste (use 1 tablespoon instead of 2 teaspoons), or if you’re feeling fancy, scrape the seeds from one vanilla bean pod. I’ve made this with imitation vanilla in a pinch, and while it works, the flavor isn’t quite as complex.
You can use 2% milk instead of whole milk, but the custard layer won’t be quite as creamy. I tried this once when I ran out of whole milk, and while the cake still worked, it was noticeably less rich. If you use a non-stick pan instead of a springform pan, just make sure it’s at least 8 inches in diameter and has straight sides.
Some recipes call for adding lemon zest, and I’ve done that variation many times. It’s lovely, but this vanilla version is my go-to because it’s so versatile. You can serve it plain, with berries, with chocolate sauce, pretty much anything.
Step-by-Step Directions
Prep Your Pan and Oven
Preheat your oven to 325°F. This is lower than you might expect, but trust me on this. The slow, gentle heat is what creates those distinct layers. Butter an 8-inch square baking dish or springform pan generously, then line the bottom with parchment paper. I learned this the hard way after my first attempt stuck to the pan so badly I had to serve it in chunks.
Separate Your Eggs
This part is crucial, so pay attention. Separate your eggs while they’re cold from the fridge (it’s easier), but then let the whites come to room temperature for about 30 minutes. Cold egg whites don’t whip up as well. I usually separate my eggs, then prep everything else while they warm up.
Beat the Egg Yolks
In a large bowl (I use my KitchenAid stand mixer for this, but a hand mixer works fine), beat the egg yolks with the sugar until the mixture is pale yellow and creamy, about 2 minutes. You want it to look almost doubled in volume. Add the melted butter, water, and vanilla extract, and beat until combined. The mixture might look a bit separated at this point, but don’t worry.
Add the Flour
Add the flour and salt to the yolk mixture and beat on low speed until just incorporated. Don’t overmix here. You just want to get rid of any flour pockets.
Warm the Milk
Here’s where it gets important. Pour in the lukewarm milk gradually while mixing on low speed. The batter will look incredibly thin and soupy. This freaked me out the first three times I made this cake. You’ll think you did something wrong. You didn’t. This is exactly how it should look. The batter should have the consistency of crepe batter or thin pancake batter.
Whip the Egg Whites
In a separate clean bowl (and this is important; any grease will prevent the whites from whipping), beat the egg whites with the cream of tartar using a hand mixer or stand mixer. Start on medium speed until foamy, then increase to high speed. Beat until stiff peaks form. This should take about 3-4 minutes. You’ll know they’re ready when you can turn the bowl upside down and the whites don’t move. I use a fish spatula to test them because it has a thin edge.
Fold Everything Together
This is the trickiest part, and it took me a few tries to get it right. Add about one-third of the beaten egg whites to the thin yolk mixture. Using a large spatula, fold gently until mostly combined. It won’t fully incorporate, and that’s okay. Add the remaining egg whites and fold very gently, just until you don’t see any more white streaks. The batter will still look thin and a bit lumpy. Stop folding as soon as the whites are incorporated. Overmixing will deflate the whites and ruin the magic.
Bake
Pour the batter into your prepared pan. It should come up about three-quarters of the way. Bake for 50-60 minutes. The top will be golden brown and set, but the cake will jiggle quite a bit when you shake the pan. This is normal. A toothpick inserted in the center won’t come out clean, and that’s also normal. You’re looking for a set top with a wobbly center.
Cool Completely
Let the cake cool in the pan on a wire rack for at least 2 hours, then refrigerate for at least 3 hours or overnight. This is not optional. The layers need time to set properly, and cutting into it too early will give you a soupy mess. I usually make this the night before I need it.
Serve
Run a knife around the edges, then carefully remove from the pan. If using a springform pan, release the sides. Dust generously with powdered sugar right before serving. I keep mine in a meal prep container in the fridge, and it stays perfect for up to 3 days.
Pro Tips
The milk temperature is absolutely critical. I learned this after my second attempt completely failed. The milk needs to be lukewarm, about 100-110°F. Too cold and the butter will seize up into little clumps. Too hot and you’ll start cooking the eggs. I heat mine in the microwave for about 45 seconds, then check with an instant-read thermometer.
When you fold the egg whites into the batter, don’t worry if you see small lumps of egg white. Those little pockets of air are part of what creates the layers. I used to think I needed to fold until everything was perfectly smooth, and my cakes came out with less distinct layers.
Make sure your oven temperature is accurate. I bought an oven thermometer after my third magic custard cake came out with a collapsed center, and I discovered my oven was running 25 degrees hot. These cakes are sensitive to temperature.
Use a pan with straight sides. I tried making this in a regular round cake pan once, and the layers weren’t as distinct because the slanted sides affected how the batter settled.
Don’t skip the parchment paper on the bottom. Even with butter, the bottom layer can stick. The parchment makes removal so much easier.
If you see the top getting too dark before the time is up, tent it loosely with aluminum foil. I keep a piece of foil ready to go, just in case.
FAQs
Why is my magic custard cake batter so thin?
The batter must be thin to create the layered effect during baking.
Why did my cake collapse?
Usually due to weak egg whites or high oven temperature.
Can I add flavors?
Yes, lemon, chocolate, or coffee work beautifully.
Do I need to refrigerate it?
Yes, this step is required for proper texture.
Can I freeze it?
Yes, freeze slices up to 2 months.
Why You’ll Love This Recipe
This is the dessert I make when I want to impress people without actually working that hard. It looks complicated and fancy, but it’s honestly one of the easiest cakes I make. One bowl, standard ingredients, and the oven does all the magic.
The texture combination is incredible. You get three completely different experiences in one bite: creamy custard, silky pudding, and light sponge. It’s like eating three desserts at once.
It’s also incredibly versatile. Serve it plain with powdered sugar, top it with fresh berries, drizzle it with chocolate sauce, or serve it with whipped cream. I’ve done all of these, and I can’t pick a favorite.
Because it needs to chill overnight, it’s a perfect make-ahead dessert for dinner parties. No last-minute stress, and you can prepare it the day before.
What Makes This Recipe Unique
The three-layer effect happens without any assembly or special techniques. You literally pour one batter into a pan, bake it, and it magically separates into three distinct layers based on density. The egg whites float to the top and create the sponge layer, the flour mixture settles in the middle and creates the custard layer, and everything in between becomes this creamy, pudding-like layer.
Unlike most cakes, you don’t need a food processor or any special equipment beyond a mixer. I’ve made this with just a hand mixer and a whisk, though having a stand mixer makes beating the egg whites easier.
The vanilla flavor is pure and simple, which means it pairs with absolutely anything. I’ve served this with everything from strawberry compote to caramel sauce to plain whipped cream, and it works every single time.
Key Features
Make-Ahead Friendly: This cake actually improves after sitting in the fridge overnight. The layers set perfectly, and the flavors develop.
Minimal Equipment: Beyond mixing bowls and a pan, you don’t need any special tools. No piping bags, no cake decorating skills, no complicated assembly.
One Batter, Three Textures: The physics of this cake are fascinating. The different densities naturally separate during baking to create three distinct layers.
Impressive Presentation: When you slice into this and reveal the three layers, people think you’re some kind of baking genius. I love watching faces when I explain it’s all from one batter.
Budget-Friendly: This uses basic pantry ingredients. No expensive extracts, no specialty items. Just eggs, butter, sugar, flour, and milk.
Easily Customizable: The vanilla base takes flavor additions beautifully. I’ve added everything from coffee to coconut to citrus, and it always works.
You’ll Also Love
If you enjoyed this vanilla magic custard cake, you’ll want to try my Classic Crème Brûlée, which has a similar creamy custard texture with a crackling caramelized sugar top. The technique for making the custard is very similar, and if you can make this cake, you can definitely make crème brûlée.
For another impressive but easy dessert, check out French Clafoutis, a rustic custard cake studded with fruit. It has that same magical quality where a simple batter transforms into something special in the oven.
And if you love the three-layer effect, you have to try Tres Leches Cake, though it achieves its layers through soaking rather than baking. It’s another make-ahead dessert that gets better overnight.
Conclusion
I’ve made this vanilla magic custard cake dozens of times over the years, and it never stops feeling a little bit magical. There’s something so satisfying about pouring that impossibly thin batter into the pan, sliding it into the oven, and knowing that in an hour, it’s going to emerge as this gorgeous three-layered dessert.
The first few times you make this, you might feel nervous when you see how thin the batter is, or how much the cake jiggles when it comes out of the oven. That’s normal. Trust the process. Let it cool completely, refrigerate it overnight, and when you slice into it the next day, you’ll see those perfect three layers.
I keep coming back to this recipe because it’s so reliable. It works every single time as long as you follow the basics: room temperature egg whites, lukewarm milk, gentle folding, and patience while it chills. Beyond that, it’s surprisingly forgiving.
Whether you’re making this for a special occasion or just because you want something sweet and impressive, this magic custard cake delivers. And when people ask how you made it, you can smile mysteriously and say it’s magic. Because honestly, it kind of is.
Pin this recipe for later, and let me know in the comments if you try it. I’d love to hear which topping you choose!
Vanilla Magic Custard Cake
A magical one-batter cake that separates into three distinct layers during baking
Ingredients
- 4 large eggs, separated and at room temperature
- 3/4 cup granulated sugar
- 1/2 cup unsalted butter, melted and slightly cooled
- 1 tbsp water
- 2 tsp pure vanilla extract
- 3/4 cup all-purpose flour
- 2 cups whole milk, lukewarm
- 1/4 tsp salt
- 1/4 tsp cream of tartar
- Powdered sugar for dusting
Instructions
- Prep pan and oven Preheat oven to 325F. Butter an 8-inch square baking dish or springform pan generously, then line the bottom with parchment paper.
- Separate eggs Separate eggs while cold, then let egg whites come to room temperature for about 30 minutes.
- Beat egg yolks Beat egg yolks with sugar until pale yellow and creamy, about 2 minutes. Add melted butter, water, and vanilla extract, and beat until combined.
- Add flour Add flour and salt to the yolk mixture and beat on low speed until just incorporated.
- Add milk Pour in lukewarm milk gradually while mixing on low speed. The batter will look very thin like crepe batter. This is normal.
- Whip egg whites In a clean bowl, beat egg whites with cream of tartar. Start on medium speed until foamy, then increase to high. Beat until stiff peaks form, about 3-4 minutes.
- Fold together Add one-third of beaten egg whites to thin yolk mixture and fold gently. Add remaining whites and fold just until no white streaks remain. Don’t overmix.
- Bake Pour batter into prepared pan. Bake for 50-60 minutes until top is golden brown and set, but cake still jiggles when shaken. This is normal.
- Cool completely Let cake cool in pan on wire rack for at least 2 hours, then refrigerate for at least 3 hours or overnight. The layers need time to set properly.
- Serve Run a knife around edges and remove from pan. Dust generously with powdered sugar right before serving. Store leftovers in the refrigerator for up to 3 days.
Pro Tips
The milk temperature is critical: it should be lukewarm (100-110F). Too cold and the butter will seize; too hot and you’ll cook the eggs. Use an instant-read thermometer for best results. Don’t worry about small lumps of egg white in the batter; they help create the layers. Make sure your oven temperature is accurate with an oven thermometer. The cake will be very jiggly when it comes out; this is normal and essential for the three-layer effect.