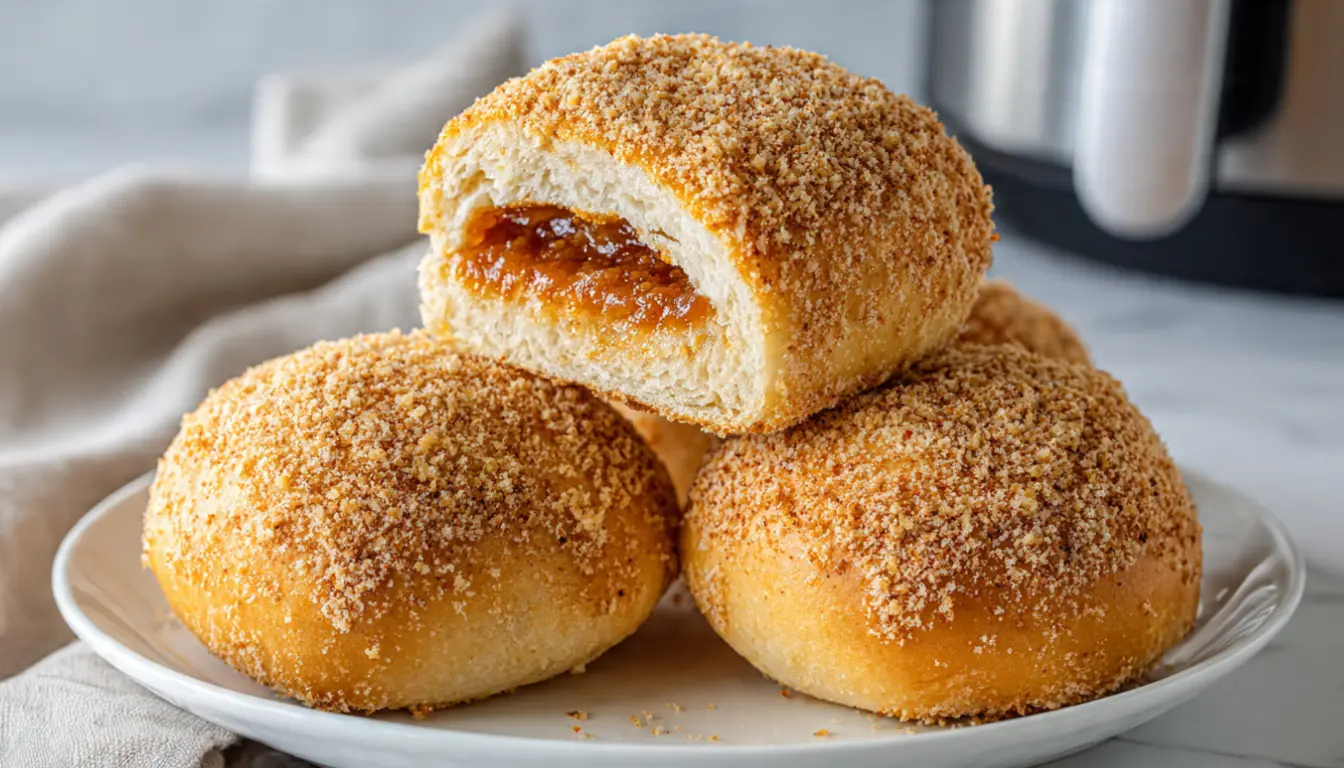
Air Fryer Spanish Bread Recipe: The Filipino Sweet Treat That Changed My Breakfast Game
I’ll never forget the first time I tried Spanish bread at a Filipino bakery in San Francisco. The sweet, buttery filling wrapped in that soft, slightly crispy exterior had me hooked instantly. Making traditional Spanish bread in my conventional oven felt like too much work, so I tested my air fryer, and it completely changed my approach to baking.
The air fryer creates the perfect environment for Spanish bread. You get that beautiful golden-brown exterior without heating up your entire kitchen. I’ve been making these every Sunday for three years, and once you nail the technique, you can prep a batch for the whole week in under an hour.
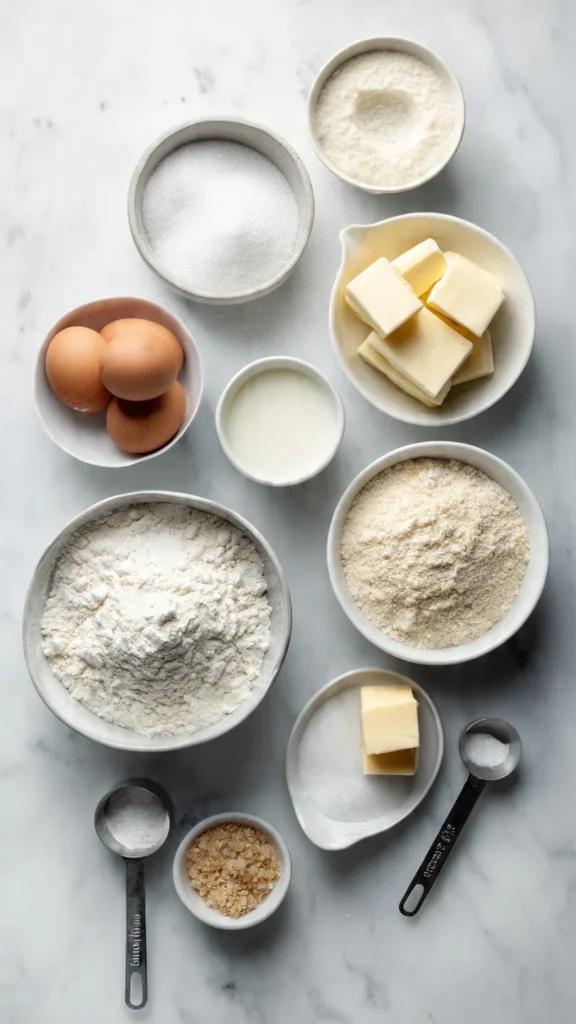
Essential Ingredients
For the Dough:
- 3 cups all-purpose flour
- 1/4 cup granulated sugar
- 1 packet (2 1/4 tsp) active dry yeast
- 1 teaspoon salt
- 3/4 cup warm milk (110°F)
- 1/4 cup warm water
- 1/4 cup unsalted butter, softened
- 1 large egg
For the Filling:
- 1/2 cup unsalted butter, softened
- 3/4 cup brown sugar
- 1/2 cup all-purpose flour
For Topping:
- 1/4 cup melted butter
- 1/2 cup breadcrumbs
Alternative Ingredients
If you’re missing some ingredients or want to customize, here are my tried-and-true substitutions. I use my stand mixer for this recipe, but a food processor works just as well for mixing the dough. You can even mix by hand if you’ve got the arm strength and patience.
Dairy-Free Version: Replace the milk with unsweetened almond milk or oat milk. I’ve tested both, and oat milk gives you the closest texture to traditional Spanish bread.
Sugar Alternatives: You can use coconut sugar instead of brown sugar for the filling. It creates a slightly different flavor profile, almost caramel-like, which I actually prefer sometimes.
Gluten-Free Option: This one’s trickier. I’ve experimented with gluten-free flour blends, and while you can make it work, the texture won’t be quite the same. Use a 1:1 gluten-free baking flour and add 1 teaspoon of xanthan gum if it’s not already in your blend.
Step-by-Step Directions
Step 1: Activate Your Yeast
Mix the warm milk, warm water, and a pinch of your sugar in a bowl. Sprinkle the yeast on top and let it sit for about 5-10 minutes. You’re looking for it to get foamy. If it doesn’t foam, your yeast is dead, and you’ll need to start over with fresh yeast. Trust me, I learned this the hard way once.
Step 2: Make the Dough
In a large mixing bowl (or your stand mixer bowl), combine flour, remaining sugar, and salt. Add the yeast mixture, softened butter, and egg. Mix until a shaggy dough forms. Then knead for about 8-10 minutes by hand, or 5-6 minutes with a dough hook attachment on your mixer. The dough should be smooth and elastic, slightly sticky but not wet.
Here’s a tip I wish someone had told me earlier: don’t add extra flour too quickly if the dough feels sticky. Let it knead for a few minutes first. The gluten development will change the texture, and you might not need that extra flour after all.
Step 3: First Rise
Place the dough in a lightly oiled bowl, cover it with a damp kitchen towel, and let it rise in a warm spot for about 1 hour or until it doubles in size. I usually stick mine in the oven with just the light on. It creates the perfect warm environment.
Step 4: Prepare the Filling
While the dough is rising, make your filling. Beat the softened butter with brown sugar until it’s well combined and creamy. Add the flour and mix until it forms a spreadable paste. This is what makes Spanish bread special. The filling caramelizes slightly when you bake it, creating those sweet pockets that everyone loves.
Step 5: Shape the Rolls
Once your dough has doubled, punch it down (this is therapeutic, by the way) and divide it into 12 equal pieces. Roll each piece into a rectangle, about 4×6 inches. Spread about 1-2 tablespoons of filling onto each rectangle, then roll it up tightly like a jelly roll.
Step 6: Coat with Breadcrumbs
Brush each roll with melted butter, then roll it in breadcrumbs. This creates that signature Spanish bread exterior. I’ve found that using panko breadcrumbs instead of regular ones gives you an extra crispy finish, but either works.
Step 7: Second Rise
Place the shaped rolls on a baking sheet lined with parchment paper. Cover them loosely and let them rise for another 30 minutes. They should puff up noticeably.
Step 8: Air Fry
Here’s where your air fryer really shines. Preheat it to 320°F. Working in batches (don’t overcrowd), place the rolls in your air fryer basket. I line mine with parchment paper to prevent sticking, but make sure to poke holes in the paper for air circulation.
Air fry for 12-15 minutes, flipping halfway through. You want them golden brown and slightly crispy on the outside. The exact time will depend on your air fryer model. I have a 6-quart air fryer, and 13 minutes is usually perfect for me.
Step 9: Cool and Serve
Let them cool for about 5 minutes before eating. I know it’s tempting to dive in immediately (I still burn my mouth sometimes), but letting them rest helps the filling set slightly.
Pro Tips
Tip #1: Temperature Matters
When working with yeast, temperature is everything. Your liquids should be around 110°F. Too hot, and you’ll kill the yeast. Too cold, and it won’t activate properly. I finally invested in an instant-read thermometer, and it’s made a huge difference in my bread baking consistency.
Tip #2: Meal Prep Like a Pro
I make a double batch every Sunday and freeze half. Once the rolls are shaped and coated with breadcrumbs, I freeze them on a baking sheet. Once frozen solid, I transfer them to freezer bags. They keep for up to 3 months. When you want fresh Spanish bread, just let them thaw and rise for about an hour, then air fry as usual.
Tip #3: The Best Air Fryer Settings
Not all air fryers are created equal. I’ve tested this recipe in three different models. If your air fryer runs hot, start checking at 10 minutes. If it’s a smaller capacity air fryer, you might need to adjust the temperature down to 300°F and add a couple of minutes to the cooking time.
Tip #4: Don’t Skip the Second Rise
I used to rush this step when I first started making Spanish bread, and the rolls always turned out dense. That second rise is crucial for getting light, fluffy bread. Give your dough the time it needs.
FAQs
Can I make Spanish bread without an air fryer?
Yes, bake in a preheated oven at 350°F for 15 to 18 minutes until golden brown.
How do I know when Spanish bread is done?
The bread should be golden brown outside and reach an internal temperature of about 190°F.
Can I use instant yeast instead of active dry yeast?
Yes, you can skip the activation step and mix it directly with the dry ingredients.
Why is my filling leaking out?
This happens if the rolls are overfilled or not sealed tightly. Use less filling and pinch edges well.
How should I store leftover Spanish bread?
Store in an airtight container for 2 to 3 days or freeze for up to 3 months.
Recipe Info Table
| Category | Details |
|---|---|
| Prep Time | 30 minutes |
| Rising Time | 1 hour 30 minutes |
| Cook Time | 15 minutes |
| Total Time | 2 hours 15 minutes |
| Servings | 12 rolls |
| Yield | 12 Spanish bread rolls |
Why You’ll Love This Recipe
If you’re into meal prep, this recipe is going to become your best friend. I make a big batch every weekend, and it solves my breakfast situation for days. The air fryer method means you’re not heating up your whole kitchen, which is a game-changer during summer months.
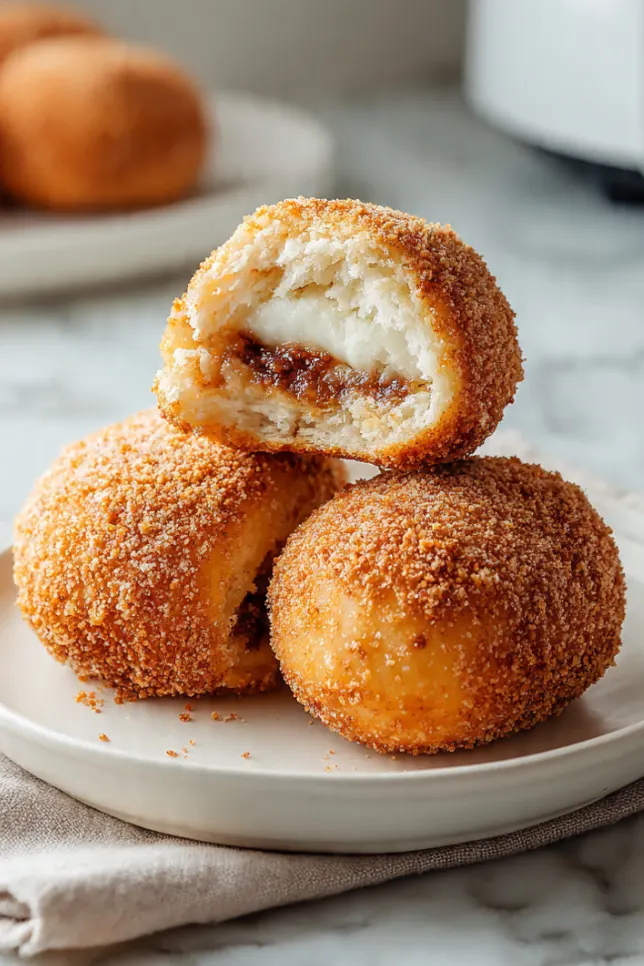
The texture is what really gets me. That crispy, breadcrumb-coated exterior gives way to the softest, pillowy bread with pockets of sweet, buttery filling. It’s like a hug in bread form. And unlike store-bought versions, you control the sugar level. I’ve cut it down by a third, and they still taste incredible.
What Makes This Recipe Unique
Traditional Spanish bread is baked in large batches in commercial ovens. Adapting it for the air fryer took me a few tries to get right. The smaller cooking space actually works in your favor here. The circulating hot air creates an even browning that’s hard to achieve in a conventional oven unless you’ve got a really good convection setting.
This recipe also uses a slightly enriched dough compared to what you’d find in most Filipino bakeries. I’ve added a bit more butter to the dough itself, which keeps the bread soft even the next day. Most bakery versions get hard quickly, but these stay tender.
Key Features
Perfect for Beginners: The dough is forgiving, and the air fryer takes away the guesswork of oven baking.
Budget-Friendly: All basic ingredients you probably already have. No special Filipino ingredients required.
Customizable: Once you master the basic recipe, you can experiment with different fillings. I’ve done chocolate hazelnut, cheese, and even a ube version.
Freezer-Friendly: Make ahead and freeze for up to 3 months. Perfect for those mornings when you need something quick.
Nutrition Facts Table
Per roll (1/12 of recipe)
| Nutrient | Amount |
|---|---|
| Calories | 285 |
| Total Fat | 12g |
| Saturated Fat | 7g |
| Cholesterol | 45mg |
| Sodium | 210mg |
| Total Carbohydrates | 39g |
| Dietary Fiber | 1g |
| Sugars | 14g |
| Protein | 5g |
Note: Nutrition information is approximate and may vary based on specific ingredients used.
You’ll Also Love
If Spanish bread is your thing, try my Pandesal Rolls in the Air Fryer. They’re another Filipino favorite that works beautifully with this cooking method. I also have a Cheese-Filled Ensaymada recipe that uses a similar dough base but with a completely different topping.
For something different but equally satisfying, my Air Fryer Cinnamon Rolls use the same technique but with a cinnamon filling instead. And if you’re really into bread baking, my No-Knead Focaccia is basically foolproof and requires way less hands-on time.
Conclusion
Spanish bread was one of those recipes I thought I’d never be able to make at home. It seemed too complicated, too time-consuming, too much effort for something I could just buy at the bakery. But the air fryer changed everything. Now I can make fresh Spanish bread anytime I want, and honestly, it tastes better than most bakery versions I’ve tried.
The first batch might take you a little longer as you get used to the process, but by your second or third attempt, you’ll have it down to a science. And there’s something incredibly satisfying about pulling those golden, crispy rolls out of your air fryer, knowing you made them from scratch.
Give this recipe a try. Start with a half batch if you’re nervous about committing to 12 rolls. But I’m willing to bet you’ll wish you’d made more. These disappear fast in my house. Like, suspiciously fast. I’m pretty sure my kids have been sneaking them for midnight snacks, but I can’t really blame them.
Air Fryer Spanish Bread
Soft Filipino sweet bread with buttery filling and crispy coating made easily in the air fryer.
Ingredients
- 3 cups flour
- 1/4 cup sugar
- 1 packet yeast
- 1 tsp salt
- 3/4 cup milk
- 1/4 cup water
- 1/4 cup butter
- 1 egg
Instructions
- Activate yeast
- Make dough
- Let rise
- Prepare filling
- Shape rolls
- Coat and rise again
- Air fry until golden