Easy Chocolate Cheesecake Recipe That Actually Works Every Time
If you’ve ever pulled a cracked, sunken cheesecake out of the oven and just stood there in the kitchen feeling defeated, this one’s for you. I’ve been there more times than I’d like to admit. My first three cheesecakes were basically chocolate-flavored disasters. The fourth one? Pure magic. And honestly, the difference came down to a few small things I’m going to share with you today.
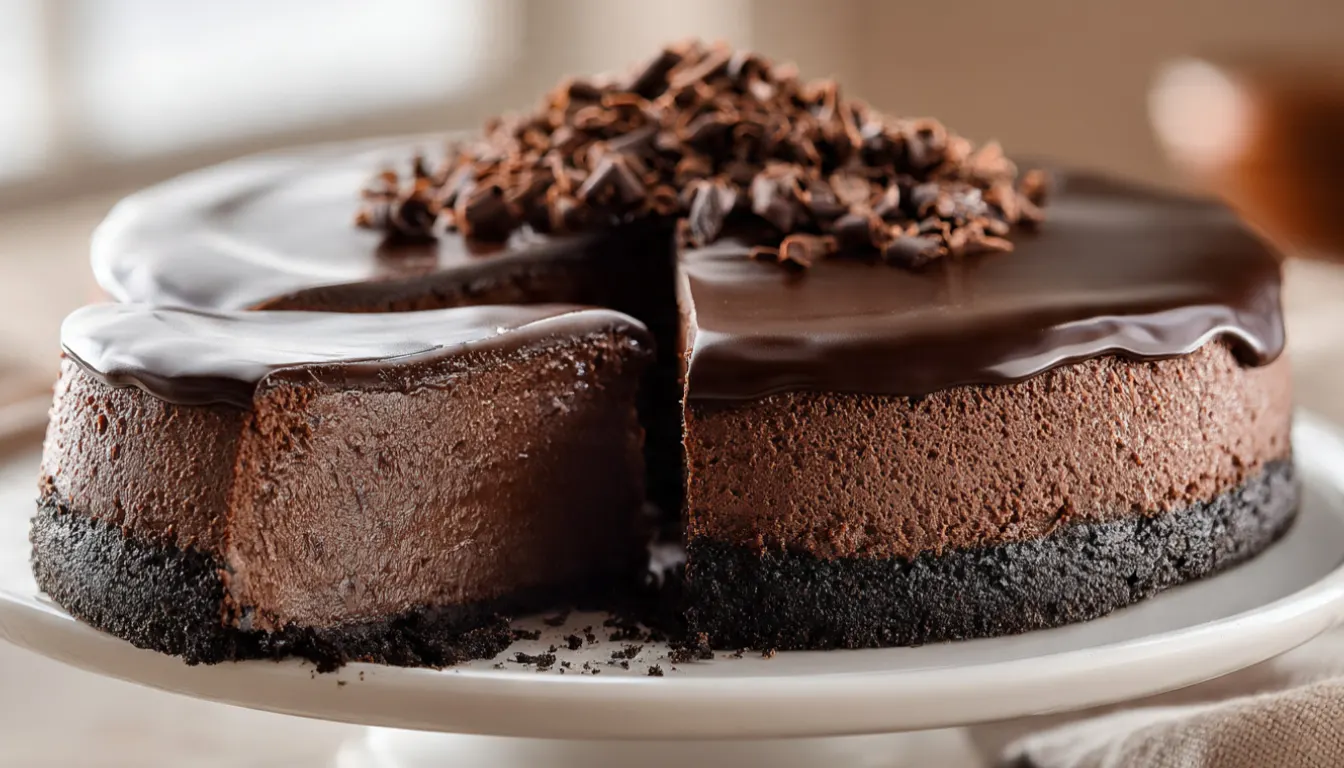
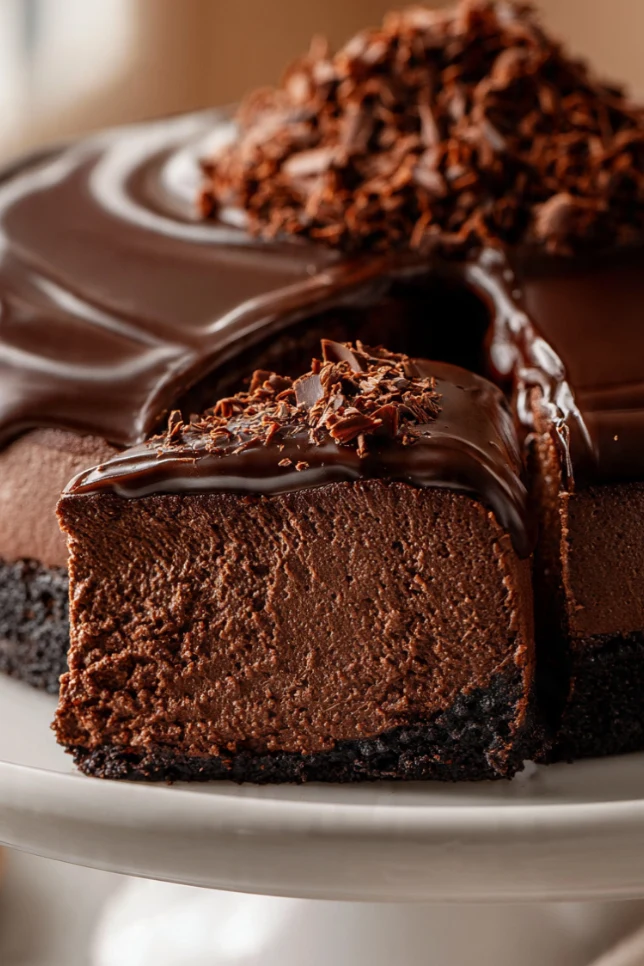
This easy chocolate cheesecake is rich, creamy, deeply chocolatey, and genuinely no-fuss once you know the tricks. No water bath drama. No mysterious cracking. Just a beautiful, dense, velvety cheesecake that looks like it came from a high-end bakery. I’ve made this recipe probably 40 or 50 times over the past decade, and it’s the one I reach for every birthday, every holiday, every “I just need chocolate” situation.
Why You’ll Love This Recipe
This chocolate cheesecake is the kind of dessert people talk about long after dinner is over. It’s not complicated, it doesn’t require a stand mixer (though my KitchenAid makes it even easier), and the ingredients are things you can grab at any grocery store. You get that deep, bittersweet chocolate flavor paired with the tangy richness of cream cheese, all sitting on a buttery chocolate cookie crust. It’s indulgent without being overwhelming. And because it chills overnight, you can make it a full day ahead, which is a lifesaver when you’re hosting.
What Makes This Recipe Unique
Most chocolate cheesecake recipes either use melted chocolate or cocoa powder. This one uses both. That combination gives you a much more complex chocolate flavor than using either one alone. The melted dark chocolate adds richness and depth, while the Dutch-process cocoa powder adds that slightly intense, almost smoky chocolate note. I learned this trick from a pastry chef friend years ago and I’ve never gone back to single-source chocolate cheesecakes since.
Key Features
- No water bath required
- Uses both melted chocolate and cocoa powder for deep flavor
- Make-ahead friendly (keeps for 5 days in the fridge)
- Works with a food processor or zip bag for the crust
- Easily adapted for a no-bake version (see tips below)
Essential Ingredients
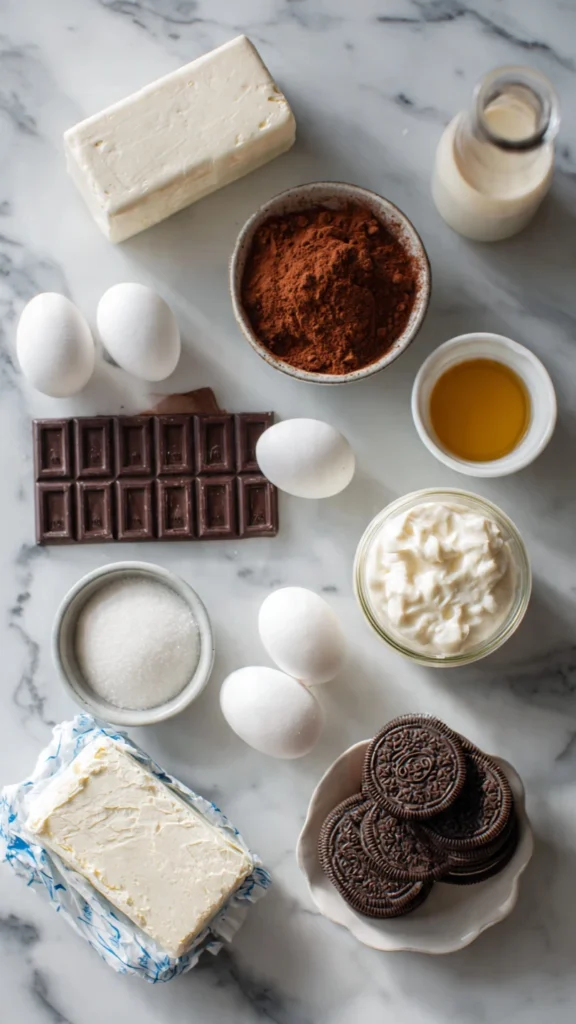
For the Chocolate Cookie Crust:
- 2 cups Oreo cookie crumbs (about 22 cookies, filling included)
- 5 tablespoons unsalted butter, melted
- 1 tablespoon granulated sugar
For the Chocolate Cheesecake Filling:
- 4 blocks (32 oz total) full-fat cream cheese, softened to room temperature
- 1 cup granulated sugar
- 1/4 cup Dutch-process cocoa powder
- 6 oz good-quality dark chocolate (70% cacao), melted and slightly cooled
- 3 large eggs, room temperature
- 1/2 cup full-fat sour cream
- 1 teaspoon pure vanilla extract
- 1/4 teaspoon fine sea salt
For the Chocolate Ganache Topping (optional but highly recommended):
- 4 oz dark chocolate, finely chopped
- 1/2 cup heavy cream
Alternative Ingredients
No Oreos? Regular graham crackers work well for the crust. Just add 2 tablespoons of cocoa powder to keep some chocolate flavor in there. For the filling, you can use reduced-fat cream cheese in a pinch, but the texture will be slightly less dense and creamy. I’ve done it when that was all the store had, and it still tasted great, just a little different. If you can’t find Dutch-process cocoa, regular unsweetened cocoa works too. The flavor will be slightly lighter. For dairy-free, I’ve tested this with vegan cream cheese and it does work, though you’ll need to add an extra tablespoon of cornstarch to help it set properly since vegan cream cheese has more moisture.
Tools That Make This Easier
You don’t need a ton of equipment for this, but a few things make the process much smoother. A 9-inch springform pan is non-negotiable here. If you bake cheesecakes more than once a year, invest in a good one. I use a Wilton brand and it’s held up for years. A hand mixer or stand mixer (I use my KitchenAid) makes the filling silky without overworking it. If you’re crushing Oreos by hand, a heavy-duty zip bag and a rolling pin work just fine. A fine mesh strainer is helpful if you want to sift the cocoa powder so it blends evenly. And a good instant-read thermometer can tell you when the center of your cheesecake is done without guessing (you want it around 150°F in the center).
For melting the chocolate, I use a double boiler, but a microwave-safe bowl in 30-second intervals works perfectly well. Just don’t rush it.
Step-by-Step Directions
Step 1: Prepare Your Pan and Oven
Preheat your oven to 325°F. Lightly grease the inside of your 9-inch springform pan with butter or non-stick spray. Line the bottom with a circle of parchment paper. This makes removal so much easier later.
Step 2: Make the Crust
Pulse the Oreos in a food processor until you have fine crumbs. (No food processor? Put them in a zip bag and roll with a heavy rolling pin.) Mix the crumbs with melted butter and sugar until it looks like wet sand. Press firmly into the bottom of your prepared pan and about 1 inch up the sides. Use the flat bottom of a measuring cup to press it evenly. Bake for 8 minutes, then set aside to cool.
Step 3: Melt the Chocolate
Chop your dark chocolate finely and melt it in a double boiler or microwave in 30-second bursts, stirring between each. Set it aside to cool for about 10 minutes. You want it fluid but not hot when it hits the cream cheese.
Step 4: Make the Filling
Beat the softened cream cheese on medium speed until completely smooth, about 2 to 3 minutes. Scrape down the sides of the bowl. Add the sugar and cocoa powder and beat again until combined. Add the melted chocolate and mix until smooth. Add the eggs one at a time on low speed, mixing just until each one disappears into the batter. Overmixing after the eggs go in is one of the biggest causes of cracking, so go slow here. Fold in the sour cream, vanilla, and salt with a spatula.
Step 5: Bake It
Pour the filling over the cooled crust. Smooth the top. Bake at 325°F for 50 to 55 minutes. The edges should look set and the center should still have a slight wobble when you gently shake the pan. Turn off the oven, crack the door open about an inch, and let the cheesecake sit in there for 1 hour. This slow cooling is what prevents the big ugly cracks.
Step 6: Chill
Once it’s cooled to room temperature, cover loosely with plastic wrap and refrigerate for at least 4 hours. Overnight is better. Don’t skip this step. The texture changes completely after a full chill.
Step 7: Make the Ganache (Optional)
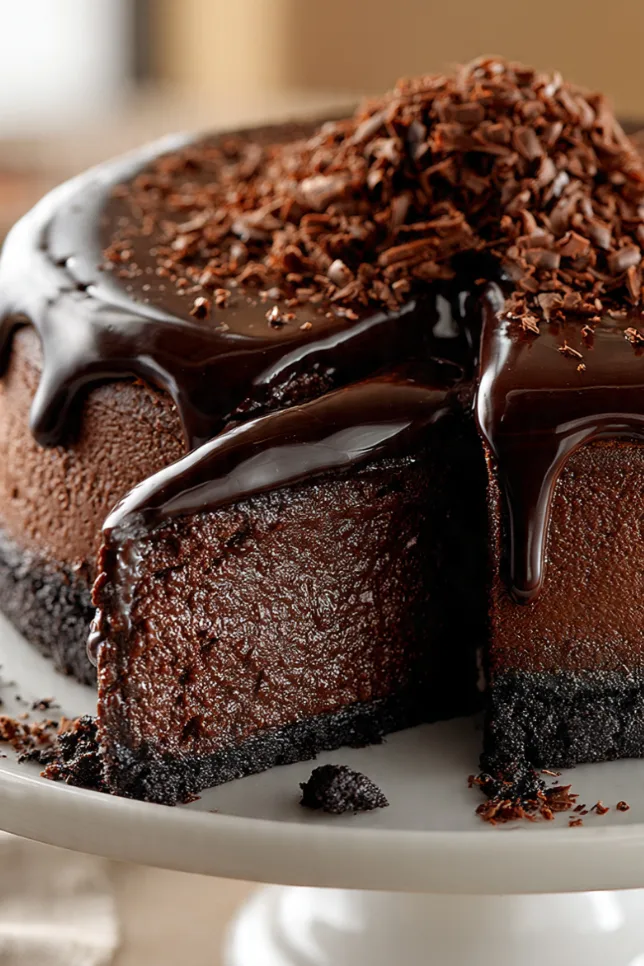
Heat the heavy cream in a small saucepan over medium heat until it just starts to simmer. Pour it over the chopped chocolate in a bowl. Let it sit for 2 minutes, then stir from the center out until glossy and smooth. Pour over the chilled cheesecake and let it set for 30 minutes in the fridge before slicing.
Pro Tips
Room temperature ingredients are not optional. Cold cream cheese will leave lumps no matter how long you mix it. Pull everything out of the fridge at least 2 hours before you start. I’ve rushed this before and regretted it every time.
Don’t skip the slow oven cool-down. Cheesecake cracks when it goes from hot to cold too fast. That one-hour rest in the cracked oven is doing more work than it looks like.
Use good chocolate. The quality of your dark chocolate matters a lot in this recipe since it’s such a prominent flavor. I like Ghirardelli 70% or Lindt Excellence. Both are easy to find and make a noticeable difference compared to baking chips.
Wrap your springform pan in foil even without a water bath. It protects the bottom from any leaks and gives more even heat distribution.
For clean slices, run your knife under hot water and wipe it between each cut. This gives you those clean, sharp slices that look great on a plate.
Frequently Asked Questions
Can I make this chocolate cheesecake without a water bath?
Yes. This recipe is specifically designed to bake beautifully without a water bath as long as you cool it slowly in the oven after baking.
Why did my cheesecake crack?
Cheesecakes usually crack from overmixing after adding eggs, baking at too high a temperature, or cooling too quickly. Mixing on low speed and letting it cool slowly helps prevent cracks.
Can I freeze chocolate cheesecake?
Absolutely. Wrap slices tightly in plastic wrap and foil, then freeze for up to 2 months. Thaw overnight in the refrigerator before serving.
Can I use milk chocolate instead of dark chocolate?
Yes, but the cheesecake will taste sweeter and less intense. Reduce the added sugar slightly to balance the flavor.
How long does chocolate cheesecake last in the fridge?
Stored in an airtight container, this cheesecake stays fresh in the refrigerator for up to 5 days.
Can I make this cheesecake ahead of time?
Yes. Chocolate cheesecake is actually better when made a day ahead because the texture becomes even creamier after chilling overnight.
Nutrition Facts (Per Slice, Based on 12 Servings)
| Nutrient | Amount |
|---|---|
| Calories | 520 |
| Total Fat | 38g |
| Saturated Fat | 22g |
| Cholesterol | 130mg |
| Sodium | 310mg |
| Total Carbohydrates | 40g |
| Dietary Fiber | 2g |
| Total Sugars | 29g |
| Protein | 8g |
| Calcium | 90mg |
| Iron | 3mg |
Nutrition is estimated and will vary based on specific brands and ingredient choices.
Mistakes I Used to Make (And You Don’t Have To)
For a long time, I thought a cracked cheesecake meant I failed. I’d try to patch it with sour cream or cover it with whipped cream and hope nobody noticed. What I didn’t realize was that almost all my cracks came from one thing: I was mixing on high speed after adding the eggs. The aeration from fast mixing creates tiny air bubbles that expand in the oven and then collapse as it cools. Low and slow after the eggs go in makes all the difference. Also, I used to pull the cheesecake straight from the oven to the counter. Please don’t do that. The oven rest is genuinely important.
You’ll Also Love
- No-Bake Oreo Cheesecake – same creamy richness, zero oven time
- Classic New York Style Cheesecake – the original for cheesecake lovers
- Chocolate Lava Cake – when you need chocolate fast (ready in 15 minutes)
- Chocolate Mousse Cake – lighter texture, equally impressive
- Keto Cheesecake with Almond Crust – low-carb version that doesn’t taste like a compromise
Conclusion
Chocolate cheesecake has a way of making people feel celebrated. There’s something about that deep chocolate flavor and that dense, creamy texture that feels genuinely special, even when the recipe itself is straightforward. Once you nail the basics (room temperature ingredients, low-speed mixing after the eggs, slow oven cool-down), this becomes one of those recipes you make on autopilot and people act like you spent all day on it.
Make the ganache topping. It takes 5 minutes and it takes the whole thing up a level. You deserve that extra 5 minutes.
If you make this, I’d love to know how it turned out. Drop a comment below or tag us on Instagram. And if you’re new here at Bees Recipes, welcome. There’s plenty more where this came from.
Happy baking, Linda
Easy Chocolate Cheesecake
A rich and creamy chocolate cheesecake with a buttery Oreo crust and silky ganache topping. No water bath required and guaranteed to impress every single time.
Ingredients
Chocolate Cookie Crust
- 2 cups Oreo cookie crumbs
- 5 tbsp unsalted butter, melted
- 1 tbsp granulated sugar
Chocolate Cheesecake Filling
- 32 oz full-fat cream cheese, softened
- 1 cup granulated sugar
- 1/4 cup Dutch-process cocoa powder
- 6 oz dark chocolate, melted
- 3 large eggs, room temperature
- 1/2 cup full-fat sour cream
- 1 tsp pure vanilla extract
- 1/4 tsp fine sea salt
Chocolate Ganache
- 4 oz dark chocolate, finely chopped
- 1/2 cup heavy cream
Instructions
- Prepare the pan and oven Preheat oven to 325°F. Lightly grease a 9-inch springform pan and line the bottom with parchment paper.
- Make the crust Combine Oreo crumbs, melted butter, and sugar until evenly coated. Press firmly into the bottom and slightly up the sides of the pan. Bake for 8 minutes and cool completely.
- Melt the chocolate Melt dark chocolate in a microwave-safe bowl using 30-second intervals or over a double boiler. Stir until smooth and let cool slightly.
- Prepare the filling Beat softened cream cheese until silky smooth. Add sugar and cocoa powder and mix until combined. Blend in melted chocolate. Add eggs one at a time on low speed. Fold in sour cream, vanilla, and sea salt.
- Bake the cheesecake Pour filling over crust and smooth the top. Bake 50 to 55 minutes until the edges are set but the center still slightly jiggles.
- Cool slowly Turn off the oven and crack the oven door open slightly. Let cheesecake rest inside for 1 hour to prevent cracking.
- Chill thoroughly Cool to room temperature, cover loosely, and refrigerate at least 4 hours or overnight for the best texture.
- Make the ganache topping Heat cream until just simmering and pour over chopped chocolate. Let sit 2 minutes, then stir until smooth and glossy. Spread over chilled cheesecake.
Notes
Room temperature ingredients are essential for a smooth cheesecake filling. Avoid overmixing once the eggs are added or cracks can form during baking. For perfectly clean slices, run a sharp knife under hot water and wipe it dry between cuts. Cheesecake keeps well in the fridge for up to 5 days and freezes beautifully for up to 2 months.