Mini Chicken Pot Pies: Flaky, Creamy, and Baked Right in a Muffin Tin
The first time I made chicken pot pie for my family, I used a big deep dish, a homemade crust, and about three hours of my Sunday. It was delicious. It also collapsed into a soupy mess the second I cut into it, and my youngest asked if it was “chicken soup with a hat.” Fair enough.
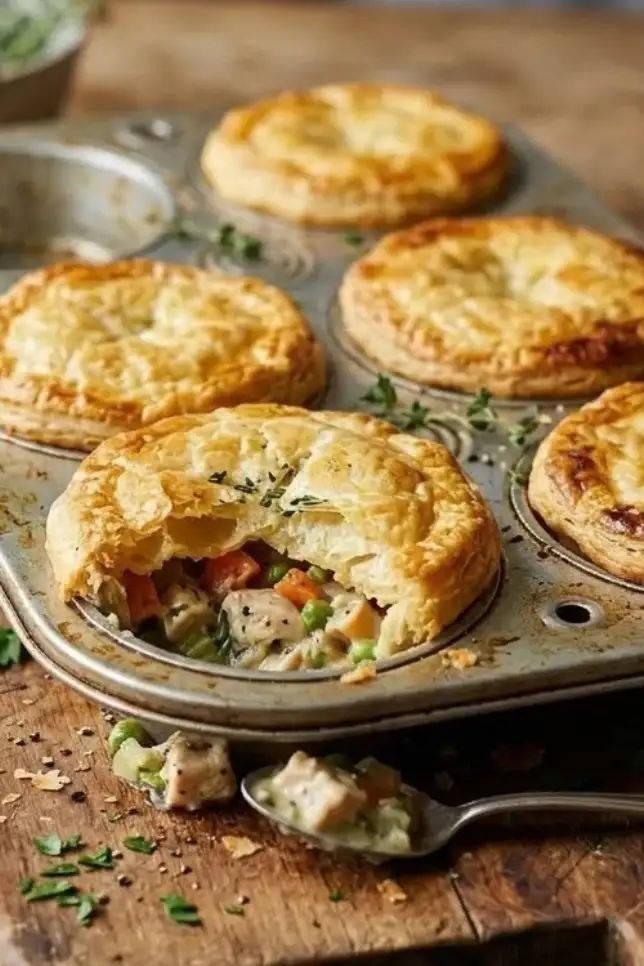
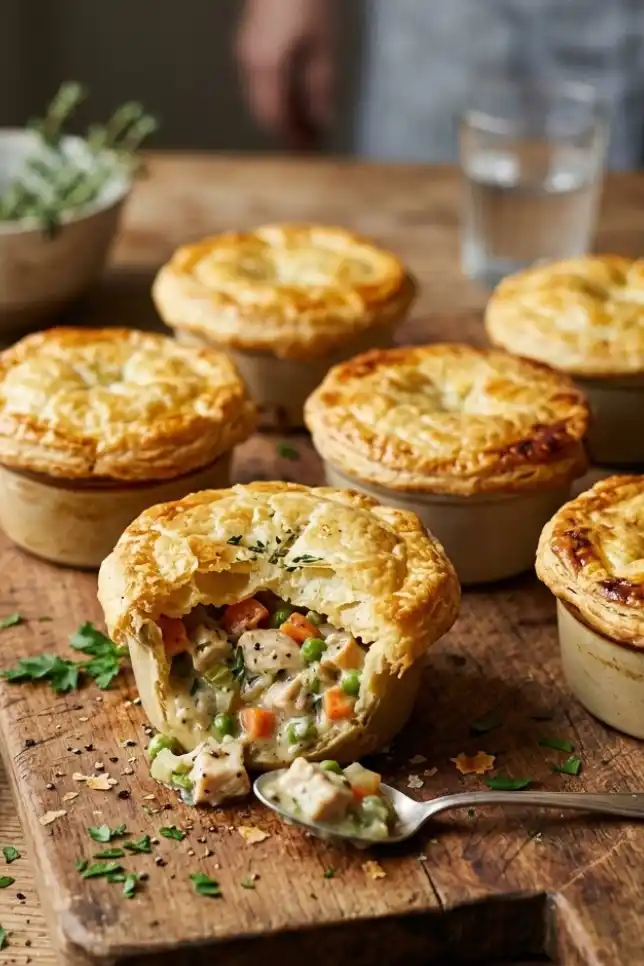
After 10 years of recipe testing, I can tell you the fix wasn’t a better crust. It was a smaller pie. These Mini Chicken Pot Pies bake in a regular nonstick muffin pan, hold their shape every single time, and come out of the oven golden, flaky, and bubbling with a creamy filling. They’re perfect for busy weeknights, kids’ lunches, and honestly some of the easiest freezer meal prep I’ve ever done.
If you love handheld comfort food, you might also like my ham and cheese puff pastry. It’s the same buttery, flaky idea with a totally different filling.
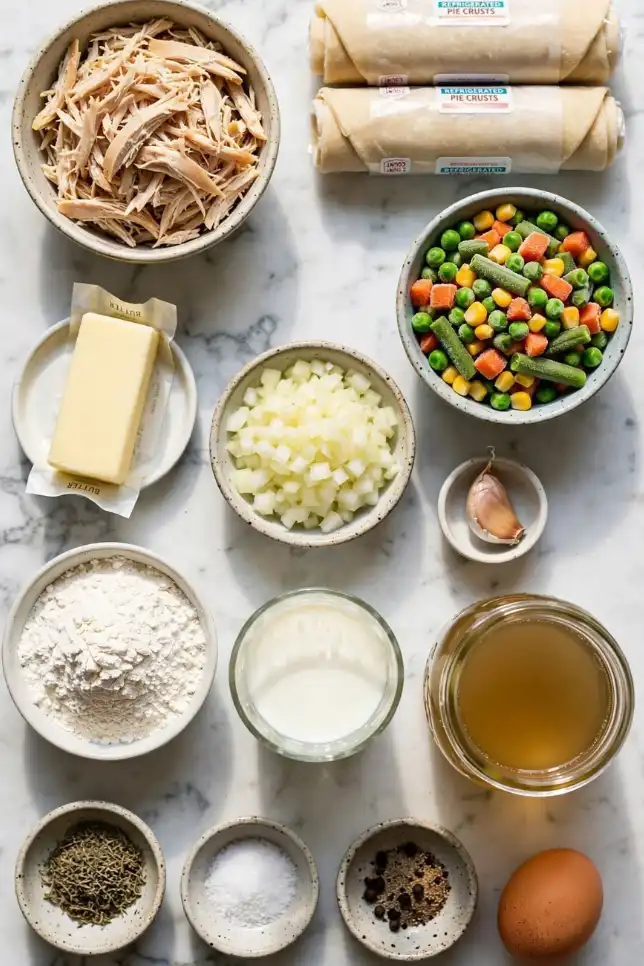
Essential Ingredients
- 2 refrigerated pie crusts (14.1 oz box, like Pillsbury)
- 2 cups cooked chicken, shredded or diced (rotisserie chicken works great)
- 2 tablespoons unsalted butter
- 1/2 small yellow onion, finely diced
- 1 clove garlic, minced
- 1 1/2 cups frozen mixed vegetables (peas, carrots, corn, green beans)
- 3 tablespoons all-purpose flour
- 3/4 cup low-sodium chicken broth
- 1/3 cup whole milk or half and half
- 1/2 teaspoon dried thyme
- 1/2 teaspoon salt and 1/4 teaspoon black pepper
- 1 egg, beaten (for egg wash)
Alternative Ingredients
No pie crust? Puff pastry gives you taller, flakier tops, and canned biscuits (Grands, flattened with your palm) make a softer, bready version kids go wild for. For a gluten-free option, use a store-bought gluten-free crust and swap the flour for cornstarch (use half the amount).
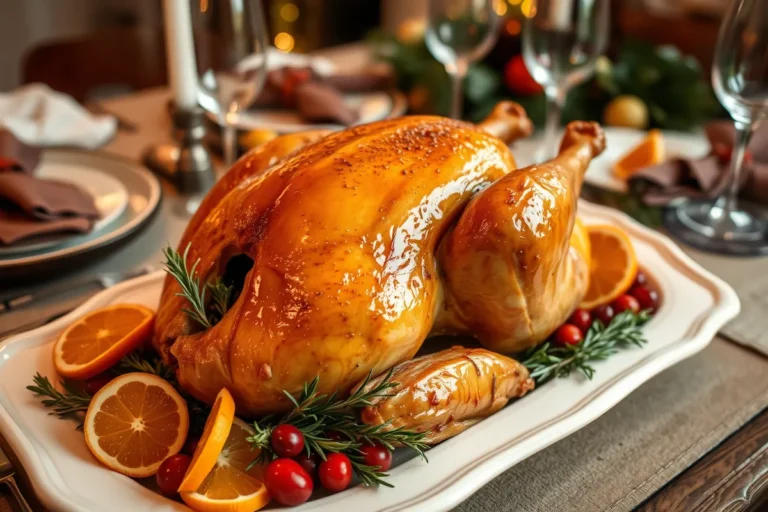
Turkey is a perfect swap after Thanksgiving. Leftover ham works too. If you’re watching sodium, go with an organic chicken broth labeled low-sodium and add salt at the end. Want it richer? Replace the milk with heavy cream. Want it lighter? Use 2% milk and you’ll barely notice.
Tools That Make This Easier
Here’s the thing: you don’t need fancy gear, but a few tools really do help. A heavy nonstick muffin pan is the big one. I use a USA Pan, but any sturdy 12 cup pan works. Thin, cheap pans brown the bottoms unevenly (learned that the hard way).
I make the filling in my cast iron skillet because it holds heat so evenly, though any medium saucepan is fine. A 4 inch round biscuit cutter or a wide drinking glass cuts the crust circles. And if you’re using raw chicken, an instant-read meat thermometer like a ThermoWorks or a budget Lavatools takes all the guessing out of it.
Step-by-Step Directions
1. Prep the oven and pan. Heat your oven to 400°F. Grease the muffin pan well with butter or baking spray, even if it’s nonstick. Trust me on this.
2. Cut the crust. Unroll both pie crusts. Cut twelve 4 inch circles for the bottoms and twelve 2.5 inch circles for the tops. Reroll scraps once if you need to.
3. Line the cups. Press the larger circles into each muffin cup so the dough comes up the sides. Don’t stress if it’s a little uneven. Rustic is charming.
4. Make the filling. Melt the butter in a skillet over medium heat. Add the onion and cook 3 to 4 minutes until soft, then add the garlic for 30 seconds. Sprinkle in the flour and stir for 1 minute to cook out the raw taste.
5. Build the sauce. Slowly whisk in the broth, then the milk. Simmer 2 to 3 minutes until it’s thick enough to coat a spoon. Stir in the thyme, salt, pepper, chicken, and frozen veggies. Take it off the heat and let it cool for 5 to 10 minutes.
6. Fill the cups. Spoon about 3 tablespoons of filling into each crust. Fill them just to the top, not over.
7. Top and seal. Place the small circles on top and pinch the edges together. Cut a tiny slit in each lid so steam can escape. Brush with egg wash.
8. Bake. Bake for 20 to 25 minutes until the tops are deep golden brown. Let them rest in the pan for 5 minutes, then run a butter knife around the edges and lift them out.
Pro Tips
The biggest mistake I used to make was spooning hot filling straight into raw dough. The butter in the crust melted before it hit the oven, and I got soggy, pale bottoms. Now I always let the filling cool for a few minutes first. It makes a huge difference.
Don’t skip the egg wash either. It’s the difference between “homemade” and “bakery window.” And if your tops are browning too fast, loosely tent the pan with foil for the last 5 minutes.
Short on time? Make the filling up to two days ahead and keep it in the fridge in glass meal prep containers. Assembly then takes about 10 minutes. If you’re into planning your week, my guide to low calorie meal prep recipes has plenty of ideas that pair nicely with these.
For reheating, the air fryer is my secret weapon. Five minutes at 325°F brings back that crisp crust way better than the microwave ever will.
Recipe Info
| Detail | Info |
|---|---|
| Prep Time | 20 minutes |
| Cook Time | 25 minutes |
| Total Time | 45 minutes |
| Servings | 6 (2 mini pies each) |
| Yield | 12 mini pot pies |
| Difficulty | Easy |
FAQs
Can I freeze mini chicken pot pies?
Yes, and they freeze beautifully. Freeze unbaked pies in the pan until solid, then move them to a freezer-safe storage container or zip-top bag. Bake from frozen at 375°F for 30 to 35 minutes.
Can I use raw chicken?
You can, but cook it fully in the skillet first. Chicken needs to reach 165°F, which is the USDA safe minimum, so a thermometer is your friend here.
Why are my bottoms soggy?
Usually it’s hot filling, too much sauce, or a thin pan. Cool the filling, keep it thick, and use a heavy pan.
Can I make these in a mini muffin pan?
Absolutely. Use 2.5 inch bottoms and 1.5 inch tops, and bake 15 to 18 minutes. They make adorable party appetizers.
Why You’ll Love This Recipe
They’re portion-controlled, freezer-friendly, and ready in under an hour. Kids eat them with their hands, and adults sneak seconds. Plus, they turn a store-bought rotisserie chicken into something that feels like real Sunday cooking.
What Makes This Recipe Unique
Most pot pie recipes ask you to slice a big pie and hope for the best. These individual pies give you the perfect crust-to-filling ratio in every bite, with crispy edges all the way around. That’s the part everyone fights over anyway, right?
Key Features
- Made with simple pantry ingredients
- Budget-friendly, at roughly $1.25 per mini pie
- Freezer meal friendly, ideal for weekly meal planning
- Easily made gluten-free or lighter
- Great for lunch boxes, potlucks, and game day
Nutrition Facts (per 2 mini pies, estimated)
| Nutrient | Amount |
|---|---|
| Calories | 410 kcal |
| Protein | 19 g |
| Carbohydrates | 33 g |
| Fat | 22 g |
| Saturated Fat | 9 g |
| Fiber | 3 g |
| Sodium | 620 mg |
Your mileage may vary depending on the crust brand and milk you use.
You’ll Also Love
- Homemade Chicken Pizza Muffin Cups for another fun muffin tin dinner
- Ham and Cheese Puff Pastry for flaky, cheesy comfort
- Low Calorie Meal Prep Recipes for planning your week
Want to Go Further?
If you want to make your own crust from scratch, the All-Butter Pie Crust from King Arthur Baking is the one I trust. For a classic full-size version, take a look at Food Network’s Homemade Chicken Pot Pie. And if you like comparing methods like I do, Taste of Home’s Muffin-Tin Chicken Potpies show another spin on the idea.
Final Thoughts
These little pies fixed my “chicken soup with a hat” problem for good. They’re cozy, practical, and easy to make your own. Fall vegetables like butternut squash or mushrooms are great in autumn, and fresh peas work beautifully in spring. Make a double batch, stash half in the freezer, and future you will be very grateful.
If you try them, let me know in the comments how they turned out and what you put in your filling. I read every single one.
Happy baking,
Linda

Mini Chicken Pot Pies
Flaky, golden mini chicken pot pies baked in a muffin tin with a creamy chicken and vegetable filling. Perfect for busy weeknights, lunch boxes and freezer meal prep.
Ingredients
- 2 refrigerated pie crusts (14.1 oz box)
- 2 cups cooked chicken, shredded or diced
- 2 tablespoons unsalted butter
- 1/2 small yellow onion, finely diced
- 1 clove garlic, minced
- 1 1/2 cups frozen mixed vegetables
- 3 tablespoons all-purpose flour
- 3/4 cup low-sodium chicken broth
- 1/3 cup whole milk or half and half
- 1/2 teaspoon dried thyme
- 1/2 teaspoon salt
- 1/4 teaspoon black pepper
- 1 egg, beaten (for egg wash)
Instructions
- Prep. Heat the oven to 400°F (200°C) and grease a 12 cup nonstick muffin pan well.
- Cut the crust. Cut twelve 4 inch circles for the bottoms and twelve 2.5 inch circles for the tops.
- Line the pan. Press the large circles into the muffin cups so the dough comes up the sides.
- Start the filling. Melt butter in a skillet over medium heat. Cook the onion 3 to 4 minutes, add garlic for 30 seconds, then stir in the flour for 1 minute.
- Make the sauce. Whisk in broth, then milk. Simmer 2 to 3 minutes until thick. Stir in thyme, salt, pepper, chicken and vegetables. Cool 5 to 10 minutes.
- Fill. Spoon about 3 tablespoons of filling into each crust.
- Top. Cover with the small circles, pinch the edges, cut a small slit in each and brush with egg wash.
- Bake. Bake 20 to 25 minutes until deep golden. Rest 5 minutes, then lift out with a butter knife.
Linda’s Notes
Avoid soggy bottoms: always let the filling cool before filling the crusts.
To freeze: freeze unbaked pies in the pan, then store in a freezer bag. Bake from frozen at 375°F for 30 to 35 minutes.
To reheat: air fryer at 325°F for 5 minutes keeps the crust crispy.
Nutrition (per 2 mini pies)
| Calories | 410 kcal |
| Protein | 19 g |
| Carbohydrates | 33 g |
| Fat | 22 g |
| Fiber | 3 g |
| Sodium | 620 mg |