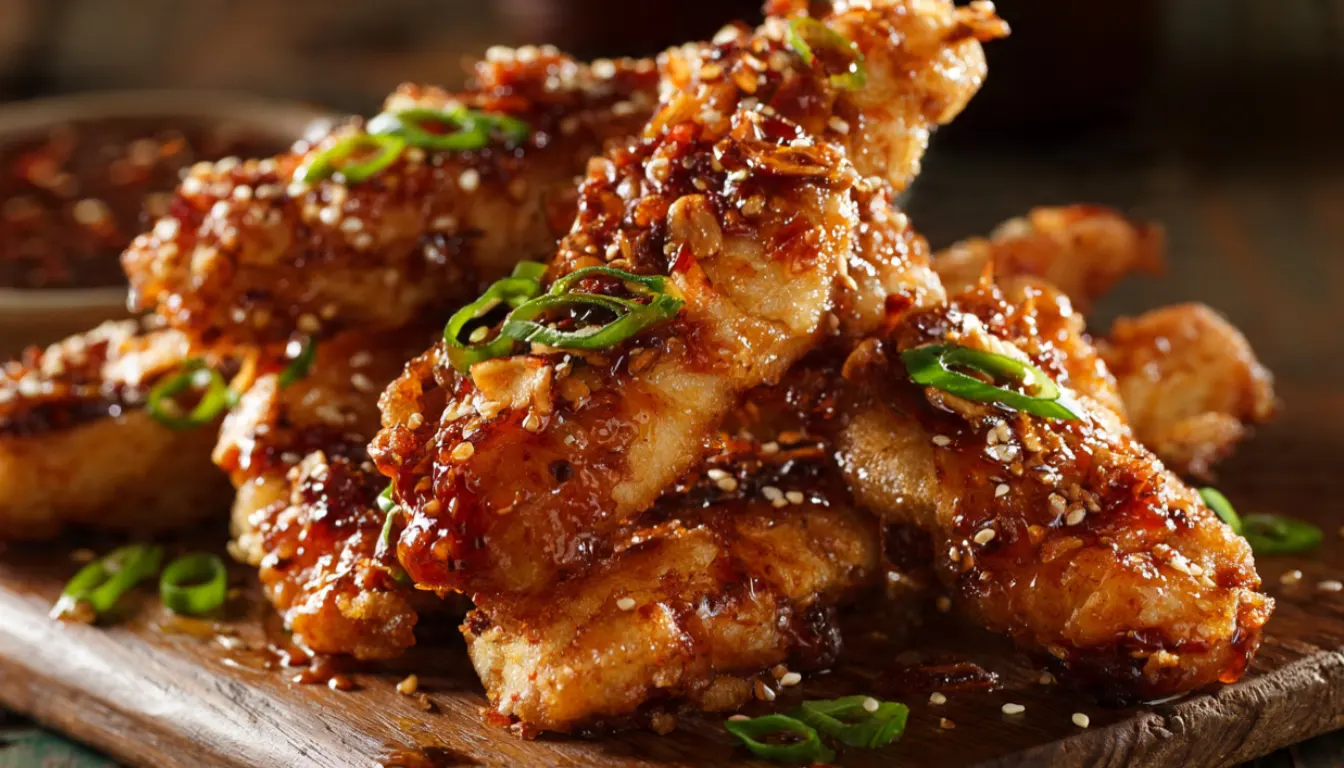
Spicy Honey Garlic Chicken Strips: Crispy, Sticky, and Completely Addictive
I’ll be honest with you. The first time I made honey garlic chicken strips, I burned the sauce so badly that my cast iron skillet looked like I’d been using it as an ashtray. Ten years later, I’ve made this recipe probably three hundred times, and I still catch myself licking the spoon before dinner is even on the table.
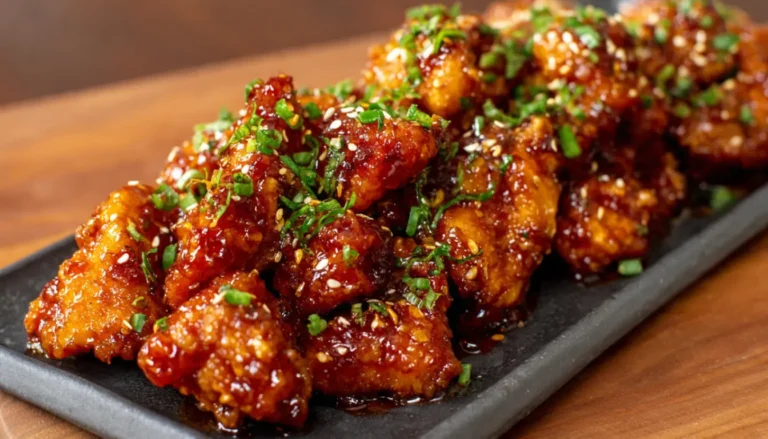
This is the kind of recipe that makes people text you at 9pm asking “what was that chicken thing you made?” It’s sticky. It’s a little spicy. There’s that deep savory sweetness from the garlic hitting the honey at just the right temperature. And it comes together in about 30 minutes, which is why it’s become my go-to when I want something that feels impressive without turning my kitchen into a disaster zone.
If you’ve been buying those overpriced meal kit delivery services just to get interesting weeknight chicken, I promise this recipe will save you real money while tasting ten times better. Let’s get into it.
Why You’ll Love This Recipe
This isn’t just another chicken recipe. The double-coat breading technique gives you that satisfying crunch that holds up even after the sauce goes on. And the sauce itself hits four flavor notes at once: sweet, spicy, savory, and just a tiny bit tangy. It’s the kind of flavor profile that keeps people reaching back into the bowl even when they claim they’re full.
It’s also genuinely flexible. I’ve made this for picky kids (just dial back the chili flakes), for meal prep on Sunday that holds up through Thursday, and for dinner parties where people always ask for the recipe. The fact that it works in an air fryer, a cast iron skillet, or even baked in the oven makes it one of those rare recipes that fits into basically any kitchen setup.
What Makes This Recipe Unique
Most honey garlic chicken recipes just toss the sauce on at the end and call it a day. What I do differently is I let the strips rest in the sauce for about two minutes off the heat before serving. That short rest lets the breading absorb just enough of the glaze to get sticky and glossy without turning soggy. It sounds like a small thing, but it makes a real difference in texture.
The spice blend in the breading also matters. I season the flour itself, not just the chicken. That way every single bite has flavor, not just the outer coating.
Key Features
- Ready in 30 minutes
- High-protein meal at roughly 38g per serving
- Works as meal prep (stays crispy for 3 days when stored properly)
- Air fryer friendly for a lighter version
- Naturally dairy-free
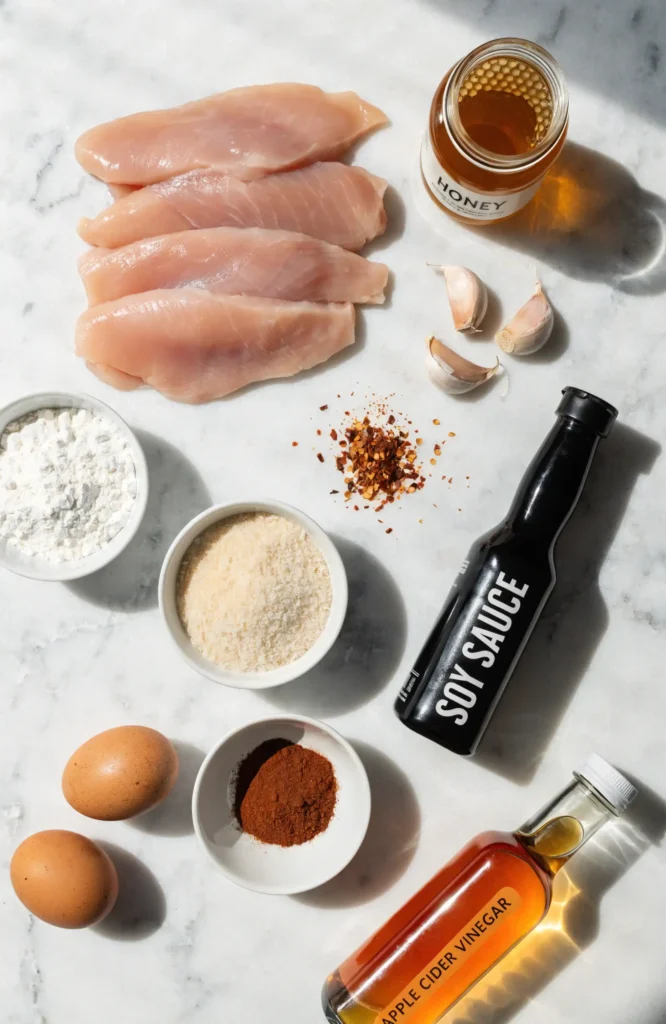
Essential Ingredients
For the Chicken:
- 1.5 lbs chicken breast, sliced into strips
- 1 cup all-purpose flour
- 2 eggs, beaten
- 1 cup panko breadcrumbs
- 1 tsp garlic powder
- 1 tsp smoked paprika
- 1/2 tsp cayenne pepper
- 1 tsp salt
- 1/2 tsp black pepper
- Neutral oil for frying (avocado oil or vegetable oil)
For the Spicy Honey Garlic Sauce:
- 1/3 cup raw honey (good quality makes a difference here)
- 5 cloves fresh garlic, minced
- 2 tbsp low-sodium soy sauce
- 1 tbsp apple cider vinegar
- 1 to 2 tsp red chili flakes (start with 1, taste, then decide)
- 1 tbsp butter
- 1 tsp cornstarch mixed with 1 tbsp cold water
Alternative Ingredients
No panko? Regular breadcrumbs work fine, though panko gives you that extra crunch. You can also crush up cornflakes if you want something really crispy (sounds weird, tastes great, trust me on this one).
For a gluten-free version, swap the all-purpose flour for rice flour and use gluten-free tamari instead of soy sauce. The texture is actually really good with rice flour.
Honey alternatives: maple syrup works surprisingly well in this sauce. It’s slightly less sweet and has a deeper flavor. Not traditional, but your mileage may vary and honestly I’ve served the maple version to guests who preferred it.
For the heat level, gochujang paste (about 1 tablespoon) can replace the chili flakes if you want a slightly different kind of spice. It adds a fermented depth that’s really interesting.
Step-by-Step Directions
Step 1: Prep the chicken Slice your chicken breasts into strips about 1 inch wide. Pat them dry with paper towels. This is the step most people skip, and it’s the reason their breading slides off. Dry chicken holds coating. Wet chicken doesn’t.
Step 2: Set up your breading station Get three shallow bowls ready. First bowl: seasoned flour (mix in the garlic powder, paprika, cayenne, salt, and pepper directly into the flour). Second bowl: beaten eggs. Third bowl: panko breadcrumbs.
Coat each strip in flour, then egg, then panko. Press the panko gently so it sticks. Set the coated strips on a plate and let them sit for 5 minutes before cooking. That little rest helps the coating adhere better.
Step 3: Cook the chicken You have three options here.
For stovetop: Heat about half an inch of oil in a cast iron skillet or heavy non-stick pan over medium-high heat until shimmering. Cook strips in batches for 3 to 4 minutes per side until golden and cooked through (internal temp 165°F). Don’t crowd the pan or they steam instead of fry.
For air fryer: This is honestly how I make them most weeknights now. Spray the basket and the strips with a little oil, cook at 400°F for 10 to 12 minutes, flipping halfway. You get about 80% of the crunch with a fraction of the oil. If you’re shopping for a new air fryer, look for one with a large basket (5.8 quarts or bigger) so you can cook a full batch without splitting it into too many rounds.
For baked: 425°F oven, wire rack set over a baking sheet, 18 to 20 minutes flipping once. Spray with cooking spray before and halfway through.
Step 4: Make the sauce While the last batch cooks, melt butter in a small saucepan over medium heat. Add the minced garlic and cook for about 60 seconds, just until fragrant. Don’t let it brown. Add the honey, soy sauce, apple cider vinegar, and chili flakes. Stir and bring to a gentle simmer for 2 minutes. Add the cornstarch slurry and stir until the sauce thickens slightly, about 1 more minute. Take it off the heat.
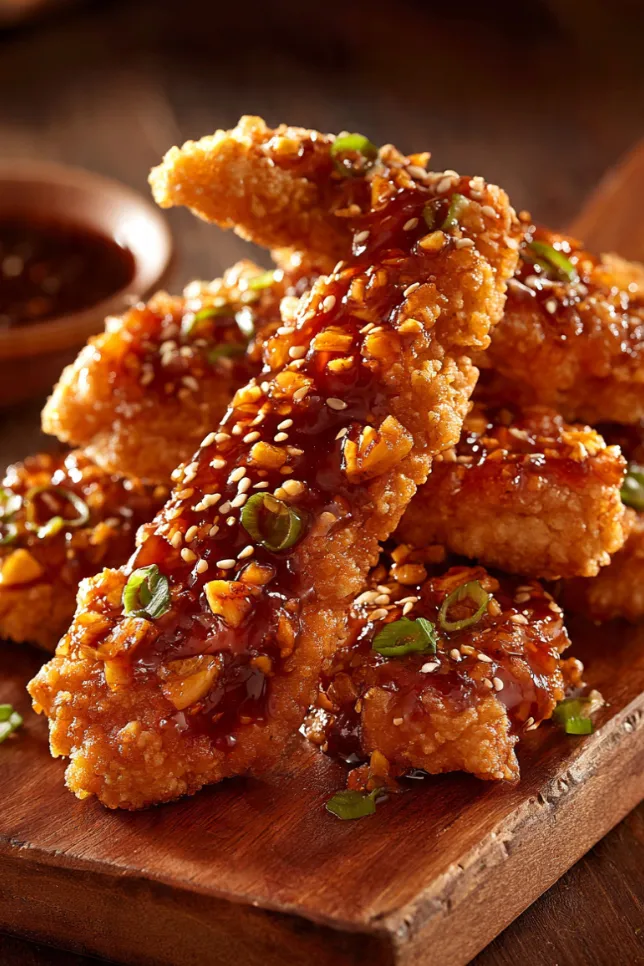
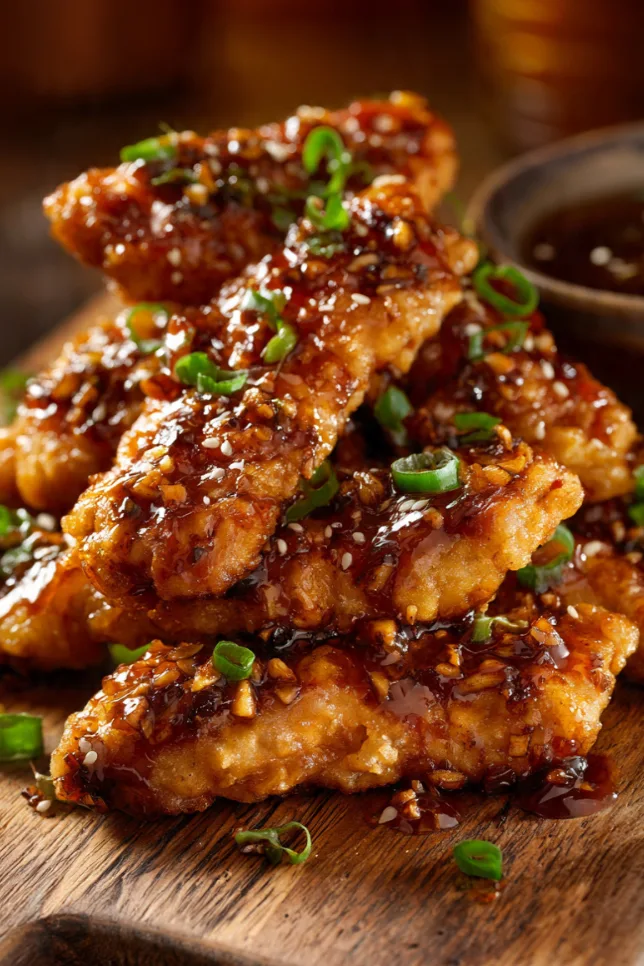
Step 5: Toss and rest Add the cooked strips to the sauce and toss to coat. Let them sit in the sauce for 2 minutes off the heat before serving. This is the step I mentioned earlier. Don’t skip it.
Pro Tips
Keep your oil at the right temperature. Too cool and the breading soaks up oil and turns greasy. Too hot and the outside burns before the inside cooks. Aim for 350 to 375°F. A simple kitchen thermometer is worth every penny if you fry food even occasionally.
For meal prep, store the cooked strips and the sauce separately in airtight meal prep containers. Reheat the strips in your air fryer at 375°F for 5 minutes to bring back the crunch, then toss in warmed sauce. They hold up really well this way for up to 4 days.
If you’re cooking for a crowd and need to keep batches warm, put the cooked strips on a wire rack in a 200°F oven. Stacking them kills the crunch.
A mistake I used to make constantly: adding the sauce while the chicken was still in the hot pan. The residual heat would overcook the garlic and turn the sauce bitter. Take it off heat completely before tossing.
Frequently Asked Questions
Can I use chicken thighs instead of chicken breast?
Yes. Chicken thighs stay juicier and add extra flavor. Just cut them into evenly sized strips for consistent cooking.
Can I make Spicy Honey Garlic Chicken Strips in the air fryer?
Absolutely. Cook the breaded strips at 400°F for 10 to 12 minutes, flipping halfway through for even crispiness.
How spicy are these chicken strips?
With 1 teaspoon of chili flakes the heat is mild-medium. Using 2 teaspoons creates a stronger spicy kick while still balanced by the honey.
Can I make the sauce ahead of time?
Yes. The spicy honey garlic sauce can be made up to 3 days ahead and stored in the refrigerator in an airtight container.
What should I serve with Spicy Honey Garlic Chicken Strips?
Steamed jasmine rice, roasted vegetables, cucumber salad, or fries pair perfectly with these crispy chicken strips.
You’ll Also Love
If this recipe hit the spot, here are a few others worth trying from the blog:
10-Minute Meals for Nurses Between Shifts – because sometimes 30 minutes feels like a luxury.
High-Protein Muscle Recovery Meals – if you’re cooking for serious physical demands.
Meal Prep Sunday for 9-to-5 Workers – a full weekly prep guide using recipes like this one.
Budget-Friendly Filling Meals Under $3 – for when grocery prices are making you question every decision.
Conclusion
This recipe is one of those things I genuinely look forward to making. There’s something satisfying about watching plain chicken strips transform into something glossy and sticky and completely crave-worthy. It’s not complicated cooking. It’s just understanding a few techniques and trusting the process.
The two things that make the biggest difference: dry your chicken before breading, and give the strips that two-minute rest in the sauce before serving. Everything else is pretty forgiving.
Try it this week and let me know how it goes in the comments. And if you do make it in your air fryer for the first time, report back because I’m always curious how different models handle the cook time.
Linda
beesrecipes.com
Spicy Honey Garlic Chicken Strips
Crispy golden chicken strips tossed in a sticky sweet and spicy honey garlic glaze. Perfect for weeknight dinners, meal prep, or party appetizers.
Ingredients
- 1.5 lbs chicken breast, sliced into strips
- 1 cup all-purpose flour
- 2 eggs, beaten
- 1 cup panko breadcrumbs
- 1 tsp garlic powder
- 1 tsp smoked paprika
- 1/2 tsp cayenne pepper
- 1 tsp salt
- 1/2 tsp black pepper
- Oil for frying
- 1/3 cup raw honey
- 5 cloves fresh garlic, minced
- 2 tbsp low-sodium soy sauce
- 1 tbsp apple cider vinegar
- 1 to 2 tsp red chili flakes
- 1 tbsp butter
- 1 tsp cornstarch mixed with water
Instructions
- Prep the chicken Slice chicken into even strips and pat dry thoroughly using paper towels for better breading adhesion.
- Bread the chicken Dip each strip into seasoned flour, beaten eggs, and finally panko breadcrumbs. Press breadcrumbs gently so they stick.
- Rest the coating Let coated strips sit for 5 minutes before cooking to help the crust stay attached.
- Cook until crispy Fry in hot oil for 3 to 4 minutes per side until golden brown and cooked through. Air fryer and oven methods also work well.
- Make the spicy honey garlic sauce Cook garlic in butter, then stir in honey, soy sauce, vinegar, and chili flakes. Simmer briefly and thicken with cornstarch slurry.
- Coat and rest Toss crispy chicken strips in sauce and let rest for 2 minutes off the heat before serving for the perfect sticky texture.
Notes
Keep cooked strips warm on a wire rack instead of stacking them to maintain crispiness. For meal prep, store the sauce separately and reheat chicken in the air fryer before tossing together again.