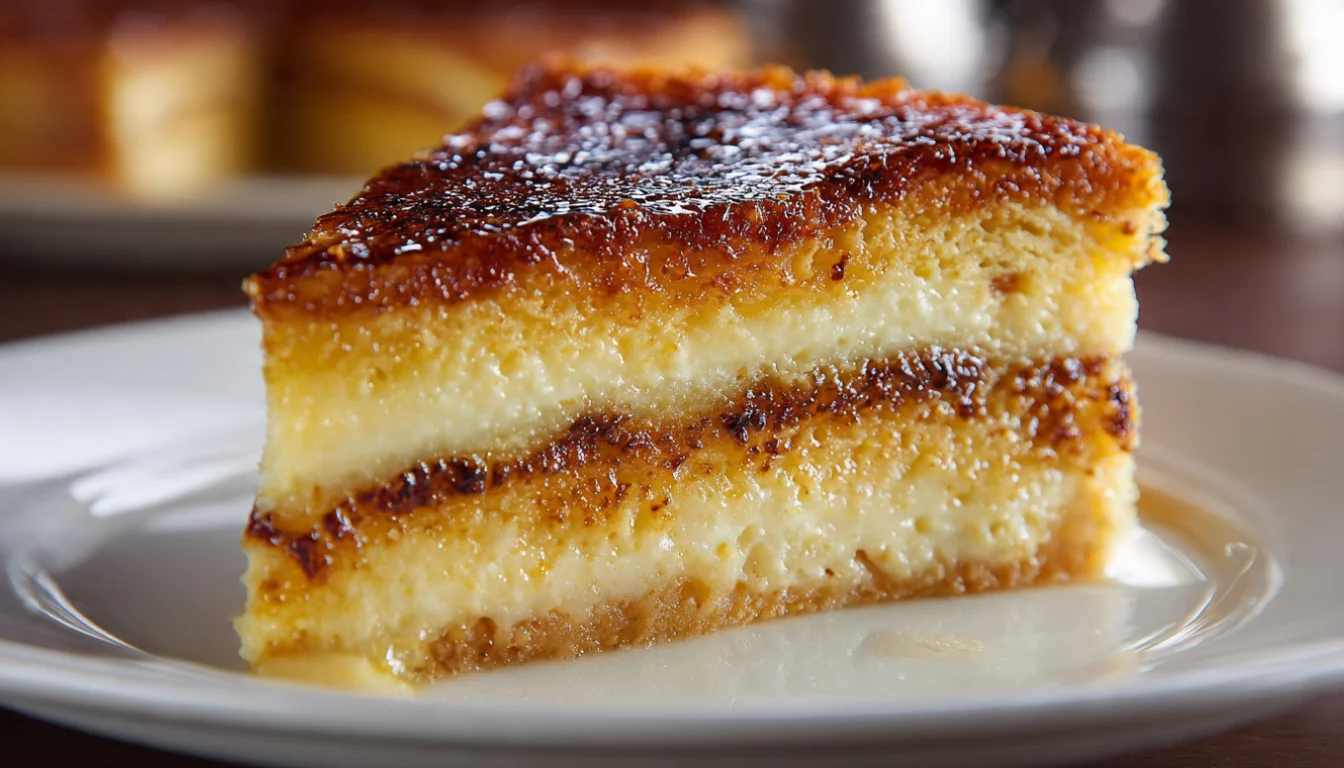
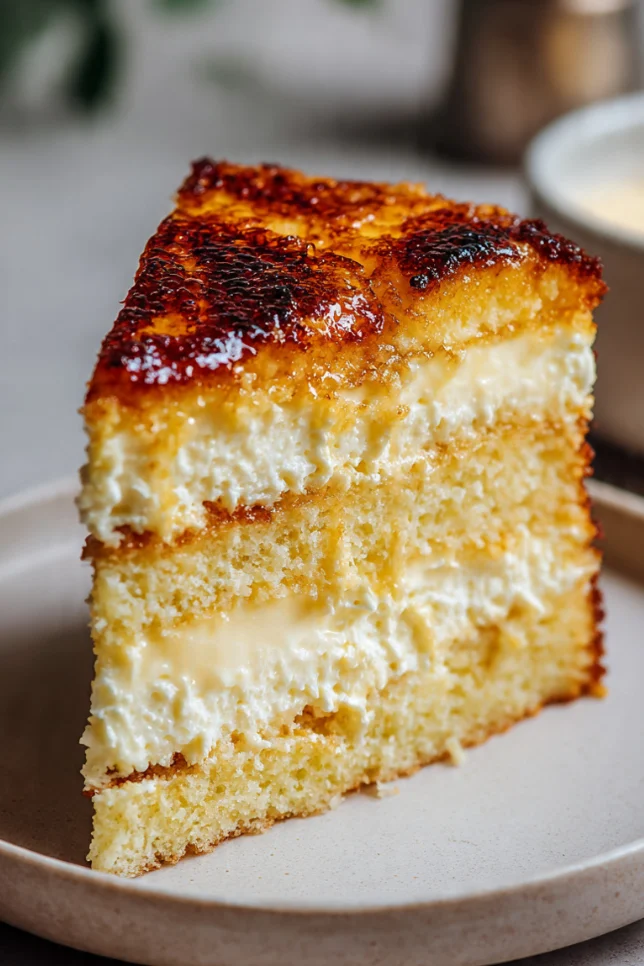
Crème Brûlée Cake with Caramelized Sugar Top
The first time I tried making crème brûlée cake, I completely underestimated how tricky the caramel top would be. I ended up with a burnt mess that set off my smoke alarm at 11 PM. My neighbors were not impressed. But after years of testing and a few more kitchen disasters, I figured out exactly how to nail this showstopper dessert every single time.
This recipe combines everything I love about classic French crème brûlée with the satisfying texture of vanilla cake. The result? A stunning dessert that looks like you spent all day in the kitchen but actually comes together in about an hour of active work.
Essential Ingredients
For the Vanilla Cake:
- 2 cups all-purpose flour
- 1½ cups granulated sugar
- ½ cup unsalted butter, softened
- 1 cup whole milk
- 3 large eggs, room temperature
- 2½ teaspoons baking powder
- 1 tablespoon vanilla extract
- ½ teaspoon salt
For the Custard Layer:
- 2 cups heavy cream
- 6 large egg yolks
- ½ cup granulated sugar
- 2 teaspoons vanilla bean paste
- ¼ teaspoon salt
For the Caramelized Top:
- ½ cup granulated sugar (for torching)

Alternative Ingredients
If you can’t find vanilla bean paste, regular vanilla extract works fine, though you’ll miss those gorgeous specks. I’ve used half-and-half instead of heavy cream when I’m trying to cut calories (spoiler: it’s still pretty rich). For a dairy-free version, coconut cream actually works surprisingly well in the custard, though the flavor profile changes noticeably.
Budget-conscious? Regular granulated sugar works just as well as fancy cane sugar for the caramelized top. Don’t let anyone tell you otherwise.
Step-by-Step Directions
Make the Cake Base:
Start by preheating your oven to 350°F. I always forget this step and end up waiting around with my batter ready, so learn from my mistakes. Grease and flour a 9-inch springform pan. Trust me, the springform pan makes your life so much easier when it comes time to remove this cake. Regular cake pans work, but you’ll struggle.
In your stand mixer (I use my KitchenAid, but any mixer works), cream the softened butter and sugar together for about 3 minutes until it’s light and fluffy. This step matters more than you think. Undermixing here gives you a dense cake.
Add eggs one at a time, beating well after each addition. Mix in the vanilla extract. In a separate bowl, whisk together flour, baking powder, and salt. Alternate adding the dry ingredients and milk to your butter mixture, starting and ending with the dry ingredients. Mix until just combined because overmixing develops gluten and makes the cake tough.
Pour the batter into your prepared pan and bake for 30-35 minutes. The cake is done when a toothpick inserted in the center comes out clean. Let it cool completely in the pan. This is crucial because if you add hot custard to a warm cake, things get messy fast.
Prepare the Custard:
While your cake cools, make the custard. Heat the heavy cream in a medium saucepan over medium heat until it just starts to simmer. Don’t let it boil or you’ll have a mess to clean up.
In a mixing bowl, whisk together egg yolks, sugar, vanilla bean paste, and salt until the mixture turns pale yellow. Here’s where technique matters. Slowly pour about half of the hot cream into the yolk mixture while whisking constantly. This is called tempering, and it prevents your eggs from scrambling. Pour the tempered mixture back into the saucepan with the remaining cream.
Cook over medium-low heat, stirring constantly with a wooden spoon or silicone spatula, until the custard thickens enough to coat the back of a spoon. This takes about 8-10 minutes. I learned the hard way not to rush this step. If you crank up the heat, you’ll end up with sweet scrambled eggs.
Assemble the Cake:
Once your cake has cooled completely, use a serrated knife to carefully slice it horizontally into two layers. Place the bottom layer back in the springform pan. Pour the warm (not hot) custard over the cake layer, spreading it evenly. Place the second cake layer on top, pressing down gently.
Refrigerate the assembled cake for at least 4 hours, but overnight is better. The custard needs time to set properly, and patience really pays off here.
Create the Caramelized Top:
Right before serving, sprinkle an even layer of granulated sugar over the top of the cake. Using a kitchen torch, caramelize the sugar by moving the flame in circular motions. The sugar should melt and turn golden brown. If you don’t have a culinary torch, you can use your oven’s broiler, but watch it like a hawk because it goes from perfect to burnt in seconds.
Let the caramelized sugar harden for a minute before slicing. That signature crack when you break through is what makes this dessert so satisfying.
Pro Tips
The biggest mistake I see people make is not letting the cake cool completely before adding the custard. Warm cake equals soupy mess. Also, when torching the sugar, keep the flame moving. If you hold it in one spot, you’ll burn right through to the cake.
For the smoothest custard, strain it through a fine-mesh sieve before pouring it over the cake. This removes any cooked egg bits and gives you a silkier texture.
If your custard seems too thin, cook it a bit longer. It should noticeably thicken and coat your spoon. Better to spend an extra few minutes stirring than to end up with runny custard.
FAQs
Can I make this cake ahead of time?
Yes, you can assemble the cake the night before and refrigerate. Just torch the caramelized sugar right before serving.
What can I use if I don’t have a kitchen torch?
You can use your oven’s broiler to caramelize the sugar, but watch it closely as it can burn quickly.
Can I make a dairy-free version?
Yes, substitute heavy cream with coconut cream and butter with a plant-based alternative. The custard will be slightly different but still delicious.
How do I get a smooth custard without lumps?
Strain the custard through a fine-mesh sieve before pouring it over the cake to remove any cooked egg bits.
Why You’ll Love This Recipe
This crème brûlée cake impresses people without requiring pastry chef skills. It’s the dessert I bring to dinner parties when I want to look like I know what I’m doing in the kitchen. The combination of fluffy vanilla cake, creamy custard, and that crackling caramelized top hits different than regular cake.
Plus, you can make most of it ahead of time. The cake and custard both sit happily in the fridge overnight, and you only need to torch the top right before serving.
What Makes This Recipe Unique
Unlike traditional layer cakes, this one has an actual custard filling rather than frosting or buttercream. The texture contrast between the tender cake and silky custard is what makes it special. And that caramelized sugar top adds a textural element that regular frosted cakes just can’t match.
I’ve simplified the custard-making process compared to traditional crème brûlée by skipping the water bath method. It’s less fussy but still delivers that signature creamy texture.
Key Features
Impressive Presentation: The caramelized top looks professional and elegant
Make-Ahead Friendly: Assemble the night before and torch before serving
Flavor Contrast: Sweet cake, rich custard, and slightly bitter caramel
Texture Variety: Soft cake, creamy custard, crunchy caramel top
Adaptable: Works with different flavor variations
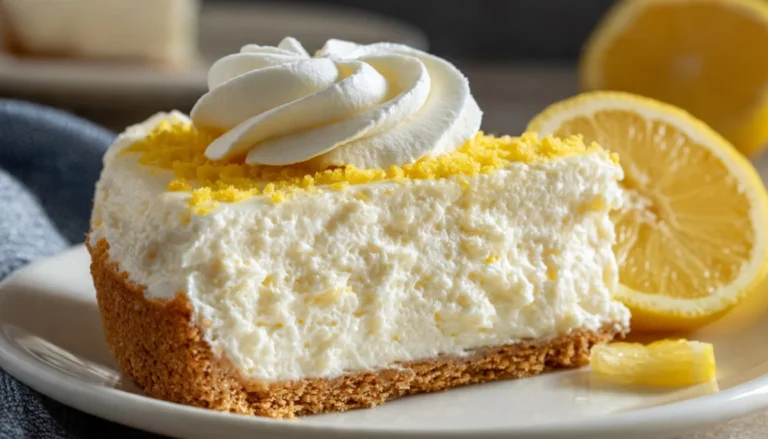
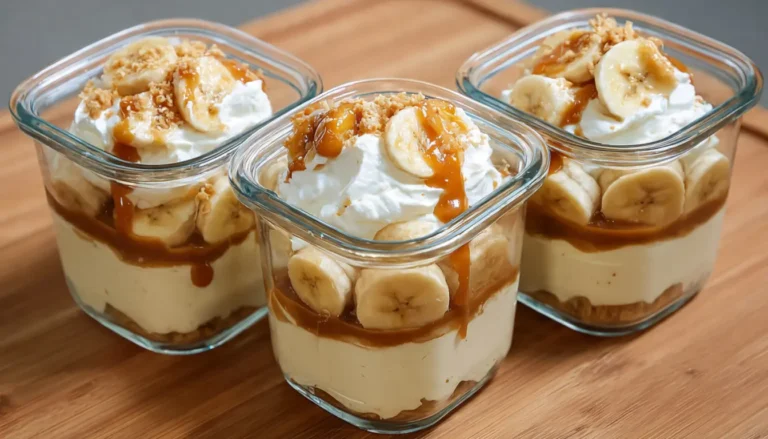
You’ll Also Love
If this cake caught your attention, try my Classic Vanilla Bean Cheesecake for another custard-style dessert that gets rave reviews. My Burnt Basque Cheesecake has a similar caramelized top without the torching step. And for something lighter, the Vanilla Panna Cotta offers that same silky custard texture in individual portions.
Conclusion
After making this cake dozens of times, I can honestly say it’s become one of my signature desserts. The technique might seem intimidating at first, but once you’ve made it once or twice, it becomes second nature.
The key is not overthinking it. Good ingredients, proper timing, and a steady hand with the kitchen torch are all you really need. And if you mess up the caramel top like I did that first time? Just scrape it off and try again. Nobody has to know.
Give yourself permission to experiment with this one. Try different extracts, add a layer of fresh berries between the cake and custard, or infuse the cream with cinnamon or citrus zest. This recipe is forgiving enough to handle your creativity.
Now go make something that’ll have your guests asking for the recipe (and wondering if you secretly went to pastry school).
Crème Brûlée Cake
A showstopping dessert combining vanilla cake, creamy custard, and caramelized top.
Ingredients
- 2 cups all-purpose flour
- 1 1/2 cups granulated sugar
- 1/2 cup unsalted butter, softened
- 1 cup whole milk
- 3 large eggs, room temperature
- 2 1/2 teaspoons baking powder
- 1 tablespoon vanilla extract
- 1/2 teaspoon salt
- 2 cups heavy cream
- 6 large egg yolks
- 1/2 cup granulated sugar (custard)
- 2 teaspoons vanilla bean paste
- 1/4 teaspoon salt (custard)
- 1/2 cup granulated sugar (for caramelized top)
Instructions
- Make cake basePreheat oven to 350°F. Grease and flour a 9-inch springform pan. Cream butter and sugar until light. Add eggs one at a time, then vanilla. Alternate dry ingredients and milk. Pour batter into pan and bake 30-35 min. Cool completely.
- Prepare custardHeat heavy cream until simmering. Whisk yolks, sugar, vanilla paste, salt until pale. Temper yolks with half the hot cream, then combine with remaining cream. Cook until thickened to coat back of spoon. Cool slightly.
- Assemble cakeSlice cooled cake horizontally. Place bottom layer in pan, pour custard evenly, top with second layer. Refrigerate 4+ hours or overnight.
- Caramelize topSprinkle sugar evenly. Use a kitchen torch to caramelize sugar until golden and crisp. Let set 1 min before slicing.