Cheeseburger Pockets Recipe: The Ultimate Freezer-Friendly Comfort Food
You know those nights when you’re staring into the fridge wondering what to make, and all you really want is the comfort of a juicy cheeseburger but without the mess or the guilt of ordering takeout? That’s exactly how I stumbled onto these cheeseburger pockets about five years ago when I was meal prepping for my busiest work weeks.
I’ll be honest, my first batch was a disaster. I overfilled them (greedy, I know), didn’t seal the edges properly, and ended up with what looked like ground beef volcanoes all over my baking sheet. But after some trial and error, I’ve got this recipe down to a science. These pockets are crispy on the outside, loaded with seasoned beef and melted cheese on the inside, and they freeze beautifully for those hectic weeknight dinners.
What makes these different from regular cheeseburgers? Well, everything’s neatly tucked inside a golden pastry shell. No condiment drips, no toppings sliding everywhere, and you can eat them with one hand while checking homework or scrolling through emails. Trust me on this one.
Essential Ingredients
Here’s what you’ll need to make about 8-10 pockets:
For the filling:
- 1 pound ground beef (80/20 works best for flavor)
- 1 medium onion, finely diced
- 2 cloves garlic, minced
- 1 cup shredded cheddar cheese
- 1/4 cup ketchup
- 2 tablespoons yellow mustard
- 1 tablespoon Worcestershire sauce
- 1 teaspoon salt
- 1/2 teaspoon black pepper
- 1/2 teaspoon smoked paprika
For the pockets:
- 2 packages (17.3 oz each) refrigerated puff pastry sheets, thawed
- 1 egg, beaten (for egg wash)
- Sesame seeds (optional, but they make it look like burger buns)
For serving:
- Pickles, diced
- Special sauce or your favorite burger condiments

Alternative Ingredients
Listen, I get it. Not everyone has a fully stocked pantry, and sometimes you need to work with what you’ve got. Here are some swaps that actually work:
Meat alternatives: Ground turkey or chicken work great if you want something leaner. I’ve even made these with plant-based ground “beef” for my vegetarian friends, and nobody complained. Just season it a bit more aggressively because plant-based proteins can be bland.
Cheese options: Can’t find cheddar? American cheese melts beautifully and gives you that classic cheeseburger vibe. Pepper jack adds a nice kick if you’re into that. I’ve used Swiss when that’s all I had, and it was perfectly fine.
Pastry shortcuts: If puff pastry isn’t your thing or you can’t find it, crescent roll dough works in a pinch. The texture’s different (more bready, less flaky), but it still tastes good. Some people swear by pie crust, though I find it a bit too firm for my liking.
Condiment tweaks: No Worcestershire sauce? A splash of soy sauce works surprisingly well. Hate mustard? Skip it and add an extra tablespoon of ketchup. These are forgiving recipes, so make them yours.
Step-by-Step Directions
Step 1: Cook the beef filling
Heat a large cast iron skillet or non-stick pan over medium-high heat. Add the ground beef and break it up with a wooden spoon. Here’s a tip I learned the hard way: don’t stir it constantly. Let it sit for a minute or two to get some nice browning. That caramelization adds so much flavor.
Once the beef is mostly browned (about 5-6 minutes), drain off most of the fat, leaving about a tablespoon in the pan. Add your diced onions and cook until they’re soft and translucent, about 3-4 minutes. Throw in the garlic and cook for another 30 seconds until it smells amazing.
Step 2: Season and cool the filling
Stir in the ketchup, mustard, Worcestershire sauce, salt, pepper, and smoked paprika. Mix everything together and let it simmer for 2-3 minutes so all those flavors can get friendly. The mixture should be slightly saucy but not swimming in liquid. If it looks too wet, let it cook a bit longer to evaporate some moisture.
Transfer the beef mixture to a bowl and let it cool completely. This is important, folks. If you try to fill pastry with hot filling, you’ll end up with soggy, sad pockets. I usually stick the bowl in the fridge for 20-30 minutes while I prep everything else.
Step 3: Prepare your workspace
Preheat your oven to 400°F (200°C). Line two baking sheets with parchment paper. If you’re planning to use an air fryer for some of them, you can do that too (I’ll explain later).
Unfold your thawed puff pastry sheets on a lightly floured surface. Each sheet should give you 4 squares when you cut it, so you’ll have 8 total from both packages. I use a pizza cutter for this because it’s faster than a knife.
Step 4: Assemble the pockets
Once your filling is completely cool, stir in the shredded cheese. This is the moment everything comes together.
Place about 2-3 tablespoons of the beef and cheese mixture in the center of each pastry square. Don’t overfill them like I did that first time. Leave about a half-inch border around the edges.
Fold one corner of the square over to the opposite corner, creating a triangle. Press the edges together firmly with your fingers, then go over them with a fork to really seal everything in. This fork-crimp method isn’t just decorative; it actually helps prevent filling from leaking out during baking.
Step 5: Add the finishing touches
Brush each pocket with beaten egg. This gives them that beautiful golden-brown color and helps the sesame seeds stick if you’re using them. Sprinkle sesame seeds on top for that authentic burger bun look.
Use a sharp knife to cut two small slits in the top of each pocket. These little vents let steam escape and prevent your pockets from getting soggy or exploding in the oven.
Step 6: Bake until golden
Bake for 20-25 minutes, rotating the pans halfway through, until the pockets are puffed up and golden brown. The pastry should look crispy and flaky, not pale or doughy.
Let them cool on the baking sheet for about 5 minutes before serving. The filling will be lava-hot right out of the oven, so resist the temptation to bite into them immediately. I’ve burned my mouth more times than I care to admit.
Pro Tips
For air fryer fans: I cook these in my air fryer when I’m only making a few at a time. Preheat the air fryer to 375°F, place the pockets in a single layer (don’t overcrowd), and cook for 12-15 minutes, flipping halfway through. They come out incredibly crispy this way.
Meal prep strategy: These are absolute lifesavers for meal planning. I make a double batch, freeze half before baking, and have instant homemade fast food ready whenever I need it. To freeze unbaked pockets, assemble them completely, place them on a baking sheet in the freezer until solid (about 2 hours), then transfer to freezer bags or meal prep containers. They’ll keep for up to 3 months. Bake from frozen, adding an extra 5-7 minutes to the cooking time.
Customization ideas: Add diced pickles directly into the filling for pickle lovers. Mix in some crispy bacon bits if you want to make these extra indulgent. I’ve even made “Big Mac” versions by adding shredded lettuce and a drizzle of special sauce after baking (sounds weird, but trust me).
Make them smaller: If you’re serving these as appetizers or for kids’ lunch boxes, cut each pastry square into 4 smaller squares instead of making triangles. You’ll get mini pockets that cook in about 15 minutes. Kids love the bite-sized version.
Keep them crispy: If you’re not eating them right away, keep baked pockets warm in a 200°F oven on a wire rack. Putting them on a plate will make the bottom soggy. For reheating, the air fryer or oven works better than the microwave, which makes the pastry tough.
FAQs
Can I freeze cheeseburger pockets?
Yes, they freeze beautifully and can be baked straight from frozen.
What dough can I use instead?
Crescent dough, pizza dough, or pie crust are great substitutes.
How do I prevent leaking?
Do not overfill, seal well, and always use cooled filling.
Can I air fry them?
Yes, cook at 375°F for 12 to 15 minutes.
Best cheese to use?
Cheddar, American, or mozzarella all work perfectly.
Recipe Info Table
| Category | Details |
|---|---|
| Prep Time | 25 minutes |
| Cook Time | 25 minutes |
| Total Time | 50 minutes |
| Servings | 8 pockets |
| Yield | 8-10 pockets |
| Cuisine | American |
| Course | Main Dish / Dinner |
| Difficulty | Easy |
Why You’ll Love This Recipe
These cheeseburger pockets hit all the comfort food notes without any of the usual mess. There’s something deeply satisfying about biting into that crispy, flaky pastry and getting a mouthful of seasoned beef and melted cheese. It’s like someone took everything you love about cheeseburgers and packaged it into the perfect portable format.
They’re also incredibly practical. I make them on Sunday afternoons, freeze half, and have ready-made dinners for those nights when cooking from scratch feels impossible. My teenage nephew calls them “gourmet Hot Pockets,” which honestly isn’t wrong. They’re way better than anything you’d buy frozen, though.
What Makes This Recipe Unique
Most cheeseburger pocket recipes you’ll find online use plain ground beef with minimal seasoning. This version actually tastes like a real cheeseburger because we’re incorporating all those classic burger flavors right into the filling. The Worcestershire sauce, smoked paprika, and the ketchup-mustard combo make all the difference.
The other thing that sets this apart is the cooling step. I know it seems like extra waiting time, but filling hot pastry is a recipe for disaster. When I skip this step (because I’m impatient), I always regret it. The cooled filling stays put, the cheese doesn’t make everything soupy, and the pastry bakes up perfectly crisp.
Also, the sesame seed topping. It’s totally optional, but it makes these look so much more intentional. Like you actually tried, you know?
Key Features
Freezer-friendly: Make a big batch and freeze for later. Perfect for busy weeknights when you need dinner in under 30 minutes.
Kid-approved: Even picky eaters usually go for these because they’re basically cheeseburgers in pastry form. What’s not to love?
Customizable: Change up the cheese, add vegetables, swap the meat, or adjust the seasonings to suit your taste. These are very forgiving.
Portable: Great for lunch boxes, picnics, road trips, or eating in front of the TV. No utensils required.
Budget-conscious: One pound of ground beef feeds a crowd when you stretch it with pastry. This is way cheaper than takeout burgers for the whole family.
Nutrition Facts Table
Per serving (1 pocket, based on 8 pockets total):
| Nutrient | Amount |
|---|---|
| Calories | 425 |
| Total Fat | 28g |
| Saturated Fat | 11g |
| Cholesterol | 65mg |
| Sodium | 520mg |
| Total Carbohydrates | 28g |
| Dietary Fiber | 1g |
| Sugars | 3g |
| Protein | 16g |
Note: Nutrition information is approximate and will vary based on specific ingredients used.
You’ll Also Love
If you’re into these handheld comfort foods, you should definitely try my Sloppy Joe Pockets next. They use a similar concept but with that tangy, sweet sloppy joe filling. I also have a Chicken Pot Pie Pocket recipe that’s basically the same technique but with creamy chicken filling instead of beef.
For more ground beef recipes that work great for meal planning, check out my collections on freezer meals and one-pan dinners. Ground beef is one of those ingredients that’s always budget-friendly and incredibly versatile.
Conclusion
These cheeseburger pockets have become a regular rotation in my house, especially during those crazy weeks when I’m juggling work deadlines and family commitments. There’s something so satisfying about opening the freezer and knowing I have homemade food ready to go, no takeout required.
The beauty of this recipe is that it’s simple enough for beginner cooks but tasty enough that even experienced home chefs will appreciate having it in their repertoire. Plus, once you get the basic technique down, you can fill these pockets with just about anything. I’ve made pizza pockets, taco pockets, even breakfast pockets with scrambled eggs and sausage.
So next time you’re planning your weekly meal prep or just looking for a fun dinner idea, give these a try. Your future self (the one who’s exhausted on a Wednesday night) will thank you for it. And if your first batch leaks a little or doesn’t look perfect? Don’t worry. Mine still do sometimes, and they always taste delicious anyway.
Happy cooking, and enjoy those crispy, cheesy, beefy pockets of comfort food perfection!
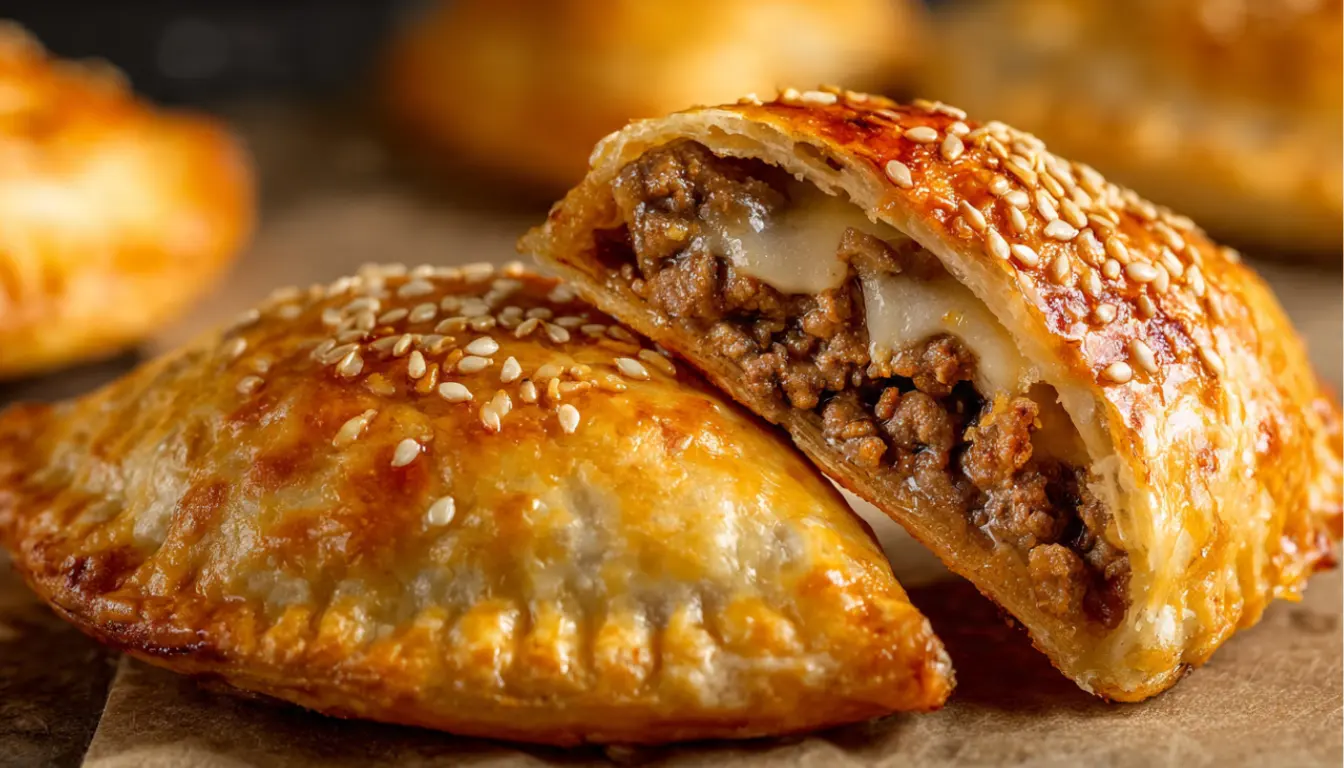
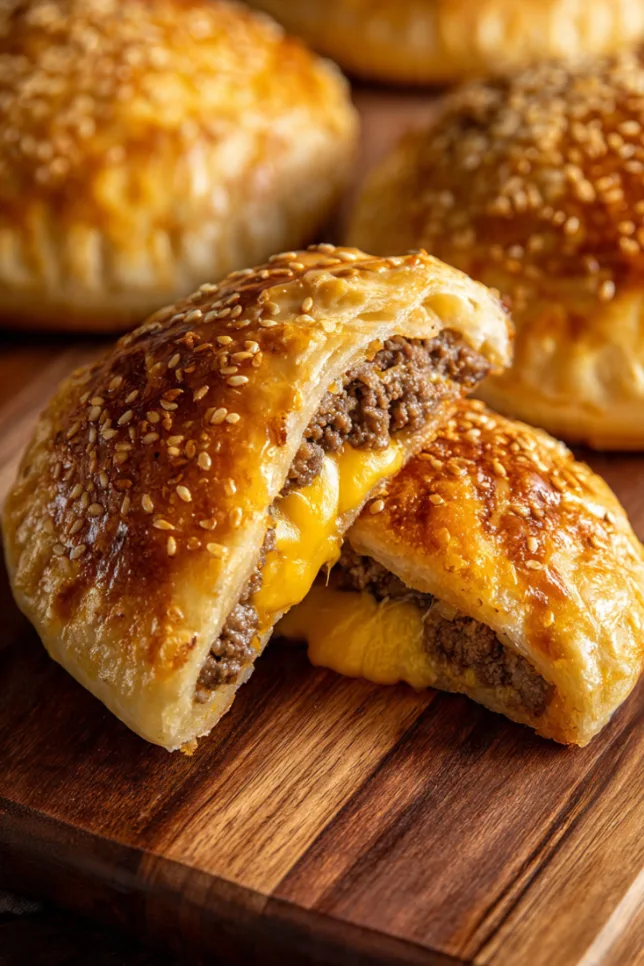
Cheeseburger Pockets
Golden, flaky pastry stuffed with juicy beef and melted cheese. The ultimate freezer-friendly comfort food.
Ingredients
- 1 lb ground beef
- 1 onion, diced
- 2 garlic cloves
- 1 cup cheddar cheese
- ketchup, mustard, Worcestershire
- salt, pepper, paprika
- 2 puff pastry sheets
- 1 egg
Instructions
- Cook beef and onion until browned
- Add seasonings and simmer
- Cool completely
- Fill pastry squares
- Seal and brush with egg
- Bake until golden
Notes
Cool filling before assembling. Freeze unbaked pockets up to 3 months. Reheat in oven for best texture.