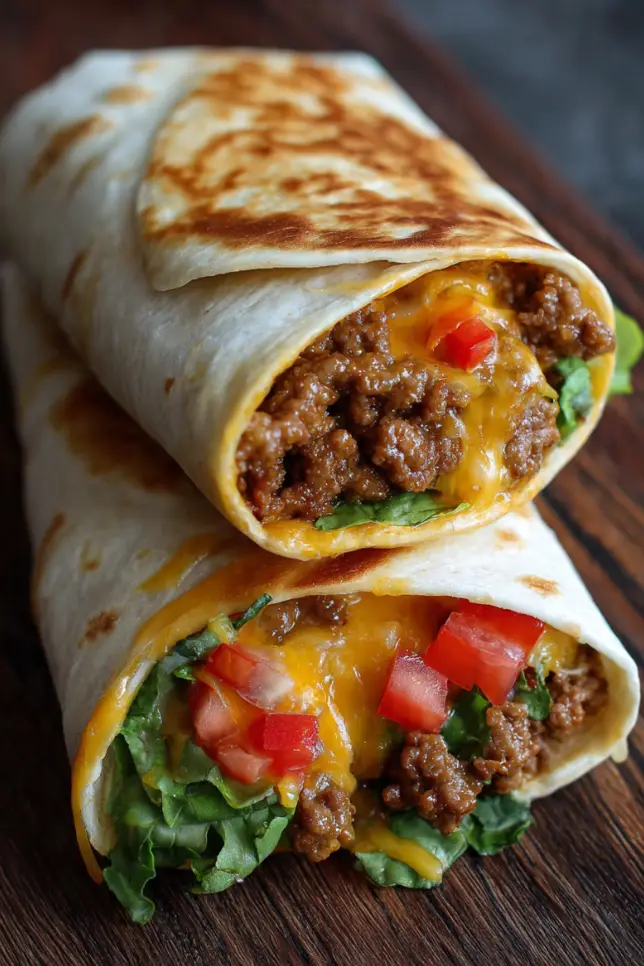
Cheesy Ground Beef Tortilla Wraps Recipe – Crispy and Delicious
You know those nights when you open the fridge and realize you’ve got about 15 minutes before everyone starts getting hangry? That’s exactly how I discovered this recipe five years ago on a particularly chaotic Tuesday. I had ground beef that needed using, some tortillas that were two days from expiration, and a kitchen full of kids asking “when’s dinner?” every three minutes.
Here’s the thing about tortilla wraps: they’ve saved my sanity more times than I can count. But not all wraps are created equal. I’ve made plenty of sad, soggy disasters in my cast iron skillet before I figured out the tricks that make these actually crispy on the outside and perfectly melty inside. Trust me on this one.
Introduction
Let me tell you what makes these wraps different from the hundreds of other recipes you’ll find online. After years of experimenting (and honestly, quite a few failures), I’ve learned that the secret isn’t just about what goes inside the tortilla. It’s about the cooking method, the cheese placement, and yes, even the type of pan you use.
I used to think any old ground beef recipe was interchangeable. Throw some meat in a pan, add taco seasoning, call it a day. But these wraps taught me that technique matters just as much as ingredients. The first time I nailed the crispy exterior while keeping the inside gooey and warm, my oldest kid actually asked for seconds. That’s when I knew I had something worth sharing.
This recipe has become my go-to for busy weeknights, last-minute dinners, and even meal prep Sundays when I’m batch cooking for the week ahead. The best part? You can make these in a regular non-stick pan or my personal favorite, a well-seasoned cast iron skillet that gives them that perfect golden crust.

Essential Ingredients
- 1 pound ground beef (80/20 works best for flavor)
- 8 large flour tortillas (burrito-size)
- 2 cups shredded cheddar cheese (or Mexican blend)
- 1 cup diced onion
- 2 cloves garlic, minced
- 1 tablespoon chili powder
- 1 teaspoon cumin
- 1 teaspoon paprika
- ½ teaspoon salt
- ¼ teaspoon black pepper
- 2 tablespoons tomato paste
- ½ cup water
- 2 tablespoons butter (for cooking)
- Optional: sour cream, salsa, jalapeños for serving
Alternative Ingredients
Look, I get it. Sometimes you’re working with what’s in the pantry. I’ve made this recipe with ground turkey when I was trying to cut back on red meat (spoiler: it works, but add a little extra fat). Ground chicken works too, though I’d recommend the darker meat for better flavor.
If you can’t find large tortillas, smaller ones work fine. Just adjust your filling amounts and maybe make a few extra. I’ve even used whole wheat tortillas when I was feeling health-conscious, though they don’t crisp up quite as nicely.
For the cheese, I usually grab whatever’s on sale. Pre-shredded is convenient, but if you’ve got time, shredding a block of cheddar cheese yourself makes a difference. Those anti-caking agents in pre-shredded cheese can make it less melty. Pepper jack adds a nice kick if you’re into spice.
The spices? Feel free to use a pre-made taco seasoning packet if that’s what you have. I started making my own blend after realizing I could control the salt and skip those weird fillers. But honestly, there’s no judgment here. Use what works for your kitchen and your budget.
Step-by-Step Directions
Step 1: Brown the Beef Heat your cast iron skillet over medium-high heat. Add the ground beef and break it up with a wooden spoon. Here’s where most people mess up (myself included, for years). Don’t stir it constantly. Let it sit for 2-3 minutes to develop that nice brown crust before breaking it up more. Cook until no pink remains, about 6-8 minutes.
Step 2: Build the Flavor Drain most of the fat, leaving about a tablespoon in the pan. Add your diced onions and cook until they start to soften, maybe 3-4 minutes. Then toss in the garlic. Give it just 30 seconds because burnt garlic is the worst and I’ve done it too many times to count.
Step 3: Season It Up Sprinkle in your chili powder, cumin, paprika, salt, and pepper. Stir everything together so the meat gets coated. This is when your kitchen starts smelling amazing and people wander in asking what’s for dinner.
Step 4: Add Moisture Stir in the tomato paste and water. Let this simmer for about 5 minutes until it thickens up nicely. You want it moist but not soupy. If it looks too dry, add a splash more water. Too wet? Let it cook a bit longer.
Step 5: Assemble the Wraps Move your beef mixture to a bowl and wipe out your skillet. Lay out a tortilla and add about ⅓ cup of the beef mixture to the center. Top with a generous handful of cheese (don’t be shy here). Fold in the sides, then roll it up tightly like a burrito.
Step 6: Cook to Perfection Here’s my secret: melt about half a tablespoon of butter in your pan over medium heat. Place your wrap seam-side down first. This seals it and prevents unraveling. Cook for 2-3 minutes until golden brown, then flip. If you’re using meal prep containers for the week, you can skip this step and just store them wrapped, then crisp them up when you’re ready to eat.
Step 7: Finish Strong Keep cooking and flipping until all sides are golden and the cheese is melted inside. This takes about 6-8 minutes total. Cut diagonally and serve immediately for maximum cheese pull.
Pro Tips
After making these probably a hundred times, here are the tricks I’ve learned:
The butter makes a huge difference. I tried olive oil, cooking spray, even dry-toasting them. Butter gives you that restaurant-quality golden crust that makes these special.
Don’t overfill. I know it’s tempting (trust me, I’ve learned this lesson the hard way), but overstuffed wraps fall apart when you try to flip them. Stick to about ⅓ cup filling max.
Let your beef mixture cool for 5 minutes before assembling if you’ve got time. Hot filling makes the tortillas soggy and harder to work with. I learned this after several wraps fell apart in my hands.
For meal prep, I make a double batch and store the uncooked wraps in airtight containers. They keep in the fridge for 3-4 days or freeze beautifully for up to 3 months. Just crisp them up in your pan when you’re ready to eat.
If you’re cooking several at once, keep the finished ones warm in a 200°F oven while you cook the rest. Game changer for feeding a crowd.
FAQs
Can I make these ahead of time?
Absolutely! Assemble them completely, wrap in plastic wrap, and refrigerate for up to 2 days. When you’re ready to eat, just cook them as directed. For longer storage, freeze them individually and they’ll keep for 3 months.
What if I don’t have a cast iron skillet?
Any non-stick pan works fine. The cast iron just gives you a slightly better crust and holds heat more evenly.
Can I bake these instead of pan-frying?
Sure, though you’ll sacrifice some of that crispy texture. Brush them with melted butter, place seam-side down on a baking sheet, and bake at 400°F for about 15 minutes, flipping halfway through.
How do I prevent them from getting soggy?
Make sure your beef mixture isn’t too wet, and don’t add any wet toppings like salsa or sour cream until serving. Also, cook them right before eating for best results.
What’s the best way to reheat leftovers?
Skip the microwave if you can. Reheat them in a dry skillet over medium heat for 3-4 minutes per side. You can also pop them in a 350°F oven for about 10 minutes.
Why You’ll Love This Recipe
Look, I’m not going to oversell this. These aren’t fancy. They’re not Instagram-perfect (though they do photograph pretty well if you get that cheese pull shot). What they are is reliable.
They’re the recipe I turn to when I need something fast that won’t disappoint. They’re what I make when my teenager’s friends show up unexpectedly at dinner time. They’re what I batch-cook on Sundays when I know the week ahead is going to be crazy.
The ingredient list is simple and probably already in your kitchen. The technique is forgiving enough that even if you mess up a bit, they’ll still taste good. And honestly? They’re just really satisfying to make. There’s something about that sizzle when the tortilla hits the buttered pan, and watching it turn golden and crispy.
What Makes This Recipe Unique
Here’s what I’ve changed from the standard ground beef wrap recipes you’ll find everywhere:
First, the tomato paste. Most recipes skip it, but I find it adds a depth that regular taco seasoning alone can’t match. It’s a trick I picked up from my friend who used to work in a Mexican restaurant.
Second, the cooking method. A lot of recipes tell you to just warm these through. But taking the time to get them properly crispy on all sides transforms them from “meh” to “can I have another one?”
Third, the cheese placement strategy. I used to put cheese on both sides of the filling, but learned that concentrating it in the middle creates better cheese pull and prevents it from leaking out during cooking.
And finally, the butter. This isn’t health food (sorry, not sorry), but that little bit of butter in the pan instead of oil makes all the difference in texture and flavor.
Key Features
- Ready in 35 minutes from start to finish
- Perfect for meal planning and batch cooking
- Kid-friendly and customizable
- Budget-friendly ingredients
- Freezer-friendly for busy weeks
- Works great in regular pans or cast iron
- Minimal cleanup (one pan cooking)
- Versatile for different dietary needs with simple swaps
You’ll Also Love
If these wraps become a regular in your rotation (and I bet they will), you might want to try some of my other quick dinner solutions:
My quesadilla recipe uses a similar technique but with different fillings. The crispy pan method works beautifully there too.
For nights when you need even less effort, my sheet pan beef and vegetable bake uses similar seasonings but everything goes in the oven.
And if you love the taco flavors but want something lighter, my taco salad bowls are perfect for summer. Same great taste, just served cold over greens.
I’ve also got a breakfast version of these wraps using scrambled eggs and sausage that my family requests constantly on weekends.
Conclusion
So here’s the deal. I’ve been making these wraps for five years now, and they’ve never let me down. They’ve fed unexpected guests, solved countless “what’s for dinner” dilemmas, and filled my meal prep containers more times than I can count.
Are they going to win any culinary awards? Probably not. But they’re going to feed your family, use up ingredients you already have, and maybe even get you a “this is really good” from someone at your table. In my book, that’s a winning recipe.
The beauty of cooking isn’t always in complexity. Sometimes it’s in having a reliable recipe you can make half-asleep on a Tuesday night and still have it turn out great. This is that recipe for me, and I hope it becomes that recipe for you too.
Give them a try, adjust the seasonings to your taste, and don’t stress if your first batch isn’t perfect. Mine sure wasn’t. But by the third or fourth time? You’ll have it down, and you might find yourself making a double batch just to have extras in the freezer.
Happy cooking, and feel free to share your own variations. I’m always learning new tricks, even after ten years of doing this.