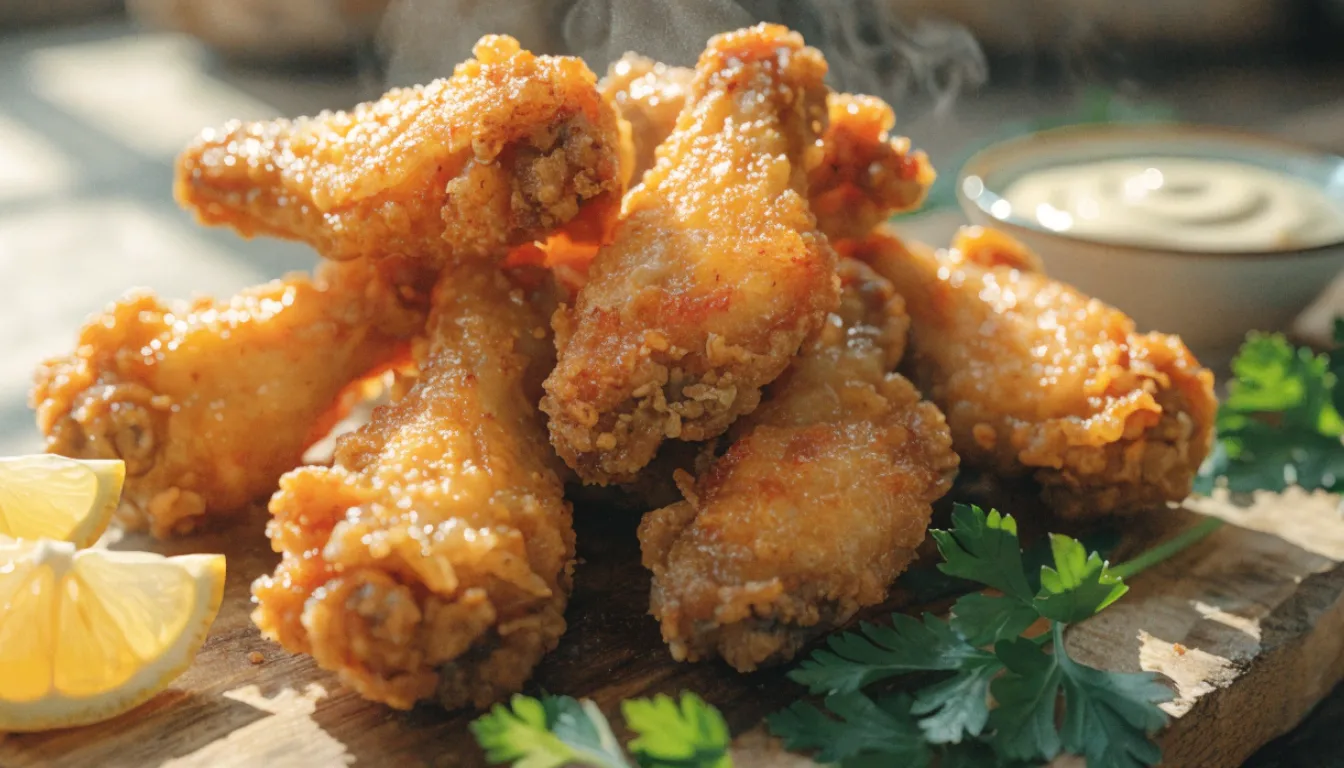
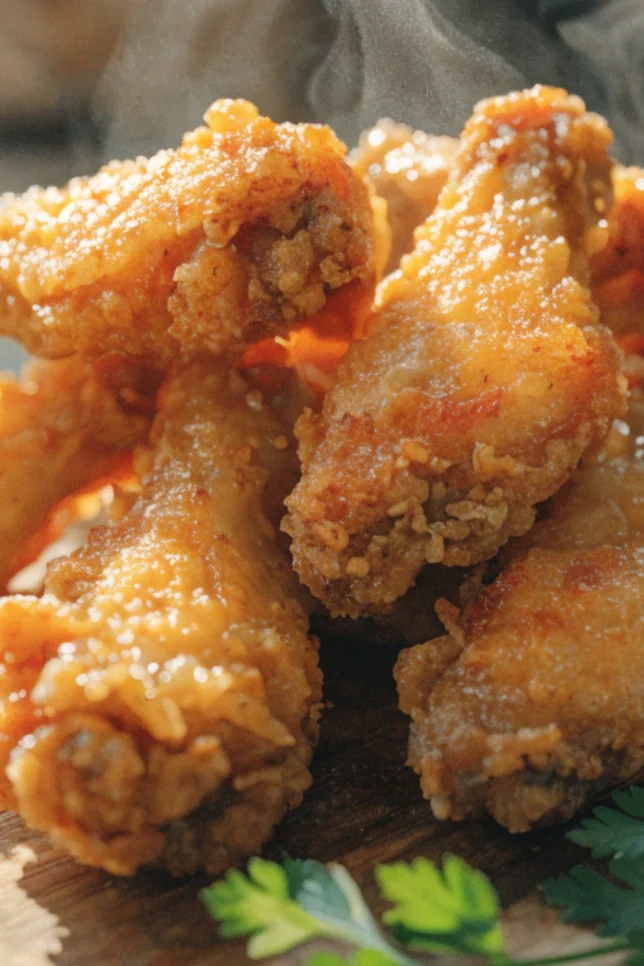
Crispy Fried Chicken Wings: The Only Recipe You’ll Ever Need
I’ve been making fried chicken wings for over ten years, and I’ll be completely honest with you. For the first three of those years, I was doing it wrong. Not catastrophically wrong. But wrong enough that my wings came out pale, greasy, and with that soft skin that peels right off the meat the second you bite into it. You know that sad floppy skin? Yeah. That was me every Friday night.
The turning point came when I started paying attention to the actual science behind what makes a wing crispy. Not just following steps blindly, but understanding why each step matters. And once I got that, everything changed. Now my family requests these every single week. My neighbor literally texted me last month asking if I could “accidentally” make too many. So let me share everything I know.
Why Most Homemade Wings Fail (And How to Fix It)
The number one problem is moisture. Wings straight from the package are wet, and wet skin does not fry crispy. It steams instead. The fix is shockingly simple. Pat your wings completely dry with paper towels, then let them sit uncovered in the fridge for at least one hour, ideally overnight. This is the single biggest game changer I can share. Do this one thing and your wings will already be better than 80% of homemade versions out there.
The second problem is the coating. A lot of recipes call for a heavy wet batter, which gives you that thick pub-style crunch. That’s great for some things, but for proper crispy wings, you want a thinner dredge. My go-to is a combination of all-purpose flour and cornstarch. The cornstarch is the secret weapon here. It creates an incredibly light, shatteringly crispy crust that stays crispy even after it cools down a bit. If you’ve ever had wings from a really good Korean fried chicken spot, that double-fried, glass-like crunch? Cornstarch is a big part of why that works.
The third issue is oil temperature. This one is where most home cooks struggle because without a proper instant-read thermometer or a deep fry thermometer, you’re basically guessing. I use a ThermoPro clip-on thermometer that sits on the side of my pot, but any reliable kitchen thermometer works. You want your oil at 350°F (175°C). Drop below that and your wings absorb oil and come out greasy. Go above 375°F and the outside browns too fast while the inside stays undercooked.
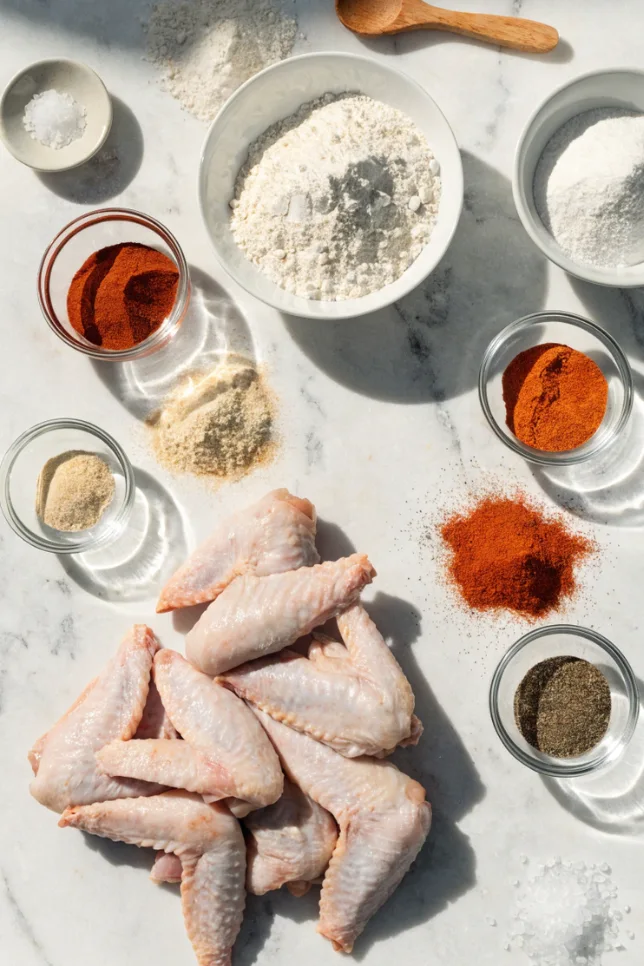
Essential Ingredients
- 2 lbs (about 900g) chicken wings, split into flats and drums
- 1 cup all-purpose flour
- 1/2 cup cornstarch
- 1 teaspoon baking powder (not baking soda)
- 1 teaspoon garlic powder
- 1 teaspoon onion powder
- 1 teaspoon smoked paprika
- 1 teaspoon salt
- 1/2 teaspoon black pepper
- 1/2 teaspoon cayenne pepper (adjust to your heat preference)
- Neutral oil for frying (vegetable oil, canola oil, or peanut oil)
For the optional brine/marinade:
- 1 cup buttermilk
- 1 teaspoon hot sauce
- 1/2 teaspoon salt
Alternative Ingredients
No buttermilk? Mix 1 cup regular milk with 1 tablespoon of white vinegar or lemon juice. Let it sit for five minutes and you’ve got a workable substitute. For a gluten-free version, swap the all-purpose flour for a 1:1 gluten-free flour blend and keep the cornstarch as-is. The results are surprisingly good.
If you want to skip frying altogether, these wings work beautifully in an air fryer. I tested this extensively on my Cosori air fryer. Coat the wings the same way, spray with a light coat of cooking spray, and cook at 400°F for 22 to 25 minutes, flipping halfway. They won’t be identical to deep fried but they get genuinely crispy and use a fraction of the oil. Great option if you’re watching calories or just don’t want to deal with a pot of hot oil.
Speaking of which, if you’re doing a lot of weekend meal prep and want to batch cook wings ahead of time, a large cast iron dutch oven is my favorite vessel for deep frying. It holds temperature better than thin stainless pots, which means more consistent results across multiple batches.
Step-by-Step Directions
Step 1: Dry and marinate. Pat wings completely dry. If you’re using the buttermilk brine, mix the wings with buttermilk, hot sauce, and salt in a zip-lock bag or large container. Refrigerate for 2 to 4 hours, or overnight if you have the time. If skipping the brine, just let the dried wings sit uncovered in the fridge for at least an hour.
Step 2: Make your dredge. In a large bowl or shallow dish, whisk together the flour, cornstarch, baking powder, garlic powder, onion powder, smoked paprika, salt, black pepper, and cayenne. The baking powder is something I added after reading about it a few years back. It slightly raises the pH of the skin, which helps it brown faster and get crispier. Small detail, big difference.
Step 3: Coat the wings. Remove wings from brine (if using) and let the excess drip off. You don’t need them totally dry at this point. Toss them in the flour mixture, pressing firmly so the coating sticks. Let the coated wings rest on a wire rack for 10 minutes. This rest period lets the coating hydrate and adhere better, so it doesn’t fall off in the oil.
Step 4: Heat your oil. Pour about 2 to 3 inches of neutral oil into a heavy pot. A cast iron skillet or dutch oven works best for even heat distribution. Heat to 350°F. Keep your thermometer clipped to the side so you can monitor temperature between batches.
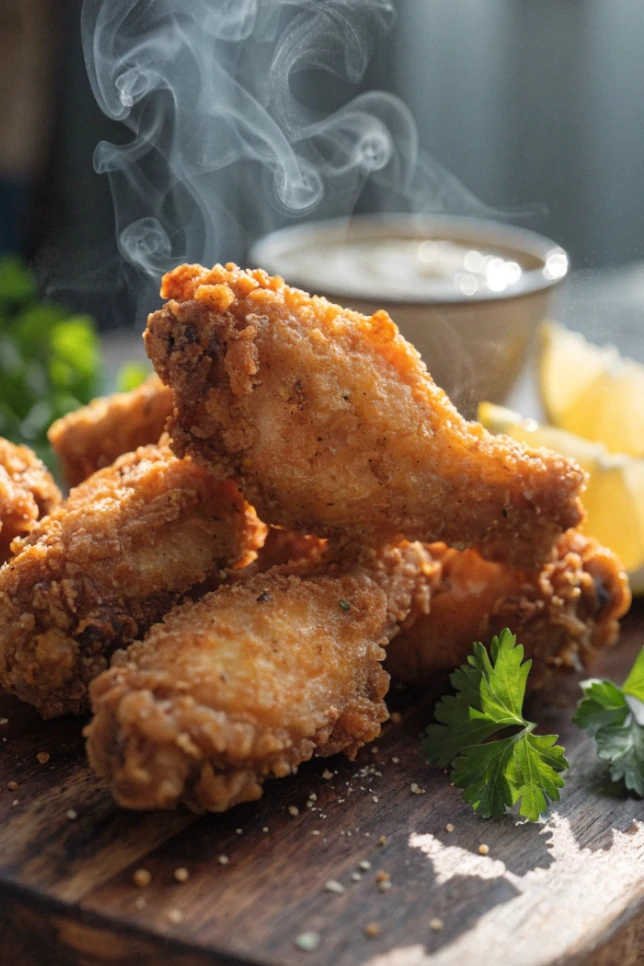
Step 5: Fry in batches. This is important. Don’t crowd the pot. Fry 4 to 6 wings at a time depending on your pot size. Overcrowding drops the oil temperature and leads to greasy, uneven wings. Fry for 10 to 12 minutes, turning once or twice, until deeply golden and cooked through (internal temp of 165°F). Use a spider strainer or slotted spoon to transfer to a wire rack over a baking sheet. Never a plate lined with paper towels, by the way. Paper towels trap steam underneath and make the bottom soggy. Wire rack lets air circulate all around.
Step 6: Optional double fry for maximum crunch. Let the wings rest for 5 minutes after the first fry, then drop them back in at 375°F for another 2 to 3 minutes. This is the Korean fried chicken technique and it absolutely works. The second fry drives out any remaining moisture and creates that extra-crispy shell.
Pro Tips
The resting period before frying matters more than most people think. Those 10 minutes on the rack after coating let the flour mixture form a proper bond with the skin. I skipped this step for years and always wondered why some of my coating fell off in the oil. Now I never skip it.
Season your coating aggressively. Chicken is an unseasoned protein and it needs help. Taste your flour mixture before you use it. It should taste noticeably salty and spiced. If it doesn’t, add more. Timid seasoning in the dredge means bland wings, full stop.
If you’re cooking for a crowd and need to keep wings warm, spread them on a wire rack set over a baking sheet and hold them in a 250°F oven for up to 30 minutes. They stay crispy much better this way than just sitting on a platter.
For storage, cooked wings keep well in an airtight container in the fridge for up to 3 days. To reheat, skip the microwave entirely. Use your air fryer at 375°F for 5 to 6 minutes or a conventional oven at 400°F for about 10 minutes. Both methods bring back a good amount of the original crispiness.
Frequently Asked Questions
Can I bake these wings instead of frying?
Yes, you can bake them at 425°F on a wire rack for crispy results, although deep frying gives the crunchiest texture.
Why are my fried chicken wings not crispy?
The most common reasons are excess moisture on the wings, overcrowding the fryer, or frying at the wrong oil temperature.
What oil is best for frying chicken wings?
Peanut oil, vegetable oil, and canola oil are all excellent choices because they have high smoke points and neutral flavor.
Can I make Crispy Fried Chicken Wings in an air fryer?
Absolutely. Air fry at 400°F for 22 to 25 minutes, flipping halfway through for even crispiness.
How do I store leftover chicken wings?
Store cooked wings in an airtight container in the refrigerator for up to 3 days and reheat in the oven or air fryer.
Why You’ll Love This Recipe
These wings are genuinely addictive. The crust is thin and crunchy without being thick or bready. The inside stays juicy because of the buttermilk brine. And the seasoning blend hits that sweet spot where it’s flavorful but not overwhelming, which means these wings work as a base for any sauce you want to toss them in after frying. Buffalo, honey garlic, lemon pepper, teriyaki. All of them work great on this base recipe.
They’re also surprisingly flexible when it comes to equipment. You don’t need a dedicated deep fryer (though a Presto FryDaddy or similar countertop deep fryer does make the whole process cleaner and easier if you fry often). A heavy pot on the stove works perfectly fine.
What Makes This Recipe Unique
Most crispy wing recipes rely on a single fry and call it done. This method includes the optional double fry from Korean fried chicken technique, the cornstarch-forward dredge, and the baking powder addition. These three things together produce a level of crunch that most home cooks don’t expect to achieve without restaurant equipment. You’re essentially using the same principles that high-volume wing spots use, just scaled down for a home kitchen.
You’ll Also Love
- Honey Garlic Chicken Thighs (30 minutes, one pan)
- Air Fryer Chicken Tenders with Dipping Sauce
- Buttermilk Fried Chicken Sandwich
- Baked Buffalo Cauliflower Wings (great vegetarian option)
- Korean Double Fried Chicken (Yangnyeom style)
Conclusion
Crispy wings at home are 100% achievable once you understand the why behind each step. Dry your wings. Rest your coating. Watch your oil temperature. Fry in small batches. These four things alone will put your wings in a completely different category than what most people make at home.
I hope this recipe becomes a regular in your rotation the way it has in mine. If you try it, let me know how it went in the comments. I genuinely love hearing what tweaks people make and what sauces they use. And if something didn’t work out, tell me that too. Sometimes the most useful conversations start with “I followed the recipe but this happened.”
Happy frying.
Linda
Crispy Fried Chicken Wings
Restaurant-style crispy fried chicken wings with juicy meat inside and a crunchy seasoned crust that stays crispy for hours.
Ingredients
- 2 lbs chicken wings, split into flats and drums
- 1 cup all-purpose flour
- 1/2 cup cornstarch
- 1 tsp baking powder
- 1 tsp garlic powder
- 1 tsp onion powder
- 1 tsp smoked paprika
- 1 tsp salt
- 1/2 tsp black pepper
- 1/2 tsp cayenne pepper
- Neutral oil for frying
Optional Buttermilk Marinade
- 1 cup buttermilk
- 1 tsp hot sauce
- 1/2 tsp salt
Instructions
- Dry and marinate: Pat the wings completely dry. Marinate in buttermilk mixture for 2 to 4 hours if desired.
- Mix coating: Combine flour, cornstarch, baking powder, garlic powder, onion powder, smoked paprika, salt, pepper, and cayenne.
- Coat wings: Toss wings in the flour mixture until fully coated. Let rest on a wire rack for 10 minutes.
- Heat oil: Heat oil in a heavy pot to 350°F.
- Fry in batches: Fry 4 to 6 wings at a time for 10 to 12 minutes until golden and cooked through.
- Double fry: Fry again at 375°F for 2 to 3 minutes for maximum crunch.
- Serve: Transfer to a wire rack and serve hot with dipping sauces.