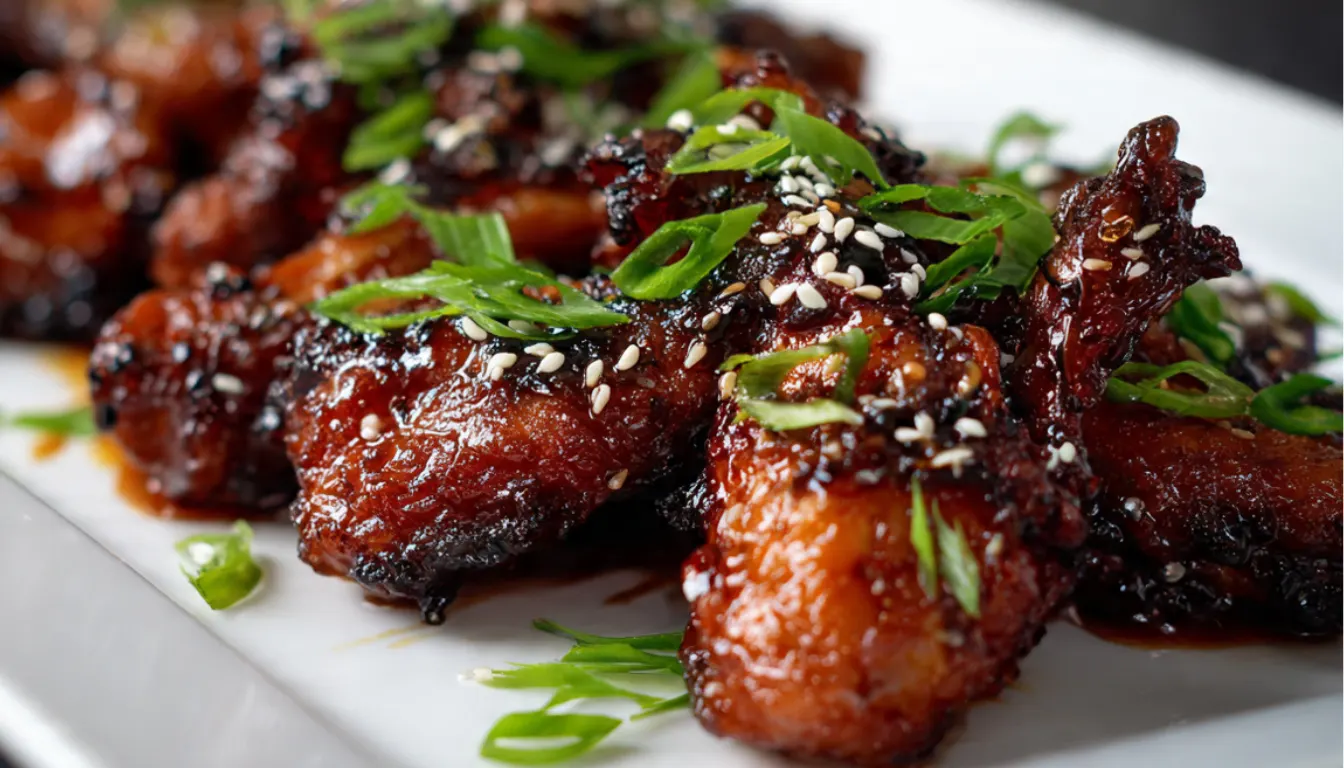
Sticky Caramelized Chicken Tulips: The Ultimate Crowd-Pleasing Recipe
You know those recipes that look impressive but are secretly easy? This is one of them. I discovered chicken tulips (also called chicken lollipops) at a friend’s dinner party five years ago, and I’ve been making them ever since. The trick is in the presentation and that sticky, sweet-savory glaze that keeps everyone coming back for more.
Here’s what I love about this recipe: it transforms ordinary chicken drumettes into something that looks like it came from a fancy restaurant. Plus, the caramelized coating creates this addictive balance between sweet and tangy that works for everything from weeknight dinners to game day spreads. And honestly, once you learn the technique for making the “tulip” shape, you’ll want to make these all the time.
The best part? You can cook these in multiple ways depending on what equipment you have. I usually use my cast iron skillet for that perfect sear and caramelization, but they also work beautifully in an air fryer if you’re watching calories or just want less mess. I’ll walk you through both methods so you can choose what works best for your kitchen.
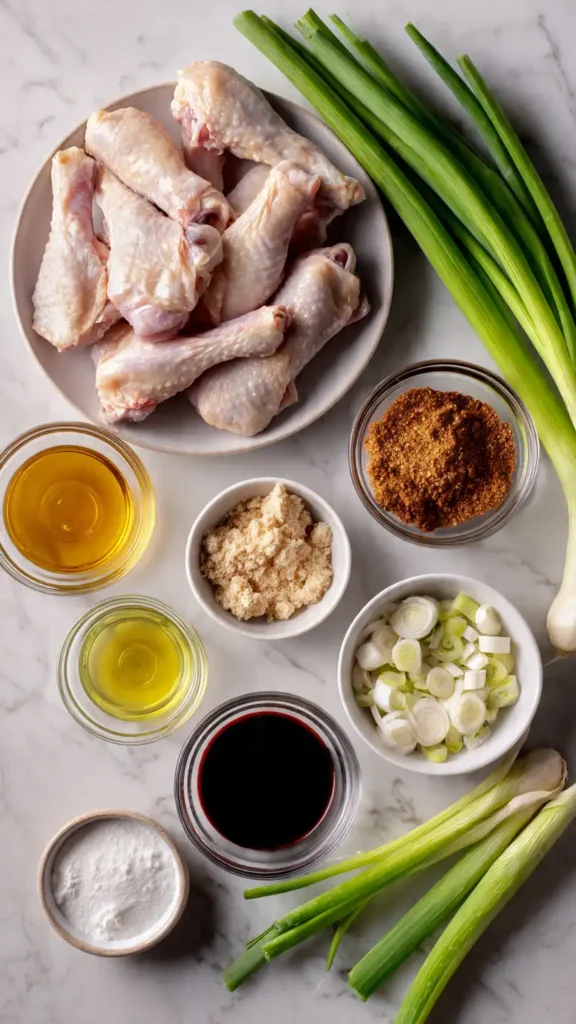
Essential Ingredients
For the Chicken:
- 12 chicken drumettes (the upper part of the wing)
- 2 tablespoons cornstarch
- 1 teaspoon salt
- 1/2 teaspoon black pepper
- 1/2 teaspoon garlic powder
- 1/4 teaspoon paprika
- 2 tablespoons vegetable oil (for pan-frying)
For the Sticky Caramel Glaze:
- 1/3 cup honey
- 3 tablespoons soy sauce
- 2 tablespoons rice vinegar
- 2 tablespoons brown sugar
- 3 cloves garlic, minced
- 1 tablespoon fresh ginger, grated
- 1 tablespoon sesame oil
- 1/4 teaspoon red pepper flakes (optional)
- 1 tablespoon water
- 1 teaspoon cornstarch (for thickening)
For Garnish:
- Sesame seeds
- Sliced green onions
- Fresh cilantro (optional)
Alternative Ingredients
Don’t have everything on hand? No problem. I’ve made this recipe with so many substitutions over the years that I can tell you what actually works.
If you’re out of honey, maple syrup creates a different but equally delicious glaze. The flavor is slightly more earthy and less floral. Brown rice syrup works too, though it’s less sweet, so you might want to add a touch more sugar.
For the soy sauce, tamari is my go-to gluten-free alternative, and it actually has a richer, less salty taste that I sometimes prefer. Coconut aminos work if you’re avoiding soy entirely, but use a bit less because they’re sweeter.
Rice vinegar can be swapped with apple cider vinegar (use about half the amount because it’s stronger) or even a splash of fresh lime juice for a citrusy twist. I’ve done the lime version for summer cookouts, and people went crazy for it.
Instead of fresh ginger, you can use 1/2 teaspoon of ground ginger. Fresh is better for that bright, zingy flavor, but ground works in a pinch. And if you don’t have sesame oil, honestly, just leave it out rather than substituting. It’s there for aroma more than anything else.
For the chicken itself, you can use whole chicken wings and separate them yourself, or even use chicken drumsticks if you can’t find drumettes. The technique is the same, though drumsticks take a few minutes longer to cook through.
Tools and Equipment
Let me tell you what makes this recipe easier. First, you’ll want a good pair of kitchen scissors or a sharp knife for preparing the chicken tulips. I struggled with a dull knife for years before investing in a quality pair of kitchen shears, and it changed everything. The process went from frustrating to actually enjoyable.
For cooking, I rotate between three methods depending on my mood and how much time I have. My Lodge cast iron skillet is my favorite because it gives that gorgeous caramelized crust and even heat distribution. Cast iron skillets retain heat so well that the glaze caramelizes perfectly without burning. If you’ve never cooked with cast iron before, this is a great recipe to start with because it’s forgiving.
If you’re going for a healthier option or it’s summer and you don’t want to heat up the kitchen, an air fryer works wonderfully. I have a basic Ninja air fryer, nothing fancy, and these come out crispy with way less oil. The circulating heat means you get that beautiful golden-brown color all around without having to stand over the stove.
You’ll also want a small saucepan for the glaze, a whisk, and a basting brush. I keep cheap silicone brushes specifically for sticky sauces like this because they’re easy to clean. And here’s something I learned the hard way: have your meal prep containers ready if you’re making these ahead. They store beautifully for up to three days, and having them portioned out makes weekday lunches so much easier.
A meat thermometer is helpful but not essential. After making these a few dozen times, I can tell when they’re done by how they feel, but when you’re starting out, checking that internal temperature hits 165°F takes the guesswork out.
Step-by-Step Directions
Let’s start with the chicken prep, which honestly looks more complicated than it is. Take each drumette and use kitchen scissors or a sharp knife to cut around the narrow end of the bone, about half an inch from the bottom. You’re basically making a cut through the tendons and meat. Then push the meat down toward the thicker end, turning it inside out to create that lollipop or tulip shape. The meat bunches up at the top and exposes the bone at the bottom, which becomes your handle.
The first time I did this, it took me about 20 minutes for a dozen pieces and I felt like I was doing surgery. Now I can prep them all in about 5 minutes. Don’t stress if they don’t look perfect because once they’re cooked and glazed, nobody notices minor imperfections.
Once all your chicken pieces are shaped, pat them completely dry with paper towels. This is important because moisture prevents that crispy exterior we’re going for. In a large bowl, mix the cornstarch with salt, pepper, garlic powder, and paprika. Toss the chicken pieces in this mixture until they’re evenly coated. The cornstarch creates an incredible crust and helps the glaze stick better later.
Now for the cooking. If you’re using a cast iron skillet, heat it over medium-high heat with the vegetable oil. You want it hot enough that a drop of water sizzles immediately. Place the chicken pieces in the pan without crowding (work in batches if needed) and let them cook undisturbed for about 4 minutes per side. This is where your patience pays off because that initial sear creates all the flavor. After browning on all sides, reduce the heat to medium-low, cover, and cook for another 8 to 10 minutes until the internal temperature reaches 165°F.
For the air fryer method, spray the basket lightly with cooking oil and arrange the coated chicken pieces in a single layer. Air fry at 380°F for 12 minutes, flip them, and cook for another 10 to 12 minutes. They should be golden brown and cooked through. The air fryer gives you crispy results with minimal oil, which is great if you’re watching your meal prep macros for the week.
While the chicken cooks, make the glaze. In a small saucepan over medium heat, combine honey, soy sauce, rice vinegar, brown sugar, garlic, ginger, sesame oil, and red pepper flakes. Bring it to a gentle simmer, stirring occasionally. In a small cup, mix the cornstarch with water to create a slurry, then stir it into the sauce. Keep stirring for about 2 minutes until the glaze thickens to a syrupy consistency. It should coat the back of a spoon.
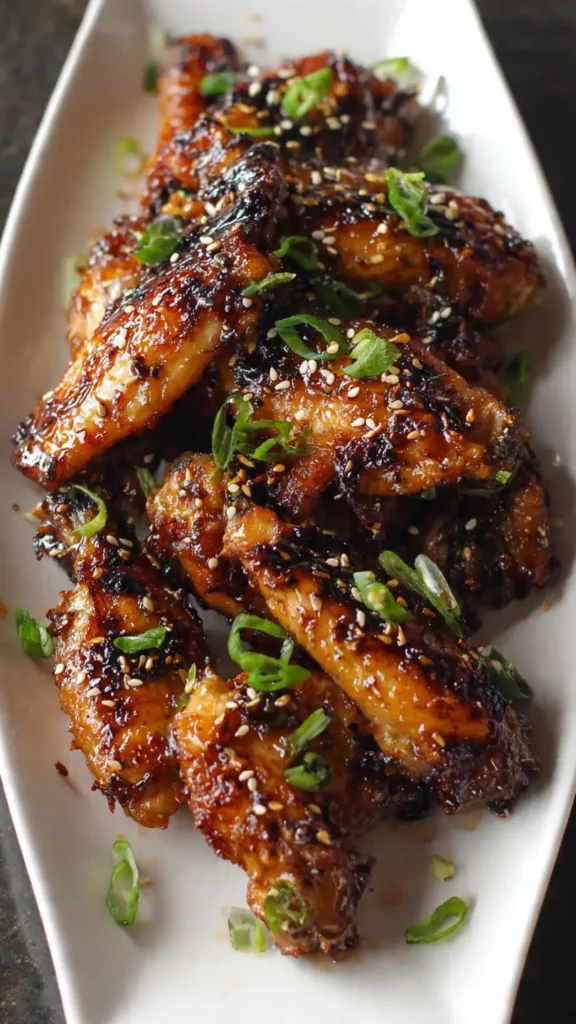
Once your chicken is cooked through, transfer the pieces to a large bowl or back to the pan if there’s room. Pour the warm glaze over the chicken and toss everything together until each piece is completely coated. The residual heat will make the glaze even stickier. Let them sit for a minute so the coating sets slightly, then arrange on a serving platter.
Sprinkle with sesame seeds and sliced green onions. I sometimes add fresh cilantro because I love how the bright, herby flavor cuts through the richness, but my husband hates cilantro, so that’s optional in your house too.
Pro Tips
After making these more times than I can count, I’ve learned some tricks that make the difference between good and absolutely incredible.
First, don’t skip drying the chicken. I used to rush this step, and the coating would steam instead of getting crispy. Just a quick pat with paper towels makes everything better.
For the glaze, make it while the chicken cooks so it’s still warm when you toss everything together. Cold glaze doesn’t coat as well and takes longer to get that sticky texture we want. If your glaze thickens too much while sitting, just add a splash of water and warm it up again.
Here’s something I discovered by accident: if you bake these instead of pan-frying or air frying, put them on a wire rack set over a baking sheet. The air circulation helps them get crispy all around, not just on the bottom. Bake at 400°F for about 25 minutes, then glaze and return to the oven for 5 more minutes.
The glaze recipe makes a generous amount. If you like things extra sticky (and who doesn’t?), reserve about a third of the glaze before tossing the chicken. You can serve it on the side for dipping or drizzle it over the plated chicken for that restaurant-quality presentation.
One more thing about storage: these reheat surprisingly well. I pack them in meal prep containers with some steamed rice and vegetables for easy lunches. Microwave for about 90 seconds, and they’re almost as good as fresh. The glaze might not be quite as crispy, but it’s still delicious. You could also reheat them in the air fryer for 3 to 4 minutes at 350°F if you want to restore that crispiness.
FAQs
Can I make these ahead for a party?
Absolutely. Cook the chicken completely and let it cool, but don’t glaze it yet. Store the cooked chicken and glaze separately in the refrigerator for up to two days. When you’re ready to serve, reheat the chicken in the oven at 350°F for about 10 minutes, warm the glaze, then toss everything together. This actually works better than trying to reheat already-glazed chicken because the coating stays crispier.
Why is my glaze too thin?
The cornstarch slurry is key. Make sure you’re mixing 1 teaspoon cornstarch with 1 tablespoon of water thoroughly before adding it to the sauce. If your glaze is still thin after simmering for 2 minutes, mix a tiny bit more cornstarch with water (just 1/4 teaspoon at a time) and add it gradually. Let it simmer a bit longer because cornstarch needs heat to activate properly.
Can I use chicken thighs instead?
You can, but the presentation won’t be the same because thighs don’t have that bone handle. If you go this route, just cut boneless thighs into large chunks, coat them the same way, and cook until crispy. They’ll taste amazing, just won’t look like tulips.
Is there a way to make this less sweet?
Sure. Cut the honey down to 1/4 cup and reduce the brown sugar to 1 tablespoon. You can add a bit more soy sauce or vinegar to balance the flavors. This creates a tangier version for those who don’t love super sweet glazes.
How do I know when they’re fully cooked?
The internal temperature should hit 165°F. If you don’t have a meat thermometer, cut into the thickest part of one piece. The meat should be white all the way through with no pink, and the juices should run clear.
Recipe Info
| Detail | Information |
|---|---|
| Prep Time | 20 minutes |
| Cook Time | 20 minutes |
| Total Time | 40 minutes |
| Servings | 4 people |
| Yield | 12 chicken tulips |
| Difficulty | Medium |
| Course | Appetizer, Main Course |
| Cuisine | Asian-Inspired, Fusion |
Why You’ll Love This Recipe
There are about a dozen reasons why this recipe has become one of my most-requested dishes, but let me give you the highlights. First, it looks fancy but doesn’t require any special skills. Seriously, if you can cut meat and make a simple sauce, you can do this. The presentation is what sells it, and that takes practice more than talent.
The flavor combination is just perfect. You get sweet from the honey, salty from the soy sauce, tangy from the vinegar, and a little heat from the ginger and optional pepper flakes. It hits every taste note, which is why people can’t stop eating them. I’ve watched guests at parties pick up “just one more” about five times.
It’s also really versatile. Serve these as an appetizer, make them the main course with rice and vegetables, pack them for lunch, or bring them to a potluck. They work for casual dinners and fancier occasions equally well. Plus, they’re naturally gluten-free if you use tamari instead of regular soy sauce, and you can adjust the sweetness and heat to match anyone’s preferences.
From a practical standpoint, this recipe is friendly to different cooking methods. Got a cast iron skillet? Perfect crispy results. Have an air fryer? Great for a healthier version. Only have an oven? That works too. And if you’re into meal prep like I am, these store well and reheat without getting gross, which is more than I can say for a lot of glazed chicken recipes.
What Makes This Recipe Unique
What sets this apart from other chicken wing or drumette recipes is the combination of technique and glaze. Most sticky chicken recipes just toss wings in sauce, which is fine but doesn’t have the same impact. The tulip presentation makes these feel special, like you went to extra effort (even though it only takes a few extra minutes once you know how).
The glaze itself is different from typical Asian-inspired sauces because it’s got that caramelization element. When the honey and brown sugar cook down and coat the chicken, they create this slightly crusty, sticky layer that’s totally different from a wet sauce. It’s more like Korean fried chicken or Chinese restaurant-style dishes, but with a homemade twist.
The other unique thing is the cooking method flexibility. Most recipes are written for one specific method, but I’ve tested this in every way possible because I know people have different equipment and preferences. Whether you’re using traditional stovetop methods, modern air fryers, or conventional ovens, you’ll get great results. That’s not common with chicken recipes because the timing and texture can vary so much between methods.
Key Features
Here’s what makes this recipe a winner in my book. The chicken stays incredibly juicy inside despite having that crispy, glazed exterior. The cornstarch coating is the secret because it creates a barrier that locks in moisture while crisping up beautifully. This is a technique borrowed from Chinese cooking, and it works like magic.
The glaze has layers of flavor instead of being one-note sweet. You taste the honey first, then the savory soy and garlic, followed by the brightness of ginger and vinegar. It’s complex without being complicated to make. And because you’re making the glaze from scratch, you control exactly how sweet, salty, or spicy it is.
These are surprisingly filling. People underestimate how satisfying chicken drumettes can be, but with that rich glaze and the protein content, a few pieces actually make a complete meal. I usually serve 3 pieces per person as a main course with sides, or 2 pieces per person as an appetizer.
The recipe scales easily. Making these for just yourself? Cut everything in half. Feeding a crowd for game day? Double or triple the recipe. The cooking time stays basically the same because you’re working in batches anyway. I’ve made 50 of these for parties, and it wasn’t much harder than making 12.
They’re also great for meal planning. Cook a big batch on Sunday, and you have protein sorted for several days. Pair them with different sides throughout the week, and you’ve got variety without cooking every single night. This is huge if you’re trying to stick to healthy eating goals while managing a busy schedule.
You’ll Also Love
If these sticky chicken tulips are your thing, I have a feeling you’ll enjoy some of my other recipes with similar flavors and techniques.
My honey garlic chicken thighs use a comparable glaze but with a simpler preparation method if you want that flavor without the tulip shaping. The crispy orange chicken is another crowd favorite that has that same sweet and tangy vibe with a citrus twist. And if you loved the Asian-inspired flavors here, my teriyaki salmon bowls offer something similar but with fish instead of chicken.
For other appetizer ideas that impress guests, try my bacon-wrapped jalapeño poppers or buffalo chicken egg rolls. Both have that finger-food appeal and bold flavors that make people come back for seconds. And if you’re meal prepping, my sheet pan chicken and vegetables uses similar Asian flavors but requires even less hands-on time because everything cooks together.
Conclusion
Look, I know chicken drumettes might not seem like the most exciting ingredient, but this recipe proves that technique and a good glaze can transform something ordinary into something memorable. The sticky caramelized coating, that fun tulip presentation, and the flexibility to cook them however you want makes this recipe a keeper.
I’ve been making these for five years now, and they never get old. My family requests them regularly, and I bring them to every potluck because I know they’ll disappear. The best part is watching someone try one for the first time and immediately reach for another.
Give these a shot this weekend. Start with a small batch if you’re nervous about the tulip shaping, and remember that even imperfect-looking ones taste amazing. Once you nail the technique, these will become part of your regular rotation. And if you make them, I’d love to hear what you think. Did you use the cast iron skillet or air fryer? Did you adjust the glaze? Let me know how they turned out for you.
Happy cooking, and enjoy those sticky fingers!
Linda