Double Chocolate Rolls: The Ultimate Bakery-Style Sweet Rolls
So here’s the thing about chocolate rolls. I spent about three years trying to recreate those incredible double chocolate sweet rolls from my favorite bakery, and honestly, I was terrible at it. The dough would be too dense, the chocolate filling would leak everywhere, or they’d come out dry as cardboard. But after countless failed batches (my family was very patient), I finally cracked the code.
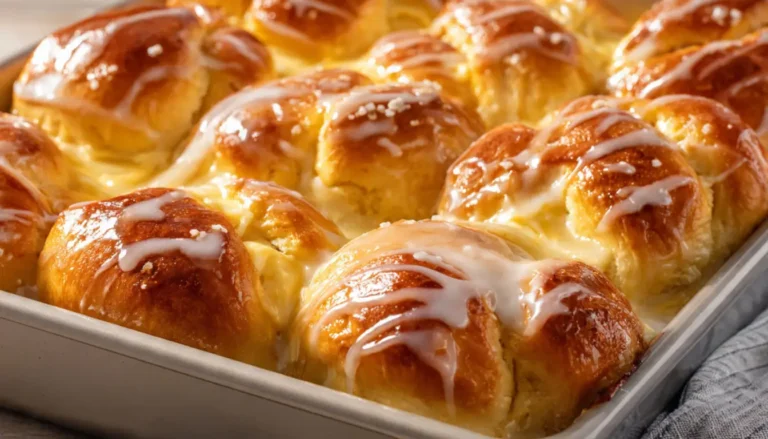
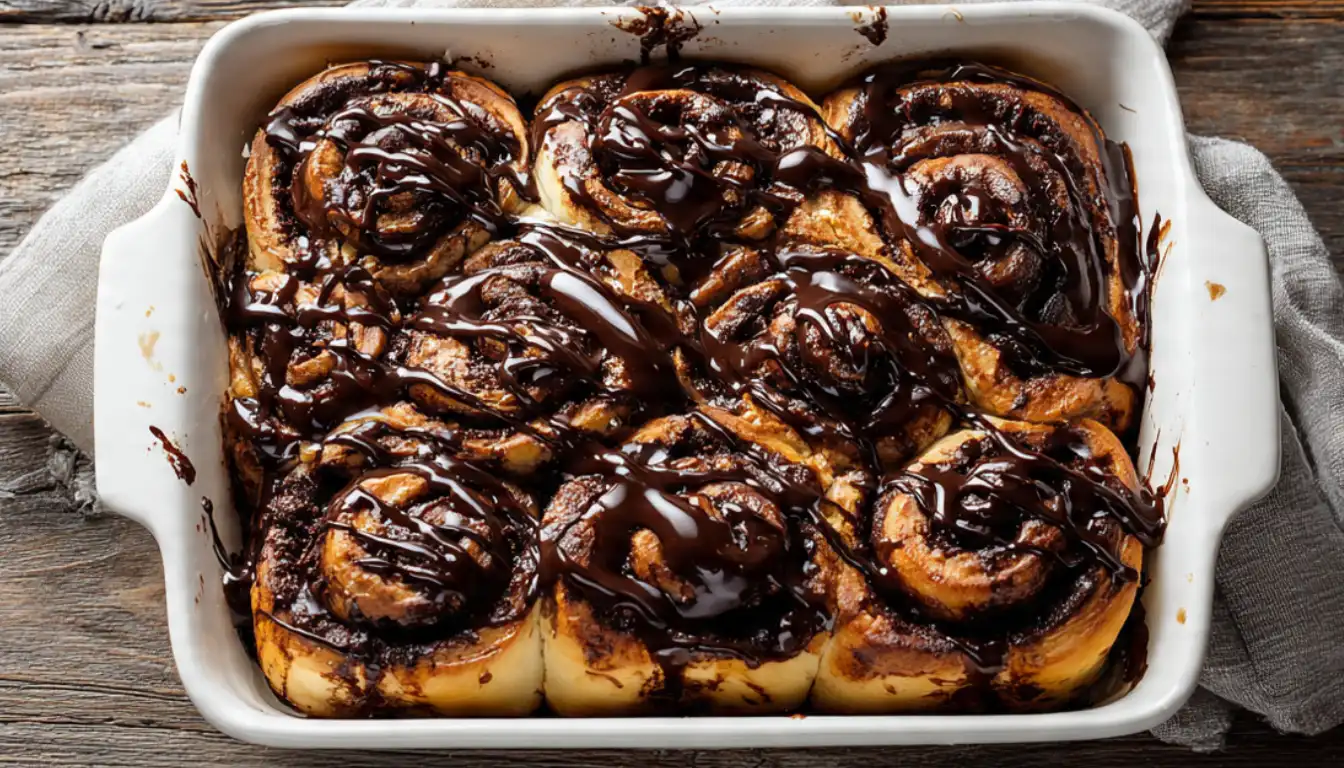
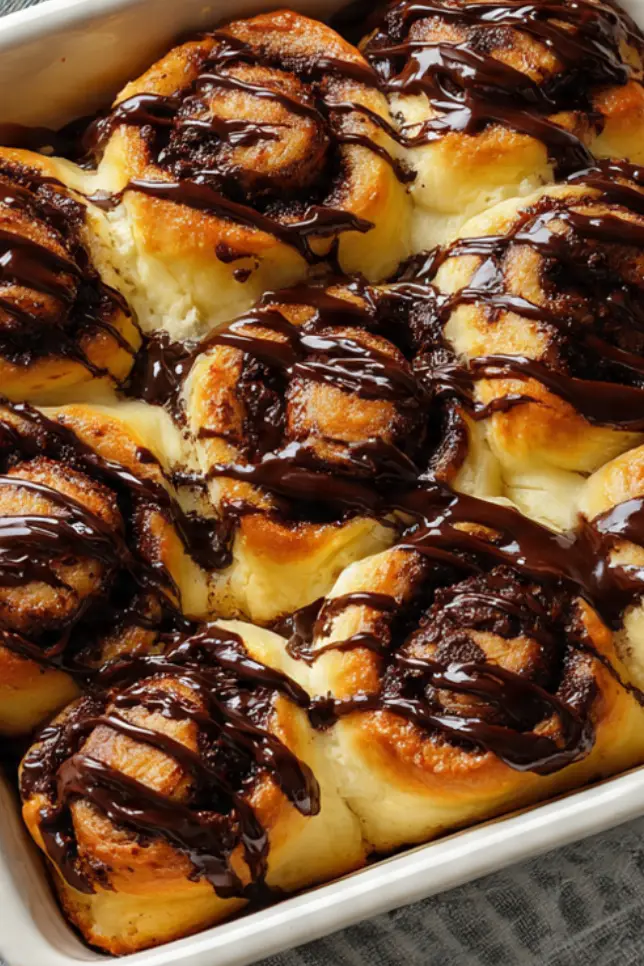
These double chocolate rolls are everything you want in a sweet roll. Soft, pillowy dough swirled with rich cocoa filling, topped with a glossy chocolate glaze. They taste like something you’d pay $6 each for at a fancy bakery, but you can make a whole batch at home. And trust me, once you nail this recipe, you’ll never look at store-bought cinnamon rolls the same way again.
The secret? It’s all about the dough hydration and not skimping on the chocolate. I learned this the hard way after trying to “healthify” the recipe one too many times. Sometimes you just need real butter and good cocoa powder, you know?
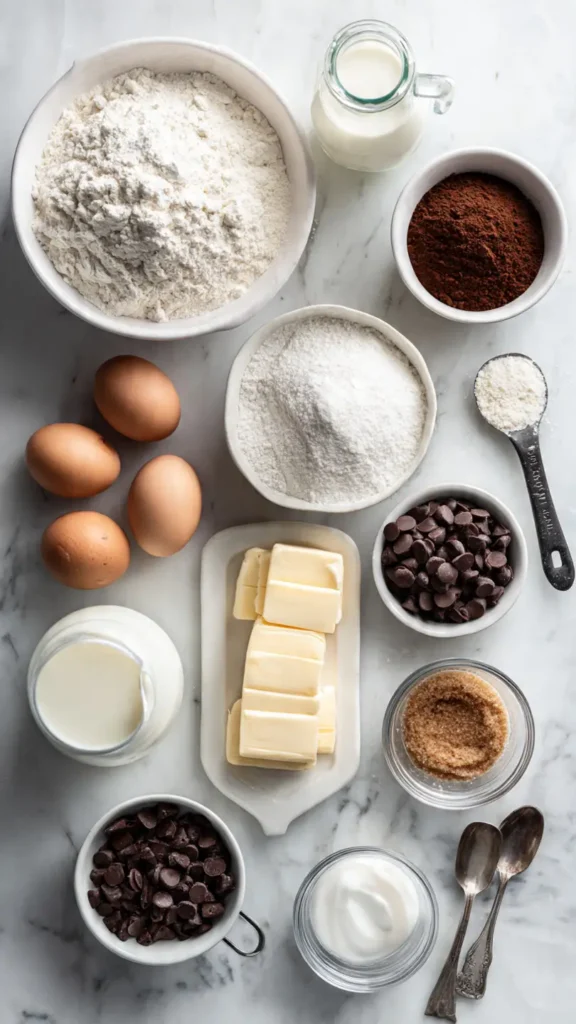
Essential Ingredients
For the Dough:
- 4 cups all-purpose flour
- 1/3 cup granulated sugar
- 2 1/4 teaspoons instant yeast (1 packet)
- 1 teaspoon salt
- 1 cup whole milk, warmed to 110°F
- 1/3 cup unsalted butter, melted
- 2 large eggs, room temperature
- 1 teaspoon vanilla extract
For the Chocolate Filling:
- 1/2 cup unsalted butter, softened
- 1/2 cup dark cocoa powder
- 3/4 cup brown sugar, packed
- 1 teaspoon cinnamon
- 1/4 teaspoon salt
- 1 cup mini chocolate chips
For the Chocolate Glaze:
- 1 cup powdered sugar
- 3 tablespoons cocoa powder
- 3-4 tablespoons heavy cream
- 1/2 teaspoon vanilla extract
- Pinch of salt
Alternative Ingredients
Look, I get it. Not everyone has a fully stocked baking pantry, and sometimes you need to work with what you’ve got. Here are some swaps that actually work:
Milk Options: If you don’t have whole milk, 2% works fine. I’ve even used oat milk in a pinch, though the rolls come out slightly less rich. Almond milk tends to make them a bit drier, so add an extra tablespoon of butter if that’s your only option.
Butter Substitutes: You can use margarine, but please don’t use the light stuff. The recipe needs fat for that soft, tender texture. I’ve tried coconut oil once (during my “healthy baking” phase), and while it worked, the coconut flavor was pretty noticeable.
Cocoa Powder: Dutch-process cocoa gives you a deeper, smoother chocolate flavor, but regular unsweetened cocoa works perfectly fine. Don’t use hot chocolate mix, though. I tried it once and the results were… disappointing.
Brown Sugar: Light or dark brown sugar both work. Dark gives you a more molasses-forward flavor. In a real emergency, you can use all granulated sugar plus a tablespoon of molasses.
Chocolate Chips: Semi-sweet, dark, or milk chocolate chips all work. I prefer mini chips because they distribute better, but regular chips chopped up also do the job.
Step-by-Step Directions
Making the Dough (This is where patience pays off):
Start by warming your milk to about 110°F. It should feel like warm bathwater. Too hot and you’ll kill the yeast, too cold and nothing happens. I use an instant-read thermometer now after I murdered my yeast one too many times by guessing.
In your stand mixer bowl (or a large bowl if you’re doing this by hand, which I respect but don’t recommend), combine the flour, sugar, yeast, and salt. Give it a quick whisk to distribute everything evenly.
Add the warm milk, melted butter, eggs, and vanilla. If you have a KitchenAid stand mixer, use the dough hook and mix on low speed for about 2 minutes until everything comes together. Then increase to medium speed and knead for 5-6 minutes. The dough should be soft, slightly sticky, and pull away from the sides of the bowl. If you’re kneading by hand, plan for about 10 minutes of work.
Here’s something I learned the hard way: don’t add extra flour just because the dough seems sticky. Sticky dough equals soft rolls. As long as it’s not soup-like, you’re good.
Transfer the dough to a greased bowl, cover it with a damp kitchen towel (or plastic wrap), and let it rise in a warm spot for about 60-90 minutes. It should double in size. I usually stick mine in the oven with just the light on. Perfect warm environment.
Preparing the Filling:
While the dough’s doing its thing, mix the softened butter, cocoa powder, brown sugar, cinnamon, and salt in a bowl until you have a spreadable paste. It’ll look kind of like chocolate frosting, and yes, it’s tempting to eat it with a spoon. (I won’t judge if you sneak a taste.)
Stir in about half the chocolate chips. Save the rest for sprinkling on top of the filling later.
Assembly (The fun part):
Once your dough has doubled, punch it down (literally, give it a good punch, it’s therapeutic) and turn it out onto a lightly floured surface. Roll it into a rectangle about 16×12 inches. It doesn’t have to be perfect. Mine never are.
Spread that chocolate filling all over the dough, leaving about a half-inch border on one of the long sides. Sprinkle the remaining chocolate chips over the filling. Now comes the satisfying part: roll it up tightly from the long side, working away from you. Keep the tension even but don’t pull so hard that the dough tears.
When you get to the end, pinch the seam closed. I use a sharp knife or unflavored dental floss (seriously, it works better than a knife for clean cuts) to slice the log into 12 equal rolls. Each should be about 1 1/2 inches thick.
Second Rise and Baking:
Arrange the rolls in a greased 9×13 inch baking pan. I like to use a non-stick pan because cleanup is easier, but a regular pan works fine if you grease it well. The rolls should be close but not quite touching.
Cover them again with that damp towel and let them rise for another 30-45 minutes. They’ll puff up and start touching each other. This creates those beautiful pull-apart edges.
While they’re rising, preheat your oven to 350°F. Once the rolls look puffy and have spread, bake them for 22-25 minutes. They’re done when the tops spring back lightly when touched and the edges are set. Don’t overbake, or they’ll dry out.
Making the Glaze:
Mix the powdered sugar, cocoa powder, heavy cream, vanilla, and salt in a bowl. Start with 3 tablespoons of cream and add more if needed. You want it thick but pourable, like the consistency of maple syrup.
Pour this glaze over the rolls while they’re still warm. It’ll seep into all the nooks and crannies and create this incredible glossy finish.
Pro Tips
After making these rolls probably 50 times, here’s what I’ve learned:
Temperature Matters: If your kitchen is cold, that first rise can take forever. I’ve had dough sit for 2+ hours in winter. Just be patient. The yeast will do its thing eventually.
Overnight Option: You can assemble the rolls, place them in the pan, cover tightly, and refrigerate overnight. In the morning, let them sit at room temperature for about 45 minutes, then bake. Fresh rolls for breakfast without the morning chaos.
Freezing: These freeze beautifully. I often make a double batch and freeze half before baking. Thaw in the fridge overnight, then let them come to room temperature and rise before baking.
Storage: Keep leftover rolls in an airtight container at room temperature for up to 3 days. They’re also fantastic reheated in the microwave for about 15-20 seconds. That brings back the soft, fresh-baked texture.
Chocolate Quality: Use good cocoa powder. I learned this after buying the cheapest stuff at the store once. The flavor difference is huge. You don’t need fancy European cocoa, but something like Hershey’s Special Dark or Ghirardelli makes a noticeable difference.
If you’re into meal prep, you could make several batches and store them in meal prep containers for grab-and-go treats throughout the week. Just saying.
FAQs
Why are my chocolate rolls dense?
Dense rolls usually happen when the dough does not rise properly or too much flour is added.
Can I make these ahead of time?
Yes. Refrigerate overnight and bake fresh in the morning.
Can I freeze them?
Yes. Freeze before baking, then thaw and rise before baking.
Best cocoa powder?
Use high-quality cocoa for deeper flavor.
How to keep them soft?
Store airtight and reheat slightly before serving.
Why You’ll Love This Recipe
Listen, I’ve tried a lot of sweet roll recipes. Store-bought, bakery versions, other homemade attempts. These double chocolate rolls hit differently.
First off, they’re genuinely easier than you’d think. Yes, there’s rising time involved, but the actual hands-on work is maybe 30 minutes. The rest is just waiting, and you can do other things while the yeast does its magic.
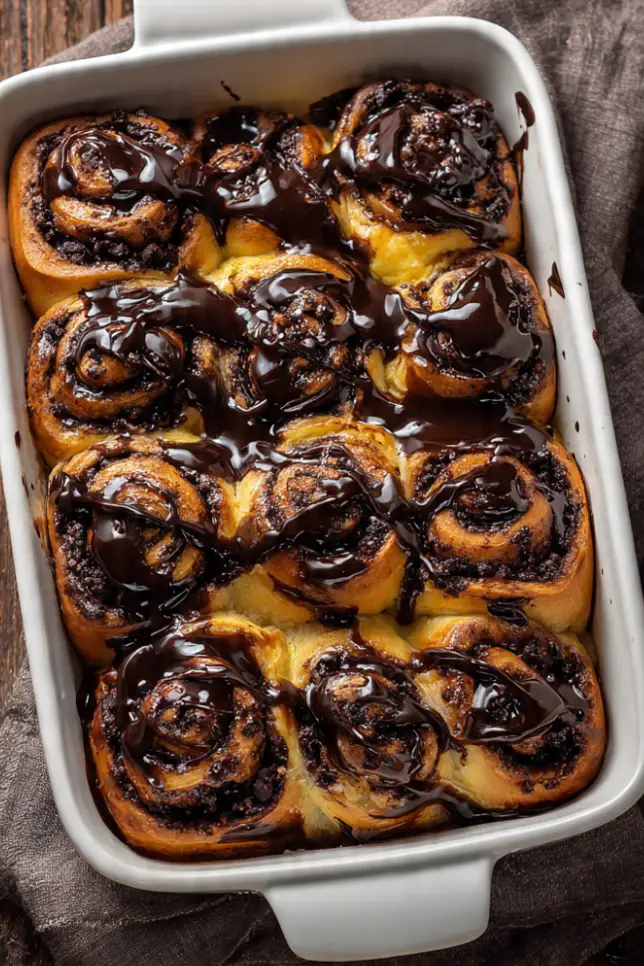
The texture is spot-on. Soft and pillowy, with just enough structure that they don’t fall apart when you pull them from the pan. That chocolate filling creates these beautiful swirls throughout, and every bite has chocolate in it. Not just the middle (looking at you, disappointing bakery rolls that are mostly just bread).
They’re also incredibly versatile. Want them for breakfast? Make the dough the night before. Need a dessert? Warm them up and add a scoop of vanilla ice cream. Having people over? These make your kitchen smell amazing and impress everyone.
The best part is that chocolate glaze. It’s not overly sweet, just rich and cocoa-forward, and it stays glossy even after the rolls cool down. I’ve had friends ask if I used some special bakery trick for that shine. Nope, just cocoa powder, powdered sugar, and cream.
What Makes This Recipe Unique
Most chocolate roll recipes I’ve seen fall into one of two camps: they’re either basically cinnamon rolls with a little cocoa thrown in, or they’re so intensely chocolate that they’re almost cake-like.
This recipe walks a perfect middle line. The dough itself is lightly sweet and buttery, which lets the chocolate filling really shine without overwhelming everything. Using both cocoa powder and chocolate chips in the filling gives you depth of flavor plus those melty pockets of chocolate.
The addition of cinnamon in the filling might seem weird, but it actually enhances the chocolate flavor. It’s not enough to taste like Mexican hot chocolate, just enough to make the chocolate taste more complex and interesting.
I also adjusted the hydration ratio after a lot of trial and error. Most recipes don’t use enough liquid, which results in rolls that are okay fresh but get dry quickly. This dough has enough moisture that the rolls stay soft for days (if they last that long).
Key Features
Bakery-Quality Texture: Soft, fluffy, and tender without being gummy or dense. These pull apart beautifully and have that classic sweet roll structure.
Double Chocolate: Not just cocoa powder, not just chocolate chips, but both. This creates layers of chocolate flavor that hit you at different moments.
Natural Ingredients: No weird additives or preservatives. Just flour, butter, eggs, sugar, and chocolate. The kind of stuff you probably already have or can grab at any grocery store.
Make-Ahead Friendly: Perfect for meal planning. You can prep them the night before, freeze them unbaked, or even freeze baked rolls for later. Great for anyone doing Sunday meal prep for the week ahead.
Customizable: Want them extra chocolatey? Add more chips. Prefer milk chocolate? Swap it in. Want a hint of espresso? Add a teaspoon of instant espresso powder to the filling. The base recipe is solid enough that you can play around with it.
No Special Equipment Required: While a stand mixer makes life easier, you can make these entirely by hand. No fancy pans, no special tools, just basic kitchen stuff.
You’ll Also Love
If these double chocolate rolls got you excited about sweet breakfast treats, you’ll probably want to check out these recipes too:
Classic Cinnamon Rolls – If you love this dough base, try it with the traditional cinnamon-sugar filling. It’s a great way to practice your rolling technique with a less messy filling.
Overnight Sticky Buns – Similar concept, but with a caramel-pecan topping that’ll change your life. Make them the night before and bake them fresh for breakfast.
Chocolate Babka – If you want to level up from rolls to something more impressive, babka uses a similar enriched dough but with a different shaping technique that creates even more layers.
Conclusion
You know what’s funny? I used to be intimidated by yeast baking. The whole process seemed finicky and time-consuming, and I figured anything good enough to sell at a bakery must be too complicated for home cooking. But once you make your first batch of these rolls and realize how straightforward it actually is, it opens up this whole world of possibilities.
These double chocolate rolls have become my go-to for Sunday mornings, holiday breakfasts, and honestly whenever I need a chocolate fix but want something more interesting than brownies. They’re the kind of recipe that makes people think you’re a way better baker than you actually are (not that I’m admitting anything here).
The best part is watching someone take their first bite. There’s always this moment of surprise when they realize these aren’t just okay homemade rolls, they’re genuinely as good as (or better than) what you’d pay premium prices for at a bakery.
Give this recipe a try. Start on a weekend when you have a few hours to spare, put on some music or a podcast, and just enjoy the process. The smell alone is worth it, and the end result? Well, you’ll see.
Happy baking, and don’t forget to set a timer. I’ve lost track of rising dough more times than I care to admit.
Linda
Double Chocolate Rolls
Soft, pillowy sweet rolls filled with rich chocolate filling and topped with glossy chocolate glaze.
Ingredients
Sweet Roll Dough
- 4 cups all-purpose flour
- 1/3 cup granulated sugar
- 2 1/4 tsp instant yeast (1 packet)
- 1 tsp salt
- 1 cup whole milk, warmed to 110°F
- 1/3 cup unsalted butter, melted
- 2 large eggs, room temperature
- 1 tsp vanilla extract
Chocolate Filling
- 1/2 cup unsalted butter, softened
- 1/2 cup dark cocoa powder
- 3/4 cup brown sugar, packed
- 1 tsp ground cinnamon
- 1/4 tsp salt
- 1 cup mini chocolate chips
Chocolate Glaze
- 1 cup powdered sugar
- 3 tbsp cocoa powder
- 3-4 tbsp heavy cream
- 1/2 tsp vanilla extract
- 1 pinch salt
Instructions
- Prepare the dough Combine flour, sugar, yeast, and salt in a stand mixer bowl. Add warm milk (110°F), melted butter, eggs, and vanilla. Mix on low for 2 minutes, then increase to medium speed and knead for 5-6 minutes until dough is smooth and elastic.
- First rise Transfer dough to a greased bowl, cover with a damp towel, and let rise in a warm place for 60-90 minutes until doubled in size.
- Make chocolate filling Mix softened butter, cocoa powder, brown sugar, cinnamon, and salt in a bowl until spreadable. Stir in half the chocolate chips and set aside.
- Roll and fill Punch down risen dough and roll into a 16×12 inch rectangle on a lightly floured surface. Spread chocolate filling evenly over dough, leaving a 1/2 inch border on one long side. Sprinkle remaining chocolate chips over filling.
- Shape the rolls Roll up tightly from the long side without the border, working away from you. Pinch seam closed. Cut into 12 equal pieces (about 1 1/2 inches each) using a sharp knife or dental floss.
- Second rise Arrange rolls in a greased 9×13 inch baking pan, spacing them close but not quite touching. Cover with damp towel and let rise for 30-45 minutes until puffy and touching each other.
- Bake Preheat oven to 350°F. Bake rolls for 22-25 minutes until tops spring back lightly when touched and edges are set. Don’t overbake.
- Make chocolate glaze While rolls bake, whisk together powdered sugar, cocoa powder, 3 tablespoons heavy cream, vanilla, and salt. Add more cream if needed for a pourable consistency like maple syrup.
- Glaze and serve Pour chocolate glaze over warm rolls immediately after baking, allowing it to seep into all the crevices. Serve warm or at room temperature.
Notes
Overnight Option: Assemble rolls in pan, cover tightly, and refrigerate overnight. In morning, let sit at room temperature 45 minutes before baking. Freezing: Freeze unbaked rolls after slicing. Thaw in fridge overnight, let rise 45 minutes, then bake. Storage: Keep in airtight container at room temperature for up to 3 days. Reheat in microwave for 15-20 seconds.