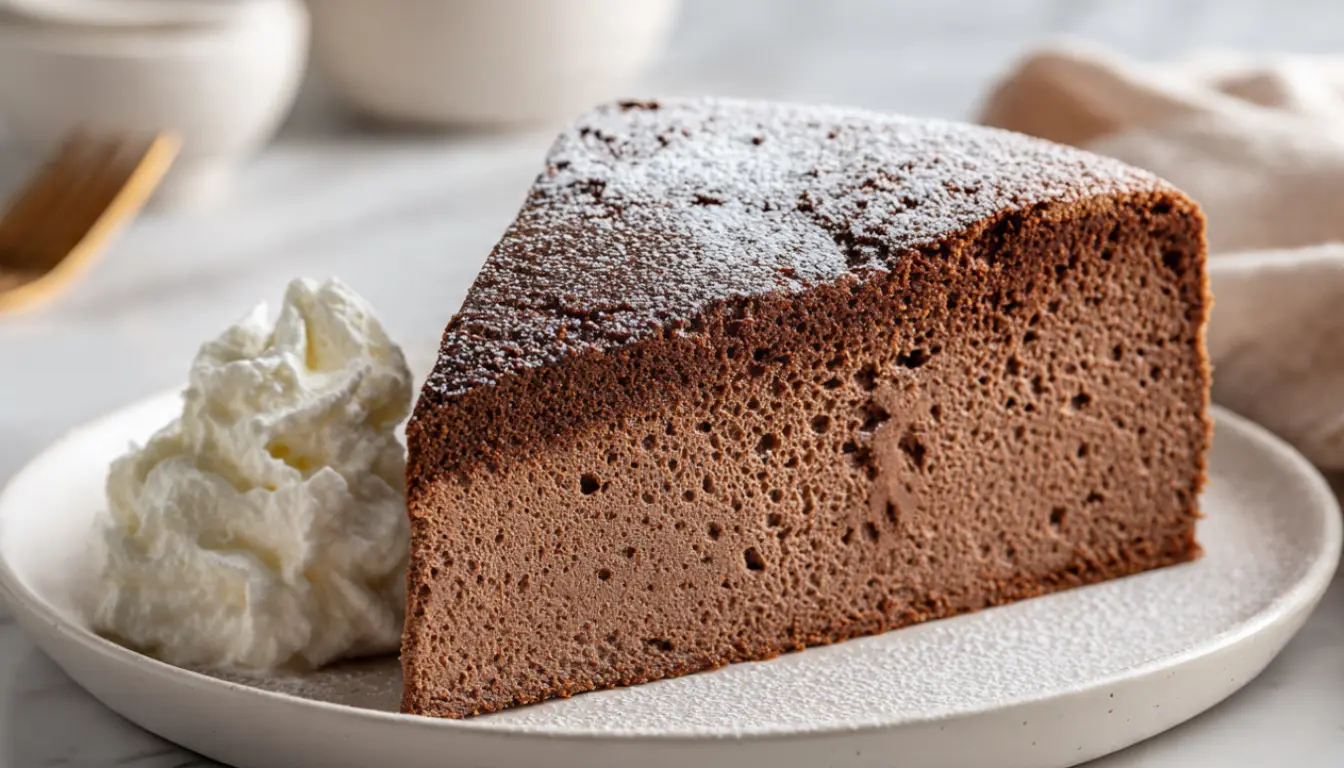
Fluffy Chocolate Cloud Cake
I’ll never forget the first time I attempted to make a chocolate cake that was supposed to be light and airy. Instead, I ended up with something that resembled a dense chocolate brick. My KitchenAid stand mixer sat there judging me as I stared at my deflated creation. That disaster sent me on a ten-year journey to master the art of making truly fluffy chocolate cakes, and let me tell you, this Fluffy Chocolate Cloud Cake is the result of countless experiments, failed attempts, and finally, sweet success.
The secret to this cake isn’t just about following a recipe. It’s about understanding how ingredients work together to create that impossibly light texture. I’ve tested this recipe in everything from my trusty cast iron skillet to various springform pans, and it delivers every single time. This cake is so light and airy that it practically melts on your tongue, with an intense chocolate flavor that doesn’t weigh you down.
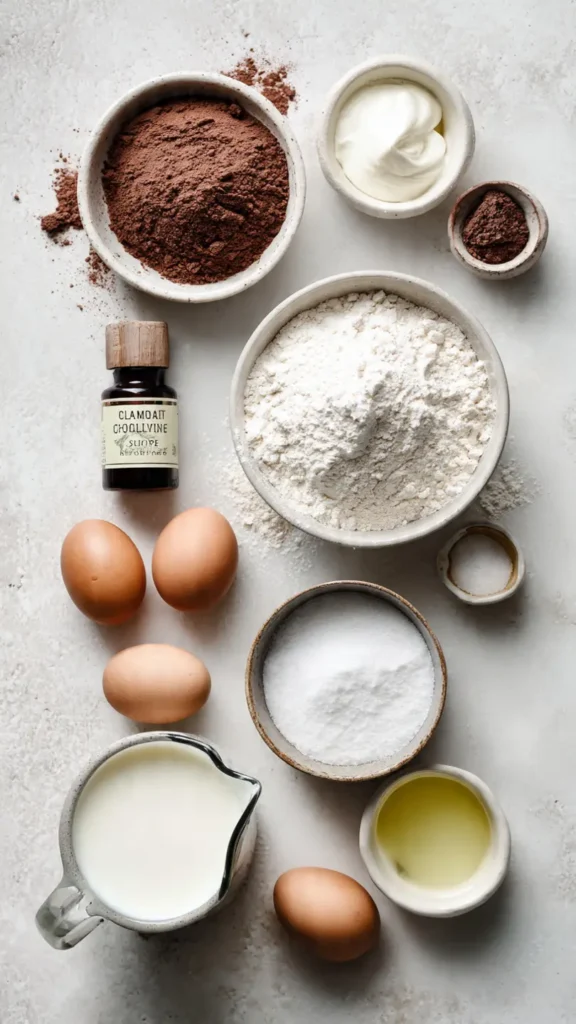
Essential Ingredients
- 1 cup all-purpose flour
- 1/2 cup unsweetened cocoa powder (Dutch-process works best)
- 1 1/2 teaspoons baking powder
- 1/4 teaspoon salt
- 6 large eggs, separated
- 1 cup granulated sugar, divided
- 1/3 cup whole milk
- 1/4 cup vegetable oil
- 2 teaspoons vanilla extract
- 1/4 teaspoon cream of tartar
Alternative Ingredients
If you don’t have certain ingredients on hand, don’t worry. I’ve made this cake with plenty of substitutions over the years. You can swap the all-purpose flour for cake flour if you want an even lighter texture, though honestly, regular flour works beautifully. For those avoiding dairy, almond milk or oat milk can replace whole milk without much difference in texture.
The cream of tartar is important for stabilizing the egg whites, but in a pinch, you can use 1/2 teaspoon of lemon juice or white vinegar. I learned this trick from my grandmother, who never had cream of tartar in her kitchen but made the fluffiest cakes I’ve ever tasted.
If you’re particular about your cocoa powder, I recommend using Dutch-process for a smoother, less acidic chocolate flavor. Natural cocoa powder works too, but you’ll get a slightly tangier taste. Some of my readers have used organic cocoa powder and reported excellent results.
Step-by-Step Directions
Start by preheating your oven to 325°F (165°C). This lower temperature is crucial because it allows the cake to rise slowly and evenly without forming a hard crust that would prevent that cloud-like texture we’re after.
Line the bottom of a 9-inch springform pan with parchment paper and lightly grease the sides. Don’t skip the parchment paper step. I learned this the hard way when half my cake stuck to the pan bottom during one of my early attempts.
Sift together the flour, cocoa powder, baking powder, and salt in a medium bowl. I use a fine mesh sieve for this because it really does make a difference in the final texture. Those little cocoa lumps will ruin the smooth, velvety crumb you’re going for.
In a large mixing bowl, whisk the egg yolks with 1/2 cup of sugar until the mixture becomes pale and thick. This usually takes about 3 to 4 minutes if you’re using a stand mixer, or 5 to 6 minutes by hand. Add the milk, oil, and vanilla extract, whisking until everything is well combined.
Gently fold the sifted dry ingredients into the egg yolk mixture using a spatula. This is where patience matters. Don’t overmix or you’ll develop too much gluten, which will make your cake tough instead of tender.
Now comes the crucial part. In a separate clean, dry bowl, beat the egg whites with the cream of tartar using a hand mixer or your stand mixer with the whisk attachment. Start on medium speed until the whites become foamy, then gradually add the remaining 1/2 cup of sugar while increasing to high speed. Beat until stiff peaks form. This should take about 4 to 5 minutes. The whites should be glossy and hold their shape when you lift the beaters.
Here’s where many people mess up. You need to fold the egg whites into the chocolate batter in three additions. Take about one-third of the beaten egg whites and gently fold them into the chocolate mixture to lighten it. Then add the remaining egg whites in two more additions, folding carefully each time. Use a large spatula and cut down through the center, then sweep along the bottom and up the side. Rotate the bowl as you go. The goal is to preserve as much air as possible while still combining everything evenly.
Pour the batter into your prepared springform pan and smooth the top gently. Give the pan a light tap on the counter to release any large air bubbles.
Bake for 45 to 50 minutes, or until a toothpick inserted into the center comes out with just a few moist crumbs. The cake should spring back lightly when touched. Don’t overbake it, or you’ll lose that fluffy texture.
This is important: let the cake cool in the pan for 10 minutes, then run a knife around the edges and remove the springform ring. Let it cool completely on a wire rack before serving. The cake will deflate slightly as it cools, and that’s completely normal.
Pro Tips
After making this cake more times than I can count, I’ve picked up a few tricks that make all the difference. First, make sure your eggs are at room temperature. Cold eggs don’t whip up as well, and you won’t get the volume you need in the egg whites. I usually take mine out of the fridge about an hour before I start baking.
When separating eggs, be meticulous about keeping the yolks and whites separate. Even a tiny bit of yolk in the whites will prevent them from whipping properly. I crack each egg into a small bowl first, then transfer the white to my mixing bowl. This way, if a yolk breaks, it only ruins one egg instead of the whole batch.
Your mixing bowl and beaters for the egg whites must be completely clean and dry. Any grease or moisture will interfere with the whites’ ability to form stiff peaks. I wipe my bowl with a bit of white vinegar or lemon juice before starting, just to be sure.
Don’t open the oven door during the first 40 minutes of baking. The temperature drop can cause the cake to collapse. I know it’s tempting to check on it, but trust the process.
If you’re storing this cake, keep it in an airtight container at room temperature for up to two days, or refrigerate it for up to five days. I like using meal prep containers with tight-sealing lids to maintain freshness. The cake actually tastes great chilled, with a slightly denser texture that some people prefer.
FAQs
Why is my chocolate cloud cake not fluffy?
Usually due to improper egg white whipping or overmixing the batter.
Can I make it without cream of tartar?
Yes, use lemon juice or vinegar instead.
How should I store it?
Keep at room temperature 2 days or refrigerate up to 5 days.
Can I freeze it?
Yes, freeze tightly wrapped slices for up to 2 months.
Why did it sink?
Likely due to oven opening, underbaking, or weak egg whites.
Why You’ll Love This Recipe
This cake defies everything you think you know about chocolate desserts. Most chocolate cakes are dense and rich, perfect with a glass of milk. But this one is different. It’s so light that you can eat a generous slice without feeling weighed down. The chocolate flavor is intense but not overwhelming, and the texture is almost soufflé-like.
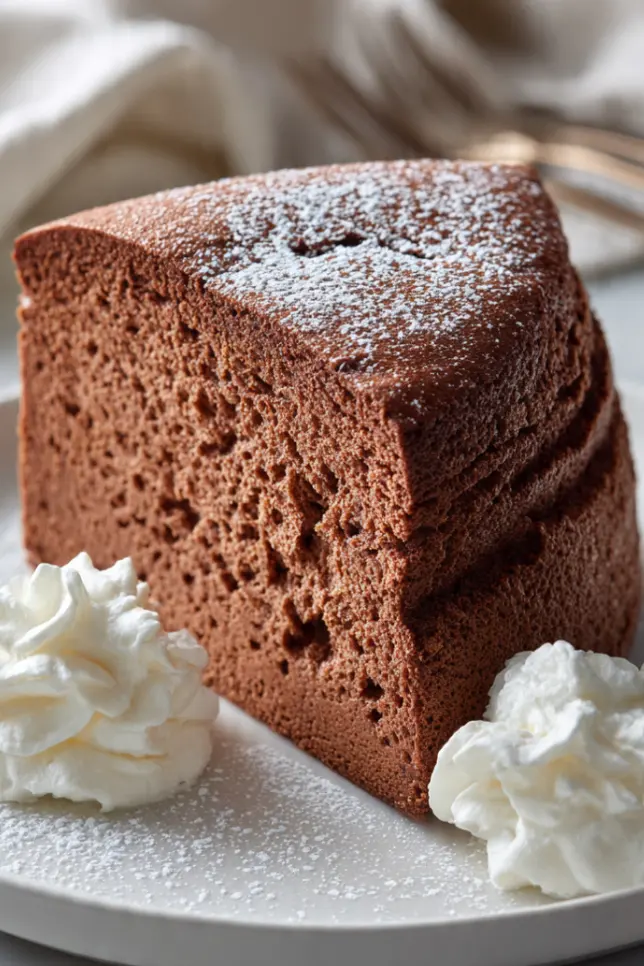
I love serving this at dinner parties because it feels elegant without being fussy. You don’t need fancy frosting or decorations. A simple dusting of powdered sugar or a dollop of whipped cream is all it needs. Sometimes I serve it with fresh berries on the side for a pop of color and a touch of tartness that complements the chocolate beautifully.
It’s also incredibly forgiving once you understand the technique. The first few times you make it, you’ll get a feel for how the batter should look and how stiff the egg whites need to be. After that, you can make this cake with your eyes closed.
What Makes This Recipe Unique
Unlike traditional chocolate cakes that rely on butter for richness, this cake uses oil. Oil keeps the crumb tender without weighing down the texture. The real magic happens with the egg whites, which act as the primary leavening agent along with the baking powder.
The technique of folding in beaten egg whites is borrowed from classic French sponge cakes and Japanese soufflé cheesecakes. It creates that signature cloud-like texture that you simply can’t achieve with standard creaming methods. I’ve experimented with adding whipped cream to the batter and using different ratios of egg yolks to whites, but this particular formula gives you the best balance of structure and airiness.
The low baking temperature is another key factor. Most cakes bake at 350°F, but this one needs the gentler heat to rise properly without forming a tough exterior. Think of it like the difference between a blast furnace and a slow oven. The results are worth the extra time.
Key Features
This Fluffy Chocolate Cloud Cake delivers on multiple fronts. The texture is exceptionally light and airy, almost like eating a chocolate cloud. The cocoa flavor is rich and pure without any bitterness. It’s not overly sweet, which makes it perfect for people who find traditional chocolate cakes too cloying.
The cake stays moist for days, which is unusual for such a light dessert. The oil in the batter helps maintain moisture without adding heaviness. It’s also naturally lower in fat than butter-based cakes, if that matters to you.
Perhaps my favorite feature is how versatile it is. Serve it plain for an elegant, minimalist dessert. Dress it up with chocolate ganache for special occasions. Add a layer of whipped cream and berries for a summer treat. I’ve even used it as the base for trifles, cutting it into cubes and layering it with pudding and fruit.
The recipe is also relatively simple in terms of ingredients. You probably have everything you need in your pantry right now, with the possible exception of cream of tartar. And as I mentioned earlier, you can work around that if you need to.
You’ll Also Love
If this Fluffy Chocolate Cloud Cake becomes a favorite (and I’m confident it will), you might want to try some of my other light dessert recipes. My Lemon Angel Food Cake uses a similar technique with egg whites to create an impossibly light texture. The Japanese Cotton Cheesecake is another cloud-like creation that never fails to impress.
For chocolate lovers, my Chocolate Soufflé takes this airy concept even further, though it requires a bit more finesse and timing. And if you want something with the same chocolate intensity but a different texture, my Flourless Chocolate Torte offers a dense, fudgy contrast to this fluffy cake.
Conclusion
Making this Fluffy Chocolate Cloud Cake changed my entire approach to baking. It taught me patience, technique, and the importance of understanding how ingredients interact. More than that, it gave me a go-to dessert that never fails to impress, whether I’m making it for family dinner or a fancy celebration.
The beauty of this cake is that it looks and tastes complicated, but once you’ve made it a few times, it becomes second nature. You’ll develop a feel for when the egg whites are perfectly beaten and how gently to fold them into the batter. Those skills will carry over into other recipes and make you a better baker overall.
I encourage you to make this cake at least twice before judging it. The first time, you’re learning the technique. The second time, you’re refining it. By the third time, you’ll wonder why you ever bothered with dense, heavy chocolate cakes. This fluffy version is everything a chocolate dessert should be: rich in flavor but light in texture, impressive to look at but simple in execution.
Give it a try this weekend. Your friends and family will think you’ve been hiding your pastry chef skills all these years. I won’t tell them it’s actually easier than it looks.
Fluffy Chocolate Cloud Cake
An impossibly light and airy chocolate cake with a cloud-like texture created by folding beaten egg whites into chocolate batter.
Ingredients
- 1 cup all-purpose flour
- 1/2 cup unsweetened cocoa powder (Dutch-process)
- 1 1/2 tsp baking powder
- 1/4 tsp salt
- 6 large eggs, separated
- 1 cup granulated sugar, divided
- 1/3 cup whole milk
- 1/4 cup vegetable oil
- 2 tsp vanilla extract
- 1/4 tsp cream of tartar
Instructions
- Preheat oven and prepare pan Preheat oven to 325°F (165°C). Line the bottom of a 9-inch springform pan with parchment paper and lightly grease the sides.
- Sift dry ingredients Sift together the flour, cocoa powder, baking powder, and salt in a medium bowl. Set aside.
- Mix egg yolk batter In a large bowl, whisk egg yolks with 1/2 cup sugar until pale and thick, about 3-4 minutes. Add milk, oil, and vanilla extract. Whisk until well combined.
- Combine with dry ingredients Gently fold the sifted dry ingredients into the egg yolk mixture using a spatula until just combined. Do not overmix.
- Beat egg whites In a separate clean, dry bowl, beat egg whites with cream of tartar on medium speed until foamy. Gradually add remaining 1/2 cup sugar while increasing to high speed. Beat until stiff, glossy peaks form, about 4-5 minutes.
- Fold in egg whites Fold one-third of the beaten egg whites into the chocolate batter to lighten it. Then gently fold in the remaining egg whites in two additions, being careful to preserve as much air as possible.
- Pour and bake Pour batter into the prepared springform pan and smooth the top. Tap pan lightly on counter to release large air bubbles. Bake for 45-50 minutes until a toothpick inserted in center comes out with a few moist crumbs.
- Cool properly Let cake cool in pan for 10 minutes. Run a knife around edges and remove springform ring. Cool completely on a wire rack. The cake will deflate slightly as it cools, which is normal.
Pro Tips
Use room temperature eggs for better volume when beating. Make sure your mixing bowl and beaters for egg whites are completely clean and dry. Don’t open the oven door during the first 40 minutes of baking. Store in an airtight container at room temperature for up to 2 days, or refrigerate for up to 5 days. Serve with a dusting of powdered sugar or fresh whipped cream.