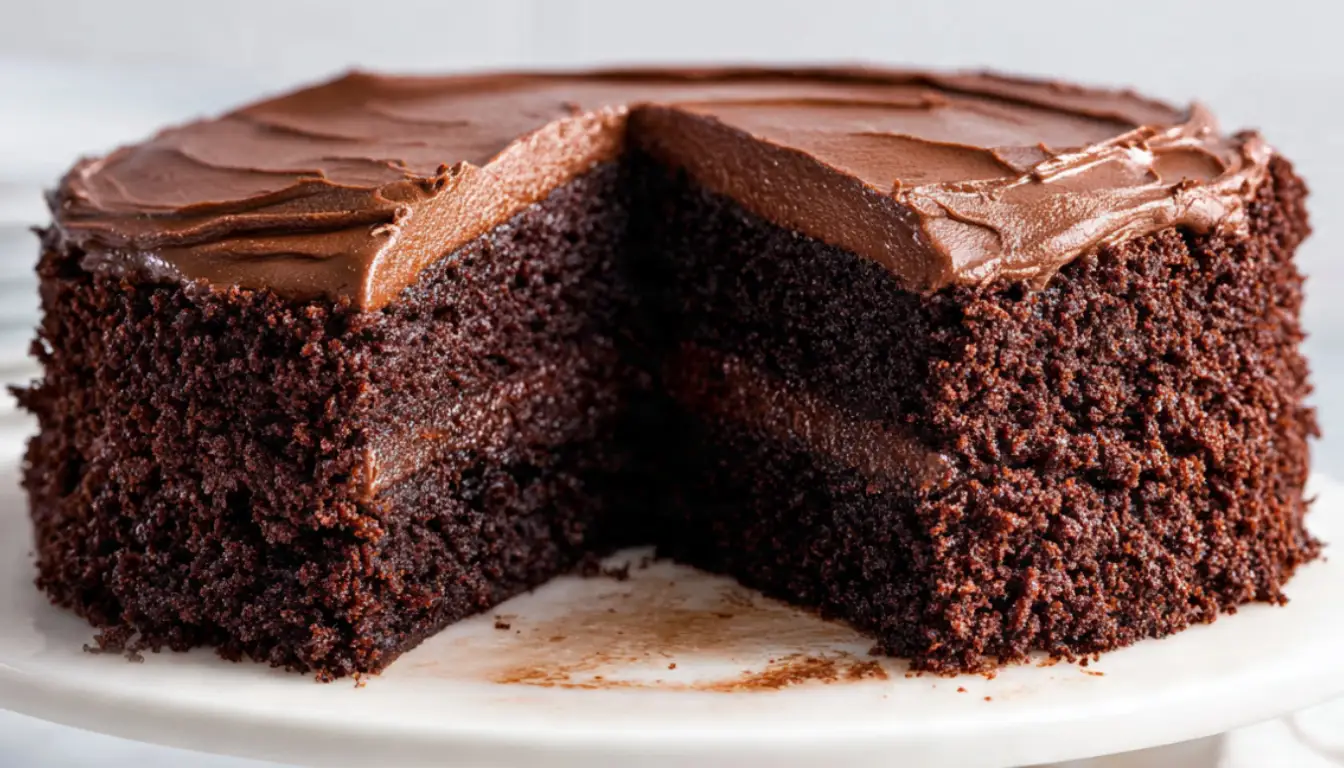
Easy Chocolate Cake Base – Perfect Two-Layer Cake
You know that moment when you’re staring at your pantry at 8 PM, remembering you promised to bring dessert tomorrow? That was me three years ago, and honestly, it changed everything about how I approach baking. I used to think chocolate cakes needed fancy ingredients and my KitchenAid stand mixer running for twenty minutes. Turns out, I was overcomplicating things big time.
This easy chocolate cake base is what I reach for now when I need a reliable, delicious cake that doesn’t require a culinary degree. It’s the recipe I’ve made probably 200 times at this point (no exaggeration), and it’s never let me down. Whether you’re making a birthday cake, cupcakes, or just need chocolate therapy on a Tuesday night, this is your foundation.
The best part? You don’t need expensive equipment or hard-to-find ingredients. I developed this recipe specifically for real kitchens with regular tools. Sure, a stand mixer makes things easier, but I’ve made this cake with just a whisk and some arm strength more times than I can count.
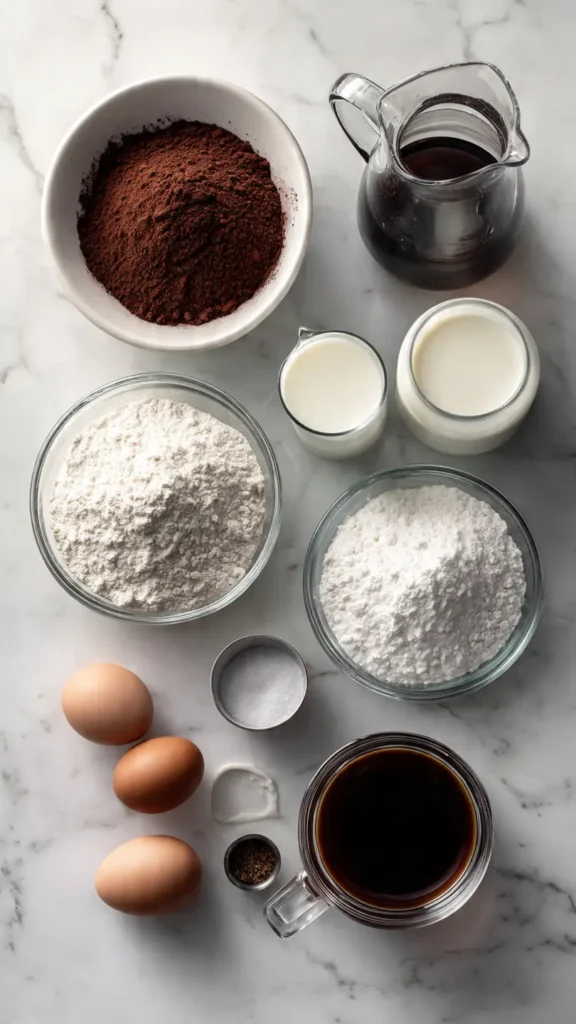
Essential Ingredients
- 1¾ cups all-purpose flour
- 2 cups granulated sugar
- ¾ cup unsweetened cocoa powder (Dutch-process or natural both work)
- 2 teaspoons baking soda
- 1 teaspoon baking powder
- 1 teaspoon salt
- 2 large eggs (room temperature)
- 1 cup whole milk (or buttermilk for extra tang)
- ½ cup vegetable oil (or melted coconut oil)
- 2 teaspoons vanilla extract
- 1 cup hot coffee (or hot water if you skip caffeine)
Alternative Ingredients
Let’s talk substitutions because not everyone has a fully stocked pantry, and that’s completely fine. I’ve tested these alternatives extensively, so you can trust they actually work.
Flour alternatives: If you need gluten-free, use a 1:1 gluten-free baking flour blend. I’ve had good results with Bob’s Red Mill, but any reputable brand works. The texture will be slightly denser but still delicious.
Sugar swaps: You can replace half the sugar with coconut sugar for a deeper flavor. I wouldn’t recommend going full alternative sweetener here though, as the sugar does important structural work in this cake.
Cocoa powder: Dutch-process cocoa gives you that deep, dark chocolate color and milder flavor. Natural cocoa powder works perfectly fine too and gives you a slightly more intense chocolate taste. I keep both in my pantry and honestly can’t pick a favorite.
Dairy-free options: Swap the milk for any plant-based milk (almond, oat, soy all work great). For the eggs, you can use flax eggs (1 tablespoon ground flaxseed + 3 tablespoons water per egg, let sit 5 minutes). The cake will be slightly denser but still moist.
Oil substitutions: Melted butter adds richness but makes the cake slightly less tender. Applesauce works in a pinch but cuts down on that moist, velvety texture I love. Stick with oil if you can.
The coffee question: This gets asked every single time I share this recipe. No, you won’t taste coffee in the finished cake. It just amplifies the chocolate flavor. But if you’re making this for kids or coffee-haters, hot water works fine. I’ve done both countless times.
Step-by-Step Directions
Step 1: Prep your workspace Preheat your oven to 350°F (175°C). Grease two 9-inch round cake pans with butter or non-stick spray, then line the bottoms with parchment paper. This double insurance prevents sticking, trust me. I learned this the hard way after destroying three cakes trying to pry them out of pans.
Step 2: Mix dry ingredients In a large mixing bowl, whisk together flour, sugar, cocoa powder, baking soda, baking powder, and salt. Make sure you really whisk it well for at least 30 seconds. You want those leavening agents evenly distributed, or you’ll get weird dense spots.
Step 3: Combine wet ingredients In a separate bowl (or a large measuring cup if you’re minimizing dishes like me), whisk together eggs, milk, oil, and vanilla extract until smooth. Room temperature eggs mix better, but if you forgot to take them out, just place them in warm water for 5 minutes.
Step 4: Bring it together Pour the wet ingredients into the dry ingredients. If you’re using a stand mixer, mix on low speed for about 1 minute. By hand, stir with a wooden spoon or whisk until just combined. The batter will look thick at this point, and that’s normal.
Step 5: Add the hot liquid Here’s where the magic happens. Carefully stir in that hot coffee or water. The batter will transform into something that looks ridiculously thin, almost like chocolate milk. Don’t panic. This is exactly what you want. That thin batter is what creates the incredibly moist texture.
Step 6: Bake Divide the batter evenly between your prepared pans. I use a kitchen scale for this because I’m neurotic about even layers, but eyeballing it works fine too. Bake for 30-35 minutes. The cake is done when a toothpick inserted in the center comes out with just a few moist crumbs. Don’t overbake, or you’ll lose that tender texture.
Step 7: Cool properly Let the cakes cool in the pans for 10 minutes, then turn them out onto a wire cooling rack. This step tests your patience, but it’s crucial. If you try to frost a warm cake, you’ll end up with a melted mess. Ask me how I know.
Pro Tips
After making this cake hundreds of times, here’s what I’ve learned the hard way:
Use hot coffee, not warm: The hotter the liquid, the better it dissolves the cocoa powder and creates that silky texture. I usually brew a fresh cup right before baking.
Don’t overmix after adding liquid: Once you add that hot coffee, just stir until combined. Overmixing can make the cake tough, though honestly this recipe is pretty forgiving.
Measure cocoa powder correctly: Spoon it into your measuring cup and level it off. If you scoop directly from the container, you’ll pack in too much and get a dry, bitter cake.
The toothpick test matters: You want moist crumbs, not wet batter, but also not completely clean. That sweet spot is what gives you a moist cake that’s still fully cooked.
Freezer-friendly for meal prep: This cake freezes beautifully. I often make a double batch, wrap the unfrosted layers in plastic wrap and foil, and freeze for up to 3 months. Great for last-minute celebrations.
Springform pan alternative: If you’re making this as a single layer cake, use a 9×13 inch pan and bake for 35-40 minutes. Perfect for sheet cakes.
FAQs
Why is my chocolate cake batter so thin?
The thin batter is completely normal and helps create a moist, soft cake texture.
Can I replace coffee in chocolate cake?
Yes, hot water works fine if you prefer no caffeine.
Can I make this into cupcakes?
Yes, bake for about 18 to 20 minutes.
How do I keep chocolate cake moist?
Use oil, avoid overbaking, and include hot liquid in the batter.
Can I freeze the cake?
Yes, freeze for up to 3 months when wrapped properly.
Why You’ll Love This Recipe
This isn’t just another chocolate cake recipe cluttering up the internet. It’s the one that’s saved me more times than I can count, from forgotten birthdays to bake sale emergencies to “I need chocolate right now” moments.
The texture is what gets people every time. It’s incredibly moist without being gummy, rich without being heavy, and that deep chocolate flavor hits exactly right. I’ve had people ask if I used some fancy European chocolate or secret ingredient. Nope, just good technique and the magic of hot coffee.
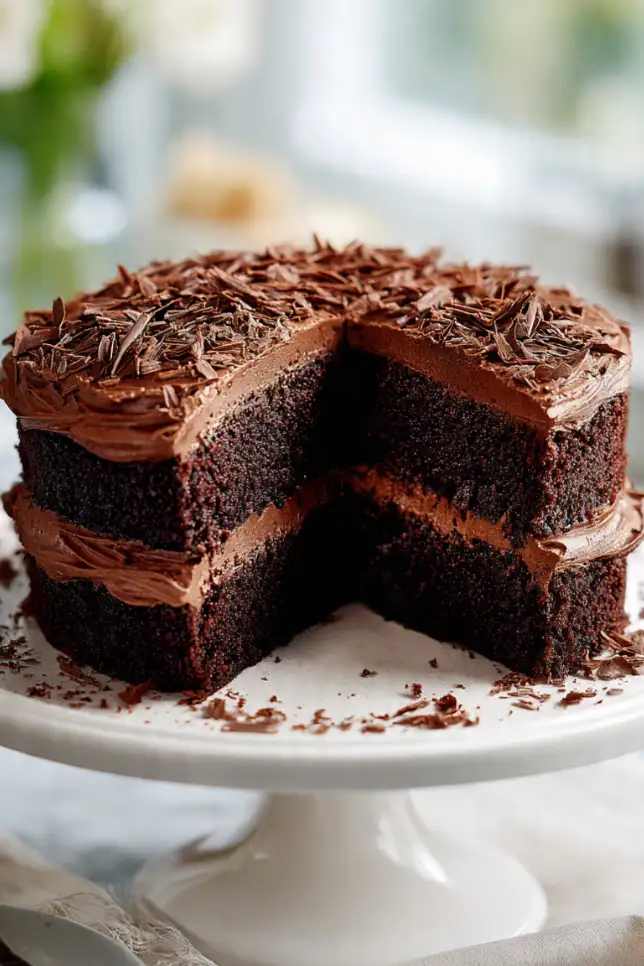
It’s also insanely versatile. I’ve turned this base into everything from elegant layer cakes with buttercream to casual sheet cakes with cream cheese frosting to individual bundt cakes for gift-giving. Once you master this base, you’ve got endless dessert possibilities.
And can we talk about how it uses ingredients you probably already have? No buttermilk, no sour cream, no fancy chocolate. Just pantry staples. This matters when you’re making dessert at 9 PM and can’t run to the store.
What Makes This Recipe Unique
Most chocolate cake recipes you find online fall into two camps. They’re either so complicated you need a culinary degree to understand them, or they’re doctored cake mix recipes trying to pass as homemade. This is neither.
The hot coffee trick is what sets this apart. I learned this technique from an old baker who’d been making cakes for 40 years, and it’s genius. That hot liquid creates steam during baking, which keeps the cake incredibly moist. It also blooms the cocoa powder, intensifying the chocolate flavor without needing expensive chocolate bars.
The ratio of wet to dry ingredients is carefully balanced. Too many recipes are either too dry (needing tons of frosting to be edible) or so wet they collapse. This one hits that sweet spot where the cake is sturdy enough to stack and frost but still tender and moist.
I also love that this recipe is flexible without being fussy. You can swap ingredients, change pan sizes, and adjust baking times without the whole thing falling apart. That’s the mark of a solid, well-tested recipe.
Key Features
Beginner-friendly: If you can measure ingredients and turn on an oven, you can make this cake. I’ve taught this recipe to complete baking novices, and they nail it every time.
One-bowl method (almost): While I use two bowls for mixing, you could technically do this in one if you’re feeling lazy. I won’t judge.
Pantry ingredients only: No specialty items, no expensive chocolate, no trips to fancy grocery stores. Everything’s available at any regular supermarket.
Dairy-free adaptable: Swap the milk for plant-based alternatives, and you’ve got a dairy-free cake that still tastes incredible.
Perfect for meal prep: Make it on Sunday, store it properly in meal prep containers, and you’ve got dessert sorted for days.
Freezer-friendly: Both baked and frosted versions freeze beautifully. Just wrap well and freeze for up to 3 months.
Customizable: This base takes on any flavor you throw at it. I’ve added espresso powder, cinnamon, orange zest, peppermint extract, you name it.
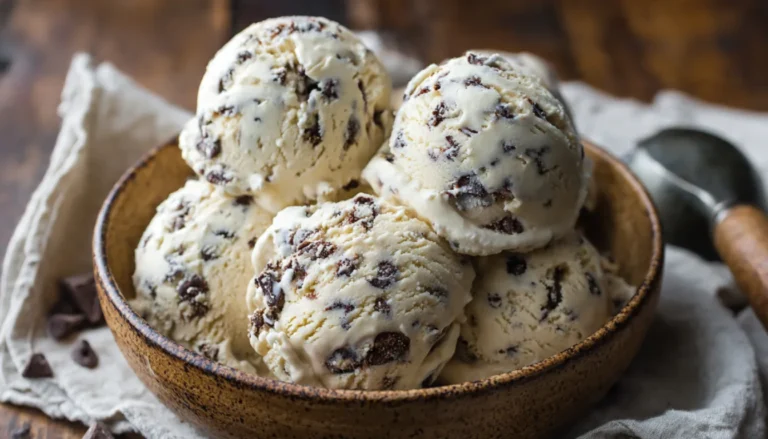
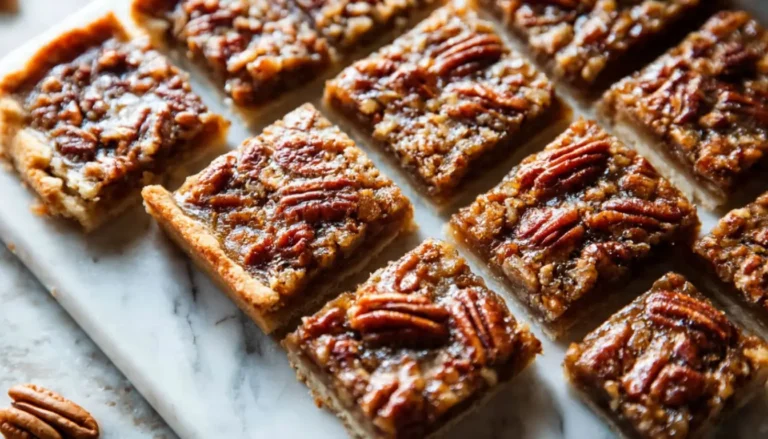
You’ll Also Love
If this easy chocolate cake base becomes your new favorite (and I’m betting it will), check out these related recipes:
- Classic Buttercream Frosting – The perfect topping for this chocolate base
- Cream Cheese Frosting – For when you want tangy richness
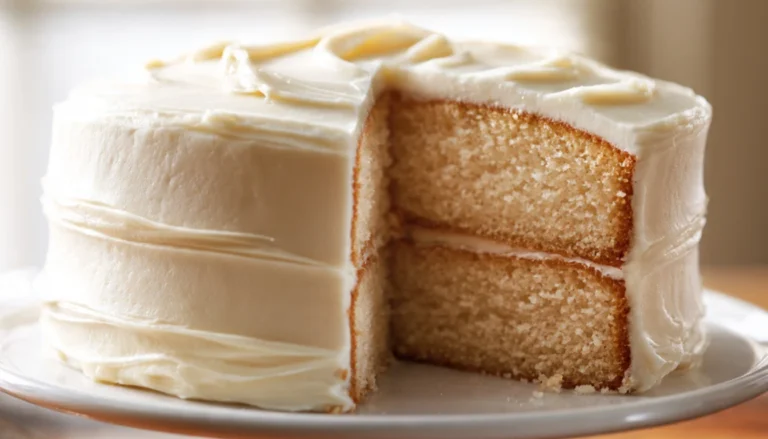
- Easy Vanilla Cake – The vanilla version of this same reliable method
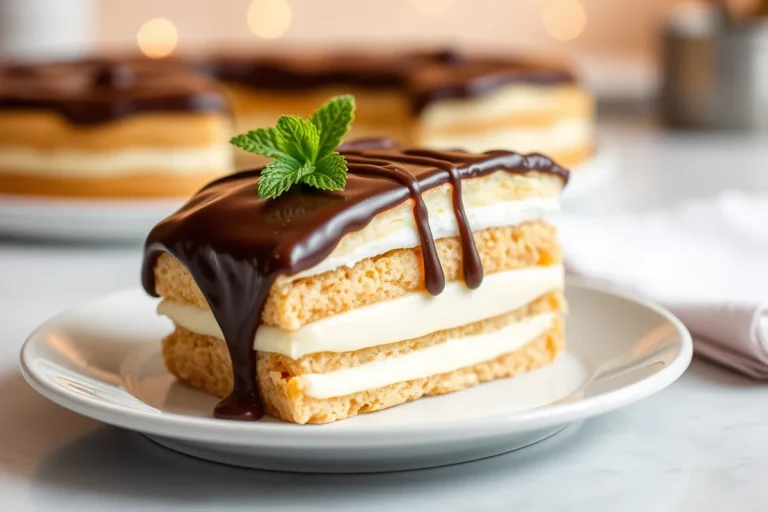
- Chocolate Ganache – For an elegant, glossy finish
Conclusion
Here’s what I want you to remember: baking doesn’t have to be complicated to be delicious. This chocolate cake base proves that simple ingredients, basic equipment, and good technique beat fancy recipes every single time.
I’ve made this cake for my kid’s birthday parties, holiday gatherings, random weeknight desserts, and everything in between. It’s never once disappointed. The recipe is forgiving enough for beginners but delicious enough that experienced bakers keep it in rotation.
So next time you need chocolate cake (and let’s be honest, that moment will come), skip the complicated recipes and the boxed mixes. Make this instead. Your food processor can stay in the cabinet, your stand mixer can take the day off, and you can still end up with a chocolate cake that tastes like you spent hours on it.
And when someone asks for your recipe? Well, that’s up to you. I usually share because good food is meant to be passed around. Plus, watching someone’s face light up when they realize they can actually make a cake this good is pretty much the best part of baking.
Now go make some cake. Your kitchen is calling.
Easy Chocolate Cake Base
A simple, reliable chocolate cake base that creates moist, tender layers perfect for any occasion
Ingredients
- 1 3/4 cups all-purpose flour
- 2 cups granulated sugar
- 3/4 cup unsweetened cocoa powder
- 2 tsp baking soda
- 1 tsp baking powder
- 1 tsp salt
- 2 large eggs, room temperature
- 1 cup whole milk, room temperature
- 1/2 cup vegetable oil
- 2 tsp vanilla extract
- 1 cup hot coffee (or hot water)
Instructions
- Prep pans and preheat Preheat oven to 350°F (175°C). Grease and flour two 9-inch round cake pans, or line with parchment paper.
- Mix dry ingredients In a large bowl or stand mixer bowl, whisk together flour, sugar, cocoa powder, baking soda, baking powder, and salt until well combined with no cocoa lumps.
- Combine wet ingredients In a separate bowl, beat eggs until slightly frothy. Add milk, oil, and vanilla extract. Whisk until smooth and well combined.
- Mix wet and dry Pour wet ingredients into dry ingredients. Mix on low speed or stir by hand just until combined. Batter will be thick.
- Add hot coffee Carefully stir in hot coffee. The batter will become thin and soupy. This is normal and creates the moist texture.
- Bake the cakes Divide batter evenly between prepared pans. Bake for 30-35 minutes, until a toothpick inserted in center comes out with a few moist crumbs.
- Cool properly Let cakes cool in pans for 10 minutes, then turn out onto wire racks to cool completely before frosting.
Chef’s Notes
Room temperature eggs and milk are crucial for proper emulsification. The coffee enhances chocolate flavor without making the cake taste like coffee. This base freezes beautifully for up to 3 months when wrapped tightly in plastic wrap and foil. For cupcakes, bake 18-22 minutes. For a 9×13 pan, bake 35-40 minutes.