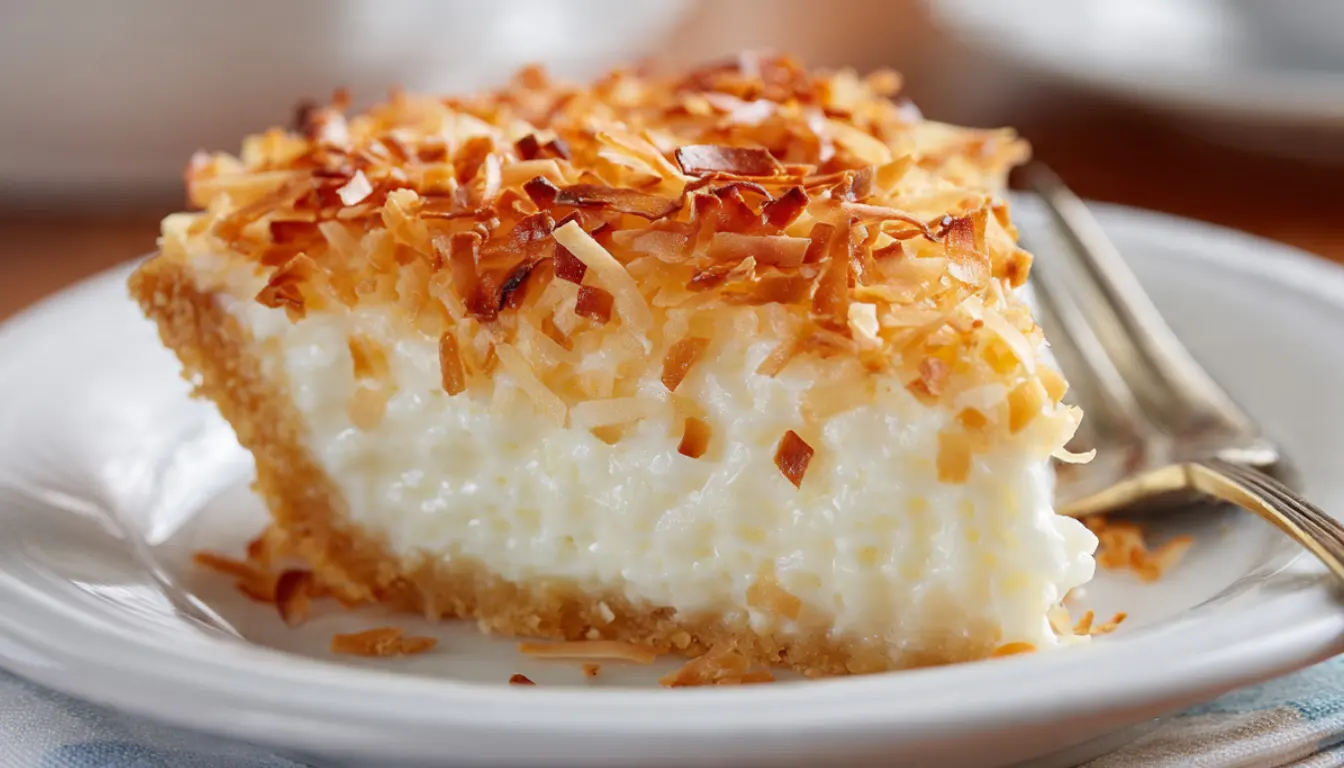
Crustless Coconut Pie
There’s something magical about a dessert that tastes like you spent hours in the kitchen but actually comes together faster than most people can decide what to watch on Netflix. I discovered this crustless coconut pie during a particularly hectic holiday season when I promised to bring dessert but completely forgot until the morning of our family gathering. No time for chilling pie dough or blind-baking crusts. Just me, my stand mixer, and a prayer that this would work.
Spoiler alert: it became the most requested dessert in our family rotation. And honestly, I think the lack of crust is what makes it so special. You get all that sweet, custardy coconut filling without any of the fuss. Plus, it magically forms its own delicate bottom layer while baking (I still don’t fully understand the science, but I’m not questioning it).
Here’s the thing about crustless pies. They sound too good to be true until you pull one out of the oven and realize you’ve just saved yourself 30 minutes of work and an entire dish of dirty pie weights. This recipe is perfect for anyone who wants impressive results without the typical pie-making stress. Whether you’re using a KitchenAid stand mixer or just going old-school with a whisk and some elbow grease, this pie is practically foolproof.
Essential Ingredients
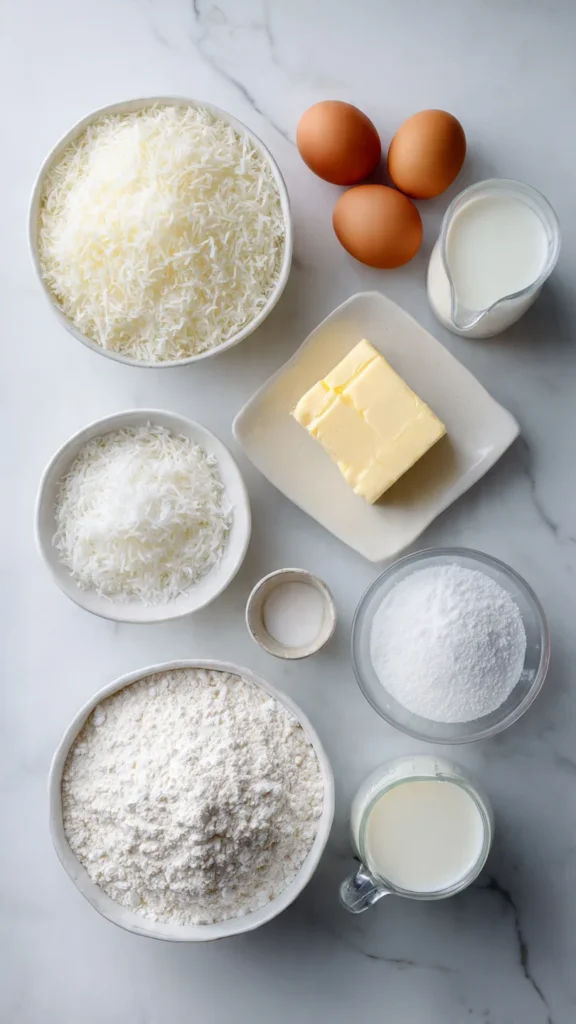
- 4 large eggs
- 1/2 cup unsalted butter, melted
- 1 3/4 cups granulated sugar
- 1/2 cup all-purpose flour
- 1/4 teaspoon salt
- 2 cups whole milk
- 1 teaspoon vanilla extract
- 1 teaspoon coconut extract
- 1 1/2 cups sweetened shredded coconut
- 1/4 cup unsweetened shredded coconut (for topping)
Alternative Ingredients
Let me share what I’ve learned after making this pie probably 50 times with various substitutions. When you can’t find coconut extract (or forgot to buy it, like I do constantly), you can double the vanilla to 2 teaspoons. The coconut flavor won’t be quite as pronounced, but the shredded coconut carries most of that tropical taste anyway.
For the milk, I’ve successfully used 2% milk when that’s all I had. The custard isn’t quite as rich, but it still sets up beautifully. Coconut milk is an interesting swap if you want to go full tropical mode. Just use the canned stuff, not the carton beverage. Trust me on this one.
If you’re watching sugar intake, you can reduce it to 1 1/2 cups, though the pie will be less sweet and the texture slightly different. I tested this when my aunt requested a “less sweet” version, and while it worked, I personally prefer the original sweetness level. It balances perfectly with the coconut.
Some bakers swear by using a food processor to pulse the coconut into finer pieces before adding it to the batter. I’ve tried this, and while it creates a smoother texture, I actually prefer the rustic bite of standard shredded coconut. But if you want that bakery-smooth consistency, go for it.
Step-by-Step Directions
Preheat your oven to 350°F and generously butter a 9-inch pie pan. I use a glass pie dish because I’m paranoid about checking the bottom for doneness, but any standard pie pan works. Some people swear by using a non-stick pan for this recipe, and I won’t argue with that logic.
In a large mixing bowl (or the bowl of your stand mixer if you’re fancy like that), whisk together the eggs and melted butter until well combined. I learned the hard way that you need to let that butter cool for about 5 minutes first. Otherwise, you’ll end up with scrambled egg bits in your pie, which is not the vibe we’re going for.
Add the sugar, flour, and salt to the egg mixture. Mix until everything is smooth and there are no flour lumps lurking at the bottom. This is where a stand mixer really shines because it catches all those sneaky pockets of flour that hand mixing sometimes misses. But honestly, a good whisk and 2 minutes of arm work gets you there too.
Pour in the milk, vanilla extract, and coconut extract. Mix on low speed (or whisk gently) until everything is fully incorporated. The batter will be pretty thin, almost like a thick cream. Don’t panic. This is exactly what we want.
Fold in the sweetened shredded coconut with a spatula. I like to make sure every strand of coconut gets coated in that custard mixture. This is also your last chance to steal a taste before it goes in the oven. Not that I would know anything about that.
Pour the entire mixture into your prepared pie pan. The coconut will try to float to the top, which is fine. Give it a gentle stir with a fork to distribute things evenly if you’re feeling particular, but it’ll sort itself out in the oven anyway.
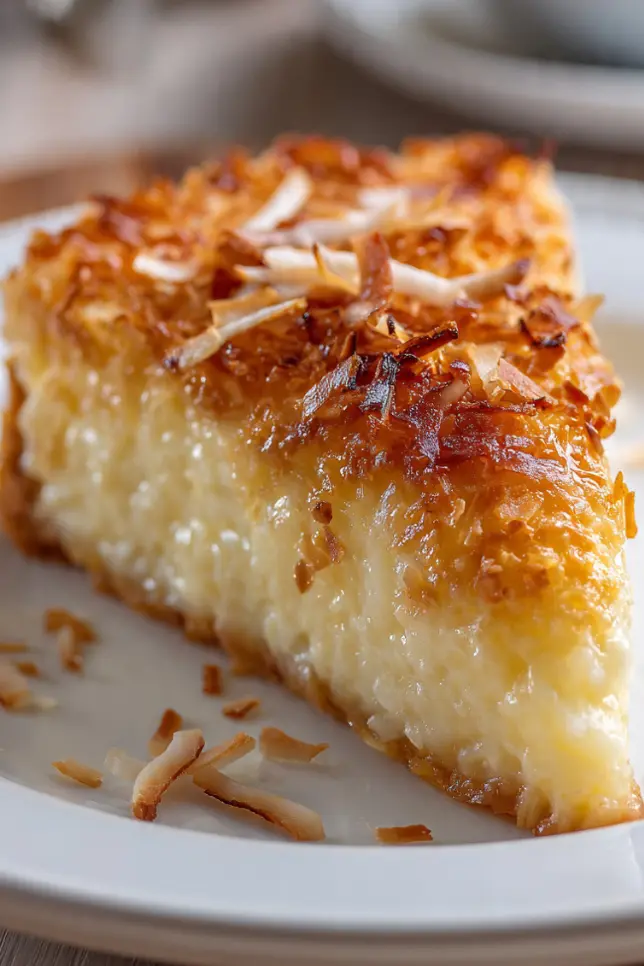
Sprinkle the unsweetened coconut on top. This toasts beautifully during baking and adds a nice textural contrast to the creamy filling. I started doing this after seeing it on a professional baker’s version, and it’s such a simple upgrade.
Bake for 50 to 60 minutes, until the top is golden brown and the center has just a slight jiggle when you shake the pan. The edges will set first, so don’t wait for the whole thing to be completely firm, or you’ll end up with an overbaked pie. I usually check mine at the 50-minute mark and then watch it like a hawk for those last 10 minutes.
Let the pie cool completely on a wire rack. This is the hardest part because it smells incredible and you’ll want to dive in immediately. But hot crustless pie is a soupy mess. It needs at least 2 hours to set up properly. I usually make mine in the morning for an evening dessert, or the night before if I’m serving it the next day.
For the cleanest slices, refrigerate the pie for at least an hour after it’s cooled to room temperature. Cold pie cuts like a dream. Room temperature pie tastes amazing but looks a bit rustic when you slice it. Your choice depending on whether Instagram-worthy presentation or peak flavor is your priority.
Pro Tips
The biggest mistake I see people make with this recipe is not greasing the pie pan well enough. This pie doesn’t have a crust to protect it from sticking, so you need to be generous with the butter. I actually run a stick of butter all around the pan and up the sides, then use my fingers to make sure every inch is coated.
If your pie seems to be browning too quickly on top (usually after about 40 minutes), tent it loosely with aluminum foil. I keep a sheet of foil nearby just in case because ovens vary so much. My mom’s oven runs hot and always needs the foil. Mine doesn’t. Know your oven’s personality.
For storing, this pie keeps covered in the refrigerator for up to 4 days. I use one of those reusable silicone covers or just plastic wrap pressed directly on the surface. The coconut can dry out a bit if it’s exposed to air too long.
Want to make this feel extra special? I sometimes toast extra coconut in a dry skillet until it’s golden and fragrant, then sprinkle it on top right before serving. It takes 3 minutes and makes the pie taste like you went to culinary school. Toasted coconut is one of those secret weapons that elevates everything.
Some people like to serve this with whipped cream, and I won’t stop you, but I think it’s perfect on its own. The custard is rich enough that it doesn’t need any accompaniments. That said, a scoop of vanilla ice cream never hurt anyone, and the temperature contrast between cold ice cream and room temperature pie is pretty fantastic.
If you’re doubling this recipe for a crowd (which I do for Thanksgiving), use a 9×13 inch baking dish instead of two pie pans. The baking time increases to about 65-70 minutes, but otherwise the recipe scales perfectly. I learned this after trying to juggle two pie pans in my oven and nearly dropping one. Not my finest moment.
FAQs
Can I make crustless coconut pie ahead of time?
Yes. It actually tastes better after chilling overnight.
Why is my coconut pie watery?
It likely needs more baking time or more cooling time before slicing.
Can I use coconut milk instead of regular milk?
Yes. Use canned coconut milk for best flavor and texture.
Does this pie need refrigeration?
Yes. Store it covered in the refrigerator for freshness.
Can I freeze this pie?
Yes, but expect slight texture changes after thawing.
Why You’ll Love This Recipe
This crustless coconut pie is the definition of effortless elegance. You skip the entire crust-making process (which, let’s be honest, is where most pie disasters happen) and still end up with something that looks and tastes like you know what you’re doing in the kitchen.
The texture is what really sets this apart. It’s creamy and custardy, almost like a coconut version of chess pie. Each bite has that perfect balance of sweet custard and chewy coconut strands. And because there’s no crust competing for attention, every forkful is pure coconut bliss.
It’s also incredibly versatile for different occasions. Casual enough for a Tuesday night dessert but impressive enough for holiday tables. I’ve served this at Easter dinners, summer barbecues, and random Sunday family meals. It always disappears, and someone always asks for the recipe.
For anyone who gets intimidated by traditional pie-making, this recipe is your new best friend. No rolling pins, no crimping edges, no worried about whether your crust is going to shrink or crack. Just mix, pour, bake, and accept compliments.
What Makes This Recipe Unique
The self-forming bottom layer is basically kitchen magic. During baking, the heavier ingredients settle to create this thin, slightly denser base that mimics a traditional crust without any of the work. Meanwhile, the coconut rises to the top and gets all toasted and gorgeous. It’s like the pie organizes itself while you’re doing literally nothing.
I’ve made a lot of coconut desserts over the years, and this one has the best coconut-to-custard ratio I’ve found. Some recipes are too heavy on custard and you barely taste the coconut. Others are so packed with coconut that they’re chewy and dry. This version hits that sweet spot where you get distinct coconut flavor and texture without it being overwhelming.
The dual extracts (vanilla and coconut) create a depth of flavor that makes people wonder what your secret is. I experimented with using just vanilla or just coconut extract, and neither version was as good as using both. They complement each other in a way that makes the whole pie taste more complex and bakery-worthy.
Because it’s crustless, it’s also naturally gluten-free if you use a gluten-free flour blend for the small amount of flour in the recipe. I’ve done this for celiac friends, and they were thrilled to have a “normal” pie option that didn’t taste like a compromise.
Key Features
Quick Prep: From deciding to make pie to getting it in the oven takes about 15 minutes. Most of that is just measuring ingredients. The actual mixing is maybe 5 minutes with a stand mixer or 8 minutes by hand.
Beginner-Friendly: If you can crack eggs and measure ingredients, you can make this pie. There are no tricky techniques or precise timing requirements. It’s genuinely hard to mess up.
Impressive Presentation: The golden toasted coconut top and custardy interior look like something from a bakery case. No one needs to know it’s actually one of the easiest pies you’ll ever make.
Flexible Serving: Delicious cold, room temperature, or slightly warm. Serve it plain, with whipped cream, with ice cream, or with fresh berries. It plays well with whatever you throw at it.
Great for Meal Prep: Keeps well in the fridge for days, so you can make it ahead for parties or just have dessert ready whenever the craving hits. It’s one of those recipes that doesn’t suffer from sitting around.
You’ll Also Love
If this crustless coconut pie is hitting the spot, you’ll definitely want to try these other tropical and custard-based desserts from the blog:
Coconut Cream Tart with Toasted Meringue takes the coconut flavor even further with a silky filling and dramatic topping. It does have a crust, but it’s worth the extra effort.
Key Lime Pie Bars offer that same tropical vibe in a more portable format. The bright citrus cuts through the richness in a way that’s really refreshing.
Classic Chess Pie has a similar custardy texture if you want to explore that Southern dessert tradition. It’s like the grandmother of this crustless coconut pie in terms of simplicity and satisfaction.
Conclusion
I’ve watched a lot of people discover the joy of crustless pies through this recipe, and it never gets old. There’s always that moment when they take their first bite and realize they didn’t miss the crust at all. In fact, most people prefer it this way once they try it.
The beauty of this dessert is that it meets you where you are. Using a basic whisk and bowl? Perfect. Want to break out your stand mixer and make it even easier? Go for it. Serving it for a special occasion or just because it’s Thursday? It works either way.
After a decade of recipe development and food blogging, I can confidently say this is one of those recipes that earns its place in your permanent rotation. It’s reliable, delicious, and makes you look like a much more accomplished baker than you actually need to be. And honestly, those are my favorite kinds of recipes.
So grab your ingredients, preheat that oven, and give this crustless coconut pie a try. I’m betting it becomes a regular appearance in your kitchen, just like it has in mine. And when people ask you for the recipe (because they will), feel free to send them my way.
Happy baking!
Crustless Coconut Pie
Easy crustless coconut pie with golden toasted coconut top and creamy custard filling. No pie crust needed!
Ingredients
- 4 large eggs
- 1/2 cup unsalted butter, melted (cooled 5 minutes)
- 1 3/4 cups granulated sugar
- 1/2 cup all-purpose flour
- 1/4 tsp salt
- 2 cups whole milk
- 1 tsp vanilla extract
- 1 tsp coconut extract
- 1 1/2 cups sweetened shredded coconut
- 1/4 cup unsweetened shredded coconut (for topping)
Instructions
- Prepare pan and preheat Preheat oven to 350°F. Generously butter a 9-inch pie pan, making sure to coat the bottom and sides completely.
- Mix eggs and butter In a large mixing bowl, whisk together eggs and melted butter until well combined. Let the butter cool for 5 minutes before adding to prevent scrambling the eggs.
- Add dry ingredients Add sugar, flour, and salt to the egg mixture. Mix until smooth with no lumps remaining.
- Add liquids Pour in milk, vanilla extract, and coconut extract. Mix on low speed or whisk gently until fully incorporated. The batter will be thin.
- Fold in coconut Fold in the sweetened shredded coconut with a spatula, making sure all strands are coated in the custard mixture.
- Pour and top Pour the entire mixture into the prepared pie pan. Sprinkle the unsweetened coconut evenly on top.
- Bake Bake for 50-60 minutes until the top is golden brown and the center has just a slight jiggle. If the top browns too quickly, tent with aluminum foil.
- Cool completely Let the pie cool completely on a wire rack for at least 2 hours. The custard needs time to set up properly.
- Chill and serve For the cleanest slices, refrigerate for at least 1 hour after cooling. Slice and serve cold or at room temperature.
Pro Tips
Generously butter your pie pan to prevent sticking. If the top browns too quickly after 40 minutes, cover loosely with foil. The pie will seem wobbly when you remove it from the oven, but it firms up beautifully as it cools. For the cleanest slices, chill the pie completely and use a sharp knife dipped in hot water between cuts. Store covered in the refrigerator for up to 4 days. This pie is naturally gluten-free if you use a gluten-free flour blend.