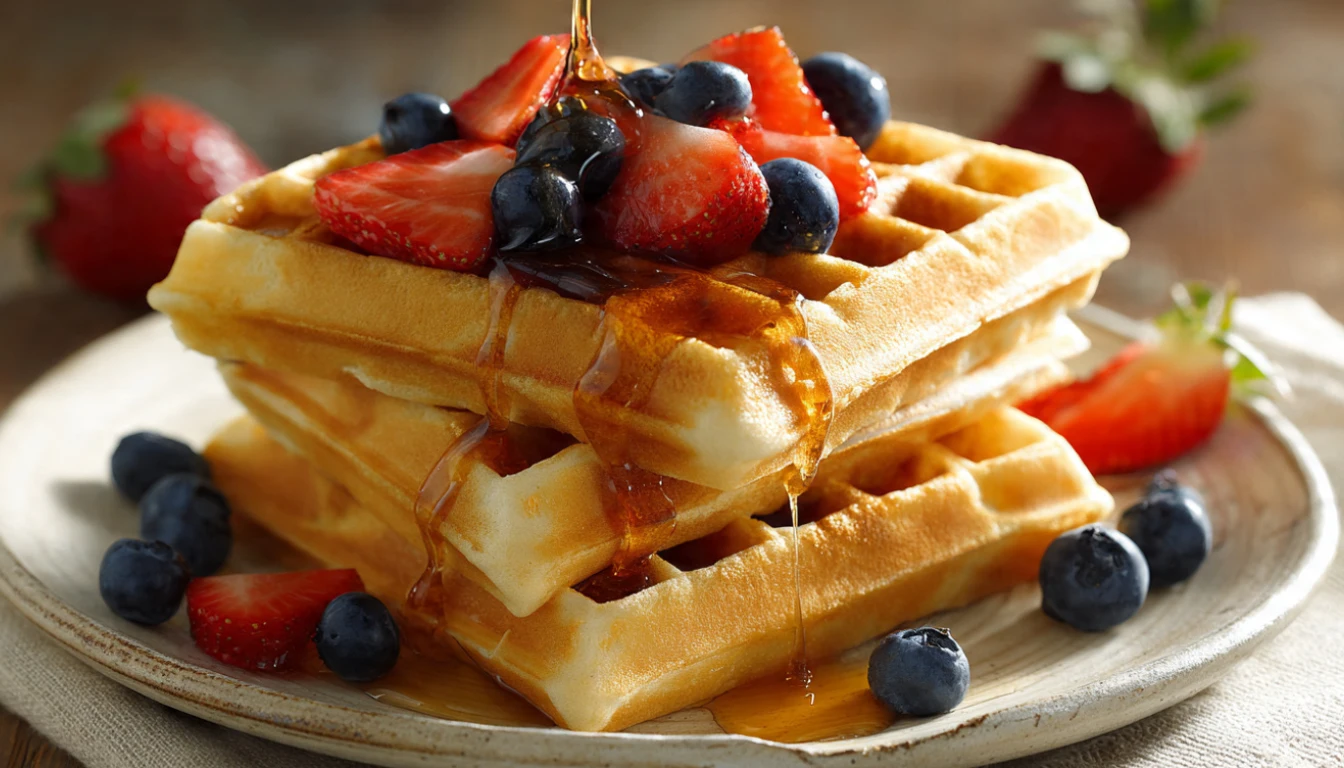
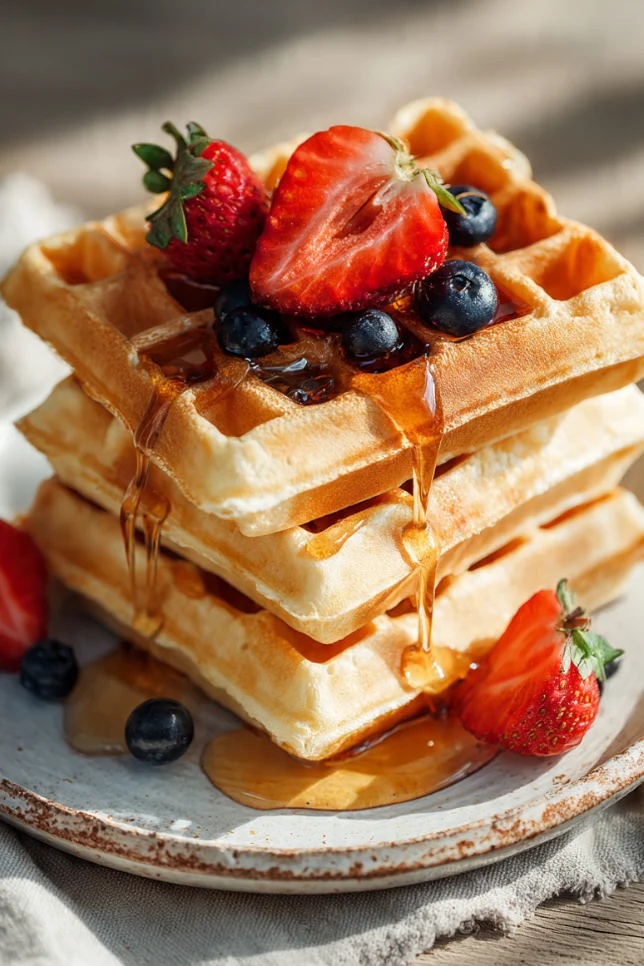
Easy Waffle Recipe Without Milk: Fluffy Dairy-Free Waffles in 15 Minutes
You know that moment when you’re craving waffles on a Sunday morning, only to realize you’re completely out of milk? Yeah, I’ve been there way too many times. The first time it happened, I actually drove to the store in my pajamas at 7 AM (not my proudest moment). But after years of recipe testing and a few kitchen disasters, I learned something that changed my breakfast game forever: you don’t actually need milk to make incredible waffles.
I’m Linda, and after 10 years of developing recipes for my food blog, I can tell you that some of my best discoveries came from those “oh no” moments when I was missing ingredients. This dairy-free waffle recipe has become my go-to, and honestly? I make it even when I do have milk in the fridge. They’re that good.
Why You’ll Love This Recipe
Listen, I’ve tested dozens of waffle recipes over the years, and here’s what makes this one special. First, you probably have all the ingredients in your pantry right now. Second, the texture is absolutely perfect: crispy on the outside, fluffy on the inside. And third, they freeze beautifully, which means you can make a big batch for meal prep and have homemade waffles ready faster than you can say “toaster.”
The secret? We’re replacing milk with water and adding a bit of extra fat to compensate. Sounds too simple to work, right? I thought so too until I tried it.
What Makes This Recipe Unique
Most waffle recipes rely on milk for moisture and richness, but here’s the thing: milk is mostly water anyway (about 87%, actually). What it does contribute is a small amount of fat and a subtle flavor. By using water and slightly increasing the butter or oil, we get the same result without any dairy.
I stumbled onto this method during a recipe development session for my breakfast meal planning series. I was testing variations for readers with dairy allergies or lactose intolerance, and honestly, I couldn’t tell the difference in a blind taste test. My husband still doesn’t know that half the waffles I’ve made in the past year have been dairy-free.
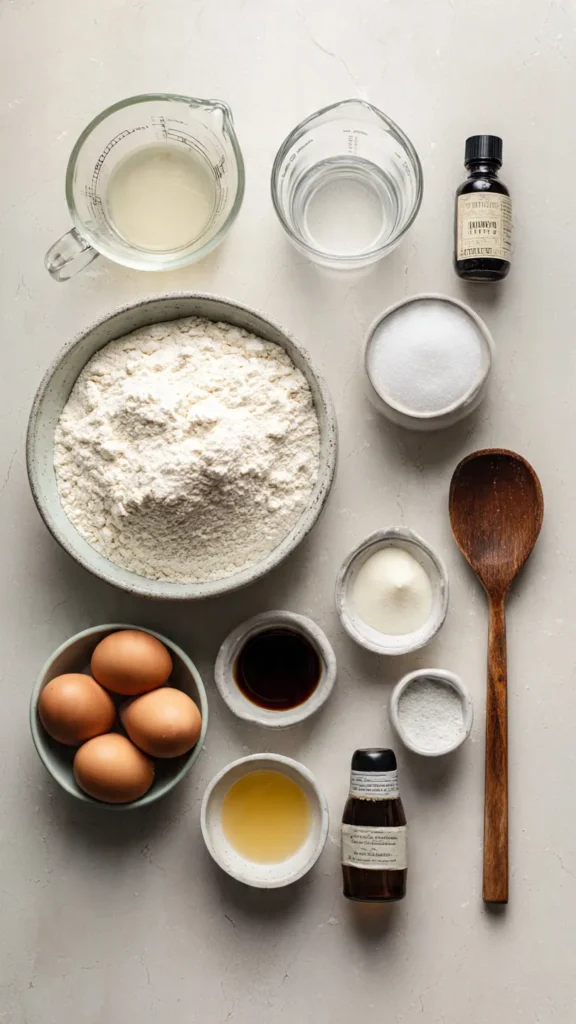
Essential Ingredients
Here’s what you need for about 6 large waffles:
- 2 cups all-purpose flour
- 2 tablespoons granulated sugar
- 1 tablespoon baking powder
- 1/2 teaspoon salt
- 2 large eggs
- 1 3/4 cups water (room temperature)
- 1/2 cup vegetable oil or melted butter
- 1 teaspoon vanilla extract
That’s it. No fancy ingredients, no trips to specialty stores. Just basic pantry staples.
Alternative Ingredients
This recipe is super flexible. If you want to keep it completely dairy-free, use vegetable oil instead of butter. I typically use canola or sunflower oil, but melted coconut oil works great too and adds a subtle tropical flavor that’s amazing with berries.
For the water, you can also substitute with non-dairy milk alternatives like almond milk, oat milk, or soy milk. I’ve done this plenty of times when I’m trying to add a bit more flavor. Oat milk is my personal favorite because it’s slightly sweet and has a creamy texture that mimics regular milk really well.
Want to make these whole wheat? Swap half the all-purpose flour for whole wheat flour. Just know they’ll be a bit denser, which isn’t necessarily bad, just different.
Step-by-Step Directions
Let me walk you through this. It takes about 15 minutes from start to finish.
Step 1: Preheat Your Waffle Maker
Turn on your waffle iron now. Whether you’re using a Belgian waffle maker or a standard one, you want it nice and hot before you pour in the batter. I learned this the hard way after making soggy waffles for months because I was too impatient to wait. A properly preheated non-stick waffle maker is the difference between crispy perfection and a gummy mess.
Step 2: Mix the Dry Ingredients
In a large bowl, whisk together the flour, sugar, baking powder, and salt. Make sure you really whisk it. I see people just stir these together, and then they wonder why their waffles have pockets of baking powder. Thirty seconds of whisking saves you from bitter surprises.
Step 3: Combine the Wet Ingredients
In a separate bowl (or a large measuring cup if you’re lazy like me), whisk the eggs until they’re slightly frothy. Add the water, oil or melted butter, and vanilla extract. Whisk until everything’s combined.
Here’s a pro tip: if you’re using melted butter, make sure it’s not piping hot, or it’ll cook the eggs when you mix them. Room temperature or slightly warm is perfect.
Step 4: Combine Wet and Dry
Pour the wet ingredients into the dry ingredients. Now, this is important: don’t overmix. Stir until you don’t see any more dry flour, but don’t worry about a few lumps. Overmixed waffle batter leads to tough, chewy waffles instead of light, fluffy ones. I ruined so many batches before I figured this out.
Step 5: Cook the Waffles
Lightly spray or brush your waffle iron with oil (even if it’s non-stick). Pour the recommended amount of batter for your specific waffle maker. Mine takes about 2/3 cup per waffle, but check your manual.
Close the lid and resist the urge to peek. Most waffle makers will tell you when they’re done, either with a light or a beep. If yours doesn’t, wait about 4-5 minutes for Belgian waffles or 3-4 minutes for regular ones.
The waffle is done when it’s golden brown and releases easily from the iron. If you have to tug at it, give it another minute.
Step 6: Keep Them Warm
If you’re making a batch, keep finished waffles warm in a 200°F oven on a wire rack. Don’t stack them or they’ll get soggy. Trust me on this.
Pro Tips
After making hundreds of waffles, here are the tricks I’ve learned:
For Extra Crispy Waffles: Add an extra tablespoon of oil to the batter, or brush the outside of the cooked waffle with melted butter right when it comes off the iron. The butter sizzles and creates an incredible crispy coating.
For Fluffier Waffles: Separate your eggs. Mix the yolks with the wet ingredients, then beat the whites until soft peaks form and fold them in at the very end. It’s an extra step, but wow, the difference is noticeable.
Freezer Storage: These freeze brilliantly. Let them cool completely on a wire rack, then store them in freezer bags or airtight containers separated by parchment paper. They’ll keep for up to 3 months. Pop them in the toaster straight from frozen, and they taste like you just made them.
Meal Prep Sunday Hack: I usually double this recipe and freeze half. It’s a lifesaver on busy mornings when you need a quick breakfast. Way better than store-bought frozen waffles and actually cheaper too.
Key Features
What I love about this recipe:
- Ready in 15 minutes from start to finish
- Dairy-free and easily adaptable for other dietary needs
- Perfect for meal planning and freezer storage
- Crispy exterior, fluffy interior
- Works with any standard waffle iron
- Budget-friendly (costs about $0.30 per waffle)
Recipe Info
| Detail | Info |
|---|---|
| Prep Time | 5 minutes |
| Cook Time | 10 minutes |
| Total Time | 15 minutes |
| Servings | 6 large waffles |
| Yield | 6 servings |
Nutrition Facts (Per Waffle)
| Nutrient | Amount |
|---|---|
| Calories | 285 |
| Total Fat | 14g |
| Carbohydrates | 34g |
| Protein | 6g |
| Sugar | 4g |
| Sodium | 320mg |
| Fiber | 1g |
Frequently Asked Questions
Can I make these without eggs? You can try using flax eggs (1 tablespoon ground flaxseed mixed with 3 tablespoons water per egg), but I’ll be honest: the texture won’t be quite as light. I’ve had better luck with commercial egg replacers for waffles.
Why are my waffles soggy? Usually it’s one of three things: the waffle maker wasn’t hot enough, you opened it too early, or you stacked the finished waffles. Keep them on a wire rack in a warm oven instead.
Can I use this batter for pancakes? Absolutely! Just thin it out with an extra 1/4 cup of water. Waffle batter is thicker than pancake batter.
How do I know when the waffle is done? Stop opening the waffle maker every 30 seconds (guilty). When the steam stops coming out, they’re usually ready. Most modern waffle makers have indicator lights that help too.
You’ll Also Love
If you enjoyed this recipe, check out these other breakfast favorites:
Conclusion
So there you have it. No milk? No problem. This dairy-free waffle recipe has saved countless Sunday mornings in my house, and I hope it does the same for you. The best part is how forgiving it is. Forgot the vanilla? Still delicious. Used all oil instead of butter? Still works. Want to add chocolate chips or blueberries? Go for it.
After 10 years of recipe development, I’ve learned that the best recipes aren’t always the most complicated ones. Sometimes they’re the ones that solve a real problem (like a milk shortage on waffle Sunday) and make your life a little bit easier.
Give these a try this weekend. And if you make them, I’d love to know what you think. Do you prefer them with maple syrup, fresh fruit, or whipped cream? Or are you a purist who eats them plain? Let me know in the comments below.
Happy cooking!
Linda
Easy Waffle Recipe Without Milk
Fluffy dairy-free waffles ready in 15 minutes. Crispy outside, tender inside!
Ingredients
- 2 cups all-purpose flour
- 2 tbsp granulated sugar
- 1 tbsp baking powder
- 1/2 tsp salt
- 2 large eggs
- 1 3/4 cups water, room temperature
- 1/2 cup vegetable oil or melted butter
- 1 tsp vanilla extract
Instructions
- Preheat waffle maker Turn on your waffle iron and let it preheat completely. This ensures crispy waffles.
- Mix dry ingredients In a large bowl, whisk together flour, sugar, baking powder, and salt until well combined.
- Combine wet ingredients In a separate bowl, whisk eggs until slightly frothy. Add water, oil or melted butter, and vanilla extract. Whisk until combined.
- Mix batter Pour wet ingredients into dry ingredients. Stir just until no dry flour remains. Don’t overmix – a few lumps are okay.
- Cook waffles Lightly grease the waffle iron. Pour recommended amount of batter (usually 2/3 cup). Close lid and cook for 4-5 minutes until golden brown and crispy.
- Serve Remove waffle when it releases easily from the iron. Serve immediately or keep warm in a 200°F oven on a wire rack.
Pro Tips
For extra crispy waffles, add an extra tablespoon of oil to the batter or brush the cooked waffle with melted butter. These freeze perfectly – cool completely, then store in freezer bags separated by parchment paper for up to 3 months. Reheat in the toaster straight from frozen.