Homemade Fudgy Chocolate Brownies Recipe
The first time I tried making brownies from scratch, I thought boxed mixes were the only way to get that perfect fudgy center. I was so wrong. After years of testing different techniques in my kitchen, I’ve landed on a recipe that’s honestly better than anything you’ll find in a box, and it’s just as easy.
Here’s what changed everything for me: using quality chocolate and not overbaking. That’s it. Those two things will transform your brownies from sad and cakey to rich and fudgy. I learned this the hard way after ruining three batches in one week.
Essential Ingredients
- 1 cup (2 sticks) unsalted butter
- 2 cups granulated sugar
- 4 large eggs, room temperature
- 2/3 cup unsweetened cocoa powder
- 1 cup all-purpose flour
- 1/2 teaspoon salt
- 1/2 teaspoon baking powder
- 1 tablespoon vanilla extract
- 1 cup semi-sweet chocolate chips (optional but recommended)
Alternative Ingredients
If you’re working with what you have in your pantry, here are some swaps that actually work. I’ve tried all of these myself, so I can tell you which ones are worth it.
You can use salted butter if that’s what you have, just skip the added salt in the recipe. For the cocoa powder, Dutch-process cocoa gives you a darker, richer color, but regular unsweetened cocoa works perfectly fine. I honestly can’t tell much difference in the final taste.
Need to make these dairy-free? Coconut oil works surprisingly well instead of butter. Use the same amount, but make sure it’s melted and slightly cooled. For the eggs, I’ve had good luck with flax eggs (1 tablespoon ground flaxseed mixed with 3 tablespoons water per egg), though the texture will be slightly different.
If you want to go fancy, swap half the chocolate chips for chopped dark chocolate. The chunks melt into these amazing pockets of pure chocolate heaven.
Step-by-Step Directions
Step 1: Prep Your Pan
Preheat your oven to 350°F. Line a 9×13 inch baking pan with parchment paper, leaving some overhang on the sides. This makes getting the brownies out so much easier later. I used to skip this step and regretted it every single time.
Trust me, even if you have a good non-stick pan, use the parchment. It’s worth the extra 30 seconds.
Step 2: Melt the Butter and Mix
Melt your butter in a large mixing bowl (I just microwave it for about 45 seconds). While it’s still warm, add the sugar and stir until combined. The mixture will look grainy, and that’s totally normal.
If you have a stand mixer like a KitchenAid, you can use that, but honestly, a wooden spoon works just fine for this recipe. I make these by hand most of the time because it’s easier to clean up.
Step 3: Add the Eggs
Add your eggs one at a time, beating well after each addition. This is important because it creates that shiny, crackly top that makes brownies look bakery-perfect. Beat each egg for about 30 seconds before adding the next one.
Step 4: Mix in Cocoa and Vanilla
Stir in the cocoa powder and vanilla extract. The batter will get thick and glossy. This is when your kitchen starts smelling amazing.
Step 5: Combine Dry Ingredients
In a separate bowl, whisk together the flour, salt, and baking powder. I know it’s an extra dish to wash, but this step prevents flour pockets in your brownies. Nobody wants to bite into a clump of raw flour.
Step 6: Fold Everything Together
Gently fold the flour mixture into the chocolate mixture. Stop mixing as soon as you don’t see any white streaks. Overmixing here makes your brownies tough and cakey instead of fudgy.
If you’re adding chocolate chips, fold them in now. I like to save a handful to sprinkle on top because it looks prettier.
Step 7: Bake to Perfection
Pour the batter into your prepared pan and spread it evenly. Bake for 25-30 minutes. Here’s the trick: take them out when a toothpick inserted in the center comes out with a few moist crumbs. Not clean, not gooey, just moist crumbs.
This is where most people mess up. If you wait for a clean toothpick, you’ve overbaked them. I set a timer for 25 minutes and start checking then.
Step 8: Cool Completely
Let the brownies cool in the pan for at least 30 minutes. I know this is torture, but cutting them warm makes them fall apart. If you can wait an hour, even better.
Use the parchment paper overhang to lift the whole block out of the pan, then cut into 16 squares.
Pro Tips
The quality of your cocoa powder matters more than you’d think. I use Ghirardelli or Hershey’s Special Dark, and it makes a real difference in the chocolate flavor. The cheap stuff tastes waxy.
Room temperature eggs mix better and create a smoother texture. I set mine on the counter about 30 minutes before I start baking. If I forget, I just put them in a bowl of warm water for 5 minutes.
Want extra fudgy brownies? Use melted chocolate instead of cocoa powder. Melt 8 ounces of semi-sweet chocolate with the butter, then reduce the sugar to 1.5 cups. This creates the ultimate fudge bomb, but it’s definitely richer.
For meal prep, these freeze beautifully. I cut them into squares, wrap individually in plastic wrap, and store in a freezer bag. They last up to 3 months, and you can grab one whenever you need a chocolate fix.
Frequently Asked Questions
Can I make these brownies in an 8×8 pan?
Yes. You can bake the brownies in an 8×8 pan, but increase the baking time to about 35 to 40 minutes. The brownies will be thicker and even more fudgy.
Why are my brownies cakey instead of fudgy?
Brownies usually turn cakey if they are overbaked or if too much flour is used. Measure flour by spooning it into the measuring cup and leveling it off rather than packing it down.
Can I add nuts to the brownies?
Yes. Fold about 1 cup of chopped walnuts or pecans into the batter along with the chocolate chips for extra texture and flavor.
How do I store leftover brownies?
Store leftover brownies in an airtight container at room temperature for up to 4 days. Many people find the flavor is even better on the second day.
Recipe Info
| Category | Details |
|---|---|
| Prep Time | 15 minutes |
| Cook Time | 25-30 minutes |
| Total Time | 45 minutes |
| Servings | 16 brownies |
| Yield | One 9×13 pan |
Why You’ll Love This Recipe
These brownies hit that perfect balance between fudgy and chewy. The edges get slightly crispy while the center stays soft and rich. They’re simple enough to throw together on a weeknight but impressive enough to bring to gatherings.
I’ve made these for everything from bake sales to dinner parties, and they always disappear first. People ask if I used a special recipe, and I have to laugh because it’s basically just good technique with simple ingredients.
The best part is you probably have everything you need already. No special equipment required, though a good stand mixer does make mixing easier if you’re doubling the batch.
What Makes This Recipe Unique
Unlike most brownie recipes that use either all cocoa powder or all melted chocolate, this one uses cocoa powder for that intense chocolate flavor without being overly sweet. The texture is what really sets these apart, though.
I tested this recipe probably 20 times to get the right flour-to-fat ratio. Too much flour makes them cakey. Too little makes them greasy. This ratio creates brownies that hold together when you cut them but still have that melt-in-your-mouth quality.
Key Features
The crackly top is something I specifically developed by beating the eggs properly. That shiny, slightly crispy surface is the hallmark of a great brownie, and this recipe delivers it every time.
These also work great for variations. I’ve added everything from peanut butter swirls to cream cheese to espresso powder, and the base recipe is sturdy enough to handle it all.
Nutrition Facts
| Nutrient | Per Brownie |
|---|---|
| Calories | 245 |
| Total Fat | 12g |
| Saturated Fat | 7g |
| Cholesterol | 65mg |
| Sodium | 95mg |
| Total Carbohydrates | 34g |
| Dietary Fiber | 2g |
| Sugars | 26g |
| Protein | 3g |
Note: Nutrition information is approximate and based on 16 servings.
You’ll Also Love
If these brownies are your thing, you should try my chocolate chip cookie dough brownies next. They’re basically these brownies with chunks of edible cookie dough mixed in. Ridiculous but amazing.
My flourless chocolate cake is another favorite for chocolate lovers. It’s gluten-free and even fudgier than these brownies, if you can believe it.
For something a bit lighter, my chocolate-covered strawberry brownies combine fresh strawberries with chocolate ganache. They’re perfect for Valentine’s Day or any time you want to feel fancy.
Conclusion
Making brownies from scratch isn’t complicated, and once you try these, you’ll understand why I stopped buying mixes. The flavor is deeper, the texture is better, and you can control exactly what goes into them.
I hope you love these as much as my family does. They’ve become my go-to dessert when I need something reliable and delicious. Let me know how yours turn out, and feel free to experiment with your own mix-ins.
Happy baking!
Linda
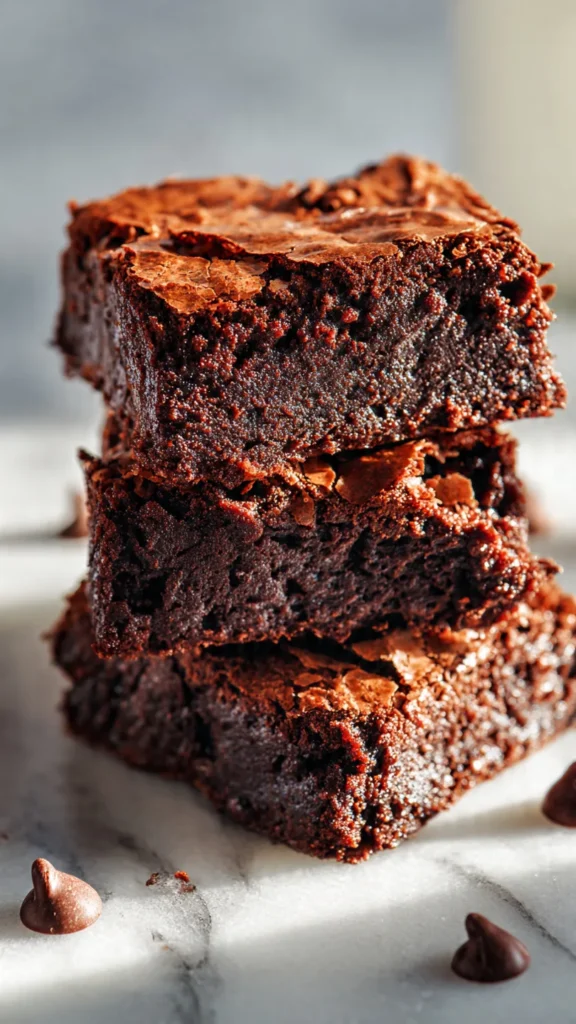
Chocolate Brownies
Rich, fudgy chocolate brownies with a shiny crackly top. Better than any box mix!
Ingredients
- 1 cup (2 sticks) unsalted butter
- 2 cups granulated sugar
- 4 large eggs, room temperature
- 2/3 cup unsweetened cocoa powder
- 1 cup all-purpose flour
- 1/2 tsp salt
- 1/2 tsp baking powder
- 1 tbsp vanilla extract
- 1 cup semi-sweet chocolate chips (optional)
Instructions
- Prep your pan Preheat oven to 350°F. Line a 9×13 inch baking pan with parchment paper, leaving overhang on the sides.
- Melt butter and mix Melt butter in a large bowl. Add sugar and stir until combined. The mixture will look grainy.
- Add eggs Add eggs one at a time, beating well after each addition for about 30 seconds. This creates the shiny top.
- Mix in cocoa Stir in cocoa powder and vanilla extract. The batter will become thick and glossy.
- Combine dry ingredients In a separate bowl, whisk together flour, salt, and baking powder.
- Fold together Gently fold flour mixture into chocolate mixture until no white streaks remain. Don’t overmix. Fold in chocolate chips if using.
- Bake Pour batter into prepared pan and spread evenly. Bake for 25-30 minutes until a toothpick comes out with moist crumbs (not clean).
- Cool and cut Let cool in pan for at least 30 minutes. Lift out using parchment overhang and cut into 16 squares.
Pro Tips
Use quality cocoa powder like Ghirardelli for best flavor. Don’t overbake! Take them out when toothpick has moist crumbs, not clean. Room temperature eggs create better texture. These freeze beautifully for up to 3 months when wrapped individually.