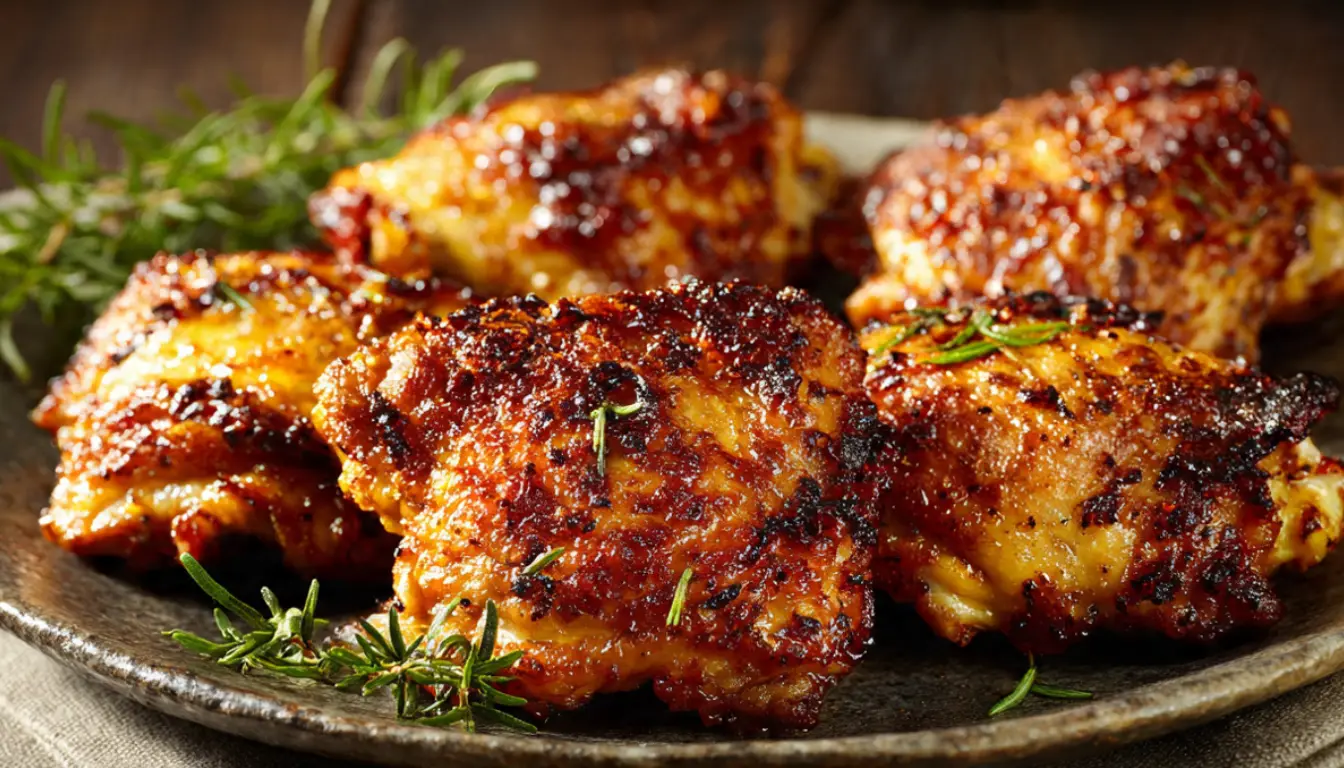
Crispy Chicken Thighs: The Ultimate Guide to Perfect Golden-Brown Skin Every Time
You know what’s funny? I spent years thinking chicken breasts were the “smart” choice. Lower in fat, more protein, blah blah blah. Then one particularly dreary Tuesday, I grabbed chicken thighs on sale without really thinking about it. That dinner changed everything. The skin crackled like glass when I cut into it, and the meat was so juicy I actually laughed out loud. My husband looked at me like I’d lost it, but honestly, after years of dry chicken breast, this felt like a revelation.
Here’s the thing about chicken thighs: they’re basically foolproof. The dark meat has enough fat that you can’t really overcook it (well, you can, but you have to try pretty hard). And that skin? When you do it right, it gets this incredible crispy texture that puts restaurant chicken to shame. I’ve been perfecting this technique for about eight years now, and I’m telling you, once you nail crispy chicken thighs, you’ll never go back to boring boneless breasts.
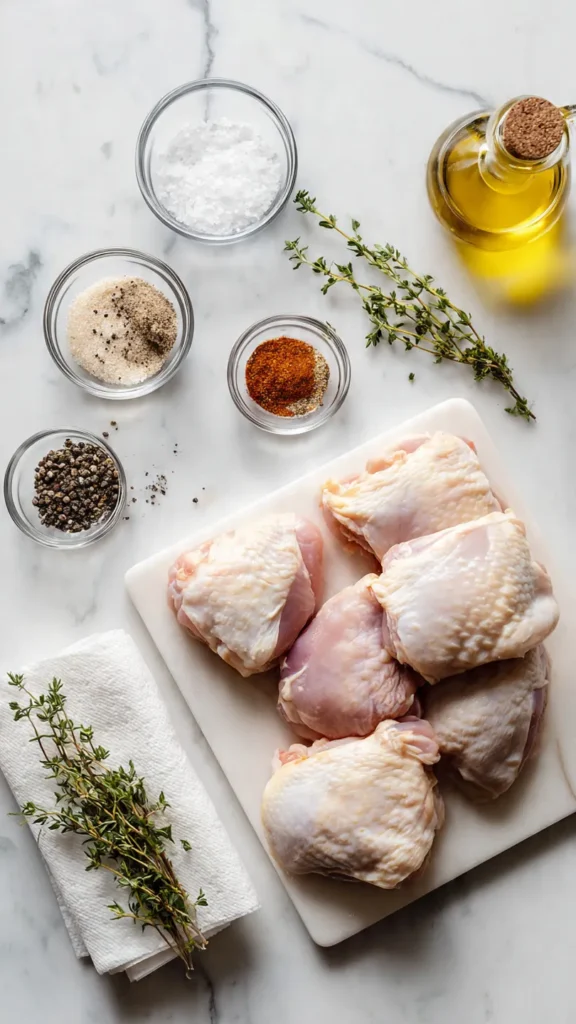
Essential Ingredients
The beauty of this recipe is how simple it actually is. You don’t need fancy ingredients or a pantry full of spices. Just good basics:
- 6 bone-in, skin-on chicken thighs (about 2.5 pounds)
- 2 tablespoons olive oil or avocado oil
- 1.5 teaspoons kosher salt
- 1 teaspoon black pepper
- 1 teaspoon garlic powder
- 1/2 teaspoon smoked paprika
- 1/2 teaspoon onion powder
- Optional: fresh herbs like thyme or rosemary
I usually buy organic chicken thighs when they’re on sale, but regular ones work perfectly fine. The most important thing is that they’re skin-on and bone-in. Those two factors are non-negotiable for the crispiness we’re after.
Alternative Ingredients
Listen, I get it. Sometimes you don’t have exactly what a recipe calls for, and that’s totally okay. Here are some swaps that actually work:
If you can’t find bone-in thighs, boneless will work, but reduce your cooking time by about 5 minutes. The bone helps conduct heat and keeps everything juicier, but it’s not a dealbreaker.
For the oil, any neutral oil with a high smoke point works. I’ve used vegetable oil, coconut oil, even bacon grease when I’m feeling particularly indulgent. Just avoid olive oil if you’re doing really high heat, it can get bitter.
The spice blend is totally flexible. I’ve made this with just salt and pepper when I’ve been lazy, and it’s still delicious. You could also use Cajun seasoning, Italian herbs, or whatever makes you happy. The technique matters more than the exact seasonings.
Step-by-Step Directions
Okay, let’s get into the actual cooking. I’m going to walk you through this exactly how I do it, including the mistakes I used to make so you can skip them.
1. Dry the chicken thoroughly
This is where most people mess up, myself included for the first year. Take those thighs out of the package and pat them completely dry with paper towels. I mean really dry, like you’re trying to remove every single drop of moisture. Wet skin will steam instead of crisp, and you’ll end up with that sad, rubbery texture nobody wants.
Pro move: after patting dry, let them sit uncovered in the fridge for 30 minutes to an hour. This extra drying time is a game changer. I usually prep them right when I get home from work, then cook them when I’m actually ready to eat.
2. Season generously
Mix all your spices together in a small bowl. Now here’s the key: you need to season both sides, but pay extra attention to the skin side. That’s where all the flavor is going to be. Don’t be shy with the salt, either. I use about 1/4 teaspoon per thigh.
Something I learned the hard way: if you’re using a cast iron skillet (which I highly recommend), you can season the chicken directly in the pan before cooking. Just rub that spice mixture all over, then let it sit for 10 minutes while your pan heats up.
3. Heat your pan properly
This is crucial, and it’s where I messed up for months. You need a really hot pan, but not smoking hot. I heat my cast iron skillet over medium-high heat for about 5 minutes. To test if it’s ready, flick a tiny drop of water into the pan. If it sizzles and evaporates immediately, you’re good to go.
If you don’t have a cast iron skillet, a heavy-bottomed stainless steel pan works great. I actually prefer cast iron because it holds heat so well, but use what you have. A non-stick pan will work too, but you won’t get quite the same crust.
4. Start skin-side down
Add a thin layer of oil to your hot pan, then place the thighs skin-side down. And here’s the really important part: don’t touch them. Seriously, don’t move them, don’t peek, don’t flip them every 30 seconds like I used to do. Just let them sit there and do their thing.
You’ll hear them sizzle like crazy at first. That’s good. After about 2 minutes, the sizzling will calm down a bit. Still don’t touch them. The skin needs direct contact with the hot pan to get crispy, and every time you lift or move the chicken, you break that contact.
5. Cook for 12-15 minutes skin-side down
I know this seems like forever. Your instinct will be to flip them after 5 minutes. Don’t. The chicken needs this time to render out the fat and crisp up properly. After about 10 minutes, you can carefully lift one edge to peek. If it’s golden brown and releases easily from the pan, it’s ready to flip. If it’s sticking, give it another 2-3 minutes.
6. Flip and finish cooking
Once the skin is gorgeously crisp and golden, flip the thighs over. At this point, I usually reduce the heat to medium. The second side only needs about 8-10 minutes. You’re looking for an internal temperature of 165°F when measured in the thickest part of the thigh.
I use a digital meat thermometer for this because I’m paranoid about undercooked chicken. It’s worth the $15 investment, trust me.
7. Rest before serving
Take the thighs out of the pan and let them rest on a cutting board for 5 minutes. This lets the juices redistribute so you don’t lose them all when you cut in. I know it’s tempting to dive right in, but that resting time really does make a difference.
Pro Tips
After making this recipe probably 200 times (I’m not exaggerating, my family requests it constantly), here are the tricks that really matter:
Start with room temperature chicken. Take it out of the fridge 20-30 minutes before cooking. Cold chicken in a hot pan = uneven cooking.
Don’t crowd the pan. If you’re making more than 6 thighs, cook them in batches. Crowding drops the pan temperature and you’ll end up steaming instead of searing.
Save that rendered fat. After cooking, there’s usually delicious chicken fat in the pan. Pour it into a jar and save it for roasting vegetables later. It’s liquid gold.
For extra crispy skin, try the air fryer method. I’ll be honest, my air fryer has become my secret weapon for this recipe. Cook the thighs at 400°F for 10 minutes skin-side down, then flip and cook for another 12 minutes. The circulating air makes the skin insanely crispy with less fuss.
Make it a meal prep staple. These thighs keep beautifully in the fridge for up to 4 days. I make a big batch on Sunday and eat them all week. They’re great cold in salads, chopped up in grain bowls, or reheated in a 350°F oven for 10 minutes.
Frequently Asked Questions
Can I use boneless, skinless chicken thighs?
You can, but the skin and bone add flavor and help keep the chicken juicy. If you use boneless skinless thighs, reduce the cooking time to about 6 to 8 minutes per side.
How do I know when crispy chicken thighs are done?
Use a meat thermometer and check the thickest part of the chicken. It should reach 165°F. If you do not have a thermometer, cut into the thickest part. The juices should run clear and the meat should be fully opaque.
Why is my chicken skin not crispy?
This usually happens if the chicken is too wet or the pan was not hot enough. Pat the chicken thighs completely dry with paper towels and make sure the pan is fully heated before cooking.
Can I bake crispy chicken thighs instead of pan frying?
Yes. Place the chicken thighs skin side up on a wire rack over a baking sheet and bake at 425°F for 35 to 40 minutes. The rack allows hot air to circulate so the skin crisps on all sides.
What should I serve with crispy chicken thighs?
Crispy chicken thighs pair well with roasted vegetables, mashed potatoes, rice pilaf, or a simple green salad. They are versatile and work with many different side dishes.
Why You’ll Love This Recipe
Look, I’m not going to oversell this. It’s chicken. But it’s really, really good chicken. The kind that makes people ask for the recipe. The kind that convinced my chicken-breast-loving husband to switch teams. Here’s why it works:
The crispy skin satisfies that craving for something crunchy and indulgent without any breading or deep frying. It’s way easier than frying chicken, way less messy, and honestly tastes just as good.
The dark meat is forgiving. If you’re like me and occasionally get distracted by a work email or a phone call, you’re not going to end up with dry, sawdust chicken. Thighs stay juicy even if you overcook them by a few minutes.
It’s budget-friendly. Chicken thighs are usually half the price of breasts, sometimes even less. I can feed my family of four for under $8, which is basically impossible with any other protein these days.
And probably the best part? It feels fancy but requires basically zero skill. You’re just seasoning chicken and letting physics do its thing. The hot pan and patient waiting create that crackling skin without any complicated techniques.
What Makes This Recipe Unique
Okay, so there are about ten thousand crispy chicken thigh recipes on the internet. What makes mine different? Honestly, it’s all about the technique details that nobody bothers to mention.
Most recipes tell you to cook skin-side down but don’t emphasize just how long you need to leave them alone. That 12-15 minute mark is crucial. I’ve tested shorter times, and the skin just doesn’t get that same shattering crisp texture.
I also don’t use the oven finish method that a lot of recipes call for. Starting on the stovetop and finishing in the oven is fine, but it’s an extra step you don’t actually need. By controlling your heat properly, you can get perfectly cooked chicken with that incredible crust all in one pan on the stovetop.
Plus, I’ve tested this with different pans and cooking methods (cast iron, stainless steel, non-stick, air fryer, even a grill pan), so I can tell you exactly what works and what doesn’t. Most recipes assume you have one specific setup, which isn’t helpful when you’re working with what you’ve got.
Key Features
Here’s what makes this recipe actually work in real life:
One-pan cooking. Everything happens in a single skillet. Less cleanup, less stress, less kitchen chaos.
Flexible seasoning. The base recipe is simple salt and pepper with some aromatics, but you can take it in any direction you want. Asian-inspired with ginger and soy? Sure. Mediterranean with oregano and lemon? Absolutely.
Meal prep friendly. Make these on Sunday and you’ve got protein for the week. They reheat beautifully and taste great cold.
No special equipment required. You don’t need a sous vide machine or a smoker or anything fancy. Just a pan and a stove.
Consistently crispy skin. By following the technique exactly, you’ll get that crackling crust every single time. No more soggy, disappointing chicken skin.
You’ll Also Love
If crispy chicken thighs are your thing, you might want to check out these other recipes:
- Garlic Butter Chicken Thighs: Same technique, but finished with a pan sauce made from butter, garlic, and herbs
- Honey Soy Glazed Chicken Thighs: Sweet and savory Asian-inspired version that’s perfect for rice bowls
- Lemon Herb Roasted Chicken: Whole roasted chicken using similar crisping techniques
- Chicken Thigh Sheet Pan Dinner: All the crispy skin goodness with roasted vegetables for a complete meal
- Meal Prep Chicken Bowl: How to use these crispy thighs in a week’s worth of different meals
Conclusion
I’ll be real with you. This isn’t a fancy recipe. There’s no complicated French technique or hard-to-find ingredients. It’s just really well-executed chicken thighs with skin so crispy it shatters when you bite into it.
But sometimes that’s exactly what you need, right? A recipe that works every single time, doesn’t require you to be a professional chef, and makes people think you’re way better at cooking than you actually are. That’s what this is.
The first time I made these for friends, one of them literally asked if I’d ordered them from a restaurant and was just pretending to have cooked. I took it as a compliment. Now it’s become my signature dish, the thing people request when they come over for dinner.
So if you’re tired of dry chicken breast or intimidated by whole roasted birds, start here. Master the crispy chicken thigh. It’ll change how you think about cooking poultry, and you’ll have a reliable recipe that works whether you’re cooking on a random Tuesday or trying to impress someone on the weekend.
Give it a shot. And when that skin crackles under your knife and you taste that first perfectly juicy bite, you’ll get why I’ve been going on about this for 1,400 words.
Happy cooking!
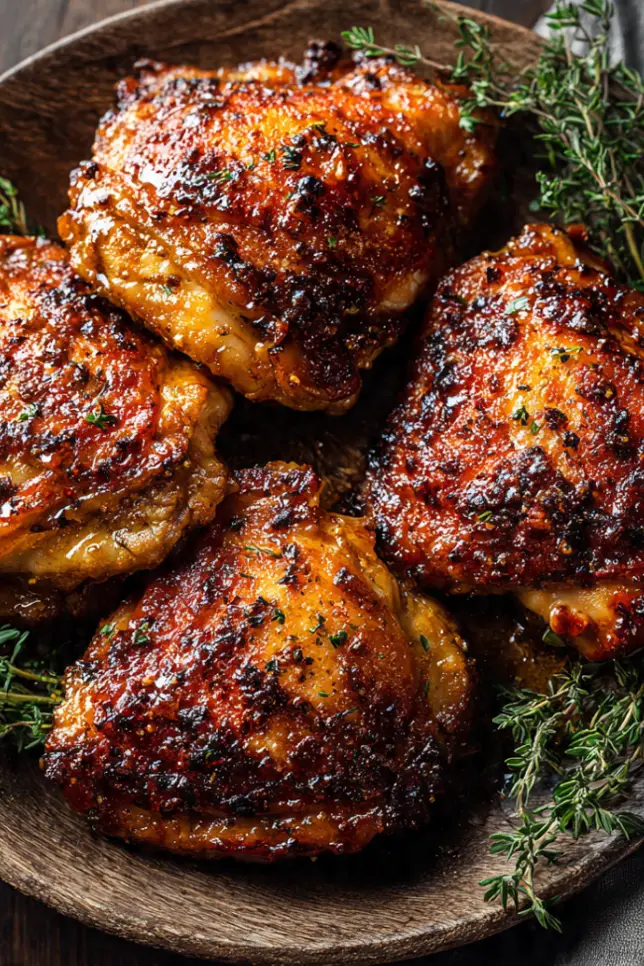
Crispy Chicken Thighs
Perfectly crispy skin with juicy, flavorful meat. Simple seasoning and foolproof technique for golden-brown perfection every time.
Ingredients
- 6 bone-in, skin-on chicken thighs (about 2.5 pounds)
- 2 tbsp olive oil or avocado oil
- 1.5 tsp kosher salt
- 1 tsp black pepper
- 1 tsp garlic powder
- 1/2 tsp smoked paprika
- 1/2 tsp onion powder
- Optional: fresh herbs like thyme or rosemary
Instructions
- Dry the chicken thoroughly Pat chicken thighs completely dry with paper towels on both sides. For best results, let them sit uncovered in the fridge for 30-60 minutes to dry out the skin further. This is crucial for crispy skin.
- Season generously Mix salt, pepper, garlic powder, smoked paprika, and onion powder in a small bowl. Season both sides of the chicken thighs generously, paying extra attention to the skin side. Use about 1/4 teaspoon per thigh.
- Heat the pan properly Heat a cast iron skillet or heavy-bottomed pan over medium-high heat for 5 minutes. Test readiness by flicking a drop of water into the pan. It should sizzle and evaporate immediately.
- Start skin-side down Add a thin layer of oil to the hot pan. Place chicken thighs skin-side down and do not move them. Let them cook undisturbed. Resist the urge to peek or flip.
- Cook skin-side down 12-15 minutes Leave the thighs skin-side down for 12-15 minutes without moving them. The skin should be golden brown and release easily from the pan when ready. If it’s sticking, give it another 2-3 minutes.
- Flip and finish cooking Flip the chicken thighs over and reduce heat to medium. Cook for 8-10 minutes until internal temperature reaches 165°F in the thickest part when measured with a meat thermometer.
- Rest before serving Remove chicken from pan and let rest on a cutting board for 5 minutes before serving to allow juices to redistribute throughout the meat.
Pro Tips
Start with room temperature chicken for more even cooking. Don’t crowd the pan or the temperature will drop and you’ll steam instead of sear. Save the rendered fat in the pan for roasting vegetables later. For air fryer method: cook at 400°F for 10 minutes skin-side down, then flip and cook 12 more minutes. These are perfect for meal prep and keep in the fridge for up to 4 days.