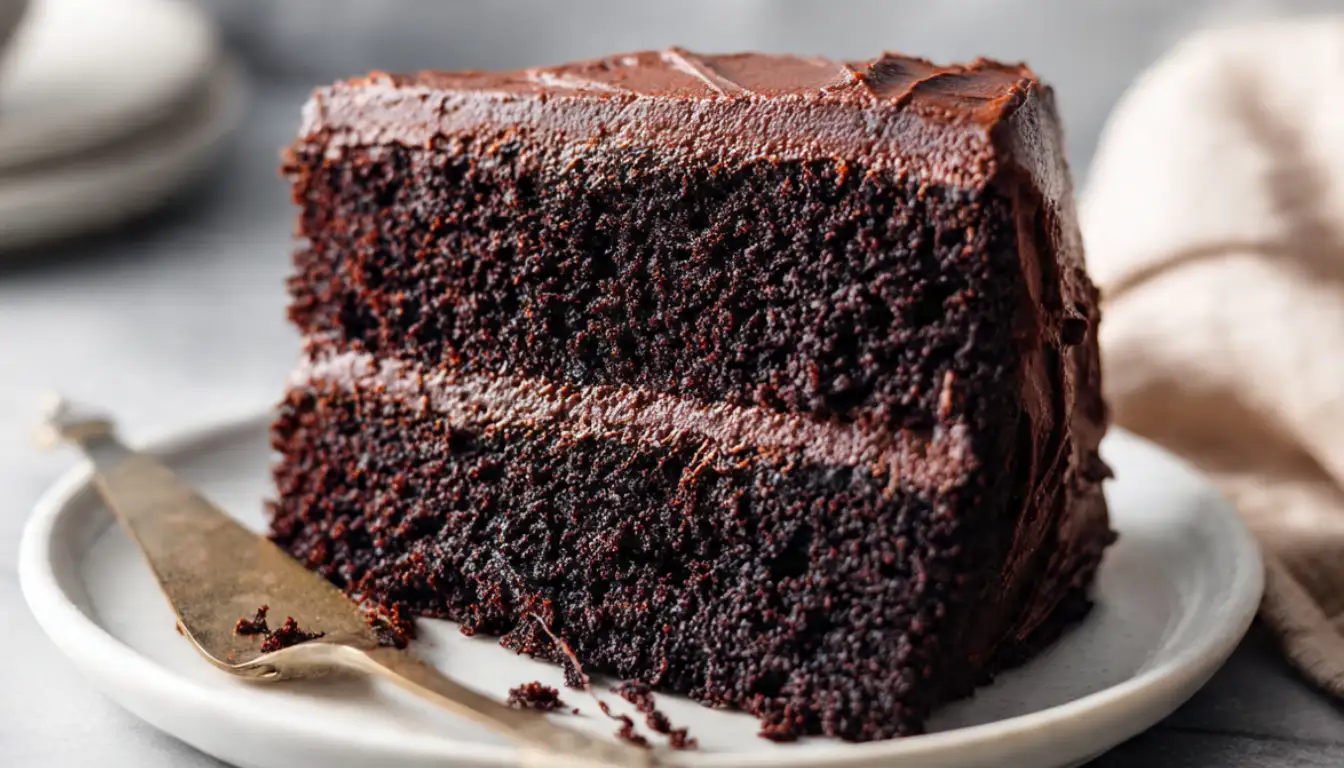
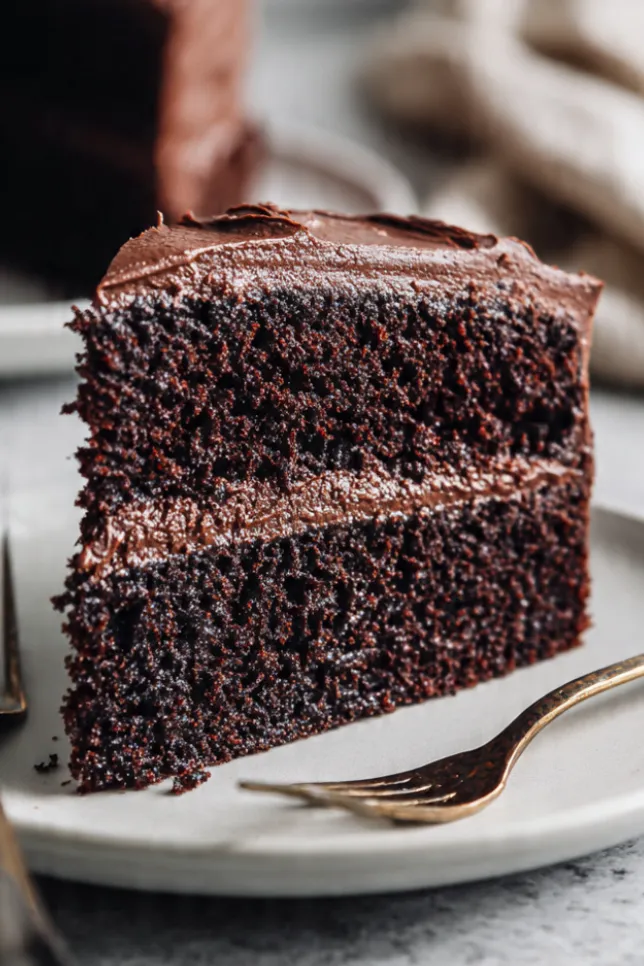
Chocolate Buttermilk Cake: The Tender, Moist Cake That Never Fails
I spent years trying to nail the perfect chocolate cake before discovering this recipe. Every version came out dry or dense until my neighbor shared her buttermilk secret. Back then, I was still learning my way around kitchen equipment, investing in my first stand mixer and decent baking pans. The buttermilk creates something magical that’s hard to describe until you taste it yourself.
Here’s the thing: buttermilk’s acidity reacts with baking soda to create tiny air pockets that make the crumb incredibly tender. That slight tang plays beautifully against rich cocoa too.
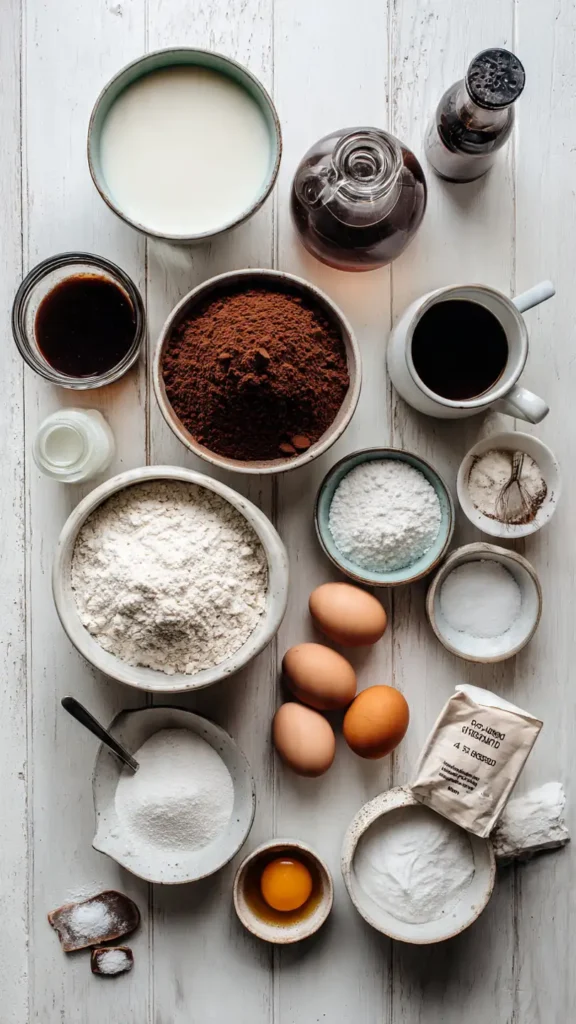
Essential Ingredients
- 2 cups all-purpose flour
- 1¾ cups granulated sugar
- ¾ cup unsweetened cocoa powder
- 2 teaspoons baking soda
- 1 teaspoon baking powder
- 1 teaspoon salt
- 2 large eggs, room temperature
- 1 cup buttermilk, room temperature
- 1 cup strong brewed coffee, cooled
- ½ cup vegetable oil
- 2 teaspoons vanilla extract
Alternative Ingredients
No buttermilk? Make a quick substitute: add 1 tablespoon white vinegar or lemon juice to 1 cup regular milk, let it sit 5 minutes. It curdles slightly but works perfectly. You can also use a small food processor to blend regular milk with a tablespoon of plain yogurt for a smoother substitute.
The coffee intensifies chocolate flavor without tasting like coffee. I’ve tried water instead, and while it’s good, it lacks that deep chocolate punch. Hot water works if you’re anti-coffee, but try coffee at least once. If you have an Instant Pot or electric kettle, brewing coffee is quick and easy.
For oil, I use vegetable or canola, but melted coconut oil works too. Some use melted butter, though oil keeps the cake moister longer, which matters if you’re doing meal prep and baking ahead. You can also melt the butter in your microwave or in a small non-stick pan if you prefer that flavor.
Tools and Equipment
Let me talk about the equipment, because having the right tools really does transform your baking. I use my KitchenAid stand mixer for this recipe. It’s been one of my best kitchen investments, and while you can make this with a hand mixer, the stand mixer lets you multitask while it does the work. If you’re shopping for one, the 5-quart models work perfectly for home baking.
You’ll need two 9-inch round cake pans. I invested in quality non-stick pans from brands like Wilton or USA Pan, and they’ve been worth every penny. The cheap ones always gave me cakes that stuck. If you’re serious about baking, decent cake pans are essential.
A sturdy wire cooling rack is crucial too. I learned this the hard way with soggy bottoms. The air circulation underneath makes all the difference.
Other helpful tools: a kitchen scale for precise measurements (game changer for consistent results), an instant-read thermometer to check if your coffee has cooled enough, and an offset spatula for frosting. I also keep my cakes in airtight meal prep containers when storing, which keeps them fresh for days.
If you’re planning to make multiple cakes for meal planning or batch baking, a food processor works great for making quick work of mixing frosting ingredients. Some people even use their Vitamix blender for super smooth buttercream, though that’s overkill for most home bakers.
Step-by-Step Directions
Step 1: Prep Your Pans and Oven
Preheat your oven to 350°F. Preheating matters here for proper rise. Grease two 9-inch round cake pans with butter or cooking spray, then dust with cocoa powder instead of flour. This keeps your chocolate cake looking chocolate. Line the bottoms with parchment paper for extra insurance.
Step 2: Mix the Dry Ingredients
In a large bowl or stand mixer, whisk together flour, sugar, cocoa powder, baking soda, baking powder, and salt. Whisk for about 30 seconds to break up cocoa lumps and distribute leavening agents evenly.
Step 3: Combine the Wet Ingredients
In a separate bowl, whisk together eggs, buttermilk, cooled coffee, oil, and vanilla. Make sure the coffee is cooled. I once added hot coffee and ended up with scrambled eggs in my batter.
Step 4: Bring It Together
Pour wet ingredients into dry. Mix on low for 30 seconds, then medium for 2 minutes. The batter will be thin, almost like thick liquid. That’s exactly right, don’t add more flour.
Step 5: Bake
Divide batter evenly between pans. I use a kitchen scale for precision. Bake 30-35 minutes until a toothpick comes out with just a few moist crumbs. Don’t overbake chocolate cake. It’s better to slightly underbake. The cake continues cooking from residual heat.
Step 6: Cool Completely
Let cakes cool in pans for 10 minutes, then turn out onto your cooling rack. Cool completely before frosting or your frosting will melt and slide off.
Pro Tips
After making this cake 50+ times, here’s what I’ve learned. Always bring eggs and buttermilk to room temperature. Cold ingredients don’t emulsify properly, and you’ll get a denser cake.
For meal prep and batch baking, these layers freeze beautifully. I wrap them individually in plastic wrap, then store in freezer-safe meal prep containers or aluminum foil. They’ll keep for up to 3 months. This is perfect if you’re into meal planning and want desserts ready for the week. I often bake three batches at once and rotate them out.
An offset spatula makes frosting layer cakes much easier and more professional-looking. It seemed like a unitasker but has become essential. If you’re serious about cake decorating, also consider investing in a cake turntable, which makes frosting so much smoother.
For storage, I use airtight containers, preferably glass meal prep containers with tight-sealing lids. These keep the cake fresh at room temperature for 3 days, or refrigerated for a week. The good containers are worth it because they prevent the cake from drying out. If refrigerating, let it sit at room temperature for 30 minutes before serving.
If you’re making this for weight loss meal prep or watching portions, cut the cake into individual slices and store each in separate containers. This helps with portion control and makes it easier to track if you’re following any meal plan or keto diet modifications.
FAQs
Can I make this as a sheet cake?
Yes. Pour batter into a greased 9×13 inch pan and bake 35-40 minutes. Perfect for casual gatherings.
Why is my cake dry?
Usually from overbaking or too much flour. Measure flour correctly: spoon into the cup and level off, don’t scoop. Check your oven temperature with a thermometer.
Can I make this without eggs?
Use flax eggs: 2 tablespoons ground flaxseed mixed with 6 tablespoons water. Let sit 5 minutes to thicken.
What’s the best frosting for this cake?
Chocolate buttercream is my go-to, but cream cheese frosting is amazing. Sometimes I just use chocolate ganache.
Recipe Variations and Dietary Modifications
This recipe is surprisingly adaptable for different dietary needs and meal planning goals.
For Keto Meal Plan: Replace the sugar with erythritol or monk fruit sweetener (use a 1:1 replacement), and swap all-purpose flour with almond flour (you’ll need about 2½ cups). The texture will be slightly different but still delicious. Many people following a keto diet find this modification works well for their meal prep routine.
For Weight Loss Meal Prep: This cake can fit into a healthy eating plan when portioned correctly. Cut into 16 smaller slices instead of 12 for better portion control. Store individual portions in meal prep containers to avoid overeating. Pair with fresh berries to add nutrition and fiber.
Cupcake Version: This batter makes excellent cupcakes, perfect for meal planning and grab-and-go portions. Divide batter into lined muffin tins and bake for 18-20 minutes. Great for packing in lunch boxes or meal prep containers.
Gluten-Free Option: Use a 1:1 gluten-free flour blend. I’ve tested this with Bob’s Red Mill gluten-free baking flour with good results. Make sure your other ingredients (especially baking powder) are certified gluten-free.
Recipe Info Table
| Prep Time | Cook Time | Total Time | Servings | Yield |
|---|---|---|---|---|
| 15 minutes | 30-35 minutes | 45-50 minutes | 12 slices | 2 9-inch layers |
Why You’ll Love This Recipe
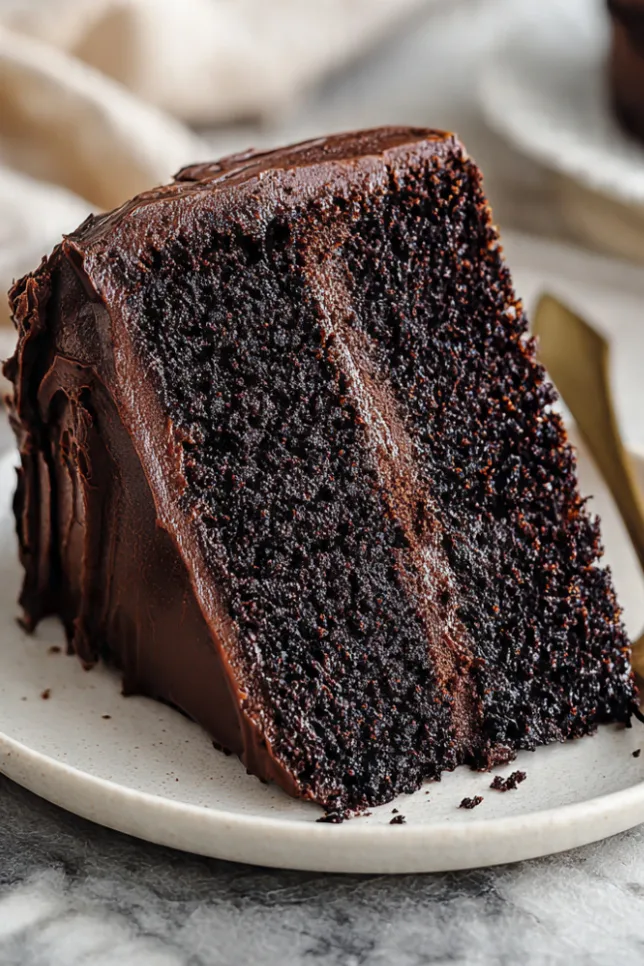
This is the chocolate cake you’ll make over and over because it works every time. The texture is impossibly tender and moist, the chocolate flavor is deep and rich, and it stays fresh for days.
It’s a one-bowl wonder with no complicated techniques. No creaming butter, just mix and bake. Perfect for weeknight baking or meal planning for celebrations.
It uses basic pantry ingredients. No specialty items, no expensive chocolate, just straightforward stuff you probably have. That earns it a permanent spot in your rotation.
For busy families, this fits perfectly into a meal prep Sunday routine. Bake it once, enjoy it all week. It’s more economical than ordering from meal kit services or prepared meal delivery, and you get better quality. I’ve found that incorporating homemade desserts into your meal planning strategy saves money and tastes better than store-bought options.
If you’re following any structured meal plan, whether it’s for healthy eating, weight management, or just organized meal prep, having a reliable cake recipe like this makes special occasions stress-free. No last-minute bakery runs or expensive cake orders.
What Makes This Recipe Unique
The combination of buttermilk and coffee is what sets this apart from standard chocolate cakes. The buttermilk creates that incredibly tender crumb I mentioned earlier, while the coffee amplifies the chocolate without adding coffee flavor.
Another unique aspect is how foolproof it is. I’ve taught this recipe to beginner bakers who’ve never made a layer cake before, and it always turns out. The thin batter might seem weird at first, but it’s actually what makes the cake so moist and easy to work with.
Key Features
Incredibly Moist Texture: Thanks to the buttermilk and oil combination, this cake stays moist for days. Not just on day one, but even on day three or four. That’s pretty rare for homemade cake.
Deep Chocolate Flavor: The coffee enhances the cocoa without making it taste like coffee. You get a rich, complex chocolate taste that beats box mix any day.
Simple Technique: No complicated steps, no precise timing for adding ingredients. Mix wet, mix dry, combine, bake. That’s it.
Versatile Base: This works as a layer cake, sheet cake, cupcakes (bake for 18-20 minutes), or even as a base for trifles or cake pops.
Perfect for Meal Prep: Because it keeps so well, you can bake this on Sunday and have cake all week. Store individual slices in stackable meal prep containers with dividers. This makes portion control easier and fits perfectly into any healthy eating routine or meal planning system.
Storage Flexibility: Invest in quality airtight containers or glass storage containers with silicone seals. The right storage solutions keep this cake fresh much longer than cheap plastic containers. I also recommend having dedicated cake carriers if you’re transporting this for potlucks or events.
Nutrition Facts Table
| Nutrient | Amount Per Slice |
|---|---|
| Calories | 285 |
| Total Fat | 11g |
| Saturated Fat | 2g |
| Cholesterol | 35mg |
| Sodium | 380mg |
| Total Carbohydrates | 44g |
| Dietary Fiber | 2g |
| Sugars | 29g |
| Protein | 4g |
Note: Nutrition facts are for unfrosted cake. Add frosting calories separately.
You’ll Also Love
If this chocolate buttermilk cake becomes a favorite (and I’m betting it will), you might want to try these related recipes on our site:
- Classic Vanilla Buttermilk Cake (uses the same technique with vanilla instead)
- Chocolate Cream Cheese Frosting (perfect pairing for this cake)
- One-Bowl Chocolate Chip Cookie Bars (another simple chocolate recipe)
- Buttermilk Biscuits (because once you buy buttermilk, you might as well use it)
- Red Velvet Cake (another buttermilk-based favorite)
Conclusion
After a decade of baking, this chocolate buttermilk cake remains one of my most-requested recipes. It’s the cake I make for birthdays, potlucks, and random Tuesday nights when I need chocolate.
The beauty is its reliability. You don’t need fancy equipment beyond a good stand mixer and decent cake pans. No exotic ingredients. Just follow the steps, trust the thin batter, and let the oven work.
I keep layers wrapped in my freezer and pull them out whenever I need a quick dessert. Add frosting and sprinkles, and you’ve got something that looks like you spent all day baking. But between you and me? We know better.
Give this recipe a try, and you’ll understand why I’ve been making it for years. The best recipes aren’t the most complicated. They’re the ones that work every time and make people ask for seconds.