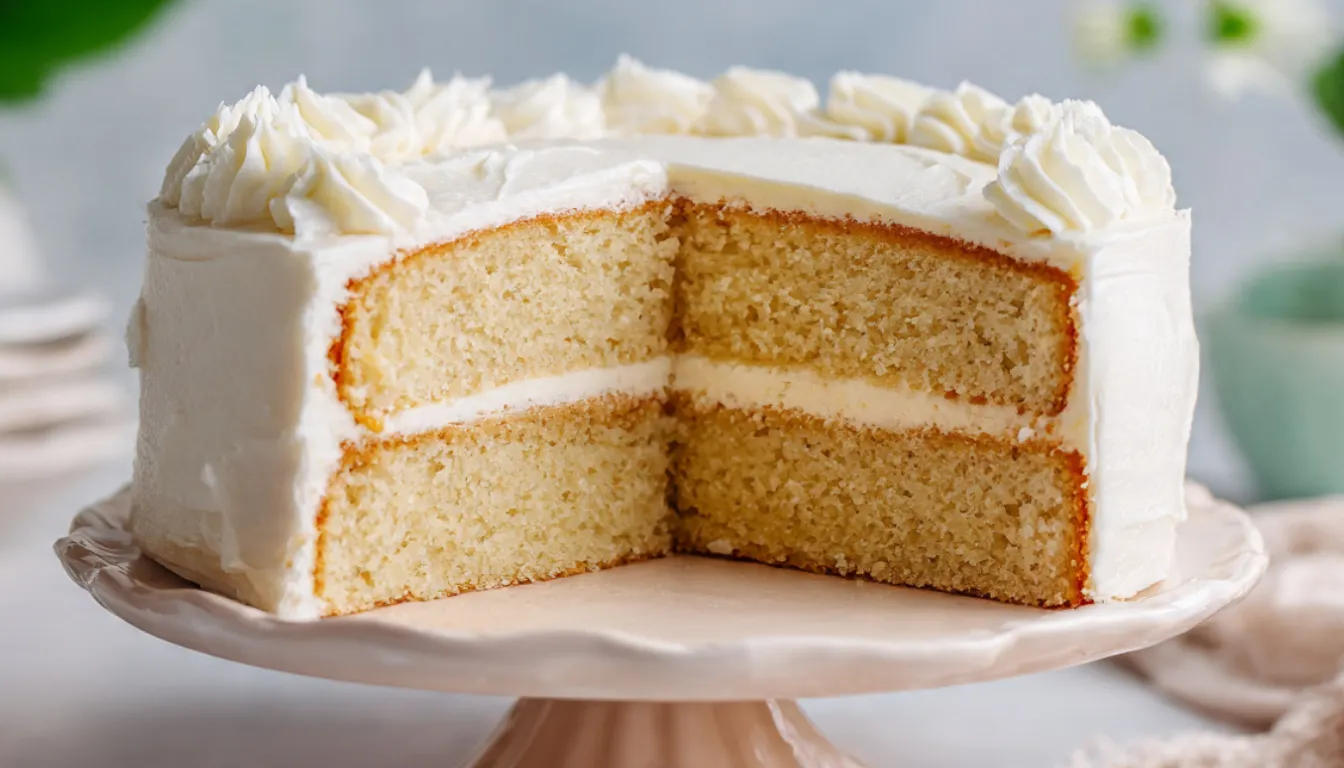
Soft Homemade Cake: The Foolproof Recipe I Wish I’d Known Years Ago
You know that moment when you cut into a cake and it’s so perfectly soft and tender that it practically melts on your tongue? I spent probably five years of my early baking days chasing that texture, making cakes that were either too dense, too dry, or weirdly rubbery. Then one afternoon, after yet another disappointing birthday cake, I finally figured out what I’d been doing wrong. Turns out, making a truly soft homemade cake isn’t about fancy ingredients or complicated techniques. It’s about understanding a few simple principles that completely transform your results.
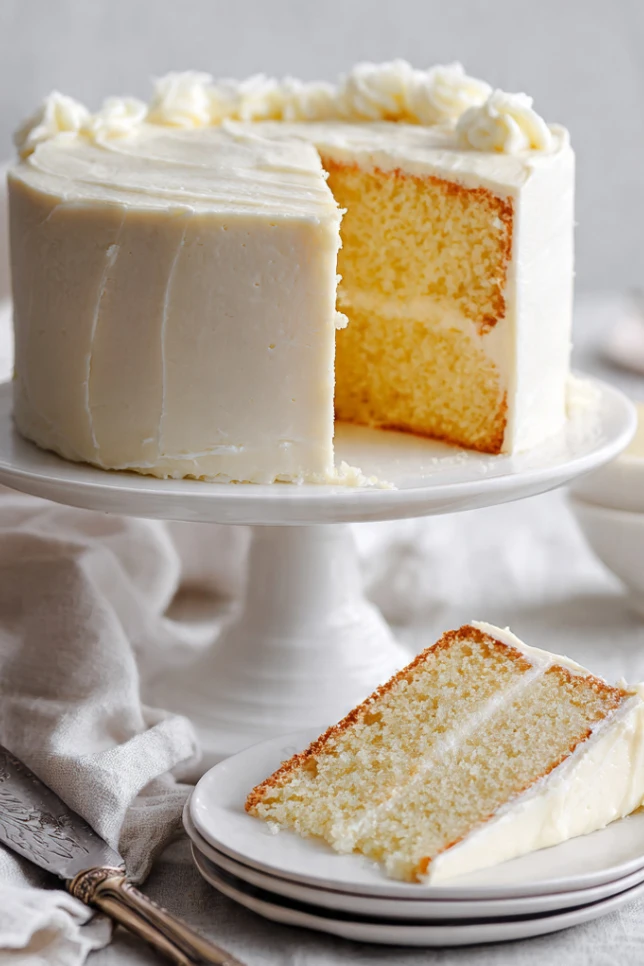
I’m Linda, and after a decade of baking everything from wedding cakes to simple everyday treats, I can tell you that this soft homemade cake recipe is the one I come back to over and over again. It’s versatile enough to dress up for special occasions but simple enough for a Tuesday night when you just want something sweet. The texture is what my grandmother used to call “cloud soft,” and honestly, once you nail this technique, you’ll never want boxed mix again.
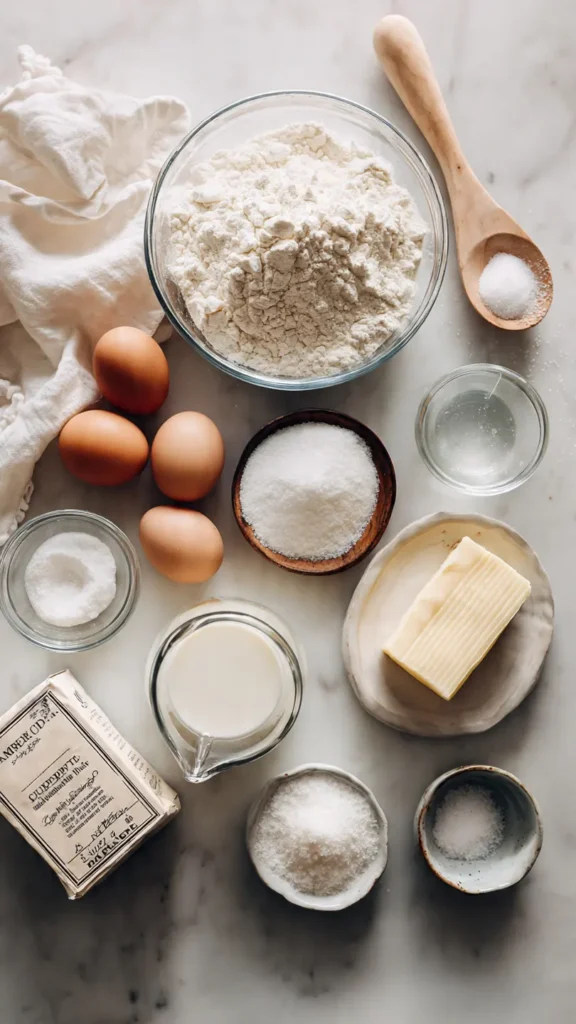
Essential Ingredients
Here’s what you need for this incredibly soft cake. Nothing fancy, just quality basics:
- 2 cups all-purpose flour (I always use unbleached)
- 1¾ cups granulated sugar
- ¾ cup unsalted butter, softened to room temperature
- 3 large eggs, room temperature
- 1 cup whole milk, room temperature
- 2 teaspoons pure vanilla extract
- 2½ teaspoons baking powder
- ½ teaspoon salt
- Optional: ½ cup sour cream for extra moisture
The room temperature thing isn’t me being picky. Cold ingredients don’t emulsify properly, and that’s how you end up with a dense cake. I learned this the hard way after ruining a cake for my niece’s fifth birthday because I was too impatient to let my eggs warm up.
Alternative Ingredients
Look, I get it. Sometimes you don’t have everything on hand, or you’re dealing with dietary restrictions. Here are some swaps that actually work:
Butter alternatives: You can use vegetable oil (¾ cup instead of butter) for an even moister cake, though you’ll lose some of that rich flavor. Coconut oil works too if you like that subtle coconut taste.
Milk substitutes: Any plant-based milk works fine. I’ve used almond milk and oat milk with great results. Just make sure it’s unsweetened and at room temperature.
Egg replacements: For each egg, you can use ¼ cup applesauce or a commercial egg replacer. The texture will be slightly different, but still delicious.
Sugar options: You can replace up to half the sugar with honey or maple syrup, but reduce the milk by 3 tablespoons for every cup of liquid sweetener you use.
Gluten-free: A 1:1 gluten-free baking flour works, though I’d add an extra ¼ teaspoon of xanthan gum if your blend doesn’t already include it.
Tools and Equipment That Make This Easier
You can absolutely make this cake with just a whisk and some arm strength, but I’ll be honest with you. After years of hand-mixing, getting my KitchenAid stand mixer was a game changer. The consistent mixing speed creates better air incorporation, which means a lighter, softer cake. If you’re serious about baking, a good stand mixer is worth saving for. That said, a hand mixer works perfectly fine too.
For pans, I swear by my two 9-inch round cake pans. Non-stick is nice, but honestly, good old-fashioned butter and flour works just as well for preventing sticking. If you’re making a sheet cake, a 9×13-inch pan is what you need. I also keep parchment paper rounds on hand because they make removing cakes from pans completely foolproof.
Step-by-Step Directions
Step 1: Set yourself up for success
Preheat your oven to 350°F (175°C). This is important because an oven that’s not fully heated bakes unevenly. While it’s heating, prepare your pans by buttering them generously and dusting with flour, or line them with parchment paper. I do both because I’m paranoid about cakes sticking.
Step 2: Mix your dry ingredients
In a medium bowl, whisk together the flour, baking powder, and salt. Set this aside. This seems like an extra step, but it ensures your leavening is evenly distributed. I used to skip this and wonder why my cakes had random dense spots.
Step 3: Cream the butter and sugar
This is where the magic starts. In your stand mixer (or large bowl if using a hand mixer), beat the softened butter and sugar together for about 3-4 minutes. You want it light and fluffy, almost white in color. This creaming process incorporates air into your batter, which is crucial for that soft texture. Don’t rush this step. Seriously, set a timer if you need to.
Step 4: Add eggs one at a time
Beat in one egg at a time, making sure each is fully incorporated before adding the next. Add the vanilla with the last egg. The mixture might look slightly curdled at this point, and that’s totally normal. Don’t panic like I did the first time this happened.
Step 5: Alternate wet and dry ingredients
Here’s the technique that changed everything for me. Add about a third of your flour mixture to the batter and mix on low speed until just combined. Then add half the milk. Mix gently. Add another third of the flour, then the remaining milk, and finally the last of the flour.
The key word here is “gently.” Overmixing develops gluten, which makes cakes tough and chewy instead of soft and tender. Mix each addition just until you can’t see streaks of flour anymore, then stop. If you’re adding sour cream, fold it in at the very end by hand.
Step 6: Bake it right
Divide the batter evenly between your prepared pans. I use a kitchen scale for this because nothing’s more annoying than lopsided layer cakes. Bake for 25-30 minutes for layer cakes, or 35-40 minutes for a sheet cake. The cake is done when a toothpick inserted in the center comes out clean or with just a few moist crumbs.
Step 7: The cooling process
Let the cakes cool in the pans for exactly 10 minutes. Not 5, not 15. Set a timer. Then turn them out onto a wire rack to cool completely. If you try to frost a warm cake, your frosting will melt into a puddle. Trust me on this one.
Pro Tips from a Decade of Cake Making
Tip 1: The toothpick test can be misleading. I also gently press the center of the cake. If it springs back, it’s done. If your finger leaves an indent, give it a few more minutes.
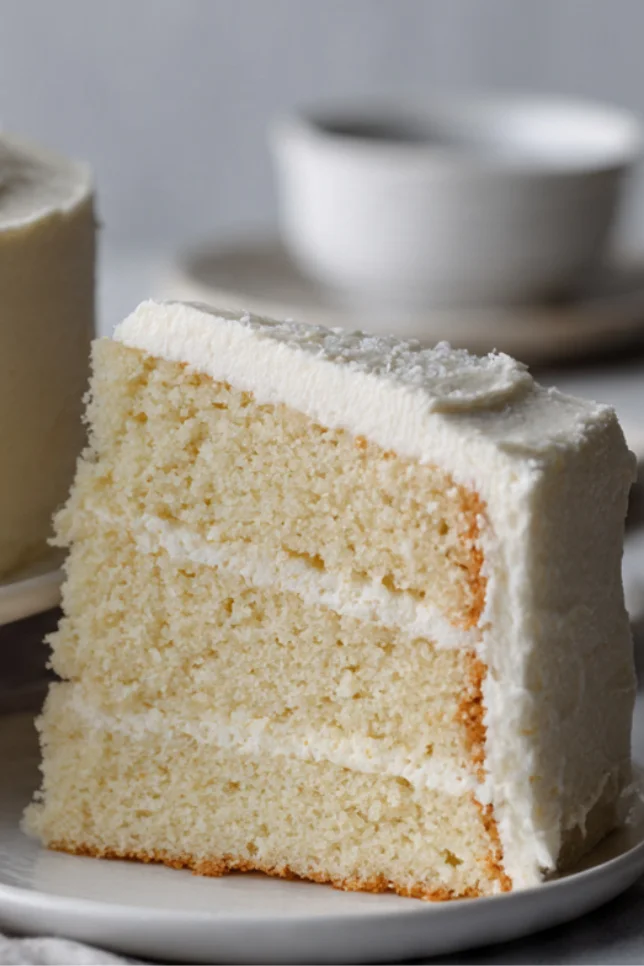
Tip 2: For the absolute softest texture, replace ¼ cup of the all-purpose flour with cake flour. Cake flour has less protein, which means less gluten development and a more tender crumb.
Tip 3: If you’re making this for a special occasion and want professional-level results, invest in a cake turntable and offset spatula. They make frosting so much easier and give you those smooth, bakery-style sides.
Tip 4: Wrap cooled, unfrosted cake layers tightly in plastic wrap and freeze them for up to 3 months. Frozen cakes are actually easier to frost because the crumbs don’t pull away as easily.
Tip 5: For extra moisture, brush each cake layer with simple syrup (equal parts sugar and water, boiled and cooled) before frosting. This is a trick I learned from a pastry chef, and it keeps cakes incredibly moist for days.
FAQs
Why is my cake dense instead of soft?
Usually it’s one of three things: overmixing the batter (which develops too much gluten), ingredients that were too cold (preventing proper emulsification), or old leavening. Baking powder loses potency after about 6 months, so check the date.
Can I make this cake ahead of time?
Absolutely! Unfrosted cake layers can be made 2 days in advance and stored wrapped in plastic at room temperature. Or freeze them for up to 3 months. Frosted cakes keep well for 3-4 days if stored properly.
My cake stuck to the pan even though I greased it. What happened?
Probably let it cool too long in the pan. The 10-minute window is crucial. Also, make sure you’re using enough grease. Use generous amounts of butter or baking spray, and always use parchment paper rounds on the bottom.
Can I turn this into cupcakes?
Yes! This recipe makes about 24 cupcakes. Fill the liners about 2/3 full and bake at 350°F for 18-22 minutes. They’re done when they spring back when lightly touched.
How do I store leftover cake?
Keep it in an airtight container or cake dome at room temperature for up to 3 days. If your frosting contains cream cheese or fresh fruit, refrigerate it instead. Let refrigerated cake sit at room temperature for about 30 minutes before serving for the best texture.
Why You’ll Love This Recipe
This isn’t just another cake recipe. It’s the one that finally makes sense of all those baking techniques you’ve heard about but didn’t really understand. The texture is phenomenally soft without being fragile or falling apart when you cut it. It’s versatile enough to pair with any frosting you love, from simple buttercream to cream cheese to whipped cream and fresh berries.
I love this recipe because it’s actually forgiving. Unlike some temperamental cakes that require precise timing and technique, this one gives you a bit of wiggle room. Miss the oven timer by a couple minutes? It’ll still be great. Don’t have a fancy stand mixer? A hand mixer or even a whisk will work. That’s the kind of recipe I want in my rotation, and I’m betting you do too.
What Makes This Recipe Unique
Here’s what sets this apart from other vanilla cake recipes out there. First, the ratio of ingredients is specifically calibrated for maximum softness. Most recipes either have too much flour (making the cake dry) or not enough structure (making it fall apart). This one hits that sweet spot.
Second, the mixing method. That alternating technique of dry and wet ingredients isn’t just busywork. It’s the key to developing just enough structure while keeping the crumb tender. I’ve tested this against the “dump everything in a bowl” method, and there’s a noticeable difference in texture.
Third, the optional sour cream. It adds moisture and a subtle tang that balances the sweetness without making the cake taste sour. Plus, the acidity tenderizes the gluten, contributing to that melt-in-your-mouth texture we’re after.
Key Features
- Ultra-soft texture that rivals any bakery cake
- Versatile base that works with any frosting or filling
- Simple ingredients you probably already have
- Reliable results even for beginner bakers
- Make-ahead friendly for stress-free party planning
- Scales easily for different pan sizes or cupcakes
- Room temperature stable so you don’t need to refrigerate unless your frosting requires it
You’ll Also Love
If this soft homemade cake becomes a staple in your kitchen like it did in mine, you might want to check out these related recipes:
- Classic Buttercream Frosting for the perfect pairing with this tender cake
- Chocolate Ganache if you want something rich and decadent
- Lemon Curd Filling for a bright, tangy contrast to the sweet cake
- Whipped Cream Cheese Frosting for a lighter, less sweet option
- Simple Syrup Variations to add extra flavor and moisture
You can find more information about the science of cake baking and how different techniques affect texture. Understanding the chemistry makes you a better baker, I promise.
Conclusion
After ten years of making cakes, I can honestly say this is the recipe I reach for most often. It’s reliable, delicious, and produces that perfect soft texture every single time. Whether you’re making it for a birthday, a potluck, or just because you want cake on a Wednesday (no judgment here), this recipe won’t let you down.
The real beauty of mastering this basic soft cake is that it becomes your canvas. Once you’ve got the technique down, you can flavor it however you want. Add cocoa powder for chocolate cake, citrus zest for lemon or orange, almond extract for an almond variation. The possibilities are endless once you nail the fundamentals.
So grab your mixing bowls and give this a try. Your first slice might just ruin you for boxed cake mixes forever. And honestly? That’s not a bad thing.
Happy baking!
Linda