Classic Beef Melt Sandwich: The Ultimate Comfort Food Recipe
You know that moment when you’re staring into your fridge at leftover roast beef and wondering what magic you can create? I’ve been there so many times. After a decade of food blogging and countless kitchen experiments, I can tell you that the Classic Beef Melt Sandwich is one of those recipes that saved my sanity on busy weeknights. It’s honestly become my go-to when I need something satisfying but don’t want to spend an hour cooking.
I’ll never forget the first time I made this sandwich. I was working from home, had back-to-back Zoom calls, and needed lunch fast. I grabbed some deli roast beef, threw it in my trusty cast iron skillet with onions and peppers, piled it on bread with cheese, and literally changed my lunch game forever. That was seven years ago, and I’ve been perfecting this recipe ever since.
Here’s the thing about beef melt sandwiches: they sound simple (and they are), but there’s a real technique to getting them restaurant-quality at home. The difference between a soggy mess and a crispy, gooey masterpiece comes down to a few key steps I’m going to share with you today.
Essential Ingredients
Let me walk you through what you’ll need. I’m pretty specific about some of these, and I’ll tell you why:
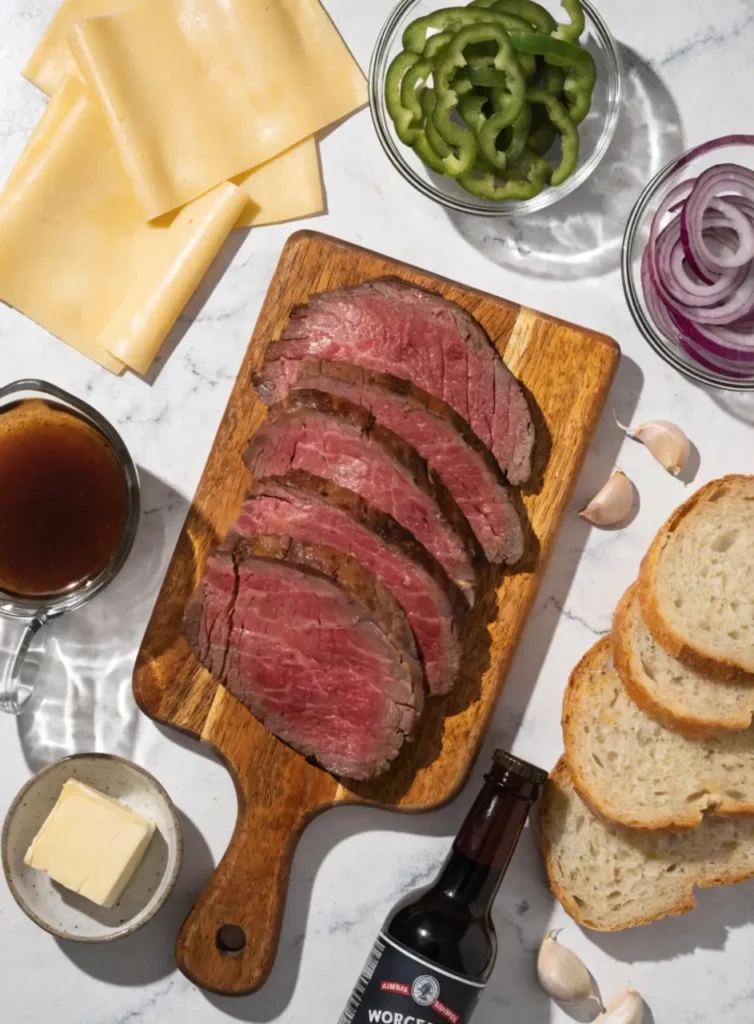
- 1 pound thinly sliced roast beef (deli-style or leftover roast)
- 8 slices of your favorite bread (sourdough or Italian work best)
- 8 slices provolone cheese (or Swiss if you prefer)
- 1 large onion, thinly sliced
- 1 green bell pepper, thinly sliced
- 2 tablespoons butter, divided
- 1 tablespoon olive oil
- 2 cloves garlic, minced
- 1/4 cup beef broth
- 2 tablespoons Worcestershire sauce
- Salt and pepper to taste
- Optional: horseradish mayo, pickled jalapeños
Alternative Ingredients
Listen, I get it. Sometimes you don’t have exactly what a recipe calls for, or you’re working with dietary restrictions. Here’s what I’ve learned works:
For the beef: If you can’t find good roast beef, thinly sliced steak works beautifully. I’ve even used leftover pot roast in a pinch. Just make sure whatever you use is sliced thin so it heats through quickly.
For the cheese: Provolone is my favorite because it melts like a dream, but Swiss, mozzarella, or even sharp cheddar bring their own personality to this sandwich. I once used smoked gouda when that’s all I had, and honestly? It was amazing.
For the bread: Sourdough gives you that perfect tangy contrast, but ciabatta rolls, hoagie buns, or even Texas toast work great. If you’re gluten-free, I’ve tested this with gluten-free sourdough and it holds up well, though you might want to toast it a bit longer.
For the vegetables: Don’t have bell peppers? Use mushrooms. No onions? Caramelized shallots are incredible. The point is to add some vegetable sweetness and texture.
Step-by-Step Directions
Okay, let’s get into the actual cooking. I’m going to walk you through this exactly how I make it in my own kitchen.
Step 1: Prep Your Ingredients
First things first, get everything ready before you start cooking. Slice your onions and peppers thin (about 1/4 inch). If you’re using a food processor with a slicing attachment, this is where it shines. Otherwise, a sharp knife and a little patience work just fine. Trust me, having everything prepped makes the cooking process so much smoother.
Step 2: Cook the Vegetables
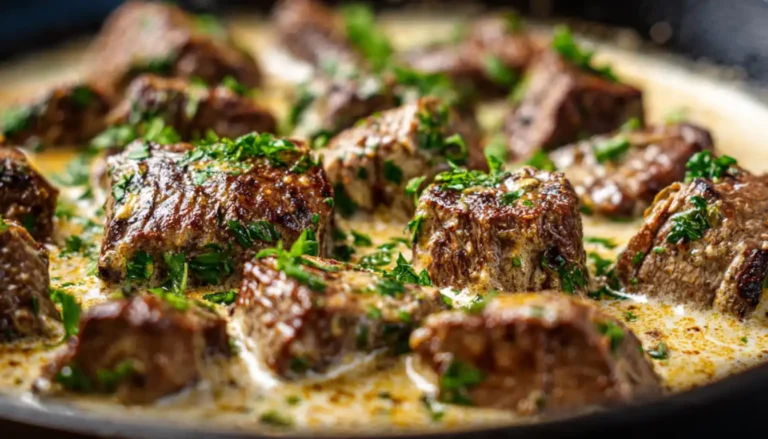
Heat 1 tablespoon of butter and your olive oil in a large non-stick pan or cast iron skillet over medium heat. I love my 12-inch cast iron for this because it holds heat beautifully and gives you plenty of room to work. Toss in your onions and peppers with a pinch of salt. Cook them for about 8-10 minutes, stirring occasionally, until they’re soft and starting to caramelize. The smell at this point is incredible.
Add the minced garlic and cook for another minute. You’ll know it’s ready when your whole kitchen smells like an Italian restaurant.
Step 3: Warm the Beef
This is where people often mess up. You don’t want to cook the beef (it’s already cooked), you just want to warm it and get it coated in all those delicious flavors. Push your vegetables to the side of the pan, add the beef broth and Worcestershire sauce, then add your roast beef slices. Toss everything together gently and let it warm through for about 3-4 minutes. The beef should be hot and the liquid mostly absorbed.
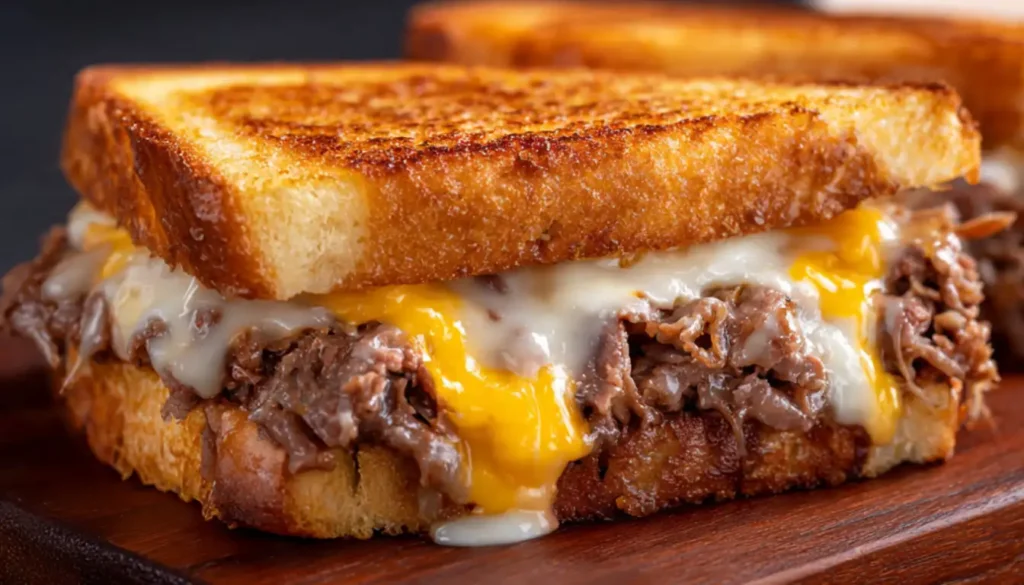
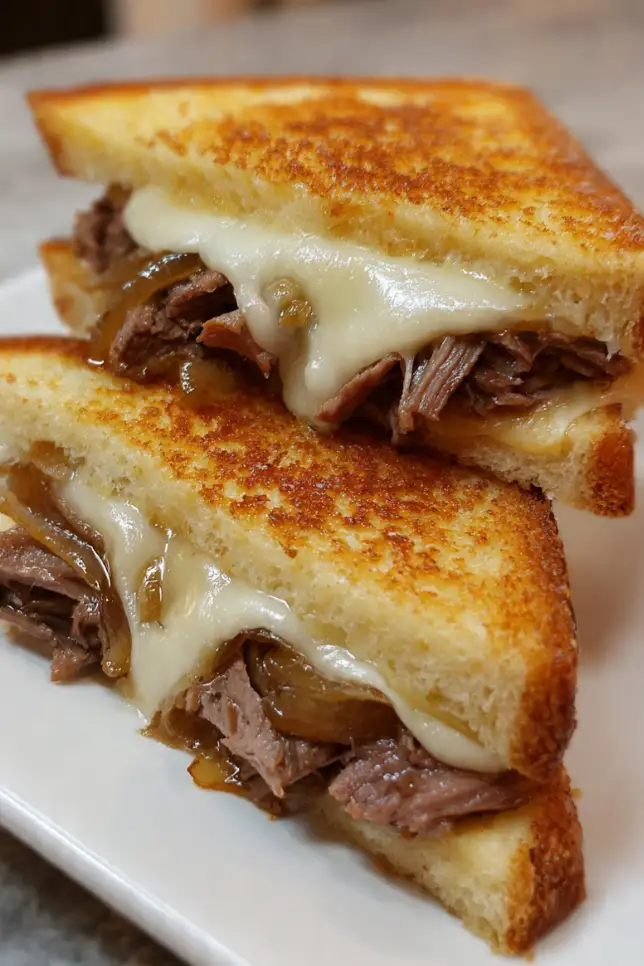
Step 4: Assemble the Sandwiches
Remove your beef and vegetable mixture from the pan and set it aside on a plate. Wipe out your pan quickly (or use a second one if you’re fancy). Butter one side of each bread slice. Place four slices butter-side down in the pan over medium heat.
Top each slice with a piece of cheese, then pile on the beef and vegetable mixture, another slice of cheese, and finally the second piece of bread (butter-side up). Here’s a pro tip I learned the hard way: don’t overfill these. I know it’s tempting, but too much filling makes them impossible to flip.
Step 5: The Perfect Melt
This is where the magic happens. Cook for about 3-4 minutes on the first side until the bread is golden brown and crispy. I usually peek under the corner to check. When it’s ready, carefully flip with a wide spatula (a fish spatula is perfect for this if you have one) and cook another 3-4 minutes on the other side.
The goal here is golden, crispy bread and completely melted cheese. If your cheese isn’t melting fast enough, you can cover the pan with a lid for the last minute or two to trap the heat.
Pro Tips
After making this sandwich literally hundreds of times, here are the tricks that really matter:
Temperature control is everything. I used to crank the heat thinking it would cook faster, but medium heat is your friend here. It gives the cheese time to melt without burning the bread. If you’re using an electric stove, medium-low might even be better.
Use good quality roast beef. I know deli roast beef can be pricey, but it makes such a difference. When it’s on sale, I buy extra and freeze it in portions using my meal prep containers. It keeps for months and you always have it ready.
Don’t skip the beef broth and Worcestershire. I tested this recipe without them once (ran out mid-recipe), and it was just okay. Those two ingredients add so much depth and moisture to the filling. They’re non-negotiable in my book.
Press gently while cooking. I use my spatula to press down on the sandwiches a little as they cook. Not hard enough to squish out the filling, just enough to ensure good contact between the bread and the pan. This creates that restaurant-style crispy exterior.
Make extra caramelized onions. Seriously, double the onions and peppers. You can store the extras in mason jars in the fridge for up to a week and use them on everything from scrambled eggs to pizza.
FAQs
Can I make a beef melt sandwich ahead of time?
You can prep the filling ahead, but cook sandwiches fresh for best results.
What cheese works best?
Provolone melts best, but Swiss and cheddar are great options too.
How do I prevent soggy bread?
Drain excess liquid and butter the bread before grilling.
Can I use a panini press?
Yes, it gives a perfect crispy texture and even melt.
Can I freeze the filling?
Yes, freeze for up to 3 months and reheat before use.
Why You’ll Love This Recipe
Let me tell you why this sandwich has become such a staple in my kitchen. First off, it’s genuinely quick. From start to finish, you’re looking at 30 minutes max, and most of that is hands-off time while vegetables caramelize. I’ve made this on countless busy weeknights when meal planning went out the window.
The flavor is ridiculously good. That combination of savory beef, sweet caramelized onions, melted cheese, and crispy buttered bread? It’s the kind of comfort food that makes you close your eyes and sigh. My husband says it’s better than what we get at our local deli, and he’s pretty hard to impress.
It’s also incredibly versatile. I’ve served this for quick lunches, game day gatherings, and even sliced into smaller portions as an appetizer. Kids love it (my nieces call it “fancy grilled cheese”), and adults appreciate the upgraded flavors.
Plus, it’s budget-friendly. Using deli roast beef is way more affordable than cooking a whole roast, and the ingredients are all pantry staples. When you compare it to takeout, you’re looking at maybe $3-4 per serving versus $12-15 at a restaurant.
What Makes This Recipe Unique
Here’s what sets this version apart from the millions of beef sandwich recipes out there. Most recipes just tell you to pile cold beef on bread and grill it. That’s fine, but you’re missing out on so much flavor.
The technique of warming the beef in beef broth and Worcestershire sauce is a game-changer. It keeps the meat tender and juicy instead of dried out, plus it infuses every bite with savory goodness. I learned this trick from a deli owner in Philadelphia, and it’s stuck with me ever since.
The double cheese layer is another thing I’m really particular about. Cheese on both sides of the filling creates this perfect gooey barrier that holds everything together. I used to just put cheese on top, but then the filling would slide out when you bit into it. Problem solved.
And the caramelized onions and peppers? They’re not just thrown in raw like some recipes do. Taking the time to properly caramelize them brings out their natural sweetness and creates this beautiful contrast with the savory beef. It’s worth the extra few minutes, I promise.
Key Features
✓ Ready in 30 minutes from start to finish ✓ Uses simple, affordable ingredients you probably have ✓ Perfect for meal prep (the filling keeps for days) ✓ Kid-friendly and crowd-pleasing ✓ Easily customizable to your taste preferences ✓ Works great in a regular skillet, panini press, or even an air fryer ✓ Scales up easily for feeding a crowd ✓ Leftovers (if you have any) reheat beautifully
You’ll Also Love
If this Classic Beef Melt Sandwich hit the spot for you, I’ve got a few other recipes I think you’ll absolutely love:
Creamy French Onion Chicken uses similar caramelized onions and that same melty cheese technique, but with tender chicken breasts. It’s become another weeknight staple in my rotation.
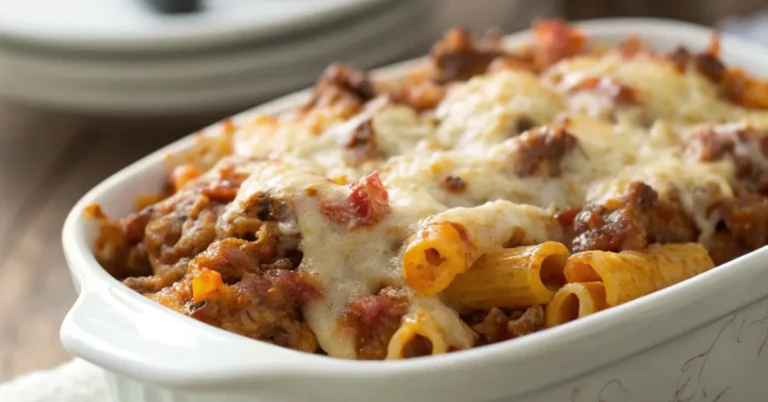
Philly Cheesesteak Pasta takes all these flavors and turns them into a one-pot pasta dish. When I’m really short on time, this is what I make.
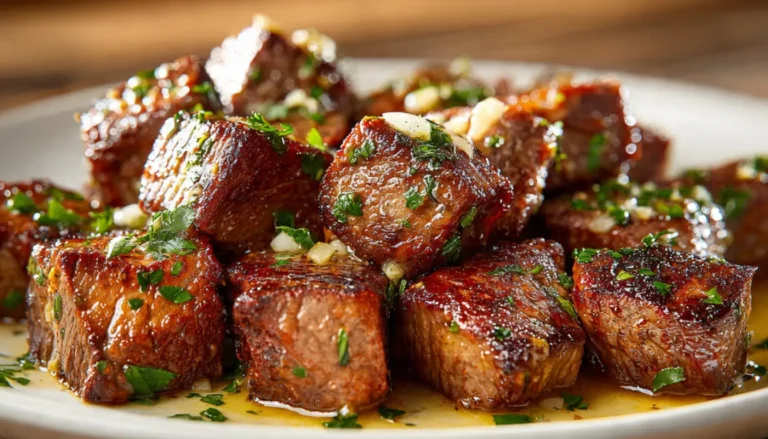
Garlic Butter Steak Bites are perfect if you want something similar but lighter. They’re great over salad or with roasted vegetables.
For sides, I always recommend my Crispy Air Fryer French Fries (if you have an air fryer, it’s a must), homemade coleslaw for crunch, or a simple garden salad to balance out the richness.
Conclusion
I really hope you give this Classic Beef Melt Sandwich a try. It’s one of those recipes that looks simple on paper but delivers way more than you’d expect. The first time you bite into that crispy, buttery bread and hit that layer of melted cheese and savory beef, you’ll get it.
After ten years of food blogging, I can honestly say this is one of my most-made recipes. It’s rescued countless busy weeknights, impressed unexpected guests, and become a requested favorite in my circle. The technique works, the flavors are spot-on, and it’s just really, really satisfying to make and eat.
Start with the recipe as written, then make it your own. Add jalapeños if you like heat, swap in different cheeses, try it with different breads. That’s the beauty of a recipe like this. Once you nail the basic technique, the possibilities are endless.
Let me know how yours turns out! I love hearing what variations people come up with, and I’m always learning new tricks from readers. Happy cooking, and enjoy every melty, delicious bite.
Classic Beef Melt Sandwich
Restaurant-quality beef melt with caramelized onions, melted provolone, and crispy toasted bread
Ingredients
Main Ingredients
- 1 pound thinly sliced roast beef (deli-style or leftover roast)
- 8 slices sourdough or Italian bread
- 8 slices provolone cheese
- 1 large onion, thinly sliced
- 1 green bell pepper, thinly sliced
Cooking Essentials
- 2 tablespoons butter, divided
- 1 tablespoon olive oil
- 2 cloves garlic, minced
- 1/4 cup beef broth
- 2 tablespoons Worcestershire sauce
- To taste salt and pepper
Optional Toppings
- Horseradish mayo
- Pickled jalapeños
- Fresh herbs for garnish
Instructions
- Prepare ingredients Thinly slice onions and bell peppers (about 1/4 inch thick). Mince garlic and set aside. Have all ingredients ready before starting to cook.
- Caramelize vegetables Heat 1 tablespoon butter and olive oil in a large cast iron skillet over medium heat. Add sliced onions and peppers with a pinch of salt. Cook for 8-10 minutes, stirring occasionally, until soft and beginning to caramelize.
- Add garlic Add minced garlic to the caramelized vegetables and cook for 1 minute until fragrant.
- Warm the beef Push vegetables to the side of the pan. Add beef broth and Worcestershire sauce, then add roast beef slices. Toss everything together gently and warm through for 3-4 minutes until beef is hot and liquid is mostly absorbed. Remove from pan and set aside.
- Butter the bread Wipe out the pan. Butter one side of each bread slice.
- Assemble sandwiches Place 4 bread slices butter-side down in the pan over medium heat. Top each with 1 cheese slice, beef and vegetable mixture, another cheese slice, and the second bread slice (butter-side up).
- Grill first side Cook for 3-4 minutes on the first side until bread is golden brown and crispy. Press down gently with a spatula.
- Flip and finish Carefully flip sandwiches with a wide spatula. Cook another 3-4 minutes until the second side is golden and cheese is completely melted. Cover with a lid for the last minute if needed to help cheese melt.
- Serve Remove from heat and let rest for 1 minute. Cut in half diagonally and serve hot with your favorite sides.
Pro Tips
Don’t overfill: Too much filling makes sandwiches hard to flip. Use about 3-4 oz of beef mixture per sandwich. Temperature matters: Medium heat prevents burning while giving cheese time to melt. Make ahead: Prepare the beef and vegetable mixture up to 2 days ahead and store in the fridge. Reheating: Use a skillet or air fryer at 350°F for best results, never the microwave.