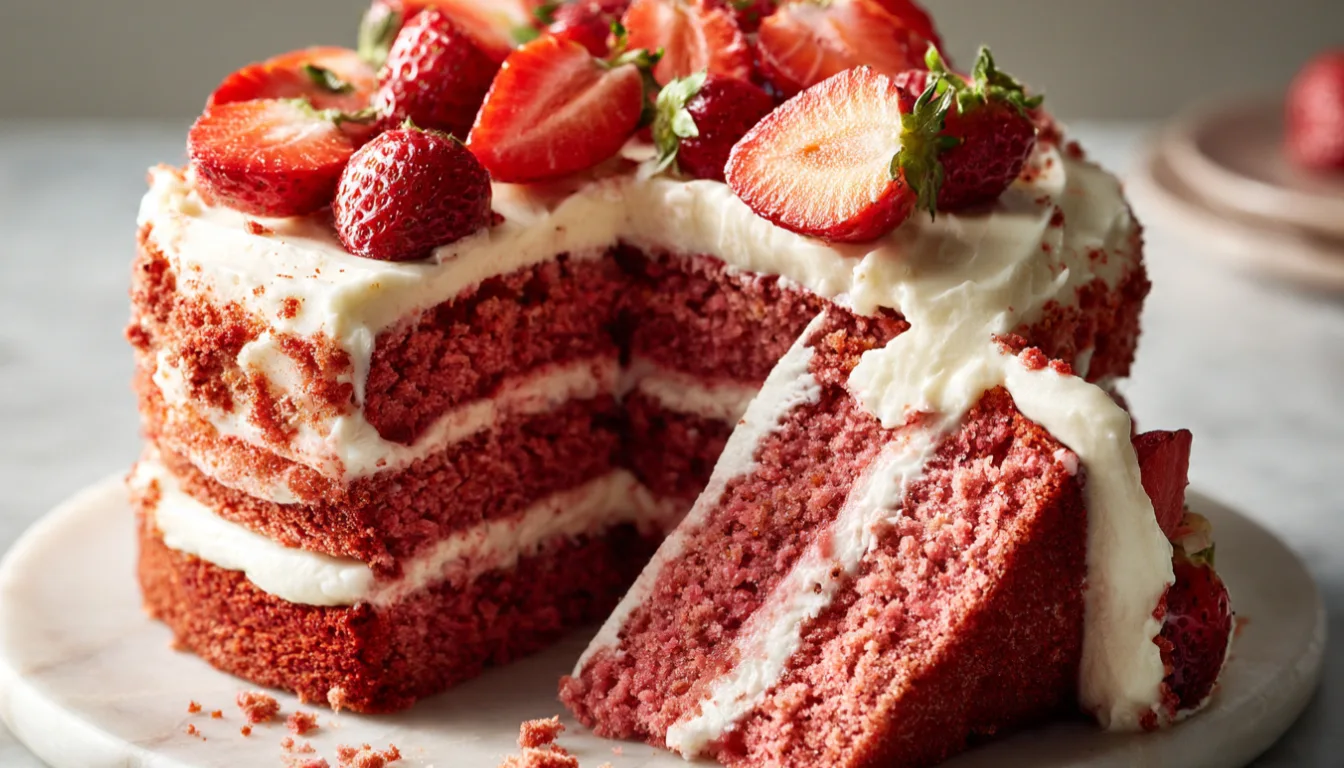
Strawberry Velvet Cake
There’s something about a strawberry velvet cake that makes people stop scrolling. I’ve been baking professionally for over a decade now, and this is one of those recipes that started as a happy accident in my kitchen when I ran out of red food coloring for a classic red velvet and grabbed a carton of strawberries instead. Turns out, that “mistake” became one of the most requested cakes I make.
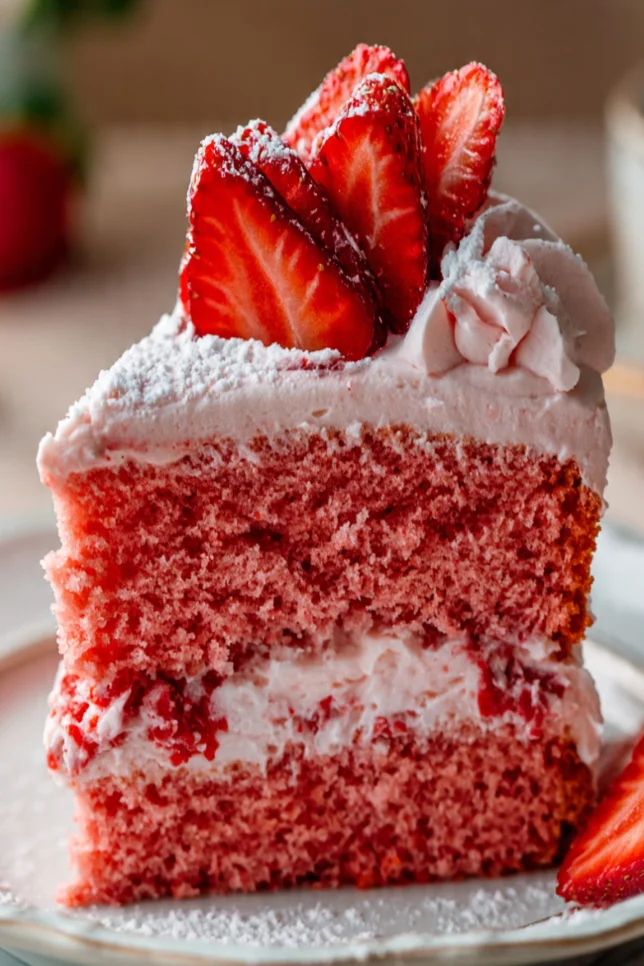
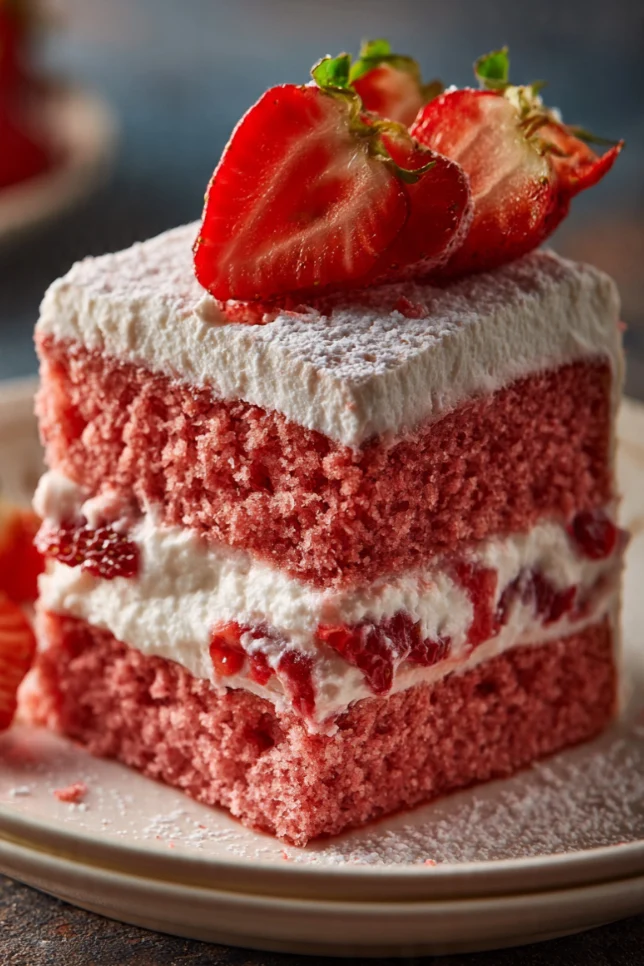
This isn’t your average strawberry cake from a box mix. We’re talking real strawberry puree folded into a tender, velvety crumb, with just enough tang from buttermilk to keep things interesting. It’s pink without being artificial, sweet without being cloying, and honestly easier to pull off than most layer cakes I’ve taught.
Why You’ll Love This Recipe
This cake hits that sweet spot between “impressive enough for a celebration” and “simple enough for a Tuesday.” The real strawberry flavor comes through in every bite instead of tasting like vague pink frosting. It’s naturally tinted, so you’re not relying on bottles of food coloring to get that signature blush color. And the texture, thanks to the classic velvet cake method, stays soft and moist for days, which matters if you’re making this ahead for a party.
What Makes This Recipe Unique
Most strawberry cakes I’ve tested over the years either use strawberry gelatin powder (fine, but artificial-tasting) or fresh berries that water down the batter. My method reduces the strawberry puree on the stovetop first, concentrating the flavor without adding extra liquid. It’s a small step that makes a noticeable difference, and I picked up the technique after one too many soggy-bottomed cakes early in my career.
Key Features
- Made with real, reduced strawberry puree for true flavor
- Buttermilk-based batter for that classic velvety crumb
- Naturally pink, no artificial dye needed
- Stays moist for 3-4 days when stored properly
- Freezer-friendly layers for make-ahead baking
Recipe Info
| Detail | Information |
|---|---|
| Prep Time | 35 minutes |
| Cook Time | 30 minutes |
| Total Time | 1 hour 30 minutes (plus cooling) |
| Servings | 12 slices |
| Yield | One 3-layer 8-inch cake |
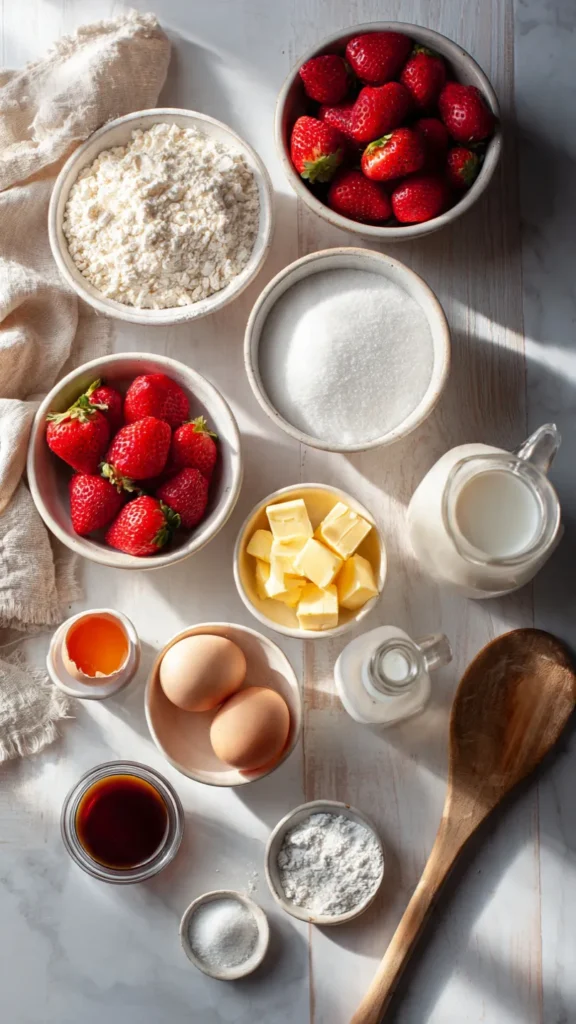
Essential Ingredients
For the cake:
- 1 1/2 cups fresh strawberries, hulled
- 2 3/4 cups all-purpose flour
- 1 1/2 cups granulated sugar
- 1 tablespoon baking powder
- 1/2 teaspoon baking soda
- 1/2 teaspoon salt
- 3/4 cup unsalted butter, softened
- 3 large eggs, room temperature
- 1 cup buttermilk
- 2 teaspoons vanilla extract
- 1 teaspoon white vinegar
For the cream cheese frosting:
- 16 oz cream cheese, softened
- 1 cup unsalted butter, softened
- 4 cups powdered sugar
- 1 teaspoon vanilla extract
- Pinch of salt
Alternative Ingredients
If fresh strawberries aren’t in season, frozen ones work fine for the puree, just thaw and drain them well first so you’re not adding extra water to the reduction. No buttermilk on hand? Mix 1 cup of regular milk with a tablespoon of lemon juice or white vinegar and let it sit for 5 minutes. For a dairy-light frosting swap, mascarpone can stand in for half the cream cheese for a slightly lighter, tangier finish. If you’re avoiding refined sugar, coconut sugar works in the cake batter, though it will affect the final color slightly.
Step-by-Step Directions
1. Make the strawberry puree. Blend the strawberries until smooth using a food processor or high-speed blender, then pour into a saucepan. Simmer over medium heat for about 10 minutes, stirring occasionally, until reduced to roughly 3/4 cup. Let it cool completely before using; this step concentrates the flavor and prevents a watery batter.
2. Prep your pans and oven. Preheat your oven to 350°F. Grease and line three 8-inch round cake pans with parchment paper.
3. Mix the dry ingredients. Whisk together the flour, baking powder, baking soda, and salt in a bowl. Set aside.
4. Cream the butter and sugar. Using a stand mixer or hand mixer, beat the softened butter and sugar together for about 3 minutes until pale and fluffy. This step matters more than people think; it’s what gives the cake its light texture.
5. Add eggs and wet ingredients. Beat in the eggs one at a time, then mix in the vanilla, vinegar, and cooled strawberry puree.
6. Alternate dry ingredients and buttermilk. Add the flour mixture in three additions, alternating with the buttermilk, mixing on low speed just until combined. Overmixing here is the most common reason cakes turn out dense.
7. Divide and bake. Split the batter evenly between the three pans. Bake for 22-25 minutes, or until a toothpick inserted in the center comes out clean.
8. Cool completely. Let the cakes cool in their pans for 10 minutes, then transfer to a wire rack to cool fully before frosting. Skipping this step is how frosting ends up sliding right off.
9. Make the frosting. Beat the cream cheese and butter together until smooth, then gradually add the powdered sugar, vanilla, and salt. Beat until light and fluffy.
10. Assemble the cake. Place one layer on your cake stand, spread frosting on top, repeat with the second layer, then frost the top and sides of the whole cake. A offset spatula or simple cake turntable makes this step far less stressful if you bake often.
Pro Tips
After years of trial and error, a few things make a real difference here. Room-temperature ingredients blend more evenly, so pull your butter, eggs, and cream cheese out at least an hour before you start. Don’t skip reducing the strawberry puree; I learned the hard way that skipping this step gives you a cake that’s pink but doesn’t actually taste like strawberries. If your kitchen runs warm, chill the frosted cake for 15 minutes before slicing for cleaner cuts. And invest in a good digital kitchen scale if you bake often; weighing your flour instead of scooping it leads to far more consistent results, especially with a delicate crumb like this one.
FAQs
Can I make this cake ahead of time?
Yes. The unfrosted layers can be baked, cooled, wrapped tightly in plastic, and stored at room temperature for a day or frozen for up to a month.
Why did my cake turn out dense?
This usually comes down to overmixing once the flour is added, or butter and sugar that weren’t creamed long enough at the start.
Can I use strawberry extract instead of real strawberries?
You can, but the flavor will taste noticeably more artificial, and you’ll lose the natural color the reduced puree provides.
How do I store leftovers?
Keep the cake covered in the refrigerator for up to 4 days, since the cream cheese frosting needs to stay cool.
Nutrition Facts (per slice)
| Nutrient | Amount |
|---|---|
| Calories | 485 |
| Total Fat | 24g |
| Saturated Fat | 14g |
| Carbohydrates | 62g |
| Sugar | 45g |
| Protein | 5g |
| Sodium | 280mg |
Values are estimates and will vary based on specific ingredients used.
You’ll Also Love
If this one becomes a regular in your rotation, you might also enjoy a classic Red Velvet Cake with the same cream cheese frosting, a Lemon Buttermilk Pound Cake for something brighter, or these Strawberry Shortcake Cupcakes for an easier, single-serve version of the same flavor profile.
Conclusion
This strawberry velvet cake has earned a permanent spot in my recipe collection, and once you taste real strawberry flavor in every bite instead of artificial pink frosting, it’s hard to go back to the boxed version. Give it a try for your next celebration, and don’t be afraid to make it your own with the swaps above. Your mileage may vary depending on how ripe your strawberries are, but that’s half the fun of baking with real ingredients.